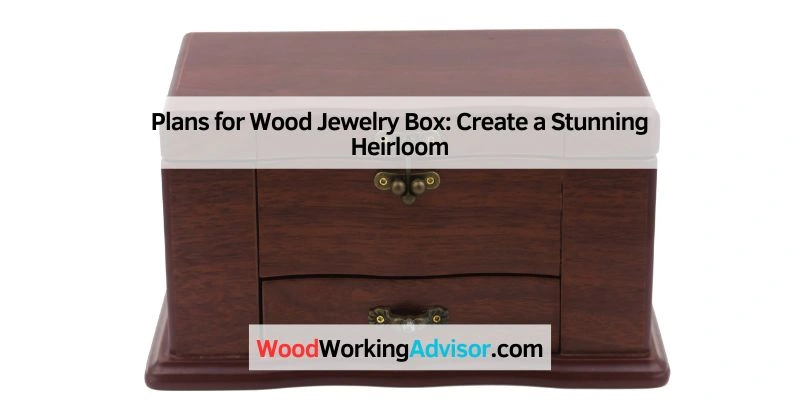
Plans for Wood Jewelry Box: Create a Stunning Heirloom
A wood jewelry box is a small hardwood case—typically joined with dovetail, finger, or butt joints—built to organize rings, earrings, and chains without the tangling a fabric-lined drawer allows. Skip a stable joint like dovetail or finger joints for a plain glued butt joint and the corners work loose within a year of daily opening and closing. This guide covers wood selection, dimensioning, joinery, compartments and drawers, finishing, and personalizing details like engraving and inlay.
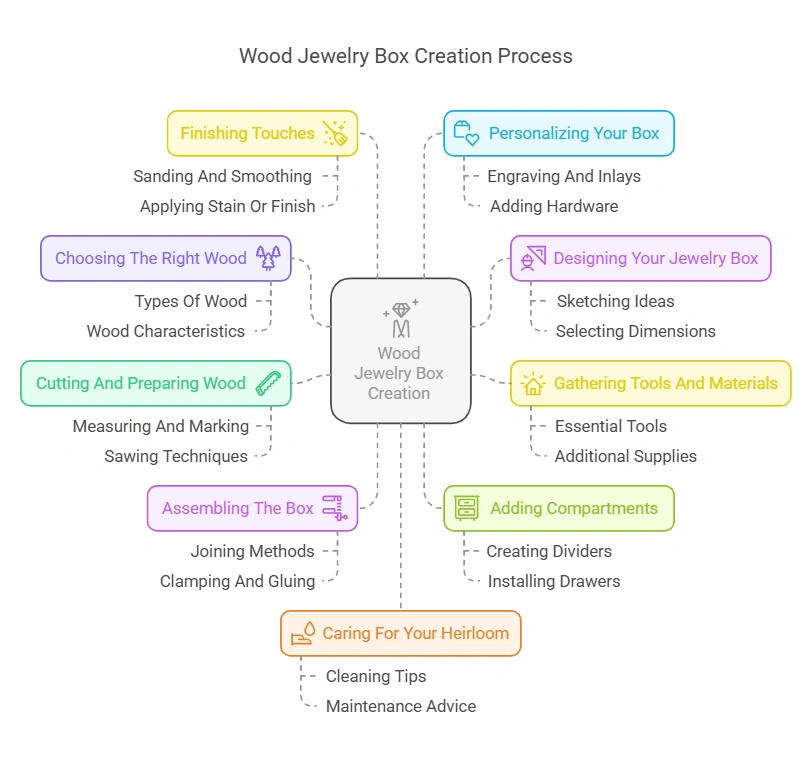
Choosing The Right Wood
Best Jewelry Box Hardware Pick
Jewelry Box Hardware Kit (Hasp Catch + 4 Hinges) – $6.99
Pairs a hasp catch with matching hinges in one kit — covers the hinges, handles, and locks this guide’s Adding Hardware section says to install together for a secure, finished box.
- Best for: Finishing a first jewelry box build without sourcing hinges and a catch separately
- Why we picked it: One kit covers both parts this guide calls out for hardware
- Main drawback: Retro brass-tone finish only, not brushed nickel or black
Compare more jewelry box hardware options
 Option 1 10-Pack Mini Brass Drawer Hinges – $8.99
|
 Option 2 Hinge, Hasp, Handle & Lock Set – $10.99
|
 Option 3 Brass Hinges w/ Screws (50-Pack) – $6.69
|
As an Amazon Associate we earn from qualifying purchases.
Choosing the right wood is crucial for your wood jewelry box. The type of wood you select will impact the beauty and durability of your project. There are many wood types to consider, each with unique characteristics.
In this section, we will explore some of the best options for wood jewelry boxes. We will also discuss the specific traits of each type of wood.
Types Of Wood
There are several types of wood suitable for making a jewelry box. Each type has its own distinct look and feel.
Common choices include oak, walnut, cherry, and maple. Oak is known for its strength and durability. Walnut offers a rich, dark color. Cherry wood has a warm, reddish hue. Maple provides a light, clean look.
Wood Characteristics
Wood characteristics play a significant role in your project’s outcome. Hardwoods like oak and walnut are strong and long-lasting. They resist wear and damage well.
Softer woods like pine are easier to work with. They are also less expensive. But they may not last as long or hold up as well over time.
Consider wood grain patterns too. Some woods have straight grains, which create a uniform look. Others have more complex patterns, adding visual interest to your jewelry box.
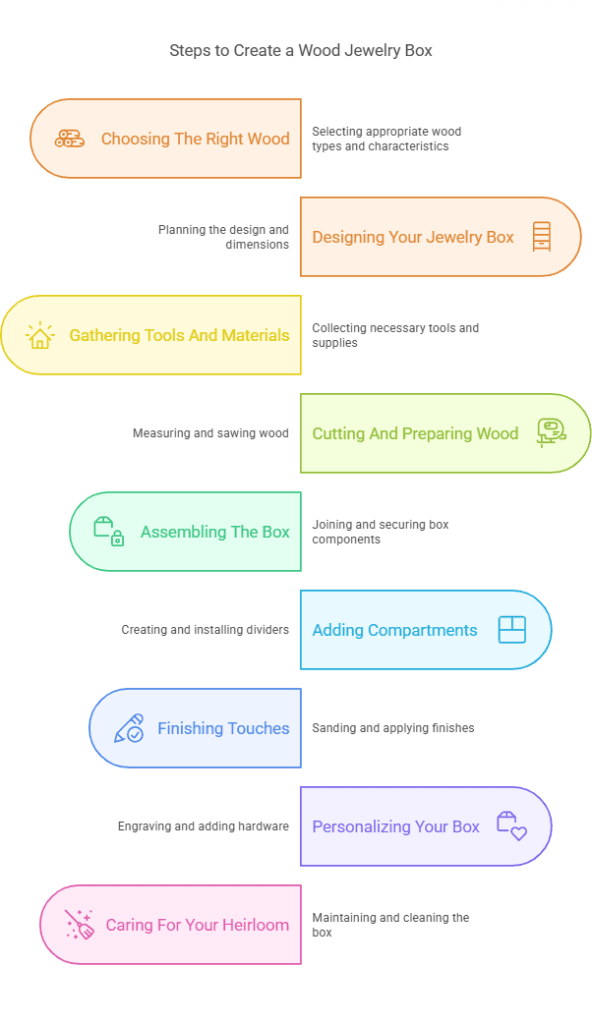
Designing Your Jewelry Box
Designing your own wood jewelry box can be a fun project. It allows you to create something unique and personal. Begin by planning your design. This will help you stay organized and focused.
Sketching Ideas
Start with a rough sketch. This helps put your ideas on paper. Draw different shapes and styles. Try to envision how you want your box to look. Think about the overall aesthetic. Do you prefer a classic look or something modern?
Consider the details. Will your box have compartments? How many drawers will you need? Sketch these elements. This helps in visualizing the final product. A good sketch can make the building process easier.
Selecting Dimensions
Now, decide on the dimensions. Measure your jewelry collection. This will help determine the size of your box. You want it to be practical. It should fit your jewelry comfortably.
Think about where you will place the box. Ensure it fits in the chosen space. Take measurements to avoid surprises. Dimensions are key to a well-balanced design.
Remember to keep the dimensions simple. This makes the building process easier. A well-sized box is both functional and beautiful.
Gathering Tools And Materials
Gathering the right tools and materials is crucial for creating a beautiful wood jewelry box. With the correct equipment, the process becomes smoother and more enjoyable. Let’s explore the essential tools and additional supplies you’ll need.
Essential Tools
Start with a good saw. A fine-tooth saw works best for precise cuts. A chisel set is also necessary. Choose chisels of different sizes for various tasks. Sandpaper is another must-have. It helps to smooth the wood and prepare it for finishing. A drill is essential for making holes for hinges and other hardware.
Additional Supplies
Wood glue is important for bonding pieces together. Clamps will hold the pieces in place while the glue dries. Wood stain or paint adds color and protection to your jewelry box. Brushes or rags help apply the stain or paint evenly. Finally, soft cloths are useful for polishing the finished box.
Cutting And Preparing Wood
Creating a wood jewelry box can be an incredibly rewarding project, especially when you see the final product gleaming on your dresser. However, the journey to a beautiful jewelry box starts with the crucial step of cutting and preparing the wood. This process requires precision, patience, and the right techniques. Let’s dive into the essential steps you need to follow to ensure your wood pieces are perfectly ready for assembly.
Measuring And Marking
Before you start cutting, it’s vital to measure and mark your wood accurately. This step is the foundation of your entire project. Think of it as laying the groundwork for a sturdy building. You wouldn’t want a crooked jewelry box, would you?
Here’s a simple way to get it right:
- Use a ruler or a tape measure to get exact dimensions.
- Mark the measurements with a pencil for clear, erasable lines.
- Double-check your measurements before you cut. As the saying goes, “Measure twice, cut once.”
For example, if your jewelry box needs a 6×4 inch base, ensure your marks are precise and straight. A little deviation can throw off the whole balance!
Sawing Techniques
Once you’ve measured and marked your wood, it’s time to cut. Using the right sawing technique can make a world of difference.
Here are some tips to keep your cuts clean and accurate:
- Choose the right saw: A handsaw or jigsaw works great for straight cuts, while a scroll saw is perfect for intricate details.
- Secure the wood: Use clamps to hold your wood steady. This prevents any unwanted movement.
- Slow and steady: Don’t rush. Let the saw do the work. A slow, steady pace ensures a clean cut and reduces the risk of mistakes.
Think of sawing as slicing a delicate piece of cake. Too fast, and you’ll end up with a mess. Slow and steady, and you get a perfect slice every time.
By carefully measuring, marking, and using the correct sawing techniques, you set the stage for a beautiful, sturdy jewelry box. Remember, the devil is in the details, and taking the time to get these steps right will pay off in the end. Next, we’ll look at assembling your pieces – but that’s a story for another day!
Assembling The Box
Assembling the box is a crucial step in creating your wood jewelry box. This stage involves putting together all the pieces you’ve carefully cut and prepared. The goal is to ensure a tight fit and a sturdy structure. Follow these steps for the best results.
Joining Methods
There are different methods to join the wood pieces. You can use butt joints, which are simple and straightforward. For a stronger hold, consider using dovetail joints. These interlocking joints add durability and a professional look. Finger joints are also a great option. They provide a balance between ease of use and strength.
Clamping And Gluing
Clamping is essential to keep the pieces steady while the glue dries. Choose clamps that fit your project size. Apply even pressure to avoid warping. Use wood glue for a firm bond. Spread a thin layer on the surfaces to be joined. Press the pieces together and secure with clamps. Wipe away any excess glue with a damp cloth. Let the glue dry for at least 24 hours before removing the clamps.
Adding Compartments
Creating a wood jewelry box is more than just a DIY project; it’s about adding a personal touch to something beautiful and functional. One of the key aspects of making a jewelry box is adding compartments. Compartments help organize your jewelry, making it easy to find your favorite pieces. Let’s dive into how you can add compartments to your wood jewelry box.
Creating Dividers
Dividers are essential for separating different types of jewelry. They can be as simple or as elaborate as you like. Here’s how you can create them:
- Measure the Interior: Start by measuring the inside of your jewelry box. This will help you determine the size of your dividers.
- Choose Your Material: Thin pieces of wood, like balsa or plywood, work well for dividers.
- Cut the Pieces: Use a saw to cut the wood into strips that fit the inside dimensions of your box.
- Sand the Edges: Smooth out any rough edges with sandpaper.
- Assemble the Dividers: Fit the pieces together to create a grid-like pattern. You can use glue to secure them in place.
Voila! You now have custom dividers that will keep your jewelry organized.
Installing Drawers
Adding drawers can take your wood jewelry box to the next level. Drawers provide extra storage and make your box even more functional. Here’s a step-by-step guide:
- Plan the Drawer Layout: Decide how many drawers you want and their sizes. Draw a rough sketch if it helps.
- Build the Drawer Frames: Cut small pieces of wood to create the sides, back, and front of the drawers. Assemble them using glue and nails.
- Add Drawer Bottoms: Cut a piece of wood or thick cardboard for the bottom of each drawer and attach it securely.
- Install Drawer Slides: Attach small drawer slides or wooden runners inside the box. This will help the drawers slide in and out smoothly.
- Insert the Drawers: Place the completed drawers into the box and ensure they fit well and slide easily.
Now you have drawers that not only look great but also keep your jewelry neatly stored and easily accessible.
Adding compartments to your wood jewelry box can be a fun and rewarding process. Whether you choose to create dividers or install drawers, each step allows you to personalize the box to suit your needs. Happy crafting!
Finishing Touches
Finishing touches bring out the beauty of your wood jewelry box. These steps add the final shine and protection. They ensure your creation looks professional and lasts long. Let’s explore the key steps involved.
Sanding And Smoothing
Sanding removes rough spots and sharp edges. Start with coarse sandpaper to shape the wood. Gradually move to finer grits for a smooth surface. Sand along the grain to avoid scratches. Wipe off dust with a damp cloth. This prepares the wood for staining or finishing.
Applying Stain Or Finish
Choose a stain to enhance the wood’s natural color. Apply it evenly with a brush or cloth. Let it soak in for a few minutes. Wipe off excess stain with a clean cloth. Allow the stain to dry completely. Next, apply a protective finish. Polyurethane or varnish works well. Use a brush to apply thin, even coats. Let each coat dry before adding another. Lightly sand between coats for a smooth finish. This protects the wood and adds a lovely shine.
Personalizing Your Box
Creating a wood jewelry box is a delightful project. However, the real charm lies in personalizing it. This is where you can make your box truly unique and special. From engraving to adding hardware, there are several ways to customize your box. Let’s explore some of these methods.
Engraving And Inlays
Engraving and inlays are beautiful ways to add a personal touch to your jewelry box. Imagine opening a box with your name or a special design etched on it – quite special, right? You can use a wood-burning tool or a laser engraver for this purpose. Both tools are easy to use and give a professional finish.
Inlays, on the other hand, involve embedding pieces of different materials into the wood. You could use mother of pearl, colorful stones, or even metals. The contrast between the wood and the inlay material creates a stunning visual effect. Here’s a simple step-by-step guide:
- Choose your design and materials.
- Carve out the design on the wood.
- Fit the inlay material into the carved spaces.
- Sand the surface for a smooth finish.
Engraving and inlays are perfect for adding a touch of elegance and uniqueness to your jewelry box.
Adding Hardware
Adding hardware to your wood jewelry box not only enhances its functionality but also its appearance. Think about it – hinges, handles, and locks can turn a simple box into a stylish and secure haven for your precious items.
Here are some tips to consider when adding hardware:
- Hinges: Ensure they are sturdy and align properly. Brass hinges are a popular choice for their durability and classic look.
- Handles: Choose handles that complement the style of your box. They can be simple or ornate, depending on your taste.
- Locks: For added security, consider installing a small lock. It’s a practical addition that adds a layer of safety for your treasured pieces.
Installing hardware may seem daunting, but with a little patience and the right tools, it’s quite manageable. Plus, the results are incredibly rewarding. A well-chosen hinge or handle can elevate the look of your jewelry box and make it more functional.
So, there you have it – a few simple yet effective ways to personalize your wood jewelry box. Whether you choose engraving, inlays, or adding hardware, each method allows you to express your creativity and make a truly unique piece. Happy crafting!
Caring For Your Heirloom
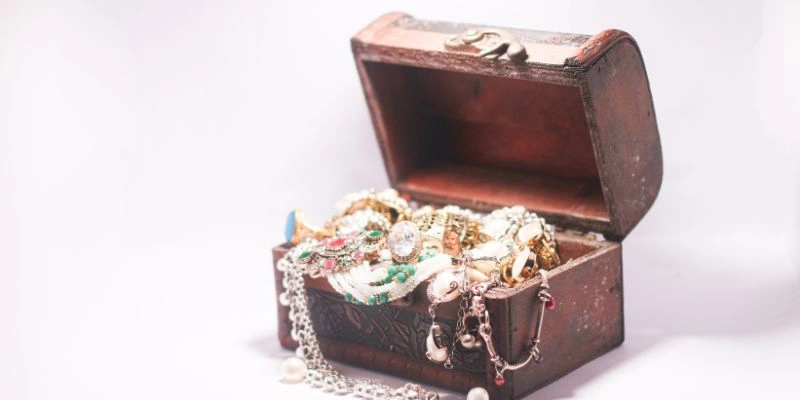
Craft a timeless wood jewelry box to protect your heirlooms. Durable and beautiful, it keeps treasures safe for generations. Enjoy the satisfaction of creating something meaningful.
A wood jewelry box is more than just a storage item. It’s a piece of art. A family treasure. Proper care ensures it lasts for generations. Follow these tips to maintain its beauty and function.
Cleaning Tips
Dust the box regularly using a soft, dry cloth. Avoid wet cloths, which can damage the wood. Use a gentle cleaner if needed. Test it on a small area first. Avoid harsh chemicals. They can strip the finish and harm the wood.
Maintenance Advice
Keep the jewelry box away from direct sunlight. Sunlight can fade the wood. Also, store it in a cool, dry place. Humidity can cause the wood to warp. Check the hinges and locks regularly. Ensure they are functioning well. Oil them lightly if they become stiff. This helps keep the box opening and closing smoothly.
Frequently Asked Questions
What Is The Best Wood To Make A Jewelry Box?
The best wood for a jewelry box is mahogany. It is durable, beautiful, and easy to work with.
Can I Store Jewelry In A Wooden Box?
Yes, you can store jewelry in a wooden box. Ensure the box is lined with soft fabric to prevent scratches.
What Are The Dimensions Of A Jewelry Box?
Jewelry box dimensions vary widely. Common sizes are 4-10 inches in length, 3-8 inches in width, and 1.5-6 inches in height.
What Is The Best Material To Line A Jewelry Box With?
The best material to line a jewelry box is soft velvet. It protects jewelry from scratches and tarnishing. Velvet also adds a luxurious touch.
Conclusion
Building a wood jewelry box can be a rewarding project. It allows you to create something unique and personal. With the right plans, the process becomes simpler. You can customize the box to fit your style and needs. The joy of crafting and the satisfaction of seeing the finished product are worth the effort.
Start your project today and enjoy the process. Happy woodworking!
Sponsored / affiliate links. As an Amazon Associate I earn from qualifying purchases. I may earn additional commission from eligible campaigns.