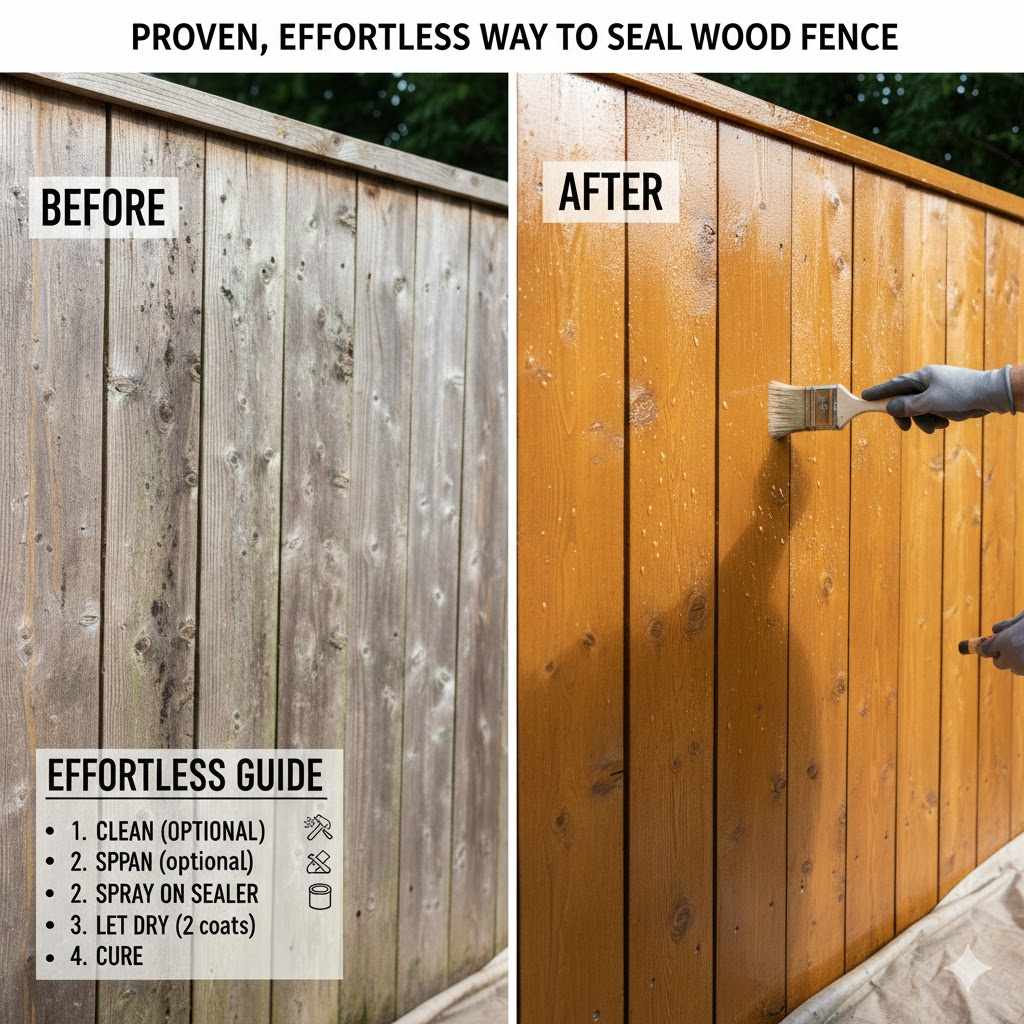
Proven, Effortless Way To Seal Wood Fence
The most effortless way to seal a wood fence is by thoroughly cleaning the wood first, selecting a quality semi-transparent or transparent sealer, and applying it quickly using an airless or pump garden sprayer, following up with a back-brushing technique for deep penetration and even coverage.
Hello there! I’m Md Meraj, and if your wooden fence is starting to look gray, warped, or just plain tired, you are not alone. Wood fences are a big investment, and keeping them looking sharp takes more work than we often expect. Dealing with harsh sun, rain, and rot can feel overwhelming, especially when you look at those long stretches of lumber. But sealing your fence doesn’t need to be a miserable weekend job involving endless buckets and brushes.
I’ve developed a simple, step-by-step method that cuts the labor in half while delivering fantastic, long-lasting protection. We will focus on using modern techniques, like spraying, to make this project genuinely easy. Ready to give your fence that beautiful, just-installed glow? Let’s dive into the easiest way to seal it up tight.
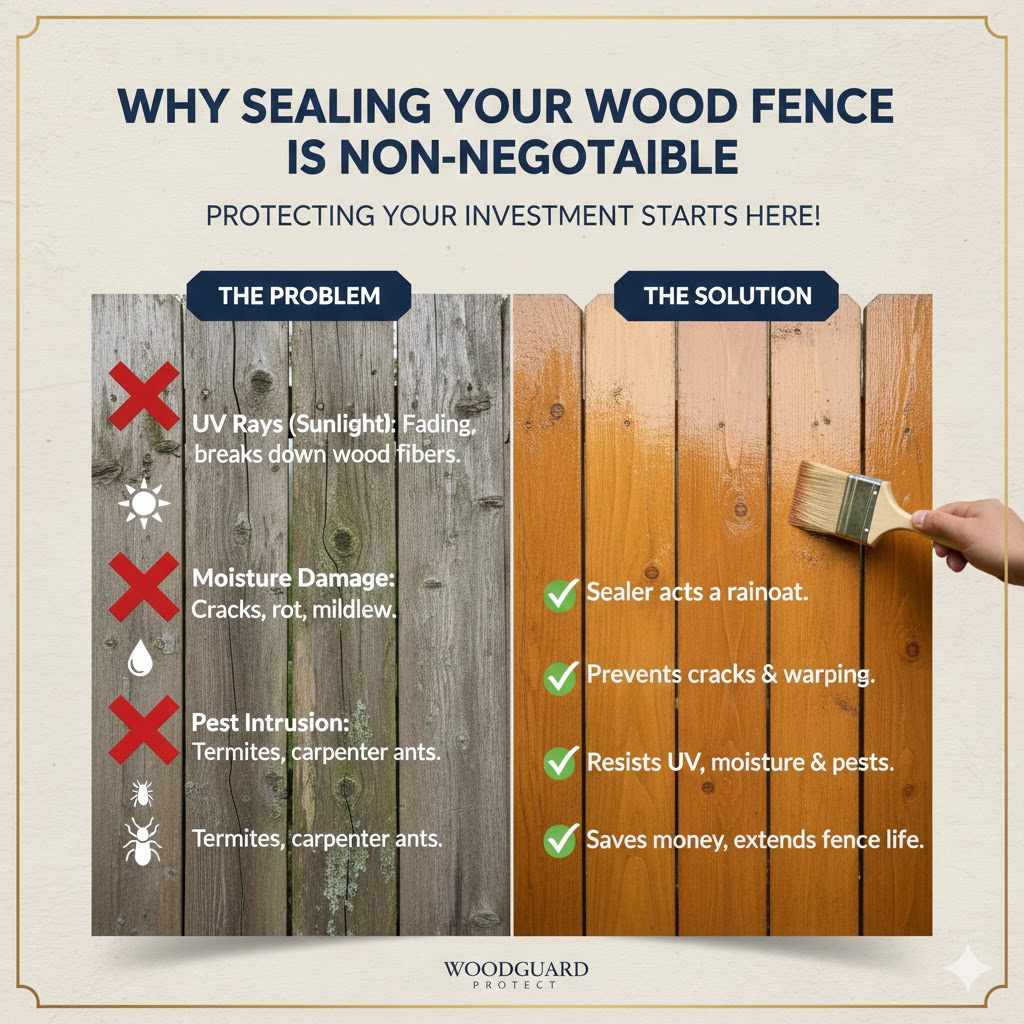
Why Sealing Your Fence Is Non-Negotiable (And So Much Easier Than You Think)
Think of wood sealant as sunscreen for your fence. Without it, the sun’s UV rays break down the wood fibers—that’s called “photodegradation.” Rainwater soaks in, causing the wood to swell and shrink, leading to cracks, warping, and, eventually, rot. A good seal stops this cycle before it starts.
The common roadblock for most DIYers is the sheer size of the project. Brushing a large fence section by hand takes days and usually results in uneven coverage. That’s why our method focuses on speed and superior application, specifically mastering how to seal a wood fence with a sprayer for an almost effortless finish.
The Secret to “Effortless” Fencing: Preparation and Tools
You cannot have an effortless seal job if the wood isn’t ready. Proper prep does 80% of the hard work. Think of this as the foundation. If the foundation is shaky, the beautiful sealant finish won’t stick!
Step 1: The Deep Clean – Banishing Grime and Gray
Before any sealer touches the wood, it must be clean and completely dry. Contaminants like dirt, mildew, and old stains block the new sealant from soaking in. This is where most people cut corners, but resist that urge!
Option A: The Best Method (Oxygenated Cleaner)
For deep cleaning and removing gray oxidation, nothing beats a dedicated wood cleaning product, usually containing sodium percarbonate (an oxygenated cleaner). This is safe for plants when used correctly.
- Mix the cleaner according to the manufacturer’s directions—usually adding it to warm water in a bucket.
- Apply the solution generously to a small 5-foot section using a pump sprayer (a standard garden sprayer works perfectly for the cleaner).
- Let it dwell (sit) for 15 to 20 minutes. Keep the surface damp by misting it lightly.
- Use a stiff-bristled brush (not wire!) to scrub the boards gently. You should see the dirt lifting off.
Option B: The Pressure Washer Assist (Use Caution!)
A pressure washer speeds up rinsing, but you must be extremely gentle. High pressure gouges wood fibers instantly.
- Set your pressure washer to 1000–1200 PSI maximum.
- Use a wide fan tip (like a 25-degree or 40-degree nozzle).
- Keep the nozzle at least 10–12 inches away from the wood surface.
- Use sweeping, top-to-bottom strokes. Never stop moving the wand on one spot!
Pro Tip from Meraj: The Wood Defender website offers great, impartial advice on proper cleaning techniques to ensure wood health, which is crucial before sealing.
Step 2: Brightening and Neutralizing (Optional but Recommended)
After using cleaners, the wood can sometimes look slightly darker or hazy. A dedicated wood brightener (often containing oxalic acid) neutralizes the cleaner, opens up the wood grain slightly, and brings back that light, natural wood color. Rinse thoroughly after using the brightener.
Step 3: The Wait Time
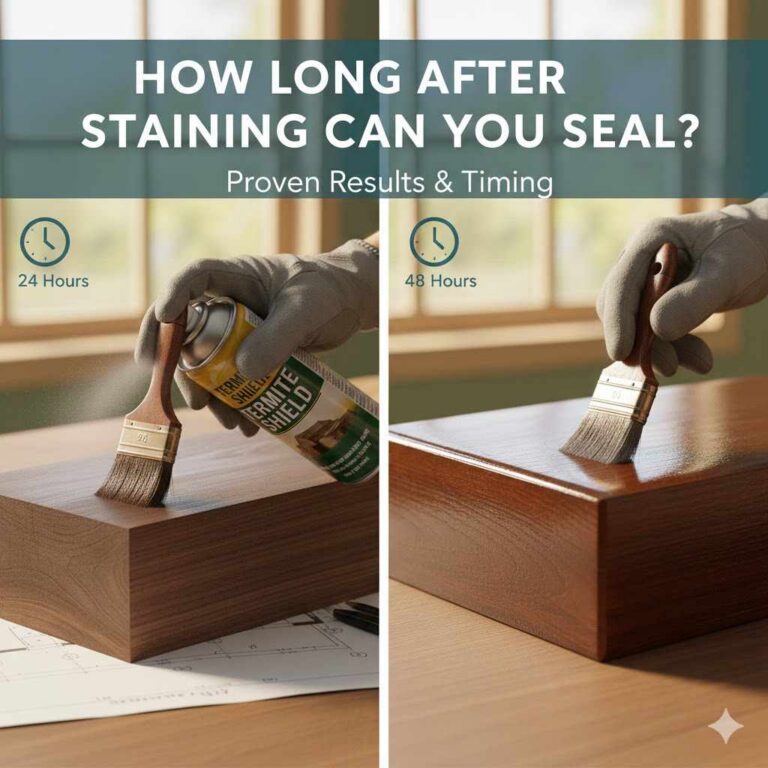
This is the hardest part: waiting. The wood must dry completely before you apply the sealer. For optimal penetration, you want the moisture content to be below 15%. Depending on the humidity and heat, this usually means waiting at least 24 to 48 hours after the final rinse. If you apply sealer when the wood is damp, it will look blotchy and fail prematurely.
Selecting Your Effortless Sealer
The right product makes the application truly effortless. We need a sealer that covers a lot of surface area quickly and soaks deep into the wood fibers.
Sealer Types Explained Simply
For fences, you generally look at two main types:
- Oil-Based (Alkyd) Sealers: These soak in deeper, offer richer color, and typically last longer. They smell stronger and take longer to dry. This is usually my top recommendation for long-lasting fence protection.
- Water-Based (Acrylic) Sealers: They are lower in VOCs (less odor), clean up easily with water, and dry quickly. They can sometimes bead up or resist penetration slightly compared to oil-based types.
Choosing the Right Transparency Level
The aesthetic look depends on transparency. This chart helps you decide what looks best for your yard:
| Type | Description | UV Protection |
|---|---|---|
| Clear/Transparent | Keeps the natural wood look; minimal color change. | Low to Moderate |
| Semi-Transparent (Best for Fences) | Adds rich color while letting the wood grain show through. | High |
| Solid Stain | Acts like paint; completely covers the wood grain. | Maximum |
For an effortless, beautiful finish that holds up, I always steer homeowners toward a high-quality oil-based, semi-transparent stain/sealer. The pigments provide UV protection, and the oil base penetrates deeply, resisting peeling.
The Effortless Application: Mastering the Sprayer Technique
This is where we save hours of work. You will need a good quality sprayer, not just the small plastic ones from the garden center.
Tool Checklist for Effortless Spraying
- Airless Paint Sprayer: This is the game-changer. If you rent one for a day, it pays for itself in saved time and better coverage compared to a cheap pump sprayer for large fencing jobs.
- OR Heavy-Duty Pump Sprayer: If an airless unit is too much, use a high-pressure garden pump sprayer designed for stain or chemical applications (check that the seals handle oil-based products if using oil).
- Stiff Bristle Brush (for back-brushing): A simple, natural bristle brush (4 to 6 inches wide) is required to push the sealer into the wood.
- Drop Cloths or Plastic Sheeting: Essential for protecting the lawn and any nearby siding or concrete.
Step 4: Setting Up Your Spray Zone Safely
Safety first! Even though sealing is easier, the product itself needs respect. Good preparation keeps your cleanup minimal.
- Mask Off Everything: Roll out heavy plastic sheeting or dedicated drop cloths along the base of the fence line, extending out 5–10 feet into the yard. Secure the edges with bricks or tape so the wind doesn’t blow it onto clean areas.
- Protect Adjacent Structures: Use painter’s tape and plastic sheeting to cover the sides of your house, garage, or shed that run near the fence line. Overspray happens!
- Don Personal Protective Equipment (PPE): Put on safety glasses (even under a face shield), chemical-resistant gloves (nitrile is good), and a respirator mask appropriate for the type of stain you are using (especially vital for oil-based products).
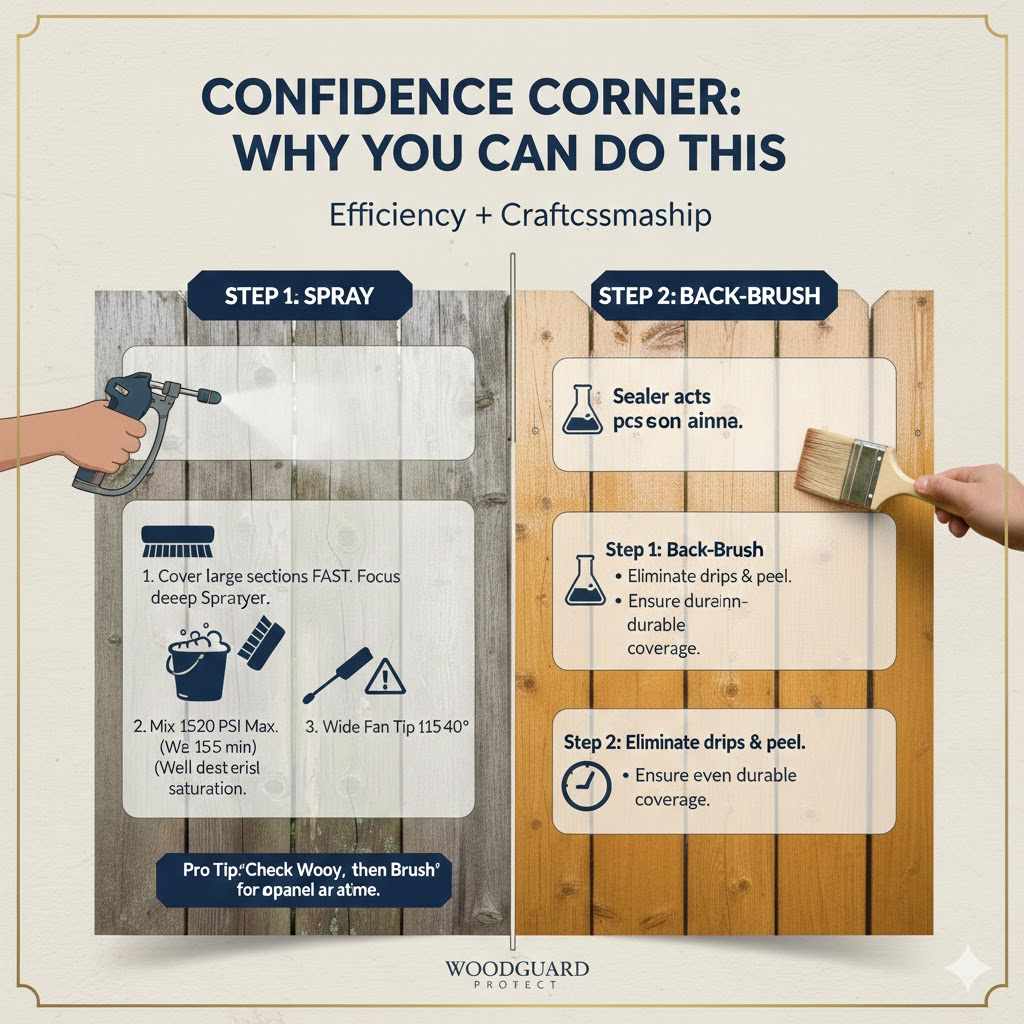
Step 5: The Crucial Spray and Back-Brush Combo
This two-part process ensures deep penetration, which is the key to long-term durability. The sprayer applies the material quickly; the brush forces it in.
The Spraying Phase: Quick and Even
- Prime your sprayer following the manufacturer’s instructions. Always test the spray pattern on a piece of scrap wood first to ensure a nice, even fan pattern, not a direct stream.
- Hold the sprayer tip about 8–10 inches from the wood surface.
- Spray in long, smooth, sweeping motions, overlapping each pass by about 50%. Work in vertical strips, starting from one post and moving across to the next.
- Work one board at a time, top to bottom, trying not to flood any one area. Remember, you are applying the sealer, not trying to build up a thick paint layer. A thin, even coat is much better than a thick, uneven coat.
- Important Consideration: Apply the stain to the side of the fence facing away from the prevailing wind first, so any drift goes onto the lawn area you have protected, not onto your freshly stained work!
The Back-Brushing Phase: Ensuring Longevity
This step is mandatory for the “effortless” long-term results. If you skip this, the stain will sit on the surface, look streaky, and likely peel off within a year. This is where craftsmanship comes in!
- Immediately after spraying a section (say, 3 feet wide), take your stiff bristle brush.
- Gently but firmly brush the sealer into the wood, using long strokes that follow the grain direction of the boards.
- You are essentially working the product fully into the grain and wiping off any obvious puddles or drips on the surface.
- This step drives the oil or binder deep into the wood, maximizing protection against moisture ingress, which is vital for longevity, as detailed by conservation experts at organizations like the U.S. Forest Products Laboratory.
Step 6: Tackling the Horizontal Surfaces (Tops of Rails)
Fence rails—the boards running horizontally across the top—take the most beating from sun and pooling water. They need extra love.
- If your top rail boards are flat and wide, they might require a slightly thicker initial application during the spray, followed by a dedicated push with the brush.
- Do not let sealer pool on the top surface. After brushing, use a clean, dry rag to wick up any excess product that didn’t soak in after 15 minutes. Pooling sealer always cures tacky or eventually peels off.
Timing and Drying: Completing the Effortless Project
Getting the timing right for your second coat and the final cure is what seals the deal on an easy long-term outcome.
Re-Coating: Do I Need a Second Coat?
For most high-quality, oil-based, semi-transparent sealers, one heavy, well-back-brushed coat is often enough. However, older or severely weathered wood may “drink up” the first coat entirely. How can you tell?
- If the wood looks dry or thirsty after the first coat has partially dried (2–4 hours): A second coat is needed on those thirsty spots.
- If the wood still looks rich and evenly coated: Stop! Applying a second coat over an already saturated area leads to film-forming and peeling later on.
If a second coat is necessary: Wait the recommended recoat time (usually 4–24 hours, check the can!), but never sand between coats when using oil-based stain. Simply re-apply your light spray and quick back-brush.
The Cure Period
Even though the surface will feel dry to the touch in 24–48 hours, the sealer needs time to fully cure (harden). Avoid leaning things against the fence, fastening new hardware, or letting pets rub heavily against the surface for at least 3 to 7 days.
Maintaining Your Effortlessly Sealed Fence
The true reward of sealing correctly is spending less time worrying about it later. An excellent seal job should last 3 to 5 years before it needs light maintenance.
Easy Maintenance Schedule
Every spring, take 15 minutes to walk the fence line. Look for:
- Any spots near ground contact that look lighter.
- Small areas where mildew might be starting (usually shade spots).
If you spot minor fading, you don’t need to clean and re-stain the whole fence! You can simply perform a “spot-stain maintenance”: clean the small faded area lightly, let it dry for 24 hours, and carefully apply a quick layer of the same stain using a small foam brush, blending it softly into the old material.
Troubleshooting Common Beginner Sprayer Problems
Even with the best tools, sometimes things go wrong. Here are quick fixes for the common sprayer mishaps:
| The Problem | The Easy Fix |
|---|---|
| The sprayer is spitting or pulsing (Airless). | Check the inlet filter—it’s likely clogged with stain solids. Clean it or replace it immediately. |
| The finish is uneven/blotchy streaks appear. | You likely skipped back-brushing, or the wood was too damp/dirty. Next time, focus on saturating and immediately brushing. |
| Stain is dripping off the boards. | You are spraying too heavily. Back off your trigger speed, stand further away, or hold the trigger only long enough to dampen the wood. Brush off excess immediately. |
Confidence Corner: Why You Can Do This
Learning how to seal a wood fence with a sprayer feels intimidating because you see large commercial rigs on jobsites. However, the secret I want you to remember is that professional application is about speed and deep material saturation, not perfect painting technique.
When you spray, you cover massive square footage fast. When you immediately back-brush, you eliminate the amateur risk of drips and peel, replacing it with professional durability. You are combining efficiency with craftsmanship in two simple, deliberate steps. Don’t sweat the minor overspray; you can clean that up with mineral spirits (for oil stain) or water (for water stain) quickly before it dries, which is infinitely easier than scrubbing a whole section with a tiny brush.
Focus on one panel at a time: Spray the section, brush the section. Repeat. Before you know it, the back side is done, and you can go enjoy the rest of your weekend knowing you protected your property for years to come. That feeling of accomplishment is always the best part of any DIY project.
Frequently Asked Questions (FAQ)
Q1: How often should I seal my wood fence after the initial treatment?
A: Generally, a high-quality stain should last 3 to 5 years. If you used a clear sealant with no pigment, you might need to reapply every 1 to 2 years as UV protection fades fastest.
Q2: Can I spray both sides of the fence at the same time?
A: No, this is a common mistake that leads to waste and poor coverage. Always treat one side completely (spray and back-brush), let it dry, and then move to the other side. If you spray both sides wet, the overspray from the second side will mess up the first side.
Q3: Should I use a solid stain or a semi-transparent sealer?
A: For maximum durability and easiest maintenance, use a semi-transparent stain. Solid stains sit more on the surface like paint and are far more prone to peeling off in sheets when the moisture inevitably gets underneath. Semi-transparent stains penetrate deeper.
Q4: What is the ideal weather for spraying wood fence sealer?
A: Look for mild weather, ideally between 50°F and 85°F, with low wind and no rain expected for 48 hours. Crucially, avoid direct, hot afternoon sun while you are working, as this dries the sealer too fast, causing streaks before you can back-brush.
Q5: My sealer has pigments—do I still need to back-brush?
A: Yes, absolutely. The pigment provides the necessary UV shield, but the carrier (oil or water) is what protects against moisture. Back-brushing ensures the carrier gets into the wood, not just sitting on the pigment layer. It’s the difference between lasting protection and surface cosmetic treatment.
Q6: How do I safely clean my airless sprayer after using an oil-based stain?
A: Immediately flush the system using mineral spirits or paint thinner. Run the thinner through the inlet tube, hose, gun, and tip until the output is completely clear. Dispose of the used thinner responsibly at a local hazardous waste collection center.
Conclusion: Enjoy Your Beautifully Protected Fence
You’ve successfully tackled what many homeowners view as a huge chore, transforming it into a manageable weekend task by mastering the spray-and-back-brush technique. We started with the crucial step of proper cleaning—remember, a clean fence is a receptive fence—selected a robust, penetrating sealer, and then leveraged the power of a sprayer to achieve maximum coverage quickly.
Don’t let the fear of hard work hold you back from preserving your outdoor spaces. By keeping your technique simple—clean well, spray lightly, brush thoroughly, and let dry completely—you have ensured your fence will stand strong against the elements for years to come. Step back and admire that rich, uniform color. You earned it. Go enjoy your beautiful, newly protected perimeter!