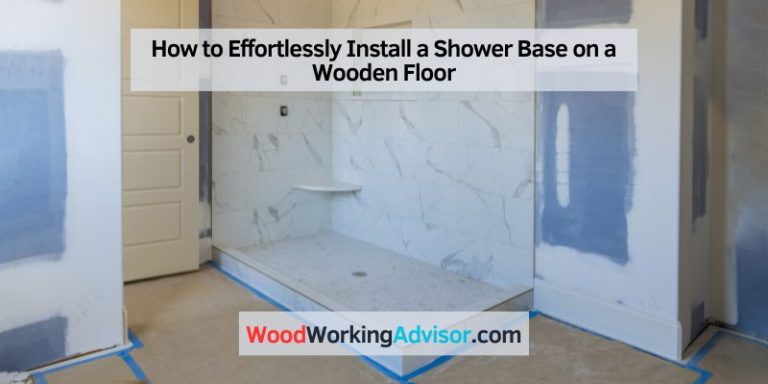
Can I Put Ceramic Tiles on a Wooden Floor? Tips & Risks
Many homeowners wonder, “Can I Put Ceramic Tiles on a Wooden Floor? Tips & Risks.” This is a common question because it seems like a great way to upgrade your home, adding the beauty of tile over existing wood. However, it’s not as straightforward as it might appear at first.
There are special steps and things to watch out for to make sure your new tile floor lasts. Don’t worry, though! We’ll walk you through everything you need to know in a simple, easy-to-follow way.
We’ll cover exactly what you need to do and the potential problems you might face.
Is It Possible To Put Ceramic Tiles On A Wooden Floor
Putting ceramic tiles directly on top of a wooden floor is a topic that sparks a lot of questions for DIYers and homeowners alike. The idea is appealing because it can save you the effort and expense of removing your old floor. However, wood and tile have very different behaviors, especially when it comes to moisture and movement.
Wood naturally expands and contracts with changes in humidity and temperature, while tile is rigid and brittle. This difference is the main reason why a simple direct installation often leads to problems like cracked tiles or loose grout. Understanding these fundamental differences is key to deciding if and how you can achieve a successful tile installation over wood.
The success of installing ceramic tiles on a wooden subfloor hinges on several critical factors. Primarily, the condition and type of the existing wooden floor are paramount. A sturdy, well-supported subfloor is essential.
If the wood is weak, warped, or not properly secured, it simply cannot provide the stable base that tile requires. Furthermore, moisture is a major enemy. Wood can absorb moisture, leading to expansion and potential rot, while ceramic tiles are highly susceptible to moisture damage.
Therefore, preparation becomes extremely important to prevent future issues like mold or structural damage.
Assessing Your Existing Wooden Floor
Before you even think about laying a single tile, you must thoroughly inspect your current wooden floor. This isn’t just a quick glance; it requires a detailed examination of its condition and structural integrity. A weak or unstable subfloor is the most common reason for tile failure over wood.
You need to check for any signs of rot, water damage, or excessive warping. The wood should feel solid underfoot, with no soft spots or creaking. If you press down on a section, it shouldn’t flex or bounce significantly.
The type of wooden flooring you have also matters. Is it solid hardwood, engineered wood, or plywood sheathing? Solid hardwood, especially older planks, can be prone to significant expansion and contraction.
Engineered wood, made with layers of wood veneer, is generally more stable. Plywood or OSB (Oriented Strand Board) subfloors are common, but their thickness and condition are crucial. A minimum thickness is usually recommended to provide adequate support.
Here are some key points to check when assessing your wooden floor:
- Moisture Levels: Use a moisture meter to check for excessive dampness in the wood. High moisture content can lead to expansion, rot, and make it difficult for adhesives to bond properly. Areas prone to moisture, like kitchens or bathrooms, require extra attention. Consider running a dehumidifier for a few days before testing if you suspect high humidity.
- Structural Soundness: Walk across the entire floor, listening for squeaks and feeling for any give or movement. Loose floorboards or joists that are too far apart will not support tile well. If you can push down on a floorboard and it visibly flexes, it’s a sign of weakness that needs to be addressed.
- Flatness and Levelness: Use a long, straight edge or a level to check for significant dips or high spots. Unevenness will make it hard to achieve a smooth tile surface and can lead to grout lines of varying widths, or even cracked tiles if one area bears too much weight.
- Existing Finishes: If the wood is sealed or waxed, this can affect the adhesion of the tile underlayment or adhesive. Sometimes, these finishes need to be removed or scuffed up to ensure a good bond.
Understanding Wood Movement And Its Impact On Tile
Wood is a natural material that breathes, meaning it absorbs and releases moisture from the air. This process causes it to expand and contract. Think of it like a sponge that swells when wet and shrinks when dry.
This movement, while often subtle, can be powerful enough to stress a rigid tiled surface. When wood expands, it pushes against the rigid tiles. When it contracts, it can create gaps or pull away from the adhesive.
This constant, albeit slight, flexing and shifting is the arch-nemesis of ceramic tile. Tile, on the other hand, is very brittle. It doesn’t bend or flex.
When the wood underneath it moves excessively, the tile can crack or break under the strain. Grout, which fills the spaces between tiles, is also prone to cracking and crumbling when subjected to this movement. This is why simply gluing tiles directly to wood is rarely a good idea and often leads to premature failure of the installation.
The impact of wood movement on tile can be seen in several ways:
- Cracked Tiles: As the wood expands, it can put immense pressure on the edges or center of tiles, leading to stress fractures that crack the ceramic. This is especially true for larger format tiles which have less grout to absorb some of the movement.
- Loose Tiles: If the wood contracts significantly, it can pull away from the adhesive holding the tiles down, causing them to become loose and wobbly. This also compromises the structural integrity of the entire floor.
- Cracked Grout: Even if the tiles themselves don’t crack, the grout lines can fail. The grout is often the first point of failure as it is more flexible than tile but still brittle enough to crack under significant shear stress.
- Subfloor Damage: In extreme cases, the constant movement can even damage the subfloor itself, leading to warping or loosening of the wooden planks over time. This makes future repairs more extensive.
Methods To Install Ceramic Tiles On Wood
Given the inherent challenges, installing ceramic tiles on a wooden floor requires specific methods to create a stable and durable surface. The goal is to decouple the tile from the wood’s natural movement and to create a rigid, monolithic layer that can withstand the stress. This usually involves adding an intermediate layer that acts as a barrier and a stable base.
These methods are designed to bridge the gap between the flexible nature of wood and the brittle nature of tile, ensuring a long-lasting and beautiful floor.
There are several proven techniques for achieving this. The most common and recommended methods involve using an underlayment system. These systems are engineered to provide the necessary rigidity, crack isolation, and sometimes even waterproofing.
The choice of method often depends on the condition of the existing subfloor, the type of tile being used, and the expected conditions of the room. For instance, a bathroom might require a different approach than a living room due to moisture concerns.
Using A Cement Backer Board
Cement backer board is a popular choice for creating a stable surface over wood subfloors. This material is made from Portland cement and aggregates, giving it a rigid, dimensionally stable structure that doesn’t expand or contract much with humidity changes. It acts as a rigid layer that bridges minor imperfections in the subfloor and provides a solid base for tiling.
When properly installed, it significantly reduces the risk of tile cracking due to wood movement.
The process involves mechanically fastening the cement backer board directly to the wooden subfloor using appropriate screws. It’s crucial to use screws that are specifically designed for cement board installation, as they won’t corrode and can create a strong mechanical bond. The seams between the backer board panels should be taped with a fiberglass mesh tape and coated with a cementitious mortar or thin-set adhesive.
This taping and mortar process creates a continuous, monolithic surface that further strengthens the installation and helps prevent cracks from migrating through the tile.
Here’s a breakdown of the process for using cement backer board:
- Preparation of the Subfloor: Ensure the wood subfloor is clean, dry, and free of any debris. Any loose boards should be secured. The surface should also be as flat as possible.
- Cutting and Laying the Backer Board: Measure and cut the cement backer board panels to fit your room. Lay them out, ensuring a tight fit against each other. Leave a small gap (typically 1/8 inch) between panels to allow for any minor expansion and to prevent them from buckling if they get damp.
- Fastening the Backer Board: Secure the backer board to the wood subfloor using specialized cement board screws. These screws are designed to embed slightly below the surface without tearing the board. Space the screws according to the manufacturer’s recommendations, usually every 6-8 inches in the field and 4-6 inches along the edges.
- Taping and Mortaring Seams: Apply a bead of thin-set mortar or a suitable cementitious adhesive along the seams between the backer board panels. Embed the fiberglass mesh tape into the mortar, pressing it down firmly. Apply another thin layer of mortar over the tape to create a smooth, seamless surface.
- Allowing to Cure: Let the mortar fully cure according to the manufacturer’s instructions before proceeding with tile installation. This ensures a strong bond and a stable base.
Utilizing An Uncoupling Membrane
Uncoupling membranes are a more advanced solution and are often considered the gold standard for tiling over wood subfloors, especially in situations where movement is a significant concern. These membranes, often made of polyethylene or rubberized materials, are installed between the wood subfloor and the tile. Their primary function is to “uncouple” the tile from the subfloor, meaning they absorb the lateral stress and movement of the wood, preventing it from transferring to the tile and grout.
This decoupling action is critical for crack prevention. Imagine the membrane as a flexible shock absorber. As the wood shifts and moves, the membrane stretches and compresses, taking the force without cracking.
Many uncoupling membranes also offer additional benefits such as waterproofing and vapor management, which are particularly valuable in areas like bathrooms or kitchens. The installation of these membranes usually involves adhering them to the subfloor with a specialized thin-set mortar, and then tiling directly onto the surface of the membrane.
The advantages of using an uncoupling membrane include:
- Superior Crack Isolation: This is their main purpose. They effectively prevent cracks from forming in the tile and grout due to subfloor movement. This is especially important for large format tiles which are more susceptible to cracking.
- Waterproofing and Vapor Barrier: Many membranes act as a waterproof barrier, protecting the wood subfloor from spills and moisture. Some also allow vapor to escape from the subfloor, preventing moisture buildup which can lead to rot.
- Ease of Installation: While requiring a specific adhesive, they are often easier to work with than multiple layers of cement board, providing a smooth and uniform surface for tiling.
- Noise Reduction: Some uncoupling membranes can also help to dampen sound, leading to a quieter floor, particularly useful in multi-story homes.
The Importance of Proper Adhesives And Grout
Even with the best underlayment, the choice of adhesives and grout is vital when installing ceramic tiles on a wooden floor. These materials are the “glue” that holds your tile down and fills the gaps, and they need to be flexible enough to accommodate minor movements. Standard tile adhesives and grouts might be too brittle and will fail if they are subjected to the stresses inherent in a wood subfloor.
For tiling over wood subfloors, it’s essential to use a high-quality, flexible thin-set mortar. These mortars contain polymers that give them increased flexibility and bond strength. They are designed to flex slightly with the substrate, reducing the likelihood of cracks forming.
Similarly, when it comes to grout, a flexible grout or one specifically formulated for use over potentially moving substrates is recommended. Many modern grout products incorporate polymers for enhanced flexibility and durability.
Key considerations for adhesives and grout:
- Flexible Thin-Set Mortar: Always opt for a polymer-modified thin-set mortar. These are specifically designed for challenging substrates like wood or to be used with uncoupling membranes. They offer superior adhesion and crack-bridging capabilities compared to basic mortar mixes.
- Flexible Grout: For grout, consider using a high-performance flexible grout or a grout designed for use in areas with potential movement. Epoxy grouts, while very durable, can be very rigid. For most wood subfloor applications, a cementitious grout with added polymers is a good choice.
- Manufacturer Recommendations: Always follow the adhesive and grout manufacturer’s instructions precisely. They will specify the types of substrates their products are suitable for and the correct application methods.
- Proper Mixing and Application: Incorrect mixing ratios or application techniques can compromise the performance of even the best adhesives and grouts, making them more prone to failure.
Risks And Potential Problems
Attempting to tile over a wooden floor without proper preparation and the right materials carries significant risks. The most common outcome is premature failure of the tile installation, leading to costly repairs and frustration. These issues stem from the fundamental incompatibility of rigid tile and flexible wood if not properly managed.
Ignoring the movement of wood or failing to create a stable, intermediate layer will almost certainly lead to problems down the line.
The consequences can range from minor cosmetic issues like cracked grout to major structural problems that require the removal of both the tile and potentially the underlying wood. Understanding these risks is crucial for making an informed decision about whether to proceed and how to do it correctly. It’s far better to invest in the right preparation and materials upfront than to deal with expensive repairs later.
Cracking And Delamination
Cracking is perhaps the most visible and common problem when tiles are installed improperly over wood. As mentioned, wood expands and contracts. If there isn’t a proper underlayment to absorb this movement, the stress is transferred directly to the brittle ceramic tiles and the grout.
This stress can manifest as hairline cracks in individual tiles or in the grout lines. Over time, these cracks can widen, making the floor unsightly and vulnerable to further damage.
Delamination, on the other hand, refers to the separation of layers. This can happen between the tile and the adhesive, the adhesive and the underlayment, or even the underlayment and the wood subfloor. If the adhesive doesn’t properly bond because of movement or moisture issues, the tiles can begin to lift.
This is often a consequence of the wood flexing, which breaks the bond of the adhesive. Loose tiles are not only an aesthetic problem but can also become a tripping hazard and allow water to seep underneath, potentially causing mold and rot.
These issues often appear in stages:
- Initial Stress: Shortly after installation, you might notice minor cracks in grout lines, especially in high-traffic areas or near walls where wood movement is often more pronounced.
- Widespread Cracking: As seasons change and humidity levels fluctuate, the cracking can spread to more tiles. Larger tiles are particularly prone to this as they have fewer grout lines to distribute stress.
- Loose Tiles: If the subfloor movement is significant, tiles may start to feel loose or hollow when tapped. This indicates a breakdown in the adhesive bond.
- Water Intrusion: Cracks and loose tiles create entry points for water. This is a major concern in wet areas like bathrooms or kitchens, leading to mold growth and rot in the wood subfloor.
Moisture Damage And Mold Growth
Moisture is a critical factor when tiling over wood. Wood is porous and can absorb water, which causes it to swell and warp. If moisture gets trapped beneath the tile, it can lead to significant problems.
This can happen if the wood subfloor wasn’t properly dried before installation, or if there are leaks from plumbing or spills that seep through grout lines or cracks.
When wood becomes saturated and then dries repeatedly, it can swell and shrink, leading to structural weakening and further movement. More concerningly, trapped moisture creates an ideal breeding ground for mold and mildew. Mold growth not only causes unpleasant odors and unsightly discoloration but can also pose serious health risks.
In severe cases, extensive mold growth can compromise the structural integrity of the wood subfloor and joists, requiring extensive and expensive remediation.
Preventing moisture damage involves several steps:
- Proper Sealing: Ensure the wood subfloor is completely dry before installation. Consider using a moisture barrier or primer if recommended by your underlayment or tile manufacturer.
- Waterproof Underlayment: In areas prone to moisture, such as bathrooms or laundry rooms, an uncoupling membrane with waterproof properties is highly recommended.
- Sealed Grout and Tile: Properly sealed grout and glazed tiles are essential to prevent water from penetrating the surface. Re-sealing grout periodically is also a good practice.
- Address Leaks Promptly: Any plumbing leaks or spills should be addressed immediately to prevent water from reaching the wood subfloor.
The Cost Of Incorrect Installation
The financial implications of installing tiles incorrectly over a wooden floor can be substantial. While the initial cost might seem lower if shortcuts are taken, the long-term expenses of repairing or replacing a failed tile floor far outweigh the savings. This is a classic case where cutting corners leads to greater expense.
These costs include not just the materials to fix the floor, but also the labor involved. If the subfloor itself has been damaged by moisture or excessive movement, the repairs can become even more extensive, potentially involving replacing joists or significant portions of the wooden subfloor. Additionally, the disruption to your home life can be considerable, as a failed floor often means a significant period of inconvenience.
Consider these potential costs:
- Cost of Replacement Materials: This includes new tiles, grout, adhesives, and underlayment if the original installation fails.
- Labor Costs for Removal and Reinstallation: Professional tile installers charge for their time and expertise, which can add up quickly for extensive repairs.
- Subfloor Repair Costs: If the wood subfloor is damaged, you’ll incur costs for repairing or replacing it, which can be significantly more expensive than tile work alone.
- Potential Health Costs: Dealing with mold remediation can be costly and also involves health considerations for occupants.
- Disruption and Inconvenience: While not a direct financial cost, the time spent without a functional floor and the general disruption to your household has a value.
Can I Put Ceramic Tiles on a Wooden Floor? Tips & Risks Summary
To answer the core question “Can I Put Ceramic Tiles on a Wooden Floor? Tips & Risks,” the answer is a qualified yes, but with crucial caveats. It is possible, and can be a beautiful and lasting upgrade, but only if done correctly.
This involves a deep understanding of the inherent differences between wood and tile and implementing proper installation techniques. The risks are significant if these steps are ignored, primarily revolving around cracking, delamination, and moisture-related damage.
Success hinges on treating the wooden subfloor not as a direct surface for tiling, but as a foundation that needs preparation and protection. This means ensuring the wood is structurally sound, dry, and rigid enough to support the tile. Crucially, it involves creating a buffer layer – an underlayment – that acts as an intermediary, absorbing the wood’s movement and providing a stable, flat surface for the tiles.
Preparing Your Wooden Subfloor For Tiling
The preparation of the wooden subfloor is the absolute bedrock of a successful tile installation over wood. Skipping or skimping on this stage is the most common pathway to failure. A solid, clean, and well-supported foundation is non-negotiable.
This involves more than just sweeping. It requires a thorough inspection and, often, remedial work to ensure the wood can handle the weight and demands of a tiled surface.
Think of it like building a house. You wouldn’t pour the foundation on soft, uneven ground. The same principle applies here.
The wood needs to be as stable and flat as possible before any underlayment or tile is applied. This process ensures that the subsequent layers have the best possible base to adhere to and function correctly, preventing the movement and stresses that lead to tile failure.
Key preparation steps include:
- Reinforce Loose or Squeaky Boards: If you have any floorboards that move or squeak when walked on, they need to be secured. Use appropriate screws to fasten them down to the joists below. This creates a solid, unified base.
- Leveling the Surface: Use a long level or straight edge to find high and low spots. Fill low areas with a leveling compound designed for wood subfloors. Sand down any high spots. The goal is a smooth, flat surface, generally within 1/8 inch over a 10-foot span.
- Moisture Testing: As mentioned before, moisture meters are your best friend. Ensure the wood is dry. If installing in a high-moisture area, consider a vapor barrier.
- Cleaning Thoroughly: Remove all dust, dirt, paint, grease, and any other contaminants. These can prevent adhesives from bonding properly. A clean surface is essential for good adhesion.
Choosing The Right Underlayment System
The underlayment is your shield between the wood and the tile. It’s the most critical component in ensuring your tile floor withstands the test of time over a wooden subfloor. The wrong choice here can lead to all the problems we’ve discussed.
Therefore, selecting an appropriate underlayment system is paramount. This isn’t a place to cut corners. The investment in a good underlayment will pay dividends in the longevity and beauty of your tiled floor.
There are a few main types of underlayment systems, each with its own strengths. Cement backer board is a strong, rigid option, while uncoupling membranes offer superior flexibility and crack isolation. The best choice often depends on the specific conditions of your subfloor and the environment where the tile will be installed.
For most modern installations over wood, an uncoupling membrane is highly recommended.
Consider these factors when choosing:
- Crack Isolation Capabilities: This is the primary function. The underlayment must effectively absorb or isolate the movement of the wood subfloor. Membranes are generally superior to backer board in this regard.
- Load-Bearing Capacity: The underlayment needs to be able to support the weight of the tile, adhesive, and traffic without failing.
- Moisture Resistance/Waterproofing: Especially important for kitchens, bathrooms, and laundry rooms. Some membranes offer full waterproofing, while others provide water resistance.
- Ease of Installation: While all require care, some systems are generally quicker or easier to install than others.
Installation Best Practices For Longevity
Beyond choosing the right materials, following best practices during the installation process is key to achieving a tile floor that lasts. This includes proper spacing, mixing, application, and curing of all materials. Think of it as a chain – each link needs to be strong for the whole to be reliable.
Even with the best underlayment, improper adhesive application or insufficient grout curing can lead to failure.
Adhering to manufacturer guidelines is non-negotiable. They have tested their products extensively and their recommendations are based on ensuring optimal performance. Pay close attention to details like the correct trowel size for applying thin-set, the proper mixing ratios for adhesives and grout, and the recommended drying and curing times between steps.
Patience during the curing process is a virtue that will save you much trouble later.
Essential best practices include:
- Follow Manufacturer Instructions: This cannot be stressed enough. Every product has specific requirements for mixing, application, and curing.
- Use the Correct Trowel Size: The notch size of your trowel determines how much adhesive is applied. Using the wrong size can lead to insufficient coverage or too much adhesive, both of which cause problems.
- Ensure Full Coverage of Adhesive: The back of every tile should be fully coated with adhesive. This is often checked by removing a tile after a short period to inspect the trowel marks.
- Allow Proper Curing Times: Do not rush the process. Let adhesives and grout cure fully as per the manufacturer’s specifications before walking on the floor or exposing it to water.
Frequently Asked Questions
Question: Can I tile over vinyl flooring on a wood subfloor?
Answer: Yes, you can often tile over existing vinyl flooring on a wood subfloor, but it requires proper preparation. The vinyl must be in good condition (not peeling or warped), clean, and well-adhered. You might need to apply a liquid membrane or a cement backer board over the vinyl to create a stable, suitable surface for tile.
Question: How much weight can a wooden subfloor support for tile?
Answer: A properly constructed wooden subfloor with appropriate joist spacing and sufficient plywood or OSB thickness can support the weight of tile and its associated materials. However, the key is stability and rigidity, not just brute strength. Excessive deflection (flexing) is more problematic than static weight for tile.
Question: Should I use thin-set or mastic for tiling over wood?
Answer: You should always use a thin-set mortar for tiling over wood subfloors. Mastic adhesives are generally not recommended for tile installations over wood because they tend to remain more flexible and can allow for too much movement, potentially leading to cracked tiles or grout. Thin-set provides a stronger, more rigid bond when used with a proper underlayment.
Question: How do I know if my wooden subfloor is strong enough?
Answer: A strong wooden subfloor typically has joists spaced 16 inches on center (or closer) and is covered with at least 3/4-inch thick plywood or OSB. It should not feel soft, spongy, or flex significantly when walked on. If you’re unsure, consulting a contractor or structurally knowledgeable person is a good idea.
Question: What happens if I put tiles directly on a wooden floor without an underlayment?
Answer: If you place ceramic tiles directly on a wooden floor without a proper underlayment, the wood’s natural expansion and contraction due to changes in temperature and humidity will likely cause the tiles and grout to crack, loosen, or even break. The rigid nature of tile is not compatible with the flexible movement of wood without an isolating layer.
Final Thoughts
So, when you ask “Can I Put Ceramic Tiles on a Wooden Floor? Tips & Risks,” remember that it’s entirely possible to create a beautiful and durable tiled surface over wood, but it demands attention to detail and the right approach. The core issue is bridging the gap between the movement of wood and the rigidity of tile.
This is achieved by preparing the subfloor rigorously and, most importantly, by installing an appropriate underlayment system.
Ignoring the fundamental principles of wood movement or opting for shortcuts will almost certainly lead to costly failures, including cracked tiles, loose grout, and potential moisture damage. By investing in quality materials like cement backer board or uncoupling membranes, using flexible adhesives and grouts, and following best installation practices, you can ensure your tile floor is not only stunning but also built to last for years to come. Always prioritize proper preparation and the right materials to protect your investment.