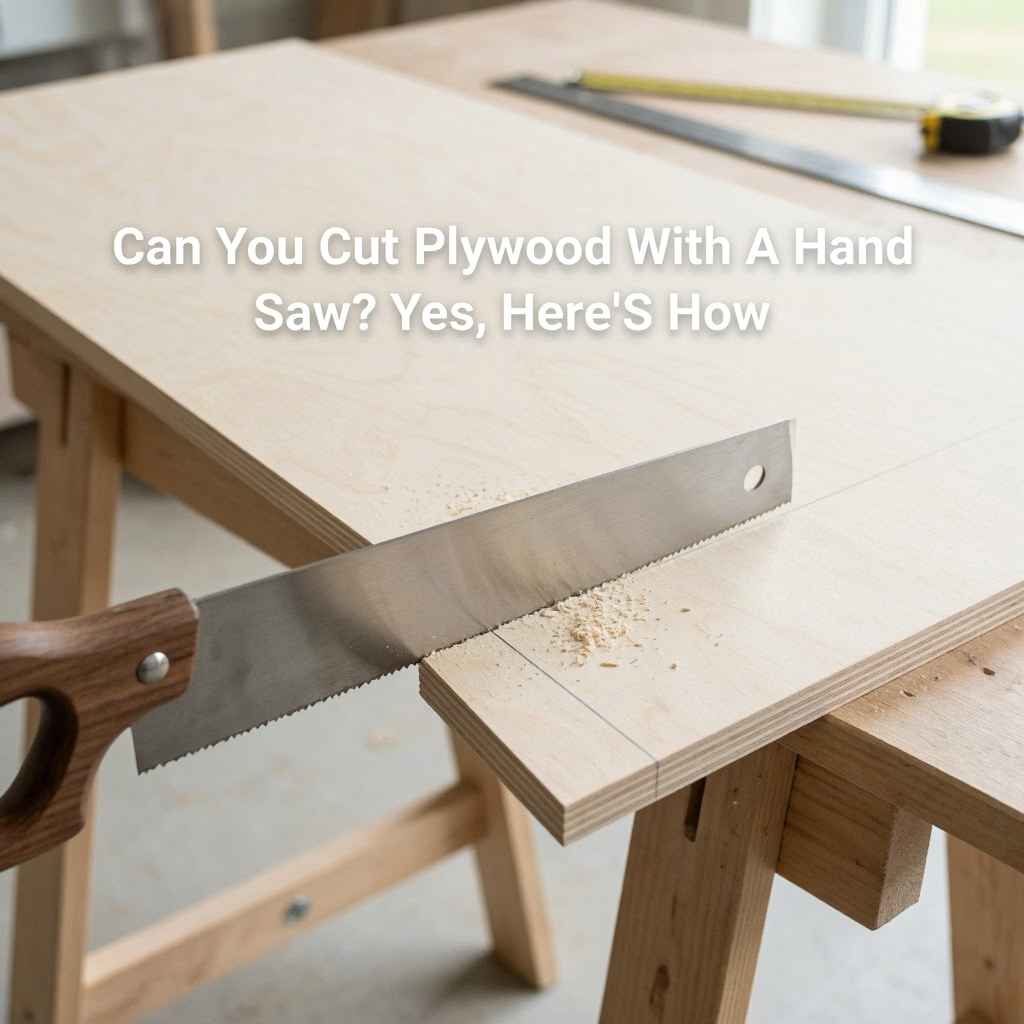
Can You Cut Plywood With A Hand Saw? Yes, Here’S How
Cutting plywood with a hand saw might seem tricky. Many folks think power tools are the only way. But it’s totally doable!
You just need the right approach. This guide will show you how.
Yes, you absolutely can cut plywood with a hand saw. With the correct saw, proper technique, and a bit of care, you can achieve clean, straight cuts without needing power tools. It takes patience and the right preparation.
Understanding Plywood Cuts
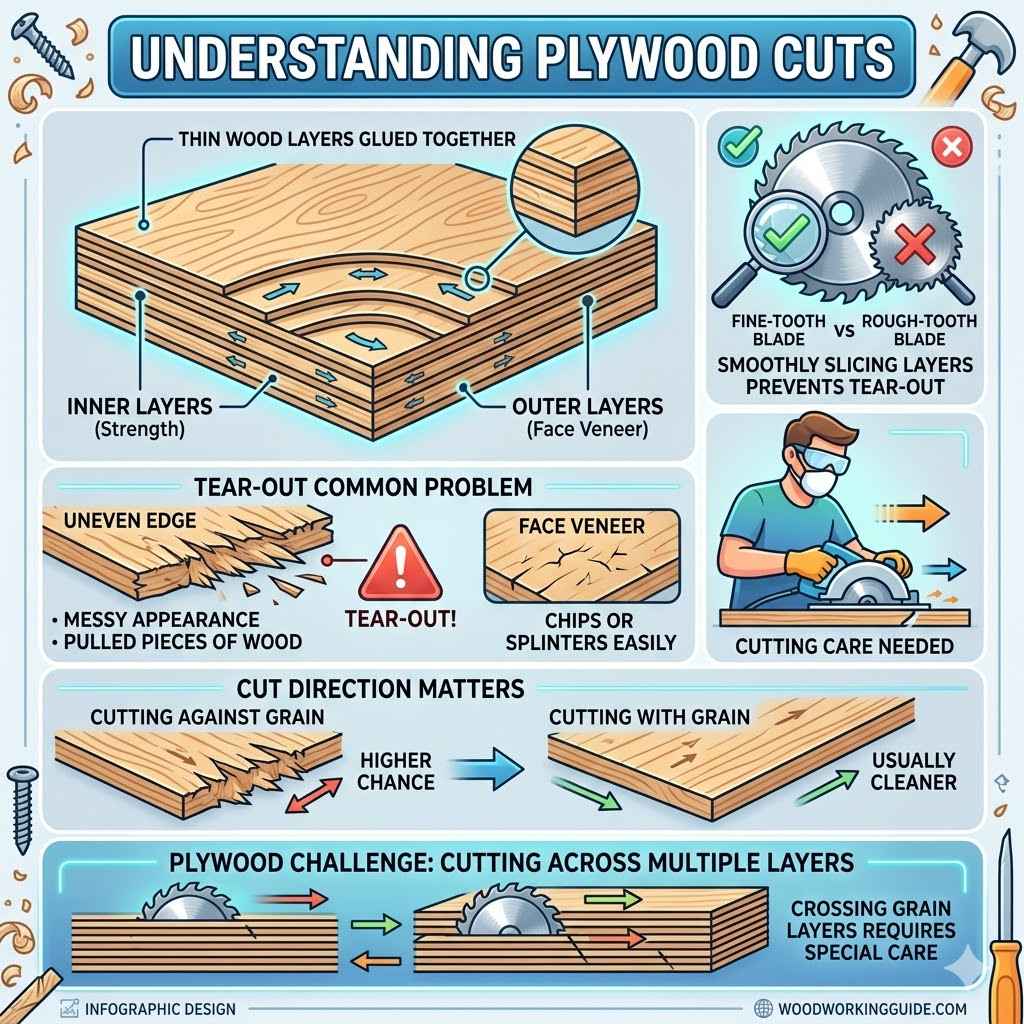
Plywood is made of thin wood layers. These layers are glued together. They have wood grain running in different directions.
This makes it strong but also a bit tricky to cut. The outer layers, called the ‘face veneer’, are usually the smoothest. They can chip or splinter easily.
The inner layers provide strength.
When you cut, you’re slicing through these glued layers. The saw blade needs to go through all of them smoothly. If the blade is too rough, it can pull out small pieces of wood.
This makes the edge look messy. This is called ‘tear-out’. It’s a common problem, especially on the top layer of plywood.
The direction of the cut matters too. If you cut against the grain on the top layer, you’re more likely to get tear-out. Cutting with the grain is usually cleaner.
But with plywood, you’re often cutting across grain layers. That’s why special care is needed.
Choosing the Right Hand Saw
Not all hand saws are created equal for plywood. You need a saw with many small teeth. These teeth should be sharp.
Think of them like tiny knives. Many small teeth make finer cuts. This means less tearing.
The teeth should also be set slightly apart. This creates a small gap, called a ‘kerf’. The kerf helps the saw move freely.
It stops the blade from getting stuck.
A ‘crosscut saw’ is often a good choice. These saws have teeth designed for cutting across wood grain. They typically have 8 to 12 teeth per inch (TPI).
This is a good range for plywood. A saw with fewer teeth (like a ‘rip saw’ for cutting with the grain) will be too coarse. It will create larger chips and more damage.
You might also see ‘Japanese pull saws’. These are becoming very popular. They cut on the pull stroke.
This makes them easy to control. They often have very fine teeth. This leads to very clean cuts.
Many Japanese saws have high TPI, making them great for delicate work like cutting plywood.
Another good option is a ‘dovetail saw’ or a ‘tenon saw’. These are called ‘back saws’. They have a stiffening rib on the back.
This makes them very rigid. They also usually have fine teeth. Their small size makes them easy to handle for precise work.
Ultimately, the best hand saw for plywood has:
- Many fine teeth (high TPI, around 10-14)
- Sharp, well-maintained blades
- A comfortable handle
- A thin blade for less resistance
Preparing Your Plywood and Workspace
Good preparation is key to success. Before you even touch the saw, think about your cut line. Use a sharp pencil to mark your line.
A thin, dark line is best. Use a ruler or a straight edge to draw the line. Make sure it’s perfectly straight.
A wobbly line will lead to a wobbly cut.
Now, think about where the tear-out will happen. For a hand saw, tear-out is most common on the top surface. This is the side of the plywood facing you as you cut.
To minimize this, you can try scoring the cut line first. Use a sharp utility knife or a chisel. Cut along your pencil line.
This scores the wood fibers. It helps prevent them from tearing out as the saw blade enters.
Next, secure your plywood. It must be stable. A wobbly piece of wood is dangerous and makes cutting hard.
Use clamps to hold it down firmly. Position the clamps so they don’t get in the way of your saw. The cut line should overhang the edge of your workbench or sawhorses.
This gives you room to saw without hitting your supports.
If you’re cutting a large sheet, use sawhorses. Place them at a comfortable height. Support the plywood where you will be cutting.
The part of the plywood you are cutting off should also be supported. This prevents it from sagging and binding the saw. You want the cut to be clean and free.
No sagging allowed!
Consider the cutting direction. For the cleanest cut on the top surface, try to make the saw cut from the ‘waste’ side of the line. This way, any minor tear-out happens on the part you’ll discard.
It sounds simple, but it makes a difference.
The Cutting Technique
Start the cut carefully. Place the saw blade on the score line. Use a gentle backward stroke first.
This helps set the blade in place. Most saws cut on the pull stroke or push stroke. Understand your saw.
For a Japanese pull saw, start with a smooth pull. For a Western push saw, start with a steady push.
Keep your strokes long and steady. Don’t rush. Let the saw do the work.
Apply even pressure. Too much pressure can bind the blade. Too little pressure means slow cutting and rough edges.
Find that sweet spot. Your strokes should be smooth and rhythmic. This helps the teeth engage the wood consistently.
Keep the saw blade straight. This is crucial. Try to keep the blade perpendicular to the surface of the plywood.
Your guiding hand can help here. Place your non-sawing hand near the blade. Use your thumb to help guide the blade.
Be careful not to place your fingers in the path of the blade! Safety first, always.
As you reach the end of the cut, slow down. The piece you’re cutting off can fall. This can cause a rough break or splintering.
Support the offcut with your free hand. Or, you can place a scrap piece of wood underneath the end of the cut. This catches the piece and prevents it from tearing the edge as it falls.
Keep an eye on your pencil line. If you start to drift, gently correct your saw’s path. Small adjustments are better than big ones.
If the saw starts to bind, stop. Check the kerf. Make sure it’s clear.
Sometimes, a little wiggling can free it up. But don’t force it.
After the cut, you might have some small splinters or rough edges. You can easily clean these up. A block plane, sandpaper, or a sharp chisel can do the job.
A few light passes will smooth out the edge nicely.
Quick Sawing Tips for Plywood
Sharp Blade is King: A dull saw makes work hard and edges messy. Always use a sharp blade.
Score the Line: A quick pass with a knife gives your saw a clean path.
Clamp It Down: No wobbling. Secure the plywood firmly.
Slow and Steady: Long, even strokes work best. Don’t rush the cut.
Support the Offcut: Prevent ragged edges at the end of your cut.
Dealing with Tear-Out
Tear-out is the bane of a smooth plywood cut. It happens when the saw blade rips wood fibers instead of cutting them cleanly. It’s most noticeable on the top surface.
This is the side you see.
You can try a few things to prevent it. Scoring the cut line with a utility knife is one. Another method is to tape the cut line.
Use painter’s tape or masking tape. Apply it along both sides of your pencil line. This tape acts like a temporary shield.
It holds the wood fibers in place. It reduces the chance of them lifting and tearing.
When you cut through the taped line, the tape often gets cut too. This gives the saw blade a cleaner path. Make sure the tape is applied smoothly.
No wrinkles or bubbles. Press it down firmly along the line.
Some people use a ‘zero-clearance’ insert on a table saw. For hand saws, you can create a similar effect. Use a thin piece of scrap wood.
Place it right next to your cut line. Clamp it down. Then, run your saw blade along the edge of this scrap piece.
This acts as a guide and a support for the plywood edge. It helps keep the fibers from lifting.
If tear-out still happens, don’t panic. It’s often minor. You can fix small tears.
Light sanding can often smooth them out. For bigger ones, a sharp chisel can carefully remove loose splinters. Sometimes, a little wood glue and a clamp can repair a more significant tear.
Tear-Out Tactics
Tape it Up: Painter’s tape along the cut line holds fibers.
Score Deeply: A sharp knife makes a clean initial cut.
Use a Guide: Clamp a scrap piece to guide your saw.
Sanding Fix: Smooth minor imperfections with sandpaper.
Chisel Cleanup: Carefully remove loose splinters with a sharp tool.
Cutting Different Types of Plywood
Different plywood types need slightly different approaches. Standard construction-grade plywood is tough. It’s made for building.
It might have more voids inside and a rougher face. It’s more forgiving with hand saws, but tear-out can still be an issue. Focus on a sturdy saw and good support.
The smooth, sanded grades, like birch or oak plywood, are for furniture and cabinetry. These have nicer veneers. They are more prone to chipping.
You’ll want your sharpest, finest-toothed saw for these. Take extra care with scoring and taping. Patience is key here for a really clean finish.
Melamine-coated plywood is another type. It has a smooth plastic-like coating. This coating is hard.
It can dull saw blades faster. The coating can also chip. It’s best to score the line very deeply.
Use a sharp utility knife. Then, cut slowly. Some people put tape over the cut line to help prevent chipping of the melamine.
Thin plywood, like 1/8 inch or 1/4 inch, is flexible. It can bend as you cut. This makes it hard to get a straight line.
Clamp it very securely. Consider cutting it over sawhorses to keep it supported. Sometimes, gluing thin plywood to a scrap piece of thicker material first can make it easier to handle and cut.
My Own Plywood Cutting Story
I remember the first time I had to cut a sheet of ¾ inch birch plywood for a shelving project. I only had my trusty old crosscut hand saw. I’d used it for lumber before, no problem.
But this plywood was different. I just started sawing, thinking it would be easy.
Within a few inches, I saw the edges looking rough. Little splinters were popping up everywhere on the top surface. It was frustrating.
I felt a knot of worry in my stomach. This wasn’t the clean finish I was hoping for. The saw blade seemed to be snagging more than cutting.
I stopped. I looked at the plywood edge. Then I looked at my saw.
It was sharp, but maybe not fine enough. I decided to try something new. I grabbed some blue painter’s tape.
I carefully lined it along my pencil mark. I pressed it down nice and flat. I also decided to score the line with my utility knife.
I really dug into the tape and plywood.
Then, I tried again. This time, I was much slower. I let the saw teeth bite gently.
The tape seemed to help a lot. The tear-out was much less. The edge wasn’t perfect, but it was much, much better.
It taught me a valuable lesson. Preparation makes all the difference, especially with tricky materials like plywood.
My Plywood Lesson: Key Takeaways
Initial Mistake: Rushing into the cut without thinking about plywood’s nature.
The Problem: Significant tear-out on the top veneer.
The Fix: Added painter’s tape and scored the cut line.
The Result: A much cleaner cut with less tear-out.
The Lesson: Always prepare your material and cut line.
When Is It Okay to Use a Hand Saw for Plywood?
A hand saw is great for smaller projects. If you need to cut a few small pieces for a craft or a quick repair, it’s ideal. You don’t need to set up large power tools for just one or two cuts.
It’s also good when you don’t have access to electricity. Maybe you’re working in a shed or outdoors far from an outlet. A hand saw is your reliable friend then.
It’s also a good option if you’re new to woodworking. Learning to control a hand saw gives you a better feel for the wood. It’s a foundational skill.
If you need very precise, repeatable cuts, especially on many pieces, a power tool like a table saw or circular saw might be better. But for occasional use, or when working with smaller plywood sheets, a hand saw is perfectly capable.
Think about the type of cut you need. If it’s a simple straight cut, a hand saw is fine. If you need complex curves or dados, you’ll need different tools.
But for basic sizing and shaping of plywood, a hand saw can definitely get the job done.
Hand Saw vs. Power Saw for Plywood
Hand Saw is Good For:
- Small projects and repairs
- Limited power access
- Learning fundamental skills
- Occasional cuts
- Smaller sheets of plywood
Power Saw Might Be Better For:
- Large production runs
- Very intricate cuts
- Maximum speed and efficiency
- Perfectly repeatable cuts
What This Means for You
So, can you cut plywood with a hand saw? Yes, and it’s a skill worth having. Don’t let anyone tell you otherwise.
You’ll save time and hassle if you know how to do it. Plus, it’s a bit more satisfying to make a nice cut with your own hands.
The main things to remember are choosing the right saw, preparing your wood, and using a careful technique. A sharp, fine-toothed saw is your best friend here. Taking a few extra minutes to tape and score your line will make a huge difference in the final look.
When it’s normal to use a hand saw for plywood? Anytime you have a project that doesn’t require dozens of identical cuts. Think DIY shelves, small boxes, repairs around the house, or custom-sized inserts for drawers.
When might you want to reconsider? If you need to cut many sheets of plywood very quickly, or if the project demands absolute edge perfection without any touch-up. In those cases, a power saw might be a more efficient tool.
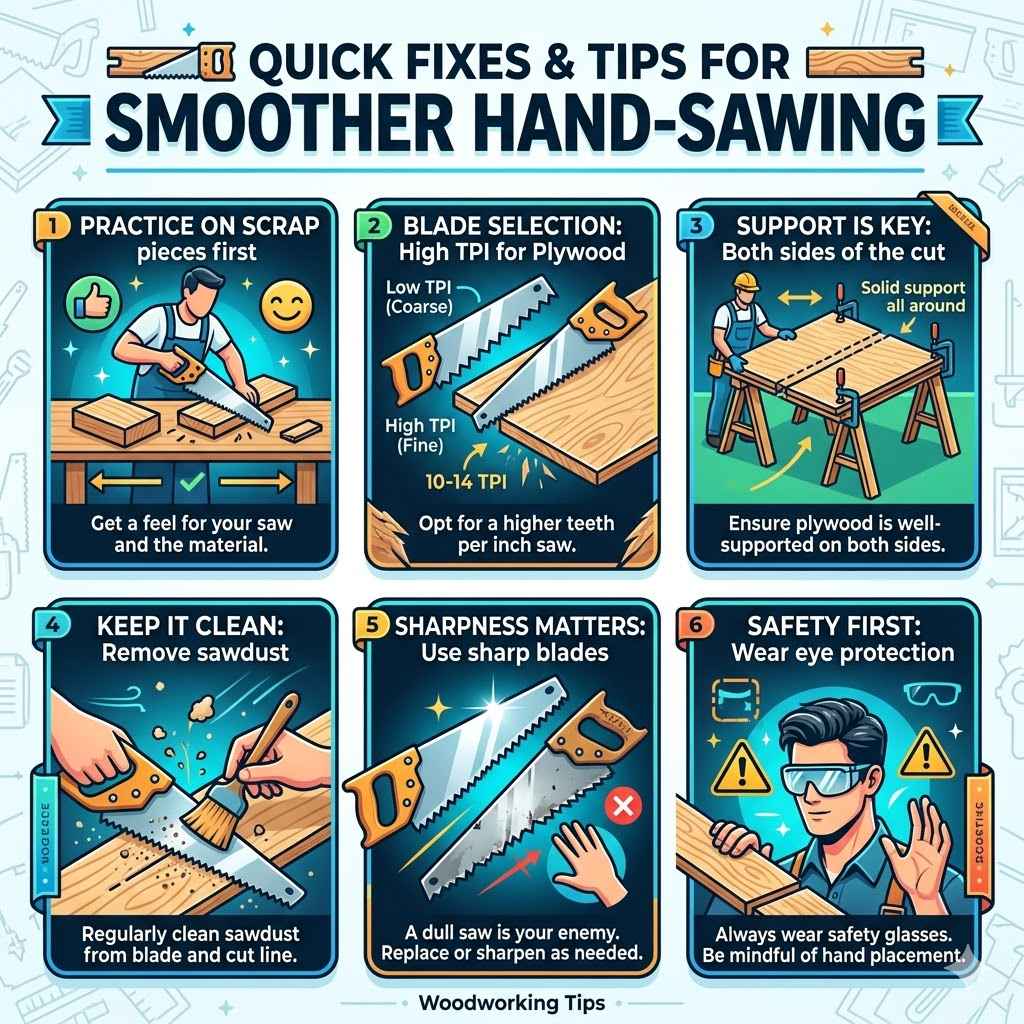
Quick Fixes and Tips
Here are some final pointers to make your hand-sawing experience smoother:
- Practice: If you’re new to this, practice on scrap pieces first. Get a feel for your saw and the material.
- Blade Selection: Always opt for a higher TPI (teeth per inch) saw for plywood.
- Support is Key: Ensure your plywood is well-supported on both sides of the cut.
- Keep it Clean: Regularly clean sawdust from your blade and the cut line.
- Sharpness Matters: A dull saw is your enemy. Keep your blades sharp or replace them when needed.
- Safety First: Always wear safety glasses. Be mindful of where your hands are.
Frequently Asked Questions
What type of hand saw is best for cutting plywood?
A hand saw with fine teeth (high TPI, around 10-14) is best for plywood. Japanese pull saws or Western back saws with many teeth are excellent choices for clean cuts.
How do I prevent plywood from splintering when cutting with a hand saw?
To prevent splintering, score the cut line with a sharp utility knife. Applying painter’s tape along the cut line also helps hold the wood fibers together during the cut.
Is it hard to cut thick plywood with a hand saw?
Cutting thick plywood (like 3/4 inch) with a hand saw requires more effort and a good, sharp saw. Ensure the plywood is well-supported and use long, steady strokes. It is harder than cutting thinner plywood.
Can I use a hacksaw to cut plywood?
While a hacksaw is designed for metal, you can use it for very small, precise cuts on thin plywood. However, it’s not ideal for larger cuts. A woodworking hand saw with fine teeth will give much better results on plywood.
How do I make a straight cut in plywood with a hand saw?
Mark your cut line clearly with a sharp pencil and straight edge. Clamp the plywood securely to prevent movement. Guide the saw carefully along the line, keeping the blade perpendicular to the surface.
Long, steady strokes help maintain accuracy.
What is the best way to cut curves in plywood with a hand saw?
For curves, you’ll need a specialized saw. A coping saw or a small handsaw with a flexible blade is designed for cutting curves in wood, including plywood. A standard hand saw is not suitable for curved cuts.
Conclusion
Cutting plywood with a hand saw is absolutely possible. It requires the right tools and a patient approach. By selecting a fine-toothed saw and employing good preparation techniques, you can achieve clean, accurate cuts.
Don’t be afraid to try it for your next project!