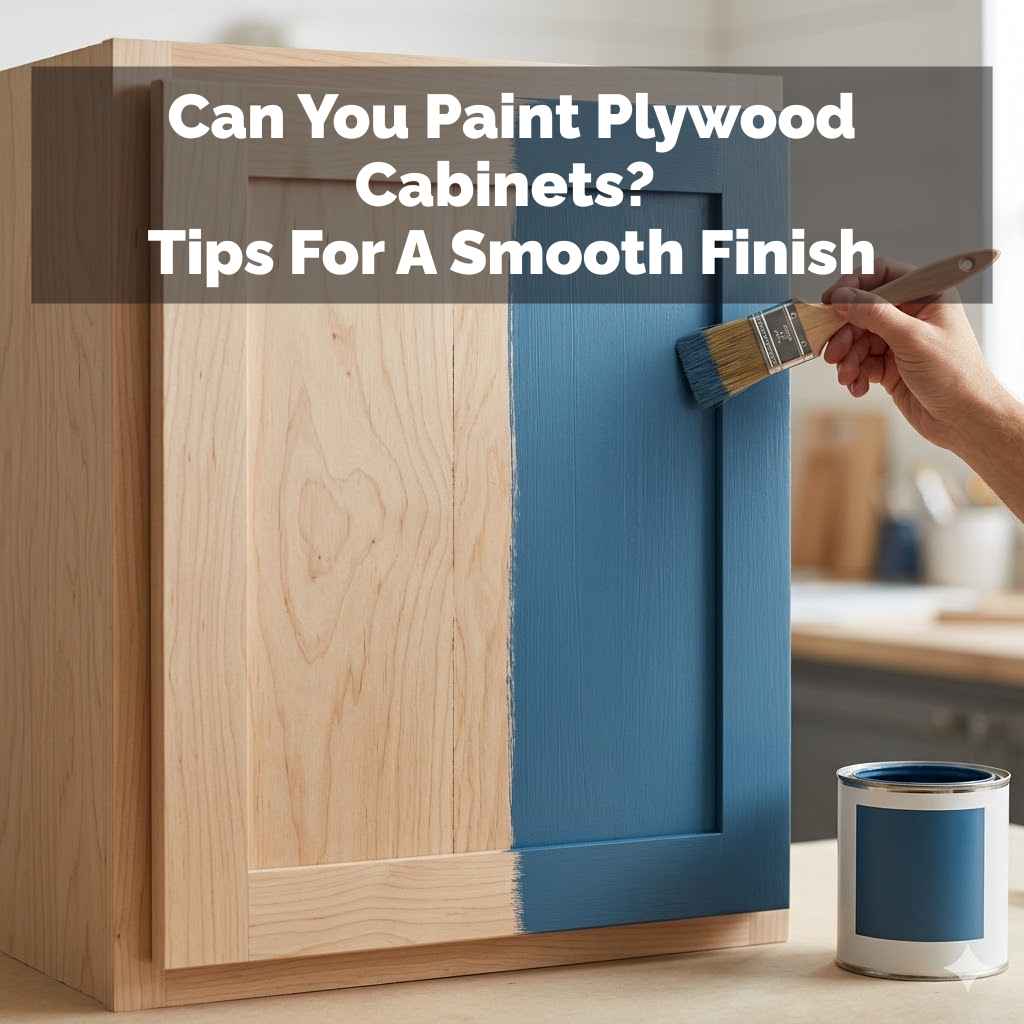
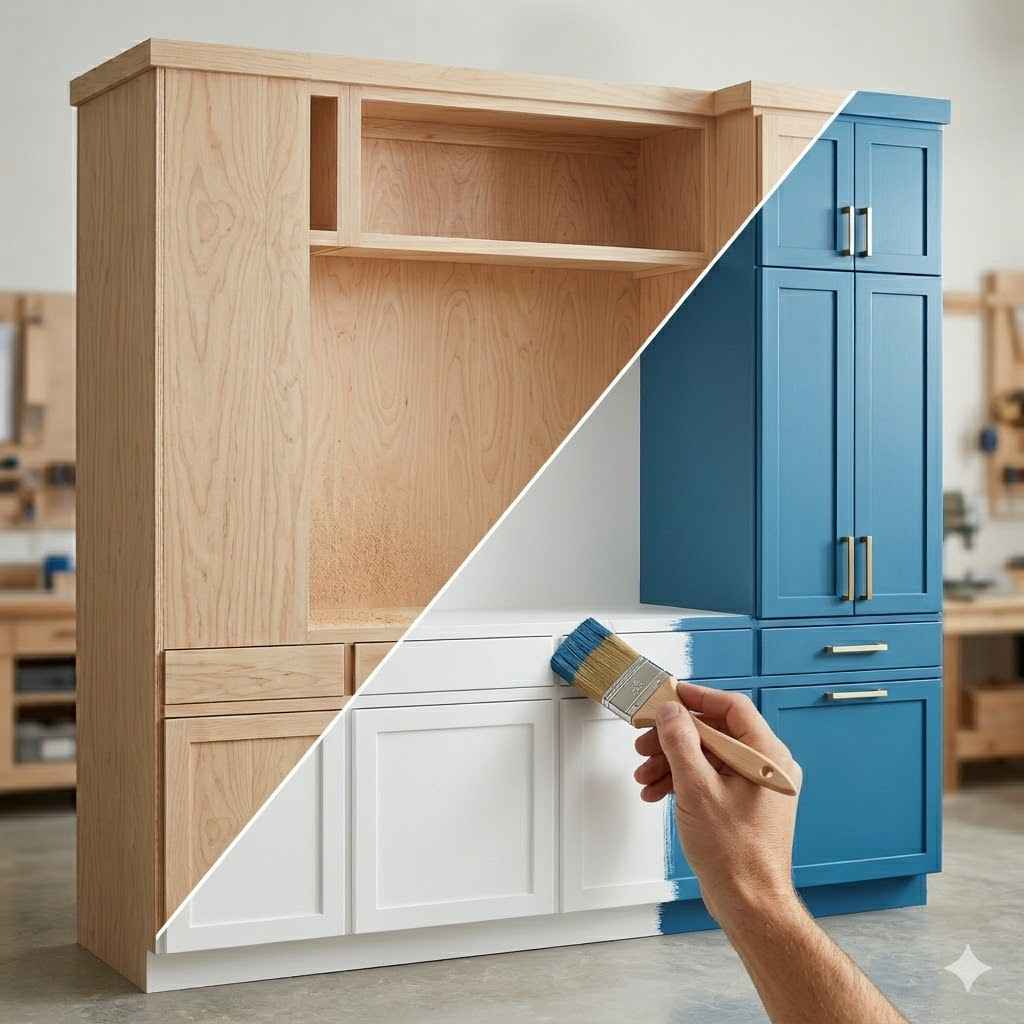
Can You Paint Plywood Cabinets? Tips For A Smooth Finish
It’s a question many homeowners grapple with. You look at those plywood cabinets. They might be older, or maybe they’re a budget choice. You wonder if a fresh coat of paint could transform them. The thought is appealing – a new look without the huge cost of replacing them. But can you actually paint plywood cabinets and get a good result? It feels a bit uncertain, doesn’t it? You want a finish that looks smooth, not grainy or uneven. You worry about the paint peeling or chipping too soon.
Yes, you can paint plywood cabinets. Success depends on proper preparation. This includes cleaning, sanding, priming, and using the right type of paint. Careful steps ensure a durable, smooth finish that can refresh your kitchen or bathroom.
What It Means to Paint Plywood Cabinets
Painting plywood cabinets is essentially giving a facelift to existing cabinetry. Plywood itself is made of thin layers of wood glued together. These layers create a strong material. However, the exposed edges and the surface can sometimes show the grain. This grain can be rough. It can also absorb paint differently than a solid wood surface. So, when we talk about painting them, we’re talking about covering that surface. We want to create a smooth, uniform look. We also want it to last.
Why do people consider painting plywood cabinets? Often, it’s about saving money. New cabinets are expensive. A paint job can cost much less. It’s also a way to update a kitchen or bathroom style. A dark, dated cabinet can become bright and modern with paint. Sometimes, the cabinets are structurally sound. They just look old. Painting is a practical way to make them look new again. You can choose any color you like. This offers huge design freedom.
The process involves several key steps. You can’t just grab a can of paint and go. You need to prepare the surface well. This means cleaning off grease and grime. You also need to smooth out any rough spots. Sanding is a big part of this. Then, you must use a good primer. Primer helps the paint stick. It also helps hide imperfections. Finally, you choose the right paint. This paint needs to be tough enough for cabinets. Cabinets get a lot of use.
My Own Plywood Cabinet Painting Adventure
I remember staring at my old kitchen cabinets. They were a light-colored plywood. The finish was worn. Some spots looked almost raw. I had just bought the house and money was tight. Replacing them felt impossible. I thought, “Surely I can paint these.” I’d painted walls before. How different could cabinets be? Famous last words. I watched a few online videos. They made it look so easy.
I skipped a lot of the prep. I gave them a quick wipe. I thought a coat of paint would cover everything. Oh, how wrong I was. The first coat went on. It looked streaky. The grain of the plywood really showed through. It looked even worse than before in some places. Then, I tried a second coat. It was a little better. But I could still see the lines where the plywood layers met. And the corners felt rough.
A few weeks later, the paint started to chip. Especially around the handles. I was so frustrated. It looked bad. It felt worse knowing I had done it. It was a mess. I learned a hard lesson that day. Preparation is not just a step. It’s the whole game. You must do it right for any paint job to look good and last. That experience made me understand the deep importance of every single step.
Plywood Prep: The Non-Negotiables
Clean Thoroughly: Grease and dirt are paint’s enemies. Use a degreaser. Rinse well.
Let them dry fully.
Sand Smoothly: Use fine-grit sandpaper. A sanding sponge works well. Focus on edges and any rough spots.
Wipe dust off with a tack cloth.
Prime Smart: Use a good quality primer. It seals the wood. It helps paint stick.
It covers stains. Two thin coats are better than one thick one.
Understanding Plywood’s Nature
Plywood is a fascinating material. It’s made by gluing thin sheets of wood veneer together. The grain of each layer runs in a different direction. This cross-graining makes plywood very strong. It’s also stable. It doesn’t warp as easily as solid wood. This is great for building. But for painting, it brings some quirks.
The edges of plywood can be a challenge. You can often see the layered structure there. It looks like little lines. This edge grain is very porous. It soaks up paint differently. Without help, it can look uneven. It might look like dark lines. Also, the surface of plywood can sometimes have small gaps or patches. These are called voids. They can show through paint.
The face veneer matters too. Some plywood has a smoother face than others. A higher grade of plywood will have a nicer surface. But even smooth plywood can have a subtle texture. This texture can be from the wood grain itself. Or it can be from the manufacturing process. If you don’t prepare the surface, this texture can show up in your paint. It might make the finish look bumpy or dull.
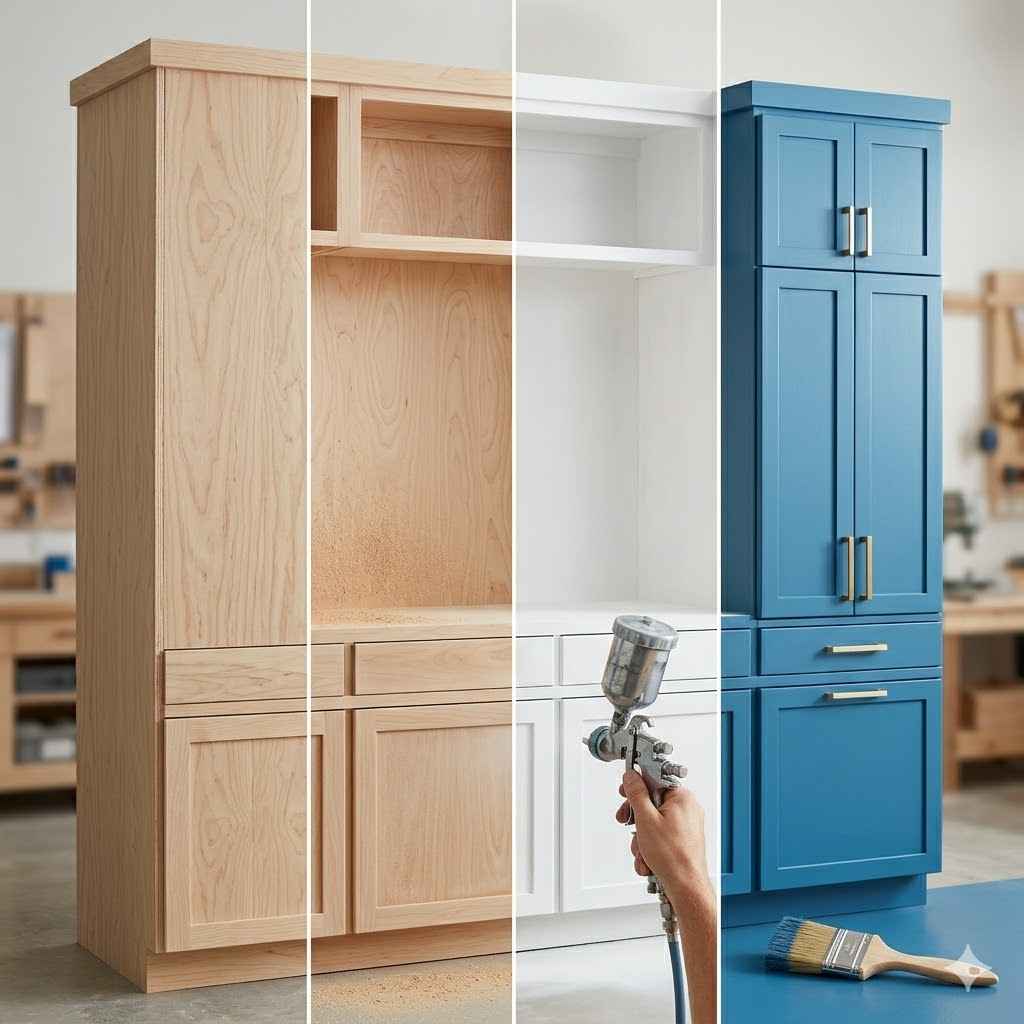
The Crucial Steps: From Grime to Gloss
Let’s break down the steps needed for painting plywood cabinets. This is where the magic happens. And where mistakes are often made.
First, you must take the doors and drawers off. This makes the job much easier. You can get to all the edges. You can also work on a flat surface. Lay them on sawhorses.
Next, cleaning is super important. Kitchen cabinets get greasy. Bathroom cabinets can get steamy and dirty. You need a good degreaser. A solution of TSP (trisodium phosphate) works well. Or a strong household cleaner. Make sure you rinse it off completely. Any cleaner left behind will mess with the paint. Let them dry overnight.
Then comes sanding. This is key for a smooth finish. You don’t want to remove wood. You just want to rough up the surface a little. This helps the primer stick. Use a medium-grit sandpaper first, maybe 120-grit. Sand everything. Then, use a finer grit, like 220-grit. This makes it really smooth. Pay extra attention to the edges. You want them to be smooth, not fuzzy. After sanding, wipe off all the dust. A vacuum cleaner with a brush attachment helps. Then use a tack cloth. This sticky cloth picks up tiny dust bits.
Now, primer. This is your foundation. Use a good quality stain-blocking primer. This is especially important if your plywood has any knots or dark spots. It seals them. It also provides a uniform base color. Apply one or two thin coats. Let each coat dry completely. Lightly sand between coats with fine-grit sandpaper (220-grit or higher). This makes the surface super smooth for the paint. Wipe off dust again.
Finally, the paint. For cabinets, you want a durable paint. An oil-based enamel is very tough. But it’s harder to clean up. Water-based acrylic or latex enamels are popular. Look for paints labeled for “cabinet coating” or “trim and door” paint. These are made to be tough and smooth. Apply two to three thin coats. Thin coats are better than one thick coat. They dry more evenly. They are less likely to drip. Let each coat dry fully. Light sanding between coats can help too. It makes the final finish super smooth.
Choosing the Right Paint and Tools
The type of paint you use matters a lot. For cabinets, you need something that can take a beating. Oil-based paints are very durable. They create a hard finish. They also level out nicely, meaning fewer brush strokes show. However, they have strong fumes. Cleanup requires mineral spirits.
Water-based acrylic or latex paints are a popular choice now. They have low VOCs (volatile organic compounds), so they smell less. They clean up with soap and water. Many modern acrylic enamels are very durable. They can be just as tough as oil-based paints. Look for ones specifically designed for cabinets or trim.
For applying the paint, you have options. Brushes give you control. A good quality synthetic brush is best for water-based paint. An angled brush helps get into corners. Rollers can speed things up. Use a small foam roller or a mohair roller. These give a smoother finish than a standard fluffy roller. Apply paint in thin, even strokes. Don’t overload your brush or roller.
Many people spray paint cabinets. This gives the smoothest, most professional finish. But it requires special equipment. You need a sprayer. You also need a well-ventilated area. And you have to mask off everything. It’s more advanced. For a DIYer, brushing and rolling are often the way to go.
Tools You’ll Need
- Screwdriver (to remove hardware)
- Degreaser cleaner
- TSP or substitute
- Sandpaper (120-grit and 220-grit)
- Sanding sponges or blocks
- Tack cloths
- Good quality primer (stain-blocking)
- Cabinet-grade paint (enamel)
- Paintbrushes (angled synthetic)
- Small foam or mohair rollers
- Paint trays
- Drop cloths
- Painter’s tape
Dealing with Plywood Edges and Grain
The edges of plywood are often the trickiest part. They show the layers. They can look fuzzy after sanding. To fix this, you can use a wood filler or an edge-banding product. Wood filler can be applied to the edges. Let it dry. Then sand it smooth. It fills in the layers.
Another trick is to use a grain filler. This is a paste that fills the pores of the wood. It makes the surface much smoother. You apply it, let it dry, and then sand it off. This is especially helpful if the wood grain itself is very deep.
For the surface grain, primer is your best friend. A good stain-blocking primer will help. It seals the pores. It creates a uniform surface. If the grain is still very visible after priming, you might need a second coat of primer. Or you could try a very thin skim coat of a good quality wood filler. Sand it smooth after it dries.
Some people try to paint plywood to mimic solid wood. This takes skill. You can use a wood grain tool. You apply a glaze. Then you drag the tool through it. This creates a wood grain pattern. But it’s an advanced technique. For most DIYers, the goal is a smooth, solid color finish. That’s achievable with good prep.
Real-World Scenarios for Plywood Cabinets
Let’s think about where you find plywood cabinets. They are common in kitchens and bathrooms. Sometimes they are in laundry rooms or garages. The environment affects them.
In a kitchen, cabinets face grease and heat. Spills happen often. They need to be easy to wipe down. A smooth, durable paint finish is essential. If you don’t prep well, grease can seep into the paint. This can cause it to fail.
Bathrooms are humid. Steam can cause paint to bubble or peel if it’s not sealed properly. A good primer and a durable topcoat protect against moisture.
Older homes might have very basic plywood cabinets. These might have been painted many times before. You might need to strip them down to the raw wood. Or use a special primer that adheres to old paint. This is where experience with different finishes comes in.
The way people use their cabinets also matters. Are they always clean? Or do hands often have food on them? Are kids pulling on doors? These habits mean the paint needs to be tough. You need to be able to clean them without damaging the finish.
What This Means for Your Home Project
Painting plywood cabinets is definitely a doable project. It can dramatically change the look of a room. But it requires patience and attention to detail. Don’t rush the prep work. It’s the most important part.
When is it normal to paint plywood cabinets? Anytime you want a change! If they are structurally sound, painting is a great option. If they are already painted, you can often repaint them. Just be sure to clean and lightly sand them first.
When should you worry? If the cabinets are damaged. If they are warped or have large holes. If the veneer is peeling off in big pieces. In these cases, painting might not be enough. You might need to repair them first. Or consider replacing them.
Simple checks: Run your hand over the surface. Does it feel smooth? Are there any bumps or rough spots? Look closely at the edges. Do they look layered and fuzzy? These are signs you need more sanding or filler.
Quick Tips for a Better Finish
Here are some quick tips to help you get a better result:
Always test your paint and primer in an inconspicuous spot.
Paint in thin coats. It’s better to do three thin coats than one thick one.
Allow plenty of drying time between coats. Rushing this is a common mistake.
Work in a well-lit area. This helps you see drips and uneven spots.
Replace hardware. New handles or knobs can make a big difference.
Use painter’s tape to protect surrounding areas. Remove it while the paint is still a little wet for clean lines.
Consider the sheen. Satin or semi-gloss paints are usually best for cabinets. They are more durable and easier to clean. A matte finish can show imperfections more.
Quick-Scan Table: Plywood Paint Prep
| Task | Why It’s Done | How To Do It |
| Remove Doors/Drawers | Easier access | Use screwdriver |
| Clean | Remove grease/dirt | Degreaser, rinse well |
| Sand | Create adhesion, smooth | 120-grit then 220-grit |
| Dust Removal | Prevent bumps | Vacuum, tack cloth |
| Prime | Seal, bond, uniform color | 1-2 thin coats, light sand between |
| Paint | Color, protection | 2-3 thin coats, dry fully |
Frequently Asked Questions About Painting Plywood Cabinets
Do I need to sand plywood before painting?
Yes, sanding is crucial. It roughens the surface so primer and paint can stick well. It also helps smooth out any minor imperfections in the plywood.
What kind of primer should I use for plywood cabinets?
A high-quality stain-blocking primer is best. It seals any tannins in the wood and prevents them from bleeding through your paint. Look for one specifically designed for wood.
Can I paint over the existing finish on plywood cabinets?
Usually, yes. But you must clean the cabinets thoroughly. You also need to sand the surface well to create a good grip for the new paint.
If the old finish is peeling or damaged, you may need to remove it first.
How many coats of paint do I need for plywood cabinets?
It often takes two to three thin coats of paint. The exact number depends on the paint color and coverage. Thin coats help build a smooth, durable finish without drips.
Will the grain of the plywood show through the paint?
With proper preparation, including good priming and potentially filling, the grain should not be very noticeable. A smooth, even finish is the goal.
How long does it take for painted plywood cabinets to cure?
Paint cures over time. It may feel dry to the touch in a few hours. But it can take several weeks for the paint to reach its full hardness.
Be gentle with them during this time.
Wrapping Up: Your Plywood Cabinet Project
So, can you paint plywood cabinets? Absolutely. It’s a fantastic way to refresh your space affordably. The key is understanding that plywood needs good prep work. Cleaning, sanding, priming, and using the right paint are all vital steps. Don’t skip them. Follow these steps, and you’ll get a beautiful, lasting finish. Your cabinets will look new again.