How to Burn Designs Into Wood: Best Woods, Tips & Shading
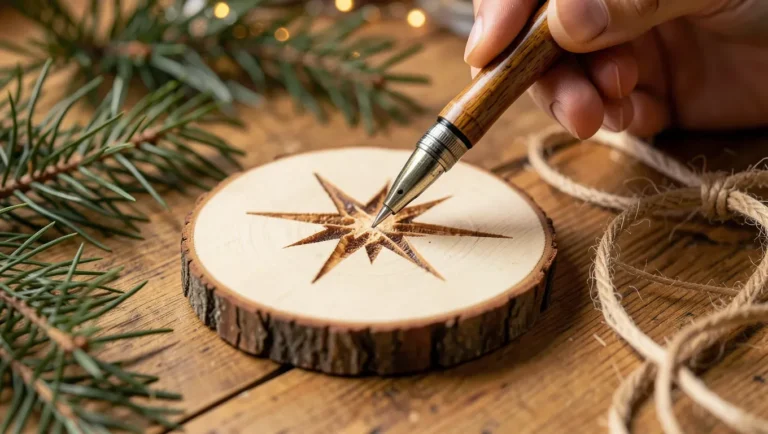
To burn a design into wood, sand a pale, soft, resin-free board such as basswood, transfer the pattern with graphite paper, then trace it with a temperature-controlled pen using light pressure and slow, steady strokes. Never burn MDF, treated, painted, or stained wood. Dark lines come mostly from how long the tip stays on the wood, not only from heat. This guide covers wood choice, which tip does which job, step-by-step burning, shading, and safety.
What You Need to Burn Designs Into Wood
Best Temperature-Control Burner Pick
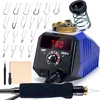 |
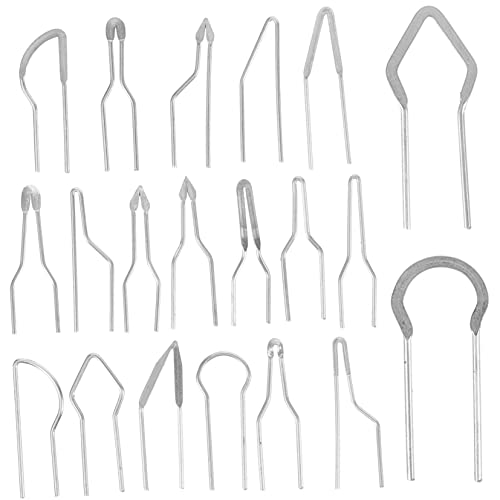
WEP 939D-V Wood Burning Kit: $37.99 A dial-controlled pen with a temperature read-out, which is what the light-pressure, test-on-scrap workflow below depends on. The listing says it heats in about 1 to 2 minutes and includes 20 wire-nib tips and a stand.
|
As an Amazon Associate we earn from qualifying purchases.
Pyrography needs less gear than most crafts. A pen with adjustable heat is the one purchase that matters, because every technique below depends on changing how hot the tip is. You can compare more options in our best wood burning kits roundup, and our wood burning pen guide covers pen setup in more detail.
- A burner with a stand. Walnut Hollow’s Creative Versa-Tool manual says to always rest the tool on its stand so the point touches nothing, and to tape the stand to your work table.
- Graphite transfer paper and a pencil or stylus for moving the pattern onto the wood.
- 220-grit sandpaper. Walnut Hollow’s guidance is to sand with the grain to remove surface oils and give graphite and heat an even surface.
- Pliers for changing points. The same manual says to change points only when the tool is cool, using pliers.
- Scrap wood of the same species as your project, for testing heat and stroke speed first.
Warm-up time varies by tool. Walnut Hollow says its solid-point Versa-Tool usually takes 4 to 5 minutes to heat, while the WEP kit’s listing says its wire-nib pen takes about 1 to 2 minutes. Plan your first test strokes accordingly rather than judging the temperature too early.
Which Wood to Burn, and Which to Never Burn
The best wood is pale, soft, evenly grained, and free of resin. Basswood is the usual beginner choice for those reasons, and birch and poplar are common alternatives. Hard maple works for advanced burners but needs more heat.
| Wood | Hardness (Janka, Wood Database) | What the sources say for burning |
|---|---|---|
| Basswood | Very soft and light | Straight, fine, even grain and pale color, with knots uncommon. Burns evenly and shades smoothly, which is why it is the beginner default. |
| Poplar | 540 lbf | Soft with a fine grain, and often cheaper than basswood. Heartwood can show occasional gray or green streaks. |
| Birch (solid or plywood) | 1,260 lbf (yellow birch) | Slightly harder than basswood with fine, even grain. If using birch plywood, Woodburn University says to choose at least 6 mm thick and never burn into the glue layer. |
| Hard maple | 1,450 lbf | Crisp lines and rich, dark tones, but it needs higher temperatures and burns slower. Better after you can control the tip. |
| Eastern white pine | 380 lbf | Soft, but with large resin canals. Burning across its grain rings can make fine lines tricky, so save it for bold designs. |
Hardness figures come from the Wood Database. The burn notes come from Woodburn University, Suncatcher Studio, and the Wood Database wood profiles, not from our own testing.
Wood and materials you should not burn
- MDF and particleboard. Suncatcher Studio and Woodburn University both say to avoid them, because the adhesive and binders can release harmful fumes when heated.
- Pressure-treated, stained, dyed, or painted wood. Woodburn University lists any wood that has been treated, stained, dyed, or painted as off limits, along with pallet wood, cedar, moldy wood, and wood of unknown type.
- Plywood glue layers. Suncatcher Studio says the outer plywood layers are generally considered safe if you avoid the adhesive. Burn shallow and stop well before the glue line.
Match the Tip to the Job
Both Walnut Hollow and Razertip sort their tips by job, and the shapes line up closely. Razertip says three tip types cover most textures: a writing tip, a skew tip, and a shader. Walnut Hollow’s manual describes the same split in its Universal, Flow, and Shading points.
| Job | Walnut Hollow point | Razertip tip | What the maker says |
|---|---|---|---|
| Outlines and writing | Universal or Flow | Standard writing tip (T9) | Razertip says the writing tip is used like a ballpoint pen. Walnut Hollow recommends the Flow point for curves and cursive. |
| Crisp, varied-width lines | Tapered | Skew or small spear | Razertip lists the skew for lines of varying width, such as feathers and hair, and the small spear for outlining. |
| Dots and stippling | Flow or Mini Flow | Writing tip | Walnut Hollow lists dots and dot shading for the Flow point. |
| Smooth shading | Shading point | Medium spoon shader (TH30M) | Walnut Hollow says the Shading point works with a very light touch. Razertip calls its medium spoon shader its most popular shader. |
How to Burn a Design Into Wood, Step by Step
- Sand the board. Use 220-grit sandpaper along the grain, then wipe off the dust. Sanding is the first step because oils and fuzz change how the tip glides.
- Transfer the pattern. Slide graphite transfer paper, graphite side down, between your printed design and the wood. Tape it and trace with medium pressure to leave a faint guideline. Without transfer paper, rub graphite on the back of the pattern and trace it.
- Set up safely. Rest the pen on its stand, keep the cord behind your hand, and open a window or run a fan before the tip gets hot.
- Test on scrap. Try each tip and heat setting on a spare piece first. If the wood smokes heavily or the tip glides too fast, lower the heat.
- Burn the outline. Hold the pen like a large pencil and pull it toward you with light pressure in slow, steady strokes. Work the lighter lines first.
- Add detail and shading. Switch to a shader or fine tip for texture and tone (see the next section).
- Clean and finish. Brush off ash and decide whether to seal the piece.
Shading and Texture That Add Depth
Three strokes produce almost every tone: crosshatching with layered, intersecting lines, stippling with small dots, and graduated shading with a shader tip. Close lines and dense dots read as darker, wide gaps as lighter. Woodburn University groups heat into low for soft, subtle shading, medium for general work, and high for deep, dark lines, so shade at low heat and save the high setting for accents.
Dark lines come from dwell time, not only heat
It is tempting to crank the dial for a darker line. Walnut Hollow’s guidance points the other way: the longer the point stays on the surface, the darker the burn gets, and slow, steady pulls create even dark lines where faster movement at the same temperature leaves paler ones. Keep the dial where it is and slow your hand first. That also avoids scorched halos around fine detail. For exact temperature ranges, see our wood burning pen temperature chart.
Safety: Fumes, Hot Tips, and Fire
- Ventilation. Woodburn University recommends a well-ventilated space with a fan or smoke extractor, plus a dust mask or respirator and safety glasses. Suncatcher Studio says to use a smoke extraction device if you work indoors.
- Hot metal. The Walnut Hollow manual warns not to touch the point or metal parts, and to let the tool cool completely before changing points or storing it.
- Fire. Woodburn University advises keeping a fire extinguisher nearby, resting the pen on a stand, and never leaving a powered tool unattended.
- Wood dust. The Wood Database notes that birch, poplar, and hard maple dust can irritate the skin and airways, so sand with a mask on.
This guide is only about pen-style pyrography. Do not try to make a burner from a microwave transformer or electrify wood: read why fractal burning is lethal and how to get a similar look safely and the transformer risk breakdown first.
Sealing and Finishing a Burned Design
Finishing is optional, and it is a separate decision from burning. Woodburn University lists polyurethane, shellac, and beeswax as finishes applied after burning, and says to test the finish on a scrap piece first so the burned detail stays visible. If you plan to add color, Suncatcher Studio notes that burned outlines partly seal off the area so stain bleeds less. We did not find a maker source on food safety for any burned or finished surface, so if a piece will touch food, such as a coaster or board, check the finish’s own label.
Beginner-to-Advanced Design Ideas
| Skill level | Project | Technique focus |
|---|---|---|
| Beginner | Coasters, keychains, initials | Clean outline, one shading pass |
| Intermediate | Botanical or animal line art | Crosshatching for texture |
| Advanced | Portraits and landscapes | Stippling and graduated shading |
For ready-made patterns, try our free wood burning patterns, the easy beginner wood burning art projects, or wood burning letters and numbers for lettering. If you are weighing burning against cutting into the surface, how to engrave wood covers that method.
Frequently Asked Questions
What is the best wood for burning designs?
Basswood is the usual beginner choice because it is soft, pale, evenly grained, and resin-free. Birch and poplar are common alternatives, and hard maple suits experienced burners because it needs more heat. Avoid MDF, treated, painted, or stained wood.
How do you transfer a design onto wood before burning?
Sand the wood first, then place graphite transfer paper, graphite side down, between the printed design and the board. Tape everything in place and trace with medium pressure. Check a corner before lifting the paper.
Can you burn designs into plywood?
Only carefully. Outer plywood layers are generally considered safe if you avoid the adhesive, so burn shallow. If you burn through the top layer into the glue, it can release fumes. Birch plywood at least 6 mm thick leaves more margin.
How do you make wood burning lines darker?
Slow your hand or hold the tip a little longer before raising the heat. Walnut Hollow says dwell time darkens the burn and faster movement at the same temperature leaves paler lines. Use higher settings only for deep, dark accents.
Conclusion
A good burned design comes from preparation more than equipment: pale, soft, untreated wood, a sanded surface, a clean graphite transfer, and a temperature-controlled pen used slowly. Practice each tip on scrap first, ventilate the room, and keep the pen on its stand.
Sponsored / affiliate links. As an Amazon Associate I earn from qualifying purchases. I may earn additional commission from eligible campaigns.