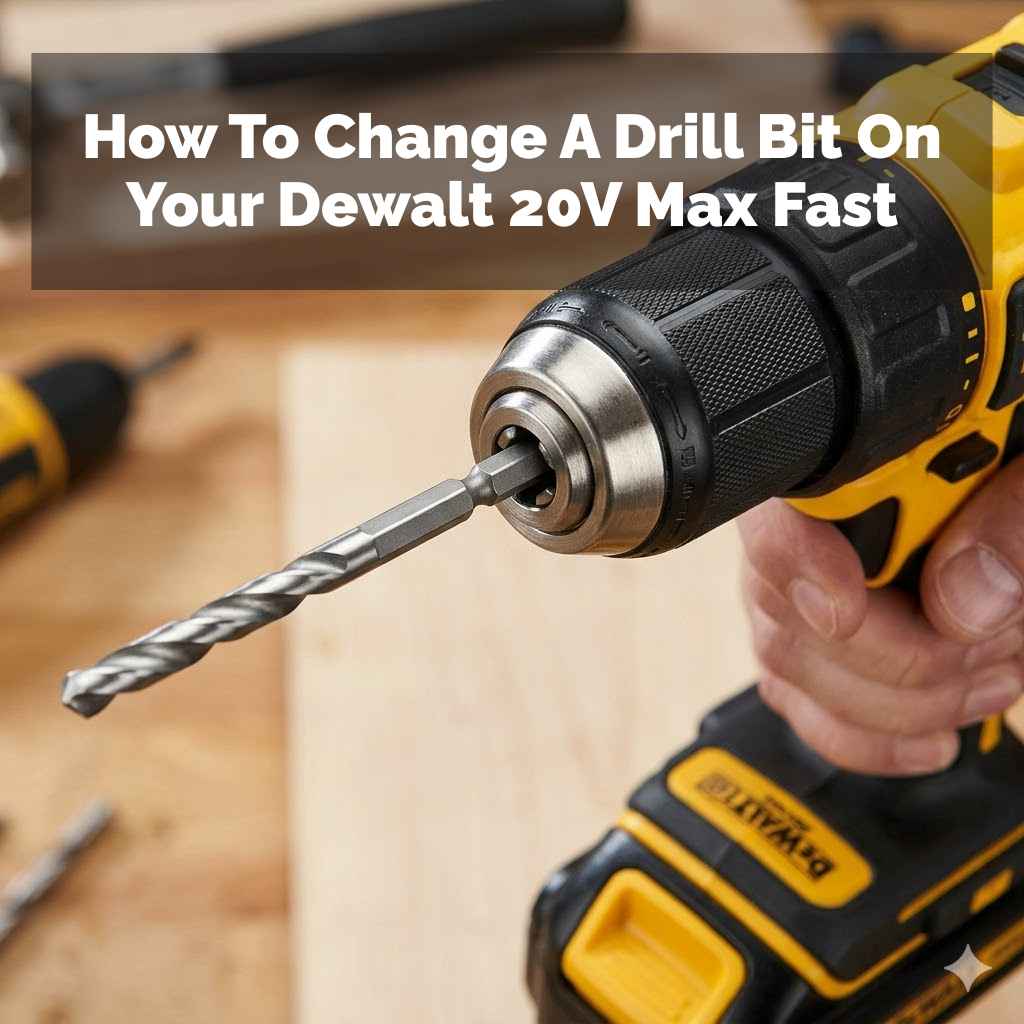
How To Change A Drill Bit On Your Dewalt 20V Max Fast
Hey there! So, you’ve got a DeWalt 20V MAX drill, and it’s time to swap out that drill bit. It sounds simple, right?
But sometimes, those little things can feel like a puzzle when you’re in the middle of a project. Don’t worry, we’ve all been there. I’m here to walk you through it, step-by-step, making sure you get it right the first time and can get back to building, fixing, or creating.
Changing a drill bit on your DeWalt 20V MAX is a straightforward process. Most models use a keyless chuck where you simply twist the collar to loosen and tighten. Ensure the drill is off and the battery is removed for safety before proceeding.
Understanding Your DeWalt 20V MAX Drill Chuck
Your DeWalt 20V MAX drill is a workhorse, and the chuck is its business end. This is the part that grips the drill bit. Most modern drills, especially cordless ones like your DeWalt, come with a keyless chuck.
This means you don’t need a special tool, a “chuck key,” to change bits.
This keyless chuck has a collar, usually the front part of the chuck. You’ll twist this collar. When you twist it one way, the jaws inside open up, letting you remove or insert a bit.
When you twist it the other way, those jaws close in, gripping the bit tightly. It’s designed for speed and ease, so you can switch bits quickly without missing a beat in your work.
There are generally two main types of keyless chucks you might find on DeWalt 20V MAX drills. One is a single-sleeve chuck. You just grab the collar and twist.
The other is a two-sleeve chuck. You might need to hold the rear sleeve steady while you twist the front sleeve. For most current DeWalt 20V MAX models, the single-sleeve type is very common.
It’s all about making your job simpler.
Step-by-Step: Changing the Drill Bit Safely
Let’s get down to business. Safety first, always. This is not just a suggestion; it’s crucial for preventing injuries and keeping your tools in good shape.
Think of it like putting on a seatbelt before you drive.
1. Power Down and Disconnect
The absolute first step is to make sure your drill is not going to accidentally power on. This means removing the battery pack. Seriously, take it out and set it aside where it won’t get bumped.
This cuts off all power to the drill, making it safe to handle.
2. Identify the Chuck Type
Look at the front of your drill. You’ll see the part that holds the drill bit. This is the chuck.
Most DeWalt 20V MAX drills have a keyless chuck. You’ll see a collar that you can grip and turn.
Some older or specialized models might have a different type. But for the vast majority of 20V MAX drills, it’s the twist-and-go kind. If you’re unsure, check your drill’s manual.
It’s a lifesaver.
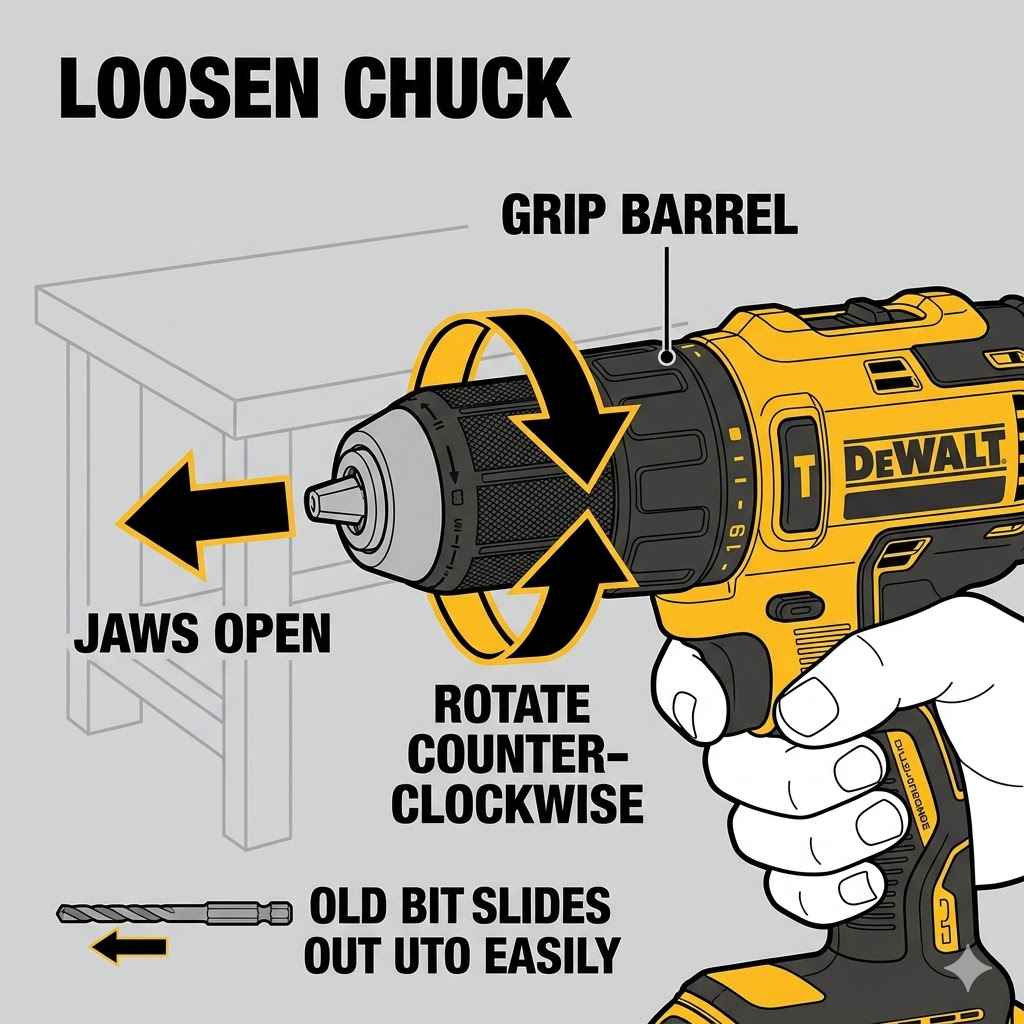
3. Loosen the Chuck
Now, grab the chuck collar. You need to twist it. The direction to loosen it is usually counter-clockwise.
Imagine you are unscrewing something. You might need to use a firm grip. If it feels a little stiff, that’s normal, especially if it hasn’t been changed in a while.
You’ll want to twist it enough so that the jaws inside the chuck open up wide. You should see the end of the bit becoming loose. Don’t twist it so far that parts start to fall off; just open it enough to free the bit.
4. Remove the Old Bit
Once the chuck is loose, the old drill bit should slide right out. Sometimes, a bit might be stuck. If it is, give it a gentle wiggle.
Avoid yanking it hard, as you could damage the chuck. You can try turning the chuck collar back and forth slightly while pulling the bit.
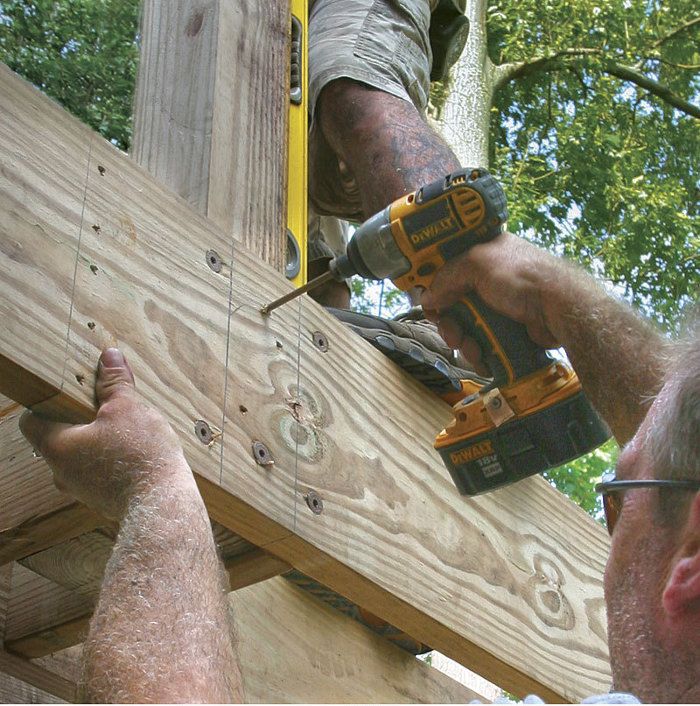
5. Insert the New Bit
Take your new drill bit. You want to slide the shank (the part that goes into the drill) into the opening of the chuck. Push it in as far as it will comfortably go.
Make sure it’s centered.
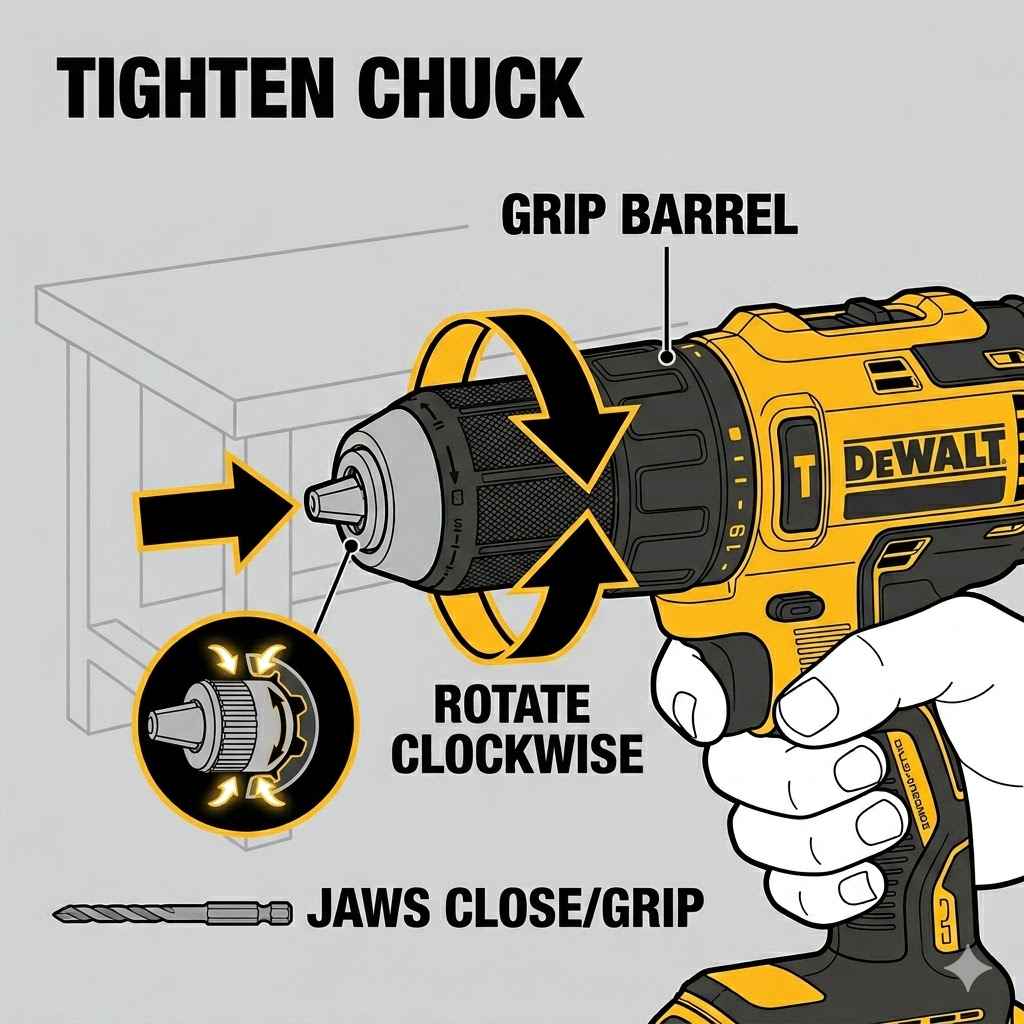
6. Tighten the Chuck
Now, you need to secure that new bit. Grab the chuck collar again. Twist it clockwise this time.
This is like screwing something in tight. You should feel the jaws closing around the bit. Keep twisting until it feels snug and secure.
You don’t need to go crazy tight, but it needs to be firm enough that the bit won’t slip or wobble when you’re drilling. Most chucks have a point where they stop tightening easily. That’s usually a good sign it’s tight enough.
7. Final Check
Give the bit a gentle tug to make sure it’s held firmly. Then, you can re-insert the battery. You might want to do a quick test spin.
Hold the drill away from anything and pull the trigger for just a second. See if the bit stays put and spins straight.
Quick Chuck Tightening Tips
- Grip Firmly: Use the whole hand to grip the collar.
- Twist Direction: Remember, loose is counter-clockwise, tight is clockwise.
- Listen: You might hear a slight click or feel a solid stop when it’s tight.
- Stubborn Bits: If a bit is stuck, try wiggling while loosening.
Troubleshooting Common Issues
Even with simple tasks, things can sometimes go sideways. What if your drill bit won’t come out? Or what if the new bit feels loose?
Bit Won’t Come Out:
This is a common frustration. Often, the bit is just stuck due to metal shavings or dust. Try this:
- Make sure the battery is out.
- Grip the chuck collar firmly and twist it counter-clockwise.
- While holding it loose, gently tap the end of the drill with the palm of your hand.
- Try wiggling the bit gently with your fingers.
- If it’s a really old bit, it might have rusted a bit. A tiny bit of penetrating oil (use sparingly and wipe it off completely) might help, but this is rare.
New Bit Feels Loose:
If you tighten the chuck, and the bit still feels like it’s not gripped tightly, here are a few things to check:
- Are you using the right size bit? Make sure the bit shank isn’t too small for the chuck jaws to grip effectively.
- Is the bit shank clean? Any dirt or debris on the bit shank can prevent a good grip.
- Did you tighten enough? Sometimes, we don’t twist the collar as much as needed. Give it another firm twist clockwise.
- Is the chuck damaged? In rare cases, the internal mechanism of the chuck might be worn or damaged. If you’ve tried everything and it still won’t grip, you might need to consider a repair or replacement of the chuck.
Chuck Seems Stuck (won’t loosen or tighten):
This usually means something is jammed inside the chuck mechanism. Again, battery out!
- Inspect the chuck jaws for any debris.
- Try turning the collar back and forth a few times, gently.
- If it’s very stubborn, a small amount of compressed air can sometimes dislodge debris.
- If it’s still stuck, it might require professional attention.
When to Call for Help
If you’re struggling to change a bit, or if the chuck seems damaged, it’s always better to stop. Trying to force something can cause more harm. Your DeWalt manual is your friend, or a quick call to DeWalt support can offer guidance specific to your model.
Types of Drill Bits and When to Use Them
The type of drill bit you use is as important as how you change it. Each bit is designed for a specific job. Using the wrong one can make the job harder, damage your material, or even damage the bit itself.
Common Drill Bit Types
- Twist Bits: These are the most common. They’re great for drilling holes in wood, metal, and plastic. They come in various sizes.
- Brad-Point Bits: Perfect for wood. The sharp point in the center helps prevent the bit from “walking” or wandering when you start drilling. This means a cleaner start.
- Spade Bits (Paddle Bits): For drilling larger holes in wood. They are flat and wide.
- Forstner Bits: Also for wood, these create very clean, flat-bottomed holes. Often used for drilling hinge recesses.
- Masonry Bits: Designed to drill into brick, concrete, and stone. They have a carbide tip. You’ll often use these with a hammer drill setting if your DeWalt has it.
- Screw Driving Bits: While not technically drill bits, these are what you’ll use to drive screws. They come in Phillips, flathead, Torx, etc.
Choosing the Right Bit
When you’re about to change your bit, ask yourself:
- What material am I drilling into? Wood, metal, concrete, plastic?
- What size hole do I need?
- Do I need a clean entry hole?
- Am I just drilling a pilot hole, or a larger clearance hole?
Answering these will guide you to the correct bit. For example, drilling into a concrete wall requires a masonry bit, not a wood bit. Trying to use a wood bit on concrete will likely just dull the bit and make a mess.
Quick-Scan Table: Bit Type vs. Material
| Bit Type | Primary Material | Best For |
|---|---|---|
| Twist Bit | Wood, Metal, Plastic | General purpose holes |
| Brad-Point Bit | Wood | Precise starting point, clean holes |
| Spade Bit | Wood | Large diameter holes |
| Masonry Bit | Concrete, Brick, Stone | Drilling hard materials |
Maintaining Your DeWalt 20V MAX Drill for Longevity
Taking care of your tools means they last longer and work better. Changing bits is a small part of this. Here’s how to keep your DeWalt 20V MAX happy.
Cleaning the Chuck
After you’ve changed a bit, especially if you were working in a dusty environment, take a moment to clean the chuck. A quick wipe with a dry cloth is usually enough. If there’s visible dust or debris inside, use a small brush or a can of compressed air to blow it out.
This prevents build-up that can make changing bits harder later.
Keeping Bits Organized
A disorganized tool bag leads to lost bits and frustration. Invest in a good bit case or organizer. This keeps your bits protected, easy to find, and ensures you have the right one for the job.
Plus, it prevents bits from getting banged around, which can dull their edges or damage their tips.
Battery Care
Your drill’s power comes from the battery. Keep your DeWalt 20V MAX batteries charged. Avoid extreme temperatures.
Store them in a cool, dry place. If you have multiple batteries, rotate them so one doesn’t sit unused for too long.
When you’re done with a project, it’s a good idea to put the battery on the charger so it’s ready for next time. This simple habit ensures you’re never caught with a dead battery when you need it most.
Drill Bit Storage Ideas
- Dedicated Bit Cases: Many drill bit sets come with these.
- Small Parts Organizers: These plastic boxes with compartments are great for loose bits.
- Magnetic Strips: Useful for metal bits, especially if you need quick access.
- Labeling: If you have a large collection, labeling compartments can save time.
What This Means for Your Projects
Knowing how to change a drill bit correctly means fewer interruptions. When you can switch bits quickly and confidently, your projects flow better. You spend less time fiddling with tools and more time actually getting work done.
It also means your tools work as they should. A properly secured bit spins true, leading to cleaner holes and more accurate work. A bit that’s not tight can wobble, tear out material, or even break.
Forcing a bit into a chuck that’s not open enough can damage the chuck’s jaws or the bit itself.
When It’s Normal:
- The chuck collar twists smoothly.
- Bits insert and remove easily when the chuck is open.
- Bits are held firmly when the chuck is tightened.
- You can change bits in under a minute.
When to Worry:
- The chuck collar is very stiff or won’t turn at all.
- The chuck jaws don’t open or close properly.
- Bits feel loose even when the chuck is tightened.
- There’s a lot of noise or grinding when you twist the collar.
- The chuck itself seems wobbly or loose on the drill.
If you notice any of the “worry” signs, it’s worth investigating. Often, it’s just a bit of debris, but sometimes it can indicate a part that needs attention.
Quick Tips for Effortless Bit Changes
Here are some of my favorite little tricks that make bit changes feel like second nature:
- Use Two Hands: Always use one hand to hold the drill body steady and the other to operate the chuck collar. This gives you more control.
- Know Your Drill’s Limits: Some DeWalt drills might have a bit of play in the chuck even when tightened. This is often normal, especially on older models. A quick tug will tell you if it’s truly loose.
- Keep it Clean: I can’t stress this enough. A clean chuck is a happy chuck. A quick brush or puff of air after each change makes a difference.
- Practice Makes Perfect: The more you change bits, the faster and more intuitive it becomes. Try it a few times when you’re not in a hurry.
- Pilot Holes for Large Bits: When drilling very large holes, especially in hard materials, it can help to first drill a smaller pilot hole with a twist bit. This guides the larger bit and reduces the strain on your drill and the bit.
Common Pitfalls to Avoid
- Forcing It: Never force a bit into a stuck chuck or try to overtighten.
- Not Removing Battery: This is the most critical safety step. Always disconnect power.
- Using Wrong Bit: Using a wood bit on masonry is a recipe for frustration.
- Ignoring Debris: Small metal shavings can cause big problems over time.
Frequently Asked Questions About Changing Drill Bits
Can I use a regular drill bit to drive screws?
While you can sometimes get away with it for very light-duty tasks, it’s not ideal. Screw driving bits are shaped differently and have a better grip for the head of a screw. Using a drill bit can strip the screw head or not drive it in effectively.
It’s best to use dedicated screwdriver bits for driving screws.
My DeWalt 20V MAX chuck is making a grinding noise when I tighten it. What should I do?
A grinding noise usually indicates debris caught in the chuck mechanism or wear on the internal gears. First, remove the battery and try to clean out the chuck thoroughly with compressed air and a brush. If the noise persists, the chuck may need to be serviced or replaced.
How do I know if I’ve tightened the drill bit enough?
The bit should feel very secure. Give it a firm tug with your fingers. If it doesn’t budge or wobble, it’s likely tight enough.
You don’t need to strain yourself; just ensure it’s not loose at all. Most chucks will have a stopping point when they are sufficiently tightened.
What’s the difference between a drill bit and a driver bit?
A drill bit is designed to create a hole in a material. It typically has a pointed or cutting tip. A driver bit is designed to turn a screw.
It has a tip that matches the screw head (like Phillips, Torx, or flathead). They serve different purposes and are shaped differently.
How often should I replace my drill bits?
Drill bits don’t have a set lifespan; it depends on how much you use them and what materials you’re drilling into. When a bit starts to perform poorly—meaning it heats up too much, drills slowly, or burns the material—it’s likely time for a new one. Sharpening is possible for some bits, but often replacement is more cost-effective.
My DeWalt 20V MAX drill has a red light flashing. Does that affect changing the bit?
A flashing red light on a DeWalt drill often indicates an issue like overheating, over-discharging the battery, or a fault with the tool itself. While this doesn’t directly affect the mechanical process of changing a bit, you should address the flashing light issue before proceeding. Ensure the drill isn’t overworked and that the battery is functioning correctly.
Consult your manual for specific error codes.
Final Thoughts on Bit Changes
Swapping out a drill bit on your DeWalt 20V MAX is a small task that matters a lot for project success. By following these simple steps, you can do it safely and efficiently. Remember to disconnect power, grip firmly, and choose the right bit for your material.
Happy building!