How to Make Wooden Weapons: A Step-by-Step Guide
To make a wooden weapon, pick a wood species that matches the piece’s job (dense hardwood like oak or maple for a sword or knife blade, a springier wood like hickory or ash for anything meant to flex, or lightweight pine or poplar for a first practice piece), rough out the shape with a saw, then carve, sand, and round every edge before finishing with an oil or sealer.
Wooden swords, knives, axes, and bows are one of the oldest beginner projects in woodworking, and one of the most forgiving. There’s no motor, no metal, and no dangerous kickback to worry about, just a blank of wood, a knife or saw, and a design. Most of these pieces are built for display, cosplay, martial arts practice (like a bokken), or historical reenactment, not for actual combat use, and that changes how you should think about the whole build: rounded edges and a smooth finish matter more than a razor-sharp point.
This guide walks through picking the right wood for the specific weapon you’re building, the tools that actually get used at each stage (not just a generic list), how to carve and shape without tearing out the grain, and the sanding, finishing, and legal considerations that most quick tutorials skip.
Choosing the Right Wood for the Weapon You’re Building
The “best wood” question depends entirely on what you’re making, because a sword blank, a bow, and an axe handle put very different stresses on the wood. A blade-shaped piece needs to resist denting and hold a crisp edge profile, while a bow stave needs to bend thousands of times without snapping, and a handle needs to absorb shock without splintering in your hand.
| Weapon Type | Good Wood Choices | Why |
|---|---|---|
| Swords, knives, katanas | Hard maple, red or white oak, poplar (practice pieces) | Maple and oak resist denting and take a crisp profile; poplar is soft and easy to shape for a first attempt |
| Bows | Hickory, ash, elm, osage orange | These species flex repeatedly without snapping; hickory and ash are the most affordable and widely available |
| Axes and hammers (handles) | Hickory | The same shock-absorbing quality that makes it a real axe-handle wood works just as well on a display piece |
| Shields | Plywood core with a hardwood edge, or basswood for lightweight builds | Plywood resists warping across a large flat panel; basswood carves easily for detail work |
One detail most tutorials leave out: check the moisture content of the lumber before you buy it, not just the species. Kiln-dried boards from a home center are usually already down around 6-8% moisture and are stable enough to carve right away. Wood sold as “green” or air-dried from a local sawmill can still be well above 20% moisture, and it will keep shrinking and can crack or warp as it dries out after you’ve already shaped it. If you’re set on a specific rough-cut board from a sawyer rather than a home center, let it acclimate in your shop for several weeks before you start cutting.
Best Beginner Carving Set for Wooden Weapons
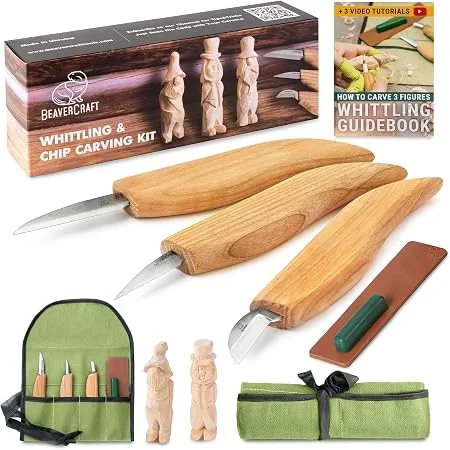 |
BeaverCraft S15 Whittling Knife Kit – $39.99 This is the set to reach for once your blank is rough-cut and it’s time to carve the profile, guard, and details by hand.
|
Tools: What Actually Gets Used at Each Stage
A wooden weapon build moves through three distinct stages, and different tools fit each one. Trying to carve the whole shape with a knife from a solid block wastes hours; trying to sand your way to the final profile with power tools alone leaves it looking blocky.
- Rough cutting: A bandsaw makes quick work of cutting the outline out of a board, but a coping saw or jigsaw works fine if you don’t have one. This gets you a flat, two-dimensional outline of the weapon.
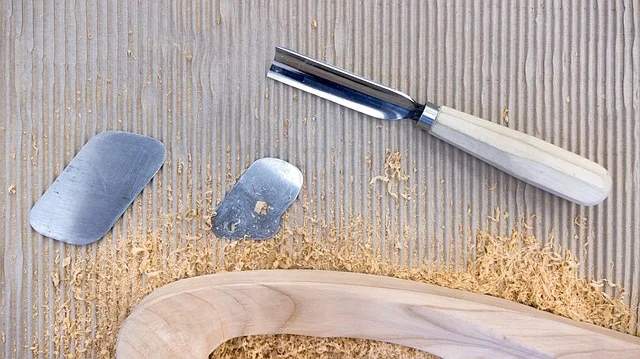
- Shaping and rounding: A drawknife or spokeshave pares down the flat outline into a rounded, three-dimensional profile fast. A rasp and a half-round file pick up where those leave off, rounding edges and refining the taper.
- Detail carving: A whittling or chip-carving knife handles the fine work: a fuller (the shallow groove down the flat of a sword blade), a guard shape, or decorative carving on a handle.
- Sanding: Work through the grits in order rather than skipping ahead: 80-grit to knock down tool marks, 120-grit to smooth them out, then 220-grit and finally 320-grit for a finish-ready surface.
Designing Your Weapon Before You Cut
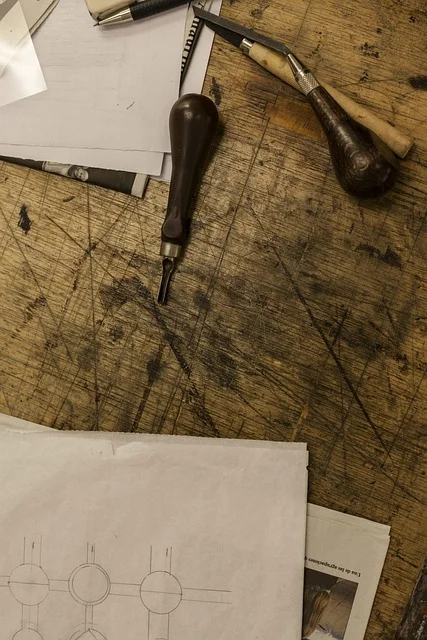
Skipping the design step is the most common reason a first wooden weapon comes out lopsided. Sketch the full-size outline on paper first, fold it in half lengthwise, and trace one side onto the other to check that both sides match, then transfer that outline onto the wood with carbon paper or by cutting out the paper template and tracing around it.
Balance matters as much as shape, especially on a sword or axe that will actually be swung during practice or reenactment. On a real weapon, the balance point (where it feels neutral resting on a fingertip) usually sits a few inches in front of the guard. You can approximate that on a wooden version by leaving extra material near the handle and thinning the blade or head, then testing the balance point as you go and adjusting before you commit to the final thickness.
Carving and Shaping Without Tearing the Grain
Once the outline is cut, work from rough to fine rather than trying to get any one section perfect right away: block out the overall taper and thickness on the whole piece first, then go back over it for finer shaping. This keeps the proportions consistent instead of over-thinning one spot before you’ve established the rest.
Always cut with the grain, not against it. Run your knife or drawknife in the direction the wood fibers naturally lay, and you’ll get clean, curling shavings. Cut against the grain and the blade will dig in and tear out small chunks, leaving rough divots that are hard to sand out later. If you’re not sure which way the grain runs on a given section, make a light test cut first; a clean cut means you’re going the right way, a rough or catching cut means you should flip direction. For anyone building their first sword specifically rather than a mixed set of weapons, our dedicated guide to carving a realistic wooden sword goes deeper into blade taper and fuller carving.
Sanding and Rounding the Edges
Because these pieces are for display, practice, or cosplay rather than actual cutting, every edge should be rounded, not sharpened to a point or a true edge. Run a rasp or a piece of folded sandpaper along what would be the cutting edge of a blade to knock the corner into a smooth, rounded profile, then blend that rounded edge into the flat of the blade with progressively finer sandpaper. Do the same on any pointed tip: a slightly rounded, blunted tip is safer to handle and still reads as sharp from a few feet away, which is really all a display or practice piece needs to accomplish.
Finishing: Stain, Oil, or Sealer
A finish protects the wood and brings out the grain, but the right one depends on how the piece will be handled. A penetrating oil finish like boiled linseed oil or a Danish oil soaks into the wood and leaves a low-sheen, hand-friendly surface that’s easy to touch up later if it gets scuffed during practice use. A wipe-on polyurethane or lacquer builds more of a hard shell on the surface, which looks great on a piece meant purely for display but can chip if it takes a real hit. Whichever you choose, apply a wood conditioner first on softer woods like pine or poplar to prevent blotchy, uneven stain absorption.
Joinery for Multi-Piece Designs
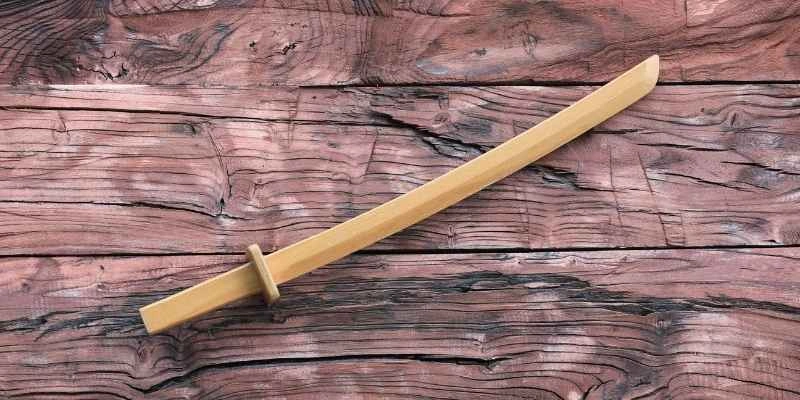
Simple weapons like a bokken or a straight knife can be carved from a single blank, but anything with a separate guard, crossbar, or attached handle needs real joinery. Wood glue combined with a dowel through the joint holds up far better under repeated handling than glue alone; drill the dowel hole after the glue-up so the pieces stay perfectly aligned, then trim and sand the dowel flush. Clamp every glued joint and let it cure fully (check the glue’s label, but 24 hours is typical) before you carve or sand anywhere near it, since carving on a joint that hasn’t cured can shift it out of alignment.
Caring for and Storing Your Wooden Weapon
Wood keeps moving with humidity even after it’s finished, so storage matters more than most people expect. Keep the piece away from direct sunlight (UV exposure fades stain and can dry out an oil finish over time) and out of spaces with big humidity swings, like an uninsulated garage. Wipe it down with a soft, dry cloth after use to remove hand oils and dust, and check periodically for hairline cracks, especially near a glued joint or a thin section like a blade tip. A thin crack caught early can be filled with wood glue or a matching wood filler; left alone, it will keep growing every time the wood expands and contracts.
Legal and Responsible Display Considerations
Rules vary by state and city, and they’re not always what you’d expect. A carved wooden sword, knife, or axe used for display, reenactment, or martial arts practice is legal in the vast majority of places in the United States, but a few cities restrict carrying even a non-functional bladed shape in public. Wooden gun shapes deserve extra caution: some states have “imitation firearm” laws that regulate any object that closely resembles a real handgun or rifle in size, shape, and color, regardless of the material it’s made from, particularly if it’s carried in public rather than kept as a display piece. If you’re building a gun-shaped prop for stage, film, or cosplay use outside the home, it’s worth a quick check of your state’s imitation firearm statute first.
For any wooden weapon, keep finished pieces stored or displayed away from small children, and treat them as the props or art objects they are rather than toys for unsupervised play.
Frequently Asked Questions
What Is the Best Wood for Making a Wooden Weapon?
It depends on the weapon. Hard maple or oak works best for swords and knives because they resist denting and hold a crisp shape. Hickory or ash is better for bows because it flexes repeatedly without snapping. Pine or poplar is a good, forgiving choice for a first practice piece since it’s soft and easy to carve.
What Tools Do I Need to Carve a Wooden Sword or Knife?
A bandsaw, coping saw, or jigsaw for the rough outline; a drawknife or spokeshave and a rasp for shaping and rounding; a whittling or chip-carving knife for detail work like a fuller or guard; and sandpaper in progressive grits from 80 up to 320 for the final finish.
How Do I Make the Edges Safe for Display or Practice?
Round every edge and tip rather than sanding it to a true point or a sharp cutting edge. Use a rasp or folded sandpaper to knock the corner off what would be the cutting edge, then blend it into the flat of the piece with progressively finer grits so there’s no sharp line left anywhere on the piece.
Are Wooden Weapons Legal to Own and Display?
In most of the United States, carved wooden swords, knives, and axes used for display, reenactment, or practice are legal to own. A few cities restrict carrying even non-functional bladed shapes in public, and some states have imitation firearm laws that apply to wooden gun-shaped props, especially outside the home, so it’s worth checking your local rules before carrying one in public.
Conclusion
A wooden weapon is a satisfying project precisely because it forgives mistakes that would ruin a metal build: a slightly uneven cut can be sanded out, a thin spot can sometimes be reinforced, and there’s no risk of a blade dulling on you mid-project. Match the wood to the job, work through the tools in order from rough cutting to fine sanding, round every edge, and finish it with something that suits how you’ll actually display or use the piece.
Sponsored / affiliate links. As an Amazon Associate I earn from qualifying purchases. I may earn additional commission from eligible campaigns.