How To Polyurethane Hardwood Floors Like A Pro (Full Guide)
Polyurethaning hardwood floors involves cleaning, preparing, and applying a protective finish. The process ensures durability and enhances the wood’s natural beauty. Proper technique leads to a smooth, even, and long-lasting result, protecting floors from wear and tear.
Understanding Polyurethane for Wood Floors
Polyurethane is a liquid coating. It dries into a hard, protective layer. This layer shields your wood floors.
It guards them against scratches, spills, and everyday wear. Think of it as a tough, clear shield for your wood.
There are two main types. Oil-based polyurethane is very tough. It also gives wood a warm, amber tone.
It takes longer to dry, though. Water-based polyurethane dries faster. It stays clear and doesn’t yellow as much.
It’s also easier to clean up.
Choosing the right type matters. Consider how long you can wait for drying. Think about the look you want.
Do you prefer a warm glow or a clear, natural look? Both work well. They just offer slightly different benefits for your home.
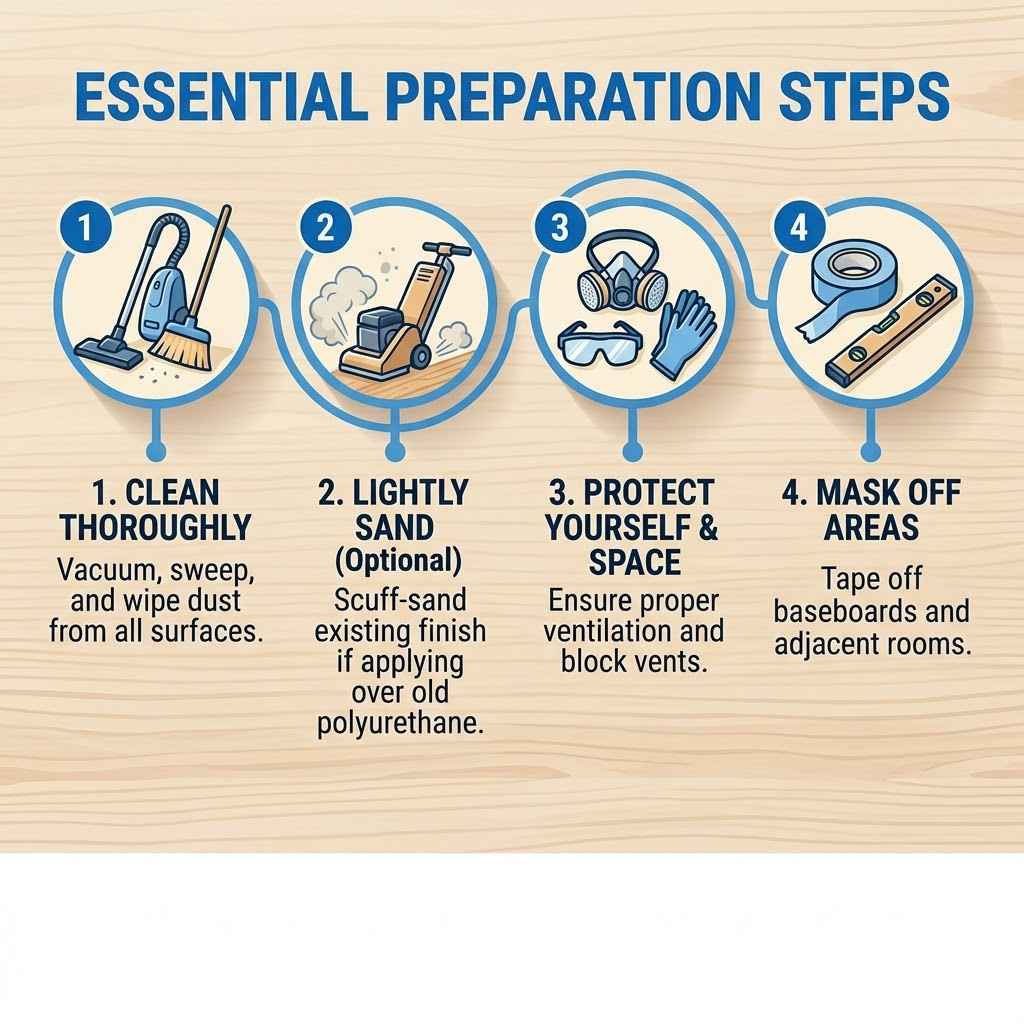
Preparing Your Hardwood Floors is Key
This is the most important step. It’s where many people stumble. Skipping prep means a bad finish.
You’ll see streaks or bubbles. Your floor won’t look its best. So, take your time here.
It’s worth it, trust me.
First, you need to clear the room. Move all furniture out. Every single piece.
Then, sweep thoroughly. Get every speck of dust. You can use a vacuum cleaner too.
Make sure it has a soft brush attachment. You don’t want to scratch the wood.
Next, you need to clean the floor. Use a wood floor cleaner. Make sure it’s one that doesn’t leave residue.
Dampen a mop. Don’t soak the floor. Wipe down the entire surface.
Let it dry completely. This can take a few hours.
If your floor has old finish, you might need to sand it. This makes the new coat stick better. It also smooths out any bumps.
You can rent a floor sander. Or, you can do it by hand for small areas. Use fine-grit sandpaper.
Work with the wood grain. After sanding, vacuum again. Then, wipe with a tack cloth.
This picks up fine dust. This dust is tiny but can ruin your finish.
Prepping Checklist
- Move all furniture out.
- Sweep or vacuum thoroughly.
- Clean with a wood floor cleaner.
- Let floor dry completely.
- (Optional) Sand the floor.
- Vacuum and tack cloth after sanding.
Choosing the Right Polyurethane
As I mentioned, there are oil-based and water-based types. Let’s look at them closer. Oil-based poly is super durable.
It’s great for high-traffic areas. Think hallways or living rooms. It gives wood a lovely, warm look.
It’s like adding a rich honey tone. But, it smells strong. You need good ventilation.
It also takes a full day or more to dry between coats.
Water-based poly dries much faster. It’s clear. It doesn’t change the wood color much.
It’s good if you want to keep the natural look of your wood. It’s also easier to clean up with just soap and water. The smell is not as strong.
You can often apply a second coat the same day. It might not be quite as tough as oil-based. But, modern water-based formulas are very good.
You can also choose the sheen. This is how shiny the finish will be. Options include satin, semi-gloss, and high-gloss.
Satin is a good middle ground. It has a soft sheen. Semi-gloss is a bit shinier.
High-gloss is very shiny. It reflects a lot of light. This can show imperfections more easily.
For most homes, satin or semi-gloss is popular.
Consider your needs. For a busy family home, durability is key. If you love the natural look, water-based is great.
If you want a quick project, water-based wins. Always read the can. It will tell you about drying times and best uses.
Polyurethane Types At a Glance
- Oil-Based:
- Pros: Very durable, warm amber tone, good for high traffic.
- Cons: Strong odor, long dry time, yellows over time.
- Water-Based:
- Pros: Fast drying, clear finish, low odor, easy cleanup.
- Cons: Can be less durable than oil (though modern ones are great).
- Sheens: Satin (soft shine), Semi-Gloss (moderate shine), High-Gloss (very shiny).
Gathering Your Tools and Materials
You can’t just grab a can of poly and a brush. You need the right tools. This makes the job easier.
It also helps you get a better finish. Think of it as having the right recipe.
You’ll need the polyurethane itself. Get enough for two or three coats. It’s better to have extra.
Always buy from the same brand and type. Mixing brands can cause problems.
For applying, a good brush or applicator is key. A high-quality synthetic brush works well for water-based. For oil-based, a natural bristle brush is often recommended.
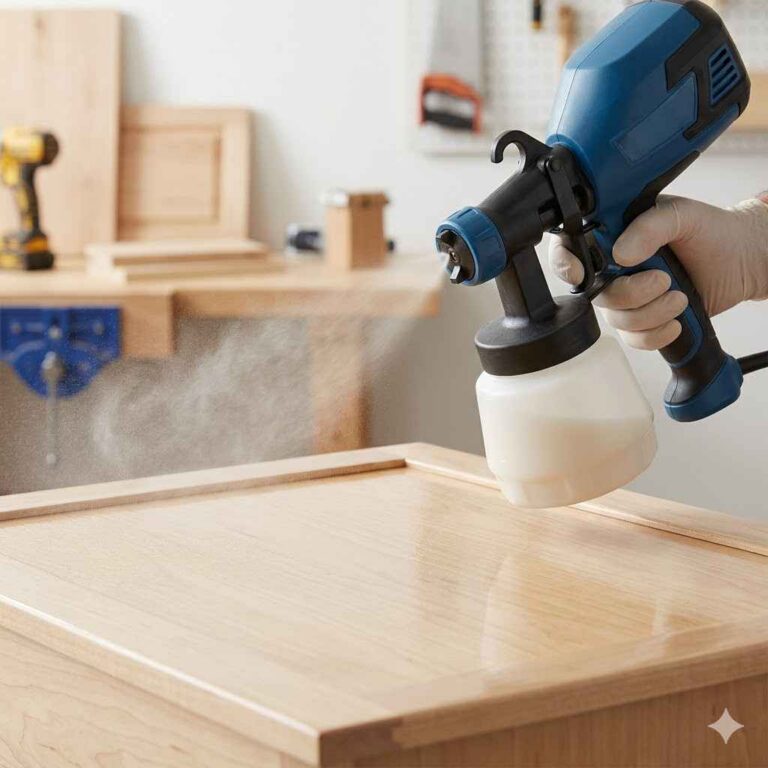
You can also use a foam roller or a lambswool applicator. These can cover large areas quickly. Make sure they are meant for polyurethanes.
You’ll need trays for your poly. If using a roller, a paint tray is good. If using a brush, a smaller container works.
You’ll also need painter’s tape. Use this to protect walls and baseboards. A stir stick is essential.
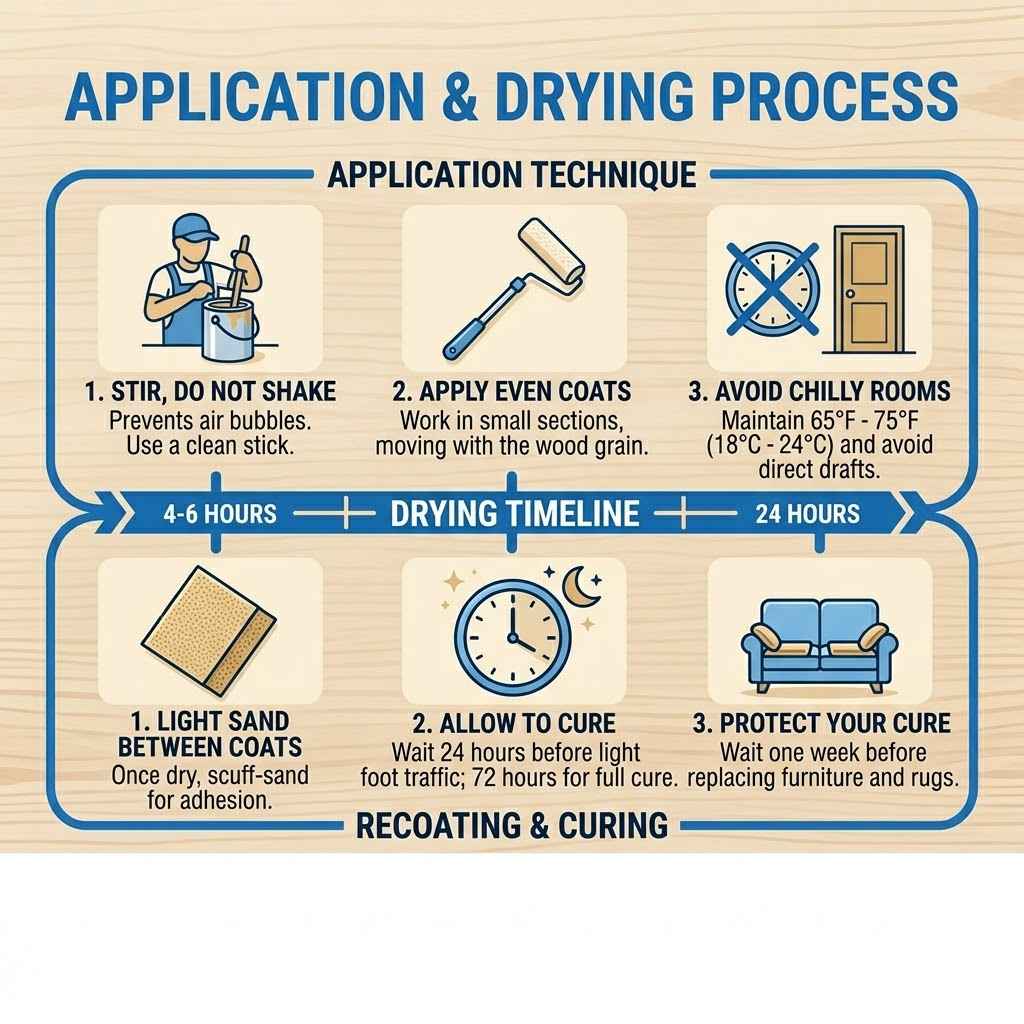
You must stir poly before and during use. Never shake it. Shaking creates bubbles.
You’ll need safety gear too. Gloves protect your hands. Safety glasses keep your eyes safe.
A respirator mask is important, especially for oil-based. Ensure good ventilation. Open windows.
Use fans.
Finally, you’ll need clean cloths. These are for wiping up drips. You might also need a tack cloth.
This is for picking up dust before applying. Having everything ready saves time and frustration.
Your Polyurethane Toolkit
- Polyurethane (oil or water-based)
- High-quality applicator (brush, roller, or lambswool)
- Paint tray or container
- Painter’s tape
- Stir stick
- Gloves
- Safety glasses
- Respirator mask (if needed)
- Clean, lint-free cloths
- Tack cloth (optional, but recommended)
The Application Process: Step-by-Step
Okay, the prep is done. Tools are ready. Let’s get to the actual coating.
This is where your floor starts to look amazing. Remember to work in good light. This helps you see where you’ve applied the poly.
First, stir the polyurethane. Do not shake it. Stir it gently for a few minutes.
This mixes the ingredients evenly. You don’t want any clumps or separated layers. Pour some into your tray or container.
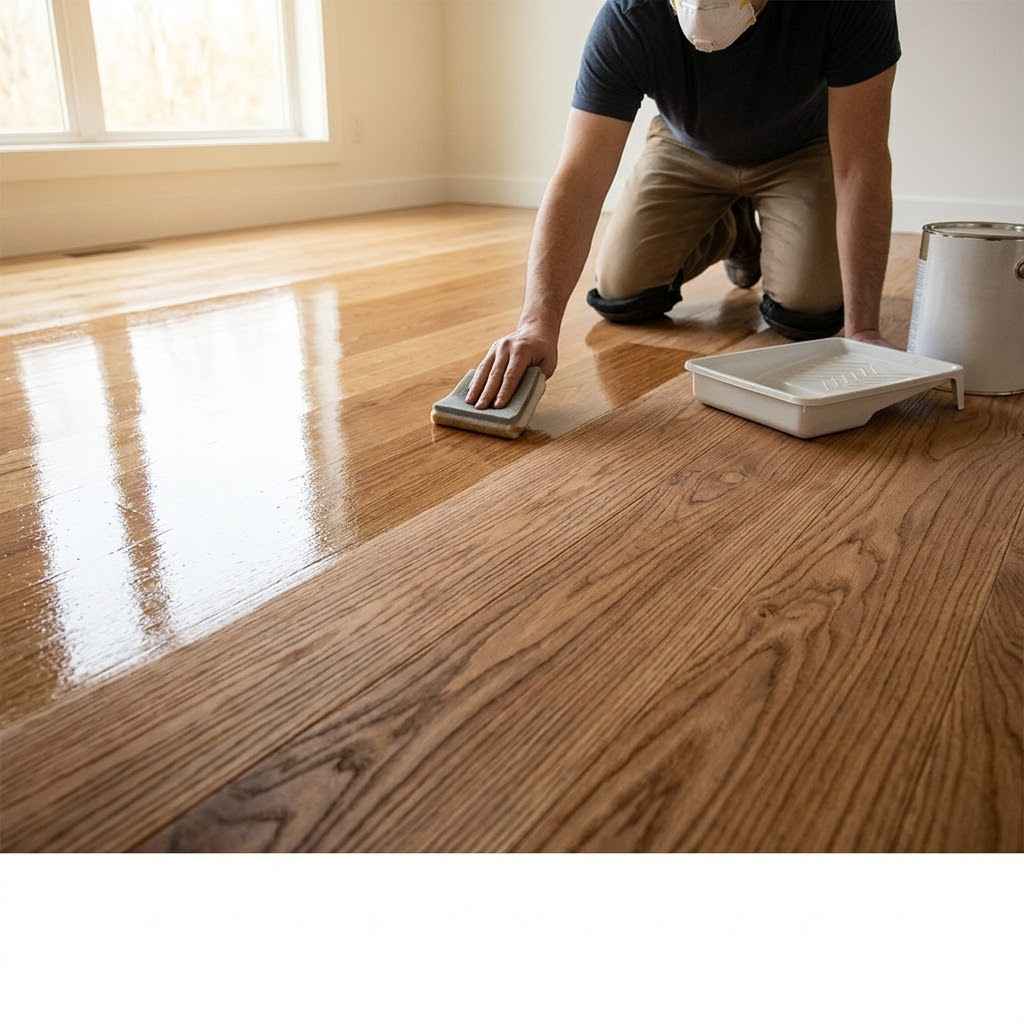
Start in a corner of the room. Work your way out. This means you won’t trap yourself.
Dip your applicator into the poly. Don’t overload it. You want a thin, even coat.
Too much poly will create puddles. It will also take much longer to dry.
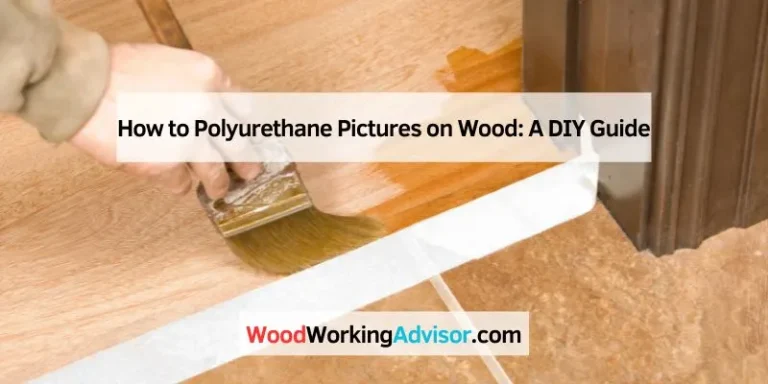
Apply the polyurethane in long, even strokes. Always follow the direction of the wood grain. This is super important for a smooth finish.
Overlap each stroke slightly. This helps prevent lap marks. Lap marks are where one stroke ends and the next begins.
They look like dark lines.
When you reach the end of a row of boards, lift the applicator. This stops you from building up too much poly. Keep a wet edge.
This means the area you just coated is still wet. You then brush into it. This helps blend the coats together.
It stops those dreaded lap marks.
If you see any drips or thick spots, fix them right away. Gently spread them out with your applicator. Work quickly but carefully.
This first coat might look a little streaky. That’s okay. It’s just the first layer.
After you finish one coat, let it dry. Drying times vary. Check the product label.
For oil-based, this might be 12-24 hours. For water-based, it could be 4-8 hours. Ensure good ventilation during drying.
Applying Coat One
- Stir polyurethane gently.
- Pour a small amount into tray.
- Start in a corner, work toward the exit.
- Apply thin, even coats following wood grain.
- Overlap strokes slightly to avoid lap marks.
- Keep a wet edge.
- Fix drips immediately.
- Let dry completely.
The Crucial Second Coat
Once the first coat is fully dry, it’s time for the second. Before you apply it, you need to do a light sanding. This is called “scuff sanding.” It makes the second coat stick better.
It also creates a smoother surface.
Use very fine sandpaper. Something like 220-grit or higher. Or, you can use a nylon abrasive pad.
Gently sand the entire floor. You are not trying to remove the first coat. You are just roughing it up a bit.
It should feel slightly smoother after.
After sanding, vacuum again. Then, use a tack cloth. This is essential.
It removes all the fine dust from sanding. If you leave dust, it will show in the second coat. It will look like little bumps or specks.
Now, apply the second coat. Use the same technique as the first coat. Stir the poly gently.
Apply thin, even strokes. Follow the wood grain. Overlap your strokes.
Work your way out of the room. This coat should look smoother than the first.
Let the second coat dry completely. Again, follow the product’s drying times. Good ventilation is still important.
This is where the floor starts to get its sheen.
I remember one time I was doing this in my old house. I got impatient after the first coat. I didn’t sand between coats.
The second coat looked okay at first. But after a few weeks, I saw little ridges. They were where the coats didn’t bond well.
It was a visual reminder. Always do that scuff sand.
Adding a Third Coat for Durability
Most projects need at least two coats. Some might even need three. This is especially true for high-traffic areas.
A third coat adds extra protection. It makes your floor much more durable over time. It’s like adding another layer of armor.
The process for the third coat is the same as the second. Scuff sand the floor gently. Use your fine-grit sandpaper or abrasive pad.
Vacuum all the dust. Use a tack cloth to pick up any remaining fine particles.
Then, apply the third coat of polyurethane. Use the same careful technique. Stir the poly.
Apply thin, even strokes. Follow the grain. Overlap your strokes.
Work your way out of the room. This coat really seals everything in. It gives you that deep, rich finish.
Let the third coat dry completely. Be patient here. This is the final coat.
It needs to cure properly. The full curing time can be longer than just drying time. Check the product instructions.
It might take several days to a week for it to fully harden.
Between Coats: The “Scuff Sand”
- Wait for the previous coat to dry fully.
- Use 220-grit sandpaper or a nylon abrasive pad.
- Sand lightly across the entire floor.
- The goal is to create a surface for the next coat to grip.
- Vacuum thoroughly.
- Wipe with a tack cloth to remove all dust.
- This step is vital for adhesion and a smooth finish.
Drying and Curing: What’s the Difference?
This is something many people mix up. Drying time is the time until the finish is dry to the touch. It feels hard.
But it’s not fully cured yet. Curing is the process where the finish hardens completely. It reaches its maximum durability.
This takes much longer.
For oil-based polyurethane, drying might be 12-24 hours. But curing can take 30 days or more. For water-based, drying might be 4-8 hours.
Curing can take up to 7 days or more.
During the drying period, be careful. Don’t walk on the floor. Don’t place furniture back.
It’s still soft enough to get dents or scratches. Even after it’s dry to the touch, it’s not ready for full use.
During the curing period, you need to be extra gentle. Avoid heavy furniture. Don’t drag anything across the floor.
You can place felt pads under furniture legs. This helps protect the finish. It stops scratches.
Always use mats at entryways. This catches dirt and moisture.
If you rush the curing process, you risk damaging the finish. You might see scuff marks. Or, the finish might peel or chip.
Patience here pays off. Your beautiful floor will last much longer. It’s like letting a good meal simmer.
It makes the flavors better.
Dealing with Common Problems
Even with care, you might run into issues. Don’t panic. Most problems can be fixed.
Or prevented next time.
Streaks and Lap Marks: These happen when the poly dries too fast. Or if you use too much. Or don’t overlap strokes properly.
Work faster. Apply thinner coats. Always maintain a wet edge.
If you have them, you might need to sand them out. Then reapply a thin coat.
Bubbles: Shaking the can is a common cause. Also, applying poly too thick can trap air. Or, using an applicator that is dirty.
Stir gently. Apply thin coats. Use a clean applicator.
If you get bubbles, let them dry. Then sand them smooth. Reapply a thin coat over the area.
Runs and Drips: This is from using too much poly. Or, letting it pool. Watch for drips.
Smooth them out as you go. If they harden, you’ll need to sand them. Then, reapply.
A clean applicator helps avoid this.
Dust and Debris: This is a big one. Dust settles while the poly dries. It makes the finish look bumpy.
It’s why tack cloths and ventilation are so important. Keep pets out of the room. Close windows and doors.
Try to work when it’s not too dusty outside.
Uneven Sheen: This can happen if coats are applied unevenly. Or if the surface isn’t prepped well. It can also be from cleaning the floor too soon.
Wait until fully cured before deep cleaning.
If you encounter a major issue, don’t be afraid to sand the entire area. Then reapply the coat. It’s better to fix it now than live with it later.
Remember, practice makes perfect. Your first try might not be flawless. But each time gets better.
Troubleshooting Quick Guide
- Streaks: Thin coats, wet edge, work faster.
- Bubbles: Stir, don’t shake; thin coats; clean tools.
- Drips: Use less poly; smooth as you go.
- Dust: Good prep, ventilation, keep area clean.
- Uneven Sheen: Even application, proper prep.
Real-World Context: When This Matters Most
Let’s think about where and why you’re doing this. Is it a new home? Or a renovation project?
Maybe you have old floors that look worn out. Or, you’ve just refinished them.
New Homes/New Floors: If you just installed hardwood, this is the first protection. You want to keep that new look. It’s a critical first step for long-term beauty.
Old Floors: If your floors are dull, scratched, or faded, polyurethane can revive them. It brings back life and shine. You might need to sand them down first.
This removes old finishes and damage. Then, you apply new poly.
High-Traffic Areas: Entryways, hallways, and living rooms see a lot of foot traffic. Polyurethane is essential here. It protects against wear and tear.
Oil-based poly is often a good choice for these spots because of its toughness.
Kids and Pets: If you have children or pets, your floors take a beating. Spills, muddy paws, and toys can cause damage. A good polyurethane finish is your best defense.
It makes cleaning up spills much easier. It resists scratches better than bare wood.
Moisture Exposure: Kitchens and dining rooms can see spills. Polyurethane creates a barrier against moisture. While it’s not waterproof, it helps prevent liquids from soaking into the wood.
This stops stains and warping.
The environment of your home matters. Do you live in a humid climate? Or a dry one?
This can affect drying times. Always adjust your schedule based on your local conditions. Proper ventilation is key in all climates.
What This Means For You and Your Floors
So, what’s the takeaway? Polyurethaning your hardwood floors is a project. It takes time and effort.
But the result is worth it. You get beautiful, durable floors that last for years.
When it’s normal: It’s normal to feel a bit nervous. It’s normal to take your time. It’s normal to want a perfect finish.
Most homeowners can achieve great results with careful steps.
When to worry: You should worry if you see major damage like deep gouges or rot before starting. You should also worry if the wood itself is warped badly. These issues need repair before poly goes on.
Also, if you skip crucial steps like sanding. Or if you apply poly too thick.
Simple checks: Before you start, check the wood for moisture. It should be dry. Check for any loose boards.
Make sure the room is clean. After you finish, check for drips. Look for missed spots.
It’s all about attention to detail.
This process can save you money. Refinishing floors yourself is cheaper than hiring professionals. It also gives you a sense of accomplishment.
You’ve improved your home with your own hands. That’s a great feeling.
Quick Tips for a Better Finish
Here are some last-minute tips. They can help you get that pro look. Small things make a big difference.
Work in good light: Natural light is best. It helps you see streaks. And areas you might have missed.
If natural light isn’t enough, use extra lamps. Position them to avoid shadows.
Ventilation is not optional: Even water-based poly has fumes. Oil-based is strong. Open windows.
Use fans to create airflow. This helps the poly dry faster. It also keeps you safer.
Don’t rush drying: I know I keep saying this. But it’s so important. Impatience leads to problems.
Let each coat dry fully. Then, let the final coat cure fully before heavy use.
Keep tools clean: Clean your brushes and rollers after each use. If you used water-based, soap and water work. For oil-based, you need mineral spirits.
Clean tools can be used again. Dirty tools cause poor finishes.
Thin coats are best: It’s always better to apply three thin coats than one thick one. Thin coats dry faster. They are less likely to drip or bubble.
They build up a smoother finish.
Read the can: Every product is slightly different. The manufacturer’s instructions are there for a reason. They know their product best.
Follow their drying times. And application advice.
Felt pads: Put felt pads on all furniture legs. This is a simple step. It prevents scratches during the curing period.
And long after.
Frequently Asked Questions About Polyurethaning Floors
How many coats of polyurethane do I need for hardwood floors?
Most projects require at least two coats of polyurethane. For high-traffic areas or maximum durability, three coats are recommended. Always follow the manufacturer’s specific guidelines for your chosen product.
Can I polyurethane over existing polyurethane?
Yes, you can. The key is to properly prepare the existing finish. This involves cleaning the floor thoroughly and then “scuff sanding” it.
This light sanding creates a surface for the new coat to adhere to. Skipping this step can lead to poor adhesion and peeling.
How long should I wait between coats of polyurethane?
This depends on the type of polyurethane. For water-based, you might be able to apply a second coat in 4-8 hours. Oil-based typically requires 12-24 hours between coats.
Always check the product label for exact drying times. Ensure the coat is dry to the touch before proceeding.
What is the best way to apply polyurethane to hardwood floors?
The best application involves using a high-quality applicator like a synthetic brush, lambswool applicator, or foam roller. Apply the polyurethane in thin, even coats, always following the direction of the wood grain. Overlap your strokes slightly to avoid lap marks and maintain a wet edge.
How long does polyurethane take to fully cure?
Polyurethane takes a significant amount of time to fully cure, even after it’s dry to the touch. For water-based, it can take up to 7 days or more. For oil-based, curing can take 30 days or longer.
During this time, be very gentle with the floor and avoid heavy furniture or dragging objects.
Can I use a regular paint roller to apply polyurethane?
It’s best to use rollers specifically designed for polyurethane finishes. Regular paint rollers may shed fibers or not hold enough product for an even coat. Look for foam rollers or lambswool applicators that are recommended for polyurethane application to ensure the best results.
Conclusion
Polyurethaning your hardwood floors is a rewarding project. It protects your investment. It makes your home look and feel better.
Remember to prep well. Choose the right product. Apply it carefully.
Be patient with drying and curing. You’ve got this! Enjoy your beautiful, refreshed floors for years to come.