How to Speed Up E6000 Drying Time (5 Methods That Work)
E6000 skins over in 5-10 minutes but needs 24-72 hours to fully cure — airflow, mild heat, and thin, even layers can shave that down, but not by much more than that.
Here are the methods that actually speed it up, and the ones — like a hot hairdryer held too close — that can do more harm than good.
Introduction To E6000 Adhesive
THE ADHESIVE THIS GUIDE IS ABOUT
 |
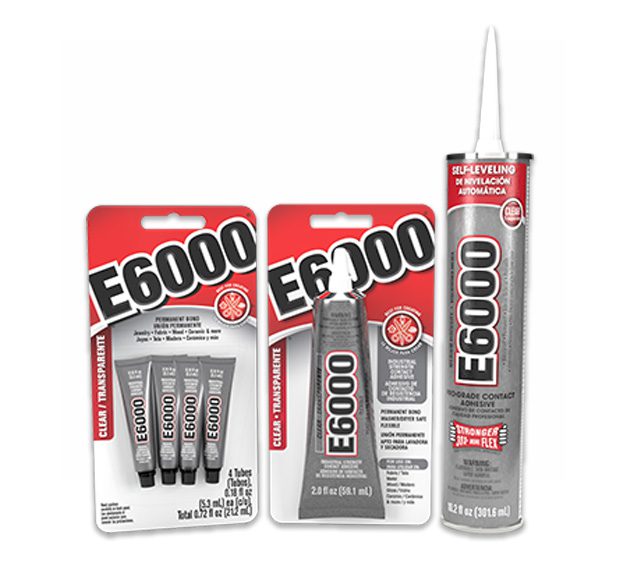
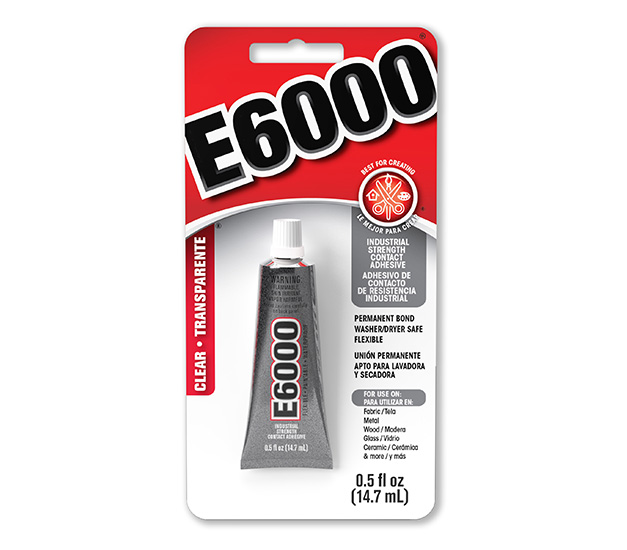
E6000 Craft Adhesive (3.7 oz) – $8.69 If you’re shopping for E6000 itself before you start timing the cure, this is the standard clear formula the tips above assume.
|
E6000 is a solvent-based adhesive – it cures as its carrier solvents (mainly a blend that includes cyclohexane and other volatile compounds) evaporate out of the glue line, rather than through a chemical reaction like epoxy. That’s the key difference from two-part adhesives, and it’s why airflow and temperature affect E6000’s cure time so directly: anything that speeds evaporation speeds the cure, and anything that traps the solvent in (a thick bead, a sealed joint, cold still air) slows it dramatically.
The manufacturer’s own spec sheet lists a 5-to-10-minute skin time, a 24-hour set time for handling, and a full 24-to-72-hour cure for maximum bond strength – that range depends heavily on layer thickness, ambient humidity, and whether both bonded surfaces let solvent vapor escape or trap it between them (bonding two non-porous surfaces like glass-to-metal cures slower than wood-to-fabric, since there’s nowhere for the solvent to vent except out the edges).
Cold and high humidity both slow evaporation, which is exactly why E6000 feels like it takes forever to set up in a damp garage in winter. The methods below work by directly targeting evaporation rate – more surface area exposed to moving air, warmer ambient temperature – rather than trying to force a chemical reaction that isn’t actually happening.
Preparation For Faster Drying
Most of the real gains in cure time come from prep, not from anything done after the glue is already applied – get these right and you’re not fighting the clock later.
Clean and dry the bonding surfaces first. Any oil, dust, or moisture left on the surface doesn’t just weaken the bond – it also gives trapped solvent vapor somewhere to pool instead of escaping through the joint edges. Wipe both surfaces with isopropyl alcohol and let it flash off completely (30-60 seconds) before applying adhesive; skipping this step is one of the most common causes of a bond that stays tacky far longer than the spec sheet promises.
Work in a warm, dry, moving-air environment from the start. E6000’s evaporation rate roughly doubles for every 18°F increase in temperature within its safe working range, so a 75°F workshop with a box fan running will genuinely cure a bond in a fraction of the time a 55°F damp garage takes. Set up your workspace before you open the tube, not after – getting the environment right first means you’re not trying to fix a slow cure mid-project.
Application Techniques
How you apply the glue changes cure time more than almost anything you do afterward, since it directly controls how much solvent has to evaporate and how far it has to travel to escape.
Layer Thickness Is the Real Lever
A bead of E6000 thicker than about 1/8 inch can take noticeably longer to fully cure than the spec sheet’s 72-hour ceiling, simply because solvent trapped at the center of a thick bead has to diffuse all the way to the surface before it can evaporate. Spread the adhesive with a craft stick or old brush into a thin, even film rather than a thick blob – you lose no bond strength doing this on most craft and repair jobs, since E6000’s strength comes from full-surface contact, not bead volume.
Airflow Beats Heat Alone
Moving air continuously carries evaporated solvent away from the glue surface, which keeps the local air right at the bond line from becoming saturated and stalling further evaporation – a small desk fan pointed at (not directly into) the project accomplishes this better than a still, even if warm, room. Crack a window or run the fan toward an open door if you’re gluing indoors; this also clears the solvent fumes faster, which matters for both cure speed and your own air quality while working.
Credit: eclecticproducts.com
Using Accelerators
A hairdryer on its lowest heat setting, held 6-plus inches away and kept moving constantly, speeds evaporation without the risk that comes from concentrated heat: E6000 skins over on the outside within minutes regardless, and if that skin forms too fast under high, direct heat, it can trap uncured, still-liquid solvent underneath – the surface looks and feels dry while the actual bond stays weak for days longer than it should. That’s the real danger with “just blast it with a heat gun,” not scorching the glue itself. A warm incandescent lamp positioned a few inches from the project gives a gentler, more even version of the same effect and is harder to overdo by accident. Skip a full oven unless the product label explicitly says it’s safe for your specific project material – E6000’s solvents are flammable while curing, and an enclosed heated space concentrates those fumes in a way open air never does.
Spray adhesive accelerators exist for cyanoacrylate (super glue) chemistry, not for solvent-evaporation adhesives like E6000 – there isn’t a chemical accelerator that meaningfully speeds up E6000’s specific cure mechanism, so skip that route rather than buying a product built for a different glue chemistry. Adding acetone directly to the adhesive is not a genuine acceleration method either: it thins the glue by dissolving some of its solid content, which can make it feel like it’s drying faster while actually weakening the final bond – the manufacturer does not recommend this, and it’s one of the “more harm than good” shortcuts worth avoiding.
Diy Drying Hacks
A genuinely useful trick for small jewelry or craft repairs: set the glued piece inside a cardboard box with a desk fan blowing across the opening rather than directly at the piece. This creates gentle, continuous airflow across the bond line without the risk of blowing dust onto tacky glue – a real problem with pointing a fan straight at an open project, since dust that lands in curing E6000 is essentially permanent.
For projects too large to box in, positioning near (not on top of) a radiator or baseboard heater works on the same evaporation principle as the hairdryer method, just gentler and more sustained. A consistent 75-80°F with light airflow for the first several hours after application does more for total cure time than a short blast of high heat followed by cooling back down to room temperature.
Maintaining Bond Strength
Every acceleration method above has a tradeoff between speed and bond integrity, and heat is where that tradeoff is sharpest – a hairdryer or heat gun held too close or too long can cause exactly the trapped-solvent problem described earlier, where the outer skin cures while uncured adhesive stays soft underneath for far longer than normal, and that mismatch is what eventually shows up as a bond that seemed fine and then failed weeks later. A fan alone, with no added heat, never carries this risk, which is why it’s the safer default for any bond where strength matters more than speed.
Even application matters for strength independent of drying time: a bead that’s thin in some spots and thick in others cures unevenly, and the thin spots can fail before the thick spots have even finished curing. Spread with a flat tool for consistent thickness across the entire bond area rather than trusting a bead straight from the tube to distribute itself.
Safety Precautions
E6000’s solvent vapors are flammable and can irritate eyes and airways in an unventilated space, so nitrile gloves, safety glasses, and a respirator rated for organic vapors (not just a basic dust mask) are worth having for any project beyond a quick small repair – and always work near an open window or running fan, which does double duty by also speeding your cure time.
Never combine heat sources with an enclosed or poorly ventilated space – a hairdryer or lamp concentrating heat on curing adhesive in a closed room raises both fire risk and fume concentration at the same time. If you do experiment with acetone (not recommended for bond strength, as covered above), keep it away from any open flame or heat source entirely, since acetone vapor is significantly more flammable than E6000’s own solvents.
Troubleshooting Common Issues
Most drying problems trace back to one of the fundamentals above – surface prep, layer thickness, or environment – rather than a flaw in the glue itself.
A Bond That Stays Tacky Too Long
This is almost always either a layer applied too thick for solvent to fully escape, a cold or still-air environment, or a surface that wasn’t fully clean and dry before bonding. Before assuming the glue itself is bad, check all three: if the bead is thin, the room is warm, and the surfaces were properly cleaned, a bond that’s still tacky well past 72 hours may genuinely be a batch issue or an expired tube – E6000 does have a shelf life, and old stock cures noticeably slower.
A Bond That Cured Unevenly
Patchy curing – firm in spots, soft in others – almost always traces back to inconsistent layer thickness. Respread future applications with a flat tool rather than trusting the bead to self-level, and keep any drying fan aimed at the general work area rather than blasting directly onto the piece, since a high-speed fan pointed straight at tacky glue is exactly how dust and debris end up permanently embedded in the surface.
Frequently Asked Questions
How Can I Make E6000 Dry Faster?
To speed up E6000 drying time, use a fan or a hairdryer on a low setting. Ensure proper ventilation. Applying thin layers of the adhesive can also help it dry faster.
Does Temperature Affect E6000 Drying Time?
Yes, temperature significantly affects E6000 drying time. Warmer temperatures help the adhesive dry faster. For optimal results, use E6000 in a warm environment.
Can I Use A Hairdryer On E6000 Glue?
Yes, you can use a hairdryer to speed up E6000 drying time. Use it on a low setting and maintain a safe distance to avoid overheating.
What Is The Fastest Way To Dry E6000 Glue?
The fastest way to dry E6000 glue is by using a fan or hairdryer. Ensure good ventilation and apply thin layers for quicker drying.
Conclusion
The methods that actually move the needle are the boring ones: clean, dry surfaces, a thin and even layer, and a warm room with moving air. Gentle heat from a hairdryer or lamp held at a safe distance adds a real but modest boost on top of that. Chemical accelerators and acetone additions aren’t genuine shortcuts – they either don’t target E6000’s actual cure chemistry or trade bond strength for the appearance of faster drying.
Even with every method applied correctly, E6000 is not a fast adhesive, and rushing past its 24-to-72-hour full-cure window on a project that will bear real load or stress is how a seemingly solid repair fails later. Handle-safe after skinning is not the same as fully cured – plan projects around the full window whenever the bond actually matters.
Sponsored / affiliate links. As an Amazon Associate I earn from qualifying purchases. I may earn additional commission from eligible campaigns.