How to Stain New Wood vs. Refinish Old Wood
Bare wood is commonly sanded to about 150–180 grit before staining. If the piece already has a film finish, remove it first, because stain will not soak through lacquer, polyurethane, shellac, or varnish. Trying to stain over finish usually leaves blotchy color, wasted product, and a surface that still needs stripping. This guide shows how to identify bare wood versus finished wood, choose the right prep steps, and stain each one correctly.
| Decision factor | Stain New Wood | Refinish Old Wood | Winner |
|---|---|---|---|
| Prep effort | Sanding, dust removal, and sometimes conditioner | Stripping, scraping, sanding, then stain prep | Stain New Wood |
| Risk of stain failure | Low if the wood is bare and sanded evenly | Higher because old finishes, repairs, and glue lines can block color | Stain New Wood |
| Color control | More predictable on fresh bare wood | Harder to match old color and aged grain | Stain New Wood |
| Best use case | Unfinished furniture, cabinets, doors, trim, molding, and hardwood floors | Furniture or built-ins with an intact finish that must be removed first | Tie |
| Repair tolerance | Handles minor sanding marks if you stay within a clean grit progression | Shows patch repairs, mixed species, and veneer transitions more easily | Stain New Wood |
New wood or old finish?
Start by identifying the surface, not the color you want. Bare wood can take stain after sanding, while old finished wood usually needs stripping or heavy sanding first because an intact film finish blocks penetration.
Quick ways to tell what surface you have
Look for sheen, film build, and edge wear. Bare wood feels open and matte, while finished wood often looks sealed and may show pooled finish in pores, brush marks, or a uniform gloss. A small hidden area is often enough for a go/no-go test.
On an old piece, finish type matters. Shellac, lacquer, varnish, polyurethane, and oil finishes do not behave the same way, and they do not all come off the same way. That is why the first test should be about finish identity, not stain color.
Why that decision changes the whole process
Unfinished wood usually needs sanding before staining, and softwoods may need wood conditioner to reduce blotchiness. Old finished wood often needs stripping, scraping, or heavier sanding first, then stain prep. Skip that step and the stain sits on top instead of into the fibers.
When a small test spot is enough
If the surface is clearly bare, a quick test on scrap, a cut-off, or a hidden face is usually enough to confirm color and absorption. If the surface has any film at all, the test should answer a different question: how much removal is needed before stain can penetrate.
📊 Minwax Wood Finish dries in 2 hours. Source: Stains.
Stain new wood the right way
Staining new wood works best when the surface is truly bare, evenly sanded, and free of dust. That gives you the most predictable absorption and the least wasted effort.
Sand from 80 to 220 grit
Use a sensible sanding progression rather than jumping straight to a finish grit. A common prep range is about 80 to 220 grit, with the final sanding often in the 150 to 180 range for stain work.
Keep the sanding direction with the grain. That matters on visible surfaces and matters even more on veneer, which can sand through if you overwork it.
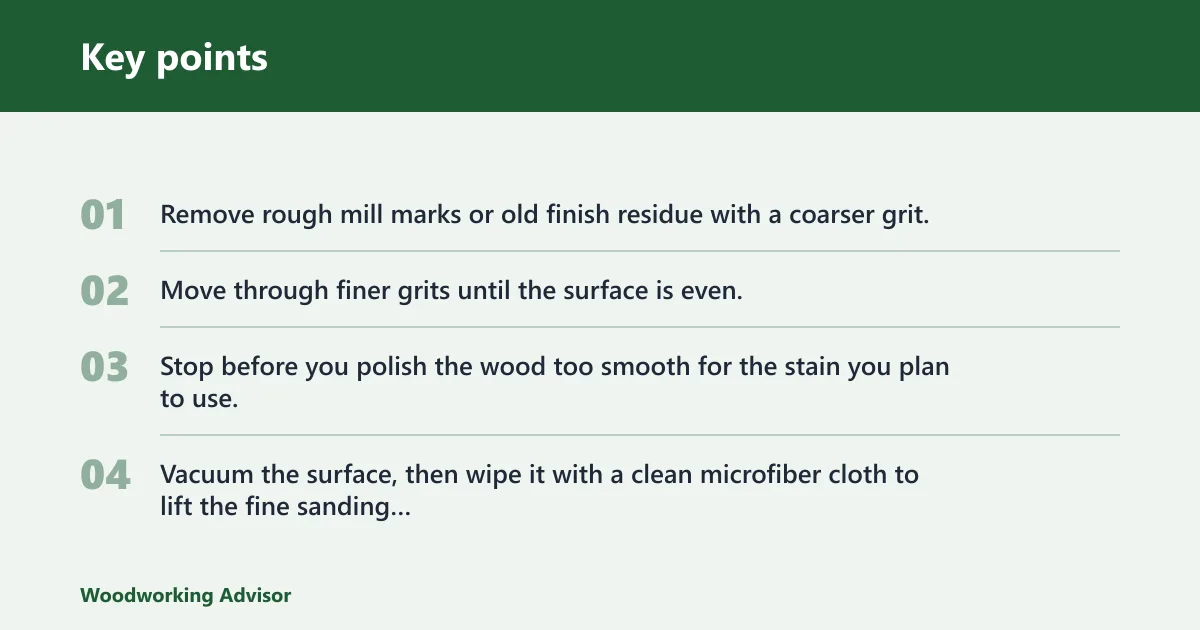
- Remove rough mill marks or old finish residue with a coarser grit.
- Move through finer grits until the surface is even.
- Stop before you polish the wood too smooth for the stain you plan to use.
- Vacuum the surface, then wipe it with a clean microfiber cloth to lift the fine sanding powder from pores and corners.
Remove dust before any stain
Dust left in pores can block stain uptake and leave specks or pale spots. Vacuum first, then wipe the surface with a clean cloth or tack cloth, and check corners, edges, and profiles again before applying stain.
Use wood conditioner on blotch-prone softwoods
Wood conditioner helps reduce blotchiness, especially on softwoods and porous woods. It is usually applied as a thin coat and allowed to sit briefly; This Old House says to allow wood conditioner to penetrate for about 15 minutes.
That step is most useful on pine, fir, and other woods that absorb stain unevenly. It is less important on many hardwoods, but it can still help if the grain is especially patchy.
Say your pine bookshelf has pale end grain at the shelf edges and darker fields in the middle. Conditioner and a controlled sanding sequence can reduce that contrast, but they will not turn pine into a perfectly even canvas.
Can you stain finished wood?
Usually, no. A finished surface with intact lacquer, polyurethane, shellac, varnish, or similar film blocks stain, so the color sits on top or wipes off unevenly instead of soaking in.
What denatured alcohol reveals
A simple spot test can help identify shellac. This Old House says shellac can be identified because denatured alcohol makes it come right off. If alcohol softens the finish but does not dissolve it away, you may be dealing with a different coating. (Thisoldhouse)
This Old House says a water-based polyurethane softens but does not come off with denatured alcohol. That distinction matters because a finish that only softens still blocks stain until it is removed by sanding or stripper.
Which finishes block stain?
Lacquer, polyurethane, varnish, and shellac all count as film finishes in this context. Oil finishes can also interfere if they have built a surface film, and older pieces may carry more than one layer. If the finish stays intact after a spot test, assume stain will not penetrate.
When stripping beats sanding
Heavy sanding can remove a film finish, but it is not always the best option. Chemical stripper is often the better choice for antique or heavily finished pieces, especially when there are carvings, profiles, or details that a sander cannot reach cleanly.
Use a scraper with the stripper, work with ventilation, and wear gloves. Fumes and residue matter here, and dust from sanding old coatings should be treated as a safety issue, not a cleanup chore.
Refinish old wood without guesswork
Refinishing old wood means removing the old finish first, then treating the wood underneath as if it were a fresh staining job. The catch is that old furniture often contains hidden repairs, mixed species, glue residue, and worn areas that do not absorb stain evenly.
Strip, scrape, or sand the old finish off
If the finish is thin and accessible, sanding may be enough. If the coating is thick, shaped, or uneven, use a chemical stripper first, then scrape and sand the residue. For flat sections, a measured sanding sequence keeps you from gouging the wood or leaving intact finish in low spots.
Watch for veneer and glue lines
Veneer changes the risk profile. Because the top layer can be thin, aggressive sanding can cut through it and expose the substrate underneath, which changes both appearance and stain absorption. Use light pressure and stop often to check your progress.
Glue contamination also causes trouble. Old glue squeeze-out, repaired joints, and hidden adhesive near veneers can repel stain and create light spots that look like damage after the finish goes on.
Deal with patch repairs and mixed color
Patch repairs, filler, and mixed species often show up only after stripping. Those areas may accept stain differently from the surrounding wood, so expect some variation and plan for it with test spots rather than a single assumed color.
Picture a dining table top with maple patches in a walnut field. Even after careful stripping, the new wood and the old wood may still take color at different rates, so a direct color match is unlikely without testing and adjustment.
Stain choice and test spots
Choose the stain after you know what surface you have. Oil-based penetrating stain, water-based stain, and gel stain each fit different prep levels and project shapes, but none of them fix an intact film finish.
Oil-based penetrating stain
Oil-based penetrating stain works well on unfinished furniture, cabinets, doors, trim, molding, and hardwood floors. Minwax Wood Finish is ideal for those uses, and Minwax Wood Finish dries in 2 hours. It tends to bring out grain well on bare wood.
Water-based stain
Water-based stain dries faster and is available in semi-transparent and solid color variants. Minwax water-based solid color stain dries in 1 hour, and Minwax water-based semi-transparent stain also dries in 1 hour. That speed can help on small projects, furniture, cabinets, doors, and trim.
Gel stain
Gel stain is a non-drip formula that works well on vertical surfaces. Minwax Gel Stain is non-drip and suitable for vertical applications like doors and molding. It can be used on wood, plywood, veneer, fiberglass, metal, and molded fiberboard.
The RE Store advises testing stain on scraps of the same wood whenever possible. If scraps are not available, use a hidden spot, the underside, or an offcut from installation. That is the only honest way to see how the grain, sanding, and species react together.
Test more than one stain color if you are trying to match existing wood. You are looking for the closest workable range, not an exact promise. Old finish color, age, and light exposure can make exact matching unrealistic.
Stain new wood vs refinish old wood matrix
This matrix puts the decision first. Choose the surface type you actually have, then follow the prep path that fits it. The same stain can behave very differently depending on whether the wood is bare, finished, solid, or veneer.
| Surface type | Required prep | Likely problems | Best stain choice | Go/no-go test |
|---|---|---|---|---|
| Bare softwood | Sand from about 80 to 220 grit, then use tack cloth; add conditioner if blotchy | Blotchiness, end-grain contrast, visible sanding marks | Water-based stain or oil-based penetrating stain; gel stain if vertical | Water drop soaks in evenly; no glossy film remains |
| Bare hardwood | Smooth sanding, dust removal, optional light conditioner only if needed | Uneven grain response, patchy absorbency on mixed species | Oil-based penetrating stain | Rub a hidden area with a damp cloth; fibers should still accept stain, not bead like finish |
| Factory-sanded furniture | Confirm it is unfinished, then sand lightly and remove dust | Pre-sanding can leave the surface too smooth; hidden sealers can block stain | Water-based stain or oil-based penetrating stain | Alcohol spot on a hidden area shows whether a finish is present |
| Lacquered piece | Strip or sand off the finish before staining | Stain will not soak through; dull patches and wipe-off failure | Any stain only after full removal of lacquer | Denatured alcohol does not dissolve the film quickly |
| Polyurethane piece | Strip or sand through the coating before staining | Beading, uneven color, incomplete removal in corners and profiles | Any stain only after full removal of polyurethane | Denatured alcohol softens but does not remove the film |
| Veneer | Light sanding only, then dust removal; avoid aggressive stripping and heavy sanding | Sanding through, glue breakthrough, uneven base layer color | Gel stain or a careful water-based stain test | Edge check shows enough veneer thickness to continue safely |
What the matrix means in practice
Bare wood gives you the most control because the stain can enter the grain. Old finished wood gives you the most risk because the coating must be removed before color work begins. Veneer sits in the middle, but its thin surface layer pushes you toward caution rather than speed.
The same logic explains why a quick “stain it anyway” approach usually fails. If the surface still has finish, the stain choice is not the real problem. Surface removal is.
Topcoat after staining
Once the stain is dry, add a topcoat to protect the color and wear surface. Common options include varnish, shellac, lacquer, and polyurethane. The topcoat is a separate layer from stain, and it does a different job.
When the stain is dry enough
This Old House says stain should dry for six to eight hours before applying a finish. Follow the product label if it calls for a different wait time, especially with water-based products or when humidity is high. (Thisoldhouse)
Why the topcoat matters
Wood stain colors the wood; topcoat protects it. A topcoat reduces wear, moisture intrusion, and handling marks, and it also helps the project look finished rather than raw. Without it, the stained surface remains more vulnerable.
For a final pass, inspect corners and edges after the topcoat dries. Those areas reveal missed dust, lap marks, and uneven stain removal faster than open flats do.
Choose stain New Wood if…
Choose Stain New Wood if the surface is truly bare, the grain is open, and the piece only needs sanding, dust removal, stain, and topcoat. It is the faster, lower-risk path for unfinished furniture, cabinets, doors, trim, molding, and hardwood floors.


Choose Refinish old Wood if…
Choose Refinish Old Wood if the piece still has lacquer, polyurethane, shellac, varnish, or another film finish. Strip, scrape, or sand the old coating off first, then reassess veneer, glue lines, repairs, and mixed species before you stain.
Frequently asked questions
Can you stain over old stain wood?
Only if the old stain sits on bare wood and the surface is not sealed by a film finish. If the old finish remains intact, stain will not penetrate it. For old color that needs refreshing, stripping or heavy sanding usually comes first.
How do you stain unfinished wood without blotches?
Sand in a clean grit progression, keep with the grain, and remove every trace of dust. On softwoods or porous woods, apply wood conditioner and let it penetrate briefly before staining. A test board or hidden spot helps confirm the final color before full application.
How to refinish wood furniture
First identify the existing finish. Then strip, scrape, or sand it off, taking extra care with veneer and molded details. After removal, sand lightly, remove dust, test the stain, and finish with a compatible topcoat once the stain is dry.
What is the difference between wood stain and wood finish?
Wood stain colors the wood. A wood finish, or topcoat, protects the surface after staining. Stain affects appearance and absorption; finish adds wear and moisture resistance. They are separate steps, and confusing them leads to poor prep and weak protection.
Sponsored / affiliate links. As an Amazon Associate I earn from qualifying purchases. I may earn additional commission from eligible campaigns.