How to Stain Wood Darker (Even If It’s Already Stained)
To stain wood darker, sand bare wood and apply 2-3 thin coats of a dark oil-based stain — but wood that’s already stained needs gel stain applied over the old finish instead of a full strip-and-restart. Skipping that distinction is why most darkening projects turn blotchy or peel within a year. This guide covers prepping new wood, darkening existing stain with gel stain, and exact dry times between coats.
What You’ll Need
Best Dark Wood Stain Pick
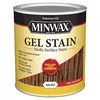
Minwax Gel Stain, Walnut, 1 Quart
A true gel stain that darkens bare wood evenly and can also be applied straight over most existing finishes.
- Best for: Getting an even, rich walnut color on blotch-prone woods like pine, cherry, or maple
- Why we picked it: Gel stain sits on top of the wood instead of soaking in unevenly, so it’s our top pick for a dependable, professional-looking dark finish
- Main drawback: Thicker consistency means it takes longer to wipe off than a traditional liquid stain
Compare more dark stain options
 Option 1 Varathane Total Control Dark Walnut Gel Stain
|
 Option 2 Minwax PolyShades Stain + Poly, Antique Walnut
|
 Option 3 Varathane Water-Based Wood Stain, Espresso
|
As an Amazon Associate we earn from qualifying purchases.
- Dark oil-based stain (for bare wood) or gel stain (for already-stained wood)
- 220-grit sandpaper, plus 320-grit for sanding between coats
- Pre-stain wood conditioner (for blotch-prone woods like pine, cherry, or maple)
- Lint-free rags or a natural-bristle brush
- Wood cleaner/degreaser or mineral spirits
- Disposable gloves, safety goggles, and a well-ventilated space
Preparing the Wood Surface
Preparation decides whether the darker color goes on evenly or turns blotchy, and it’s different depending on whether you’re starting with bare wood or wood that already has stain on it.
For Bare or New Wood
- Inspect the wood: Check for cracks, dents, or old finish residue and sand rough spots smooth.
- Clean the surface: Wipe away dust and debris with a clean cloth or mineral spirits.
- Sand with 220-grit: Work in the direction of the wood grain, then vacuum or wipe away sanding dust with a tack cloth.
- Apply pre-stain conditioner (optional): Use this on pine, cherry, maple, or other blotch-prone species so the stain absorbs evenly instead of forming dark, uneven patches.
For Wood That’s Already Stained
Sanding an already-finished piece down to bare wood works, but it’s rarely necessary just to go darker. Clean the surface with a grease-cutting degreaser, then lightly scuff-sand with 220-grit sandpaper or wipe it with a liquid deglosser until the sheen dulls. That light texture is what lets a new coat of gel stain grip — skip it, and the new color can peel within months.

How to Stain Bare Wood Darker
Once the surface is prepped, test the stain on a scrap piece of the same wood first — color always looks different on the can than it does on your actual project.
- Stir the stain thoroughly: Pigment settles at the bottom of the can, so stir until the color is consistent.
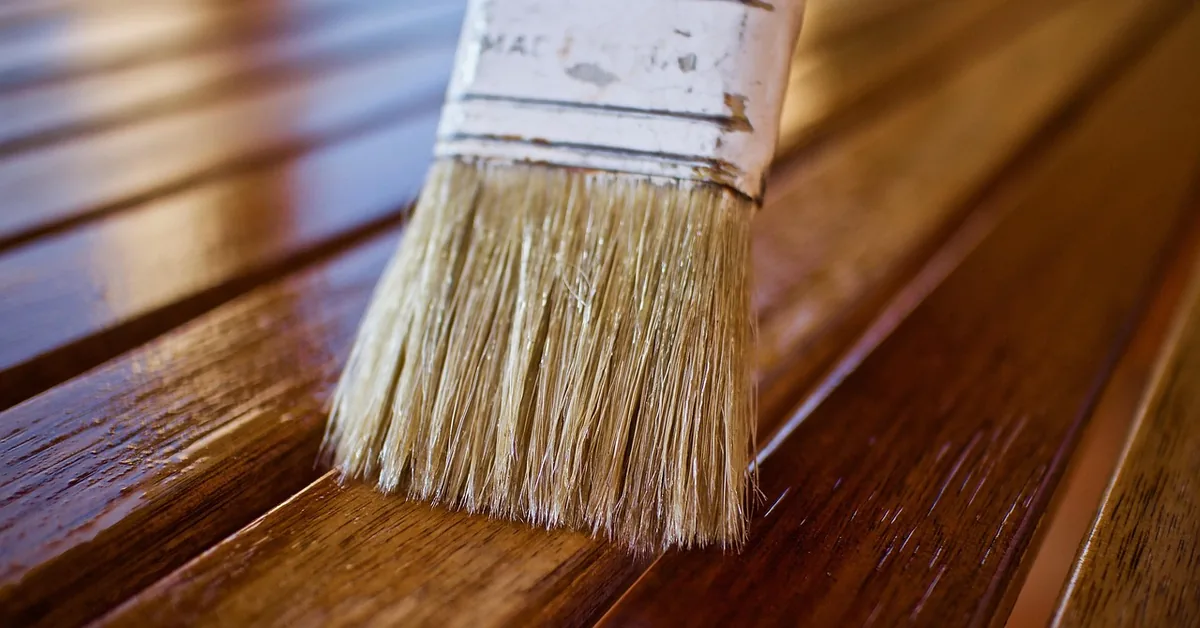
- Apply the first coat with the grain: Use a high-quality brush or rag and spread it evenly to avoid blotches or streaks.
- Wipe off excess after a few minutes: Leaving excess stain to pool on the surface causes a sticky, uneven film.
- Let the coat dry fully before deciding whether you need another one (see the drying-time chart below).
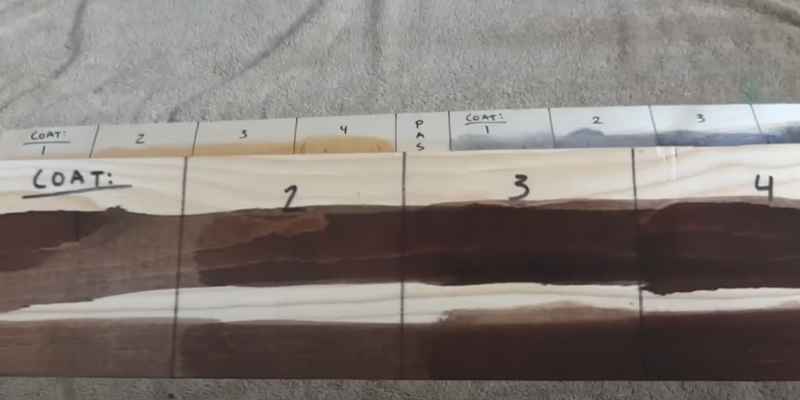
- Apply a second or third coat if you want the color darker, sanding lightly with 320-grit between coats.
Two to three coats is where most stains hit their darkest practical color. If it’s still not dark enough after that, switch to a darker stain color rather than adding a fourth coat — extra coats mostly add a tacky film instead of more depth.
How to Darken Wood That’s Already Stained (Gel Stain Method)
Gel stain is a thick, pudding-like wood finish that sits on top of the existing surface instead of soaking into the grain. That difference is what makes it the standard fix for darkening furniture, cabinets, or trim that’s already stained and sealed — you’re coating over the old color, not stripping it off first.
| Wood Condition | Stain to Use | Sanding Needed | Best For |
|---|---|---|---|
| Bare or new wood | Traditional oil- or water-based stain | Yes — 120 to 220 grit | Full color control, natural grain show-through |
| Already stained or sealed | Gel stain or a stain+poly combo like PolyShades | No — light scuff-sand or deglosser only | Darkening furniture or cabinets without stripping |
| Blotch-prone wood (pine, cherry, maple) | Gel stain, or liquid stain plus pre-stain conditioner | Yes, plus conditioner | Even color without splotching |
- Clean and degrease: Wipe the entire surface with a grease-cutting cleaner to remove wax, oils, and grime.
- Scuff-sand or deglaze: Lightly sand with 220-grit sandpaper or wipe on a liquid deglosser until the old sheen dulls.
- Apply gel stain in small sections: Brush or wipe on a thin, even coat with the grain, working one area at a time.
- Wipe off the excess: After 20-30 seconds, wipe back any stain that hasn’t started to set, following the grain.
- Let it dry, then repeat for a darker shade: Apply additional coats after each one dries, buffing lightly with #000 steel wool between coats.
- Seal it: Once you’re happy with the color, protect it with a polyurethane, wax, or clear topcoat.
📊 Most oil-based gel stains need about 24 hours to dry before recoating, though some products (like Old Masters gel stain) can be recoated in as little as 6-8 hours. Water-based polyurethane topcoats need a full 48 hours before light use, and any new stain finish takes roughly 30 days to fully cure. — Source: manufacturer product data sheets (Minwax, Old Masters, Varathane)
“Skipping the scuff-sand or deglosser step on furniture that’s already stained is the number one reason gel stain peels within a few months. The surface can look perfectly clean and still be too slick for anything new to grip.”
Other Ways to Get a Deeper, Richer Color
Beyond choosing the right stain type, a few application habits make a real difference in how dark and even the final color looks.
Let the Stain Sit Longer Before Wiping
The longer stain sits on the wood before you wipe it off, the more pigment soaks in and the darker the final color. Follow the maximum time on the product label — going past it on a liquid stain can leave the surface sticky instead of just darker.
Sand Lightly Between Coats
A quick pass with fine-grit sandpaper or steel wool between coats knocks down raised grain and gives the next coat something to grip, which keeps the color building evenly instead of pooling in some spots and skipping others.
Finishing Touches
Once the stain has fully dried, seal it to protect the color and add sheen.
- Choose a clear finish that fits the project — polyurethane, lacquer, or wax.
- Lightly sand with fine-grit sandpaper for a smooth base.
- Apply thin, even coats with a quality brush or sprayer, letting each one dry fully.
- Buff the cured final coat with a soft cloth or glossy finish-reducing pad and a little wood polish for a smoother sheen.
Common Mistakes and Safety Notes
- Skipping the scrap-wood test: Stain color always looks different on your actual project than on the can — test first.
- Adding coats past the point of diminishing return: More than 3 coats usually just adds a tacky film, not more color.
- Working without ventilation: Open windows or run a fan, and wear gloves and goggles — oil-based stains give off strong fumes.
- Balling up used stain rags and tossing them in the trash: Oil-soaked rags can generate enough heat to spontaneously combust as they dry. Lay them flat outdoors to dry completely, or submerge them in a sealed metal container of water before disposal.
Frequently Asked Questions
Can you stain wood darker without sanding?
Yes, but only on wood that’s already been stained or sealed. Clean the surface, scuff it with 220-grit sandpaper or wipe it with a liquid deglosser, then apply gel stain over the old finish. Bare or raw wood still needs sanding first so the stain can absorb evenly — gel stain skips the strip-and-restart step, not the surface prep.
How many coats of stain does it take to make wood darker?
Most stains reach their darkest practical color by the second or third coat — after that, extra coats mostly add a tacky, uncured film rather than more depth. If two coats still aren’t dark enough, switch to a darker stain color instead of piling on a fourth coat.
Does gel stain make wood darker than regular stain?
Gel stain can build to a darker, more opaque color faster because it sits on top of the wood instead of soaking in, and each extra coat adds visible pigment. Traditional liquid stain soaks into the grain and shows more of the wood’s natural pattern, but it’s limited by how much color the wood can absorb.
How long should wood stain dry between coats?
Plan on 24 hours between coats for most oil-based stains and gel stains, though a few fast-dry products are ready in 6-8 hours — check the can. Water-based polyurethane topcoats need a full 48 hours before light use, and any stain finish needs about 30 days to fully cure and harden.
What is the darkest wood stain color?
True black and espresso are the darkest standard stain colors, followed closely by ebony and dark walnut. For the deepest possible color on open-grain wood like oak, apply two to three coats of an espresso or true-black stain rather than relying on the color alone.
Can you apply gel stain over polyurethane?
Yes, as long as you scuff-sand or deglaze the polyurethane first so the gel stain has something to grip — gel stain won’t bond to a glossy, sealed surface on its own. After the gel stain dries, add a fresh topcoat of polyurethane to protect and seal the new color.
Conclusion
The stain type is what decides success here more than technique: use a traditional oil- or water-based stain on bare wood, and switch to gel stain the moment you’re darkening something that’s already been stained or sealed. Prep the surface for the wood you actually have, respect the dry times between coats, and test the color on scrap first.
For more on getting the coverage right, see our guides on how many coats of stain you actually need and gel stain vs. oil stain, or browse the full wood staining guide hub for more finishing projects.
Sponsored / affiliate links. As an Amazon Associate I earn from qualifying purchases. I may earn additional commission from eligible campaigns.