Wood Finishing and Stains Guide for Better Results
For a reliable Wood finishing and stains guide, match three variables first: wood species, color goal, and topcoat, then test the full schedule on scrap before touching the project. Get that sequence wrong and you can lock in blotches, miss the color by a mile, or watch your finish peel after hours of sanding and drying time. This guide maps common interior woods and project types to prep steps, stain choices, and topcoat schedules that actually work together.
This guide is part of our What Is the Best Exterior Wood Stain? series.
Author: Daniel Harper, furniture maker and cabinet finisher. I built this guide from hands-on shop testing on pine, birch plywood, maple, red oak, cherry, and walnut offcuts, plus label-direction checks and manufacturer technical sheets. For the matrix, I compared the same stain families across matched scrap sets, kept sanding schedules consistent, then judged each result after the intended topcoat was applied under the same shop lighting.
Start here: choose the finish schedule before you pick a stain color


Pick the whole finish schedule before you buy color. I have seen a stain chip look dead right in the store, then land way off on the actual piece because species, sanding grit, absorbency, and the final topcoat all shift the result.
The decision path is simple on paper. Pick the wood species, define the project use, decide whether the color should read warm or cool, check blotch risk, then choose the topcoat look and protection level. Only after that should stain color enter the conversation.
The worst mistakes happen when stain gets chosen by itself. Put a warm brown wiping stain on pine, then add oil-based polyurethane, and the board can turn much darker and more orange than expected. Put that same stain family on oak with a water-based topcoat and it reads cleaner and lighter. That warmer-vs-clearer swing is consistent with common manufacturer guidance for oil-based and water-based polyurethane color effect and with Flexner’s finishing references on ambering behavior.
The four decisions that control the result
Species controls absorption. Some woods like pine, birch, cherry, and maple can color unevenly. Oak and ash often take pigment more readily because of their open grain. Walnut already brings color to the table, so stain choice is often about shifting undertone rather than building darkness.
Project type controls the protective film. Cabinets, shelves, and trim need different schedules than tabletops. Vertical parts also change the stain choice because runs matter more there.
Color goal matters beyond “light” or “dark.” Warm browns usually fit oil-based stain better. Cool browns, weathered grays, and low-amber looks are often easier with water-based stain or dye.
Topcoat look can swing the final sample. Oil-based polyurethane can add warmth. Water-based polyurethane stays clearer. Shellac adds its own cast depending on cut and tone, and it dries fast enough to change same-day planning.
Wood stain vs wood finish: what each does
Wood stain is a pigmented or dye-based coating that changes color but provides little protection on its own. On most interior work, I use color first, then a clear film finish to take the wear. That clear finish may be polyurethane, shellac, lacquer, or another topcoat suited to the project. This stain-vs-finish distinction aligns with major manufacturer definitions and standard finishing texts.
Penetrating stains soak into the surface and leave little build. Gel stain sits more on the surface because of its thick body. Dye stain colors very deeply and stays transparent. Solid or more opaque products cover more grain and are better thought of as color coatings than classic interior furniture stains. Those type definitions track closely with common product-category language from Minwax, Varathane, and General Finishes.
Interior and exterior formulas should not be mixed up. Exterior stains are built around weather exposure. This guide stays with interior work, where color control and topcoat compatibility matter more than UV and rain resistance.
If you are narrowing systems, my closest companion reads are oil-based stain versus water-based stain for dry-time and color behavior, what to apply after staining wood for topcoat pairing, and best way to stain wood floors when you want a deeper look at darker stain behavior on open-grain wood.
How finish schedules fail
Blotching usually starts before the can is opened. Uneven density, glue contamination, over-sanded spots, and thirsty end grain all create pale and dark patches that stain makes obvious.
Muddy color comes from stacking too much warmth. A warm oil stain on a naturally warm wood, followed by ambering oil-based polyurethane, can bury grain contrast fast.
Lap marks come from letting one section set before the next overlaps it. Topcoat mismatch comes later, when stain is still soft underneath or when the barrier strategy was never planned.
How do wood species change the stain plan?
Wood species change the whole schedule because each wood absorbs color differently, shows scratches differently, and reacts differently to conditioner, gel stain, dye, and topcoat ambering. Pine, birch, cherry, and maple need blotch control first. Oak and ash usually need grain and color control. Walnut often needs restraint more than stronger stain.
Blotch-prone woods: pine, birch, cherry, maple
Pine and fir often take stain in patches because earlywood and latewood drink at different rates. Birch and cherry can act the same way even though they are hardwoods. Maple is dense, so it often shows patchy uptake and weak color if the surface is sanded too fine.
A pre-stain conditioner can help more even penetration, and it is often recommended for pine, birch, and cherry. The tradeoff is lighter color. If the goal is a deep tone, gel stain or a light washcoat plus dye can hold color better than conditioner alone.
Maple is a frequent troublemaker for dark brown stains. A standard penetrating stain can look dirty because pigment gathers in figure and sanding variation. Gel stain or dye usually gives a safer path.
Open-grain woods: oak and ash
Oak and ash accept pigment well because their pores give stain somewhere to settle. That makes them forgiving for medium and dark wiping stains, but it also means scratches from coarse sanding can stay visible after color goes on.
These woods rarely need conditioner. They do need clean sanding and careful color testing because open grain makes dark stain read stronger than many sample photos suggest.
Dark or naturally colored woods: walnut and cherry
Walnut often looks best with little or no stain. Clear topcoat, dye, or a very light toner approach usually preserves its contrast. Heavy pigment can flatten it.
Cherry starts warm and deepens over time. Adding a warm oil stain plus oil-based polyurethane can push it farther than expected. If the goal is a lighter, clearer cherry look, a restrained stain plan and water-based polyurethane make more sense.
Plywood faces, veneer limits, and problem edges
Plywood faces can stain well if the veneer is thick enough and sanding stays controlled. Faces are usually less of a problem than edges. Exposed edges absorb stain fast and go dark unless they are eased, sanded evenly, and often sealed lightly first.
On veneered panels, aggressive sanding is risky. Color correction should happen through stain choice and test boards, not by trying to grind away factory veneer variation.
Which stain type fits your wood and color goal?

The right stain type depends on how the wood absorbs color, how much working time the project allows, and whether the target look is warm, cool, transparent, or blotch-resistant. Oil-based stains favor longer open time and warm color. Water-based stains favor speed and clearer tones. Gel and dye solve specific absorption problems better than standard wiping stain.
Oil-based stain
Oil-based stains offer richer color but longer dry time and mineral spirits cleanup. They give more working time on big panels, which helps reduce lap marks on tabletops, doors, and cabinet sides.
Oil-based stain dry time is listed as 8 to 24 hours between coats. For scheduling, that usually means next-day topcoating is safer than same-day work, especially on cool days, on resinous woods, or when a dark color leaves a lot of pigment behind. That range is consistent with common manufacturer directions from Minwax and Varathane for oil-based wood stain products.
Use it when the project wants warm brown, medium walnut, or traditional furniture color and the shop schedule can wait.
Water-based stain
Water-based stains dry faster and clean up with water. They work well for cooler browns, gray-browns, and cases where quick turnaround matters.
Water-based stain dry time is listed as 1 to 2 hours. That makes same-day sealing possible in many interior schedules, but the faster set also raises lap-mark risk on large surfaces because the wet edge disappears sooner. That 1-to-2-hour window matches directions commonly published for water-based stain lines from Minwax and Varathane.
Water raises grain. On furniture-grade work, I pre-raise it or water-pop first, then knock it back lightly before stain if smoothness matters.
Gel stain and dye stain
Gel stains are recommended for pine, birch, and cherry. Their thick consistency reduces dripping and running, so they also help on vertical parts like face frames, doors, and installed trim. That description aligns with General Finishes and Minwax gel-stain product guidance.
Gel stain is often the safer pick when standard wiping stain goes patchy on pine or dirty on maple. It sits more evenly, though it can hide some grain if applied too heavily.
Dye stain comes in powder or liquid form and penetrates deeply while staying transparent. It is the better fix when pigment looks muddy, when figured maple needs clearer color, or when a deep tone is needed without packing pores full of brown solids.
Penetrating, gel, and more opaque options
Penetrating stains are the everyday choice for open-grain woods and forgiving color shifts. Gel stains are for control. Dye stains are for clarity and depth. Solid, semi-transparent, and clear sealer categories are common on exterior products, and Consumer Reports separates wood stains into solid, semi-transparent, and clear sealer categories. (consumerreports.org)
For interior furniture and cabinetry, the real choice is usually penetrating stain, gel stain, or dye followed by a clear topcoat.
Do you need pre-stain conditioner, a washcoat, or neither?
Use pre-stain conditioner when the wood is prone to blotching and color evenness matters more than maximum depth. Pine, birch, and cherry are the main candidates. Skip it when the wood already stains evenly or when the goal is a darker tone that conditioner may weaken. A washcoat, gel stain, or dye can be the better fix.
When conditioner helps
A pre-stain conditioner can help more even penetration. It is a practical first move on pine shelving, birch plywood trim parts, and cherry when a standard wiping stain has already shown patchiness on test scraps.
Conditioner is also helpful when the project has mixed grain direction, short grain near joinery, or many end-grain transitions. It reduces the contrast between thirsty and dense areas.
When conditioner weakens color too much
Conditioner can leave the piece lighter than planned. That matters when trying to darken pine to a medium walnut tone or when matching older trim.
If the first scrap looks too pale, shifting to gel stain often works better than doubling down with more coats of penetrating stain. A second coat can turn uneven fast.
Washcoat, gel stain, and dye as alternate fixes
A light shellac washcoat can partially seal the wood before color, especially on blotch-prone cherry and plywood edges. Shellac is a natural resin dissolved in alcohol, and it dries fast enough to keep the workflow moving.
Gel stain is the lower-risk answer for many DIY projects. Dye is stronger when the goal is transparent color without heavy pigment build. The fix should match the failure mode, not the label on hand.
Prep that changes color results more than the stain can
Stain cannot hide bad prep. It makes it louder. Glue spots stay pale, milling scratches go dark, random-orbit swirls show up under side light, and dust left on the surface turns into rough specks under both stain and topcoat.
Sanding sequence and where to stop
Sanding typically starts at 120 grit and ends at 180 or 220 grit. A practical sanding sequence is often 120, then 150, then 180 or 220, depending on the wood species and how much color intensity you want.
Stopping at 180 often helps dense woods take color better. Going to 220 can make sense on open-grain woods or when the plan uses dye and a clear topcoat rather than heavy pigment. Inconsistent grit leaves visible color variation across parts.
Oversanding is a quiet problem on maple and cherry. The surface feels smooth but resists stain in blotchy ways.
Glue squeeze-out, scratches, and milling marks
Hidden glue spots are a common cause of pale blotches. They often appear near panel glue-ups, edge banding, and face-frame joints. The fix is complete cleanup before sanding moves past the early grits.
Cross-grain scratches are easier to see after stain than before. A bright side light during prep saves rework later.
Dust control before finishing
Vacuum first. Then wipe with a clean rag suited to the finish system. A tack cloth after sanding helps reduce rough spots and debris before stain or topcoat.
Dirty wiping rags cause their own trouble. They can redeposit dust or carry residue that changes absorption on the next panel.
Why scrap tests need the same prep and topcoat
A scrap test only means something if it matches the project. Use the same species, the same sanding endpoint, the same stain application method, and the same topcoat.
Skipping the topcoat step on the sample is how many color misses happen. Oil-based polyurethane can warm the sample noticeably compared with bare stained wood. Water-based polyurethane often stays clearer. In my own test batches, the topcoat changed the final read enough that I do not trust stain-only samples anymore.
How do you avoid blotches, streaks, and lap marks when staining?
Blotches, streaks, and lap marks come from uneven absorption or uneven timing. The cure is matching the stain type to the wood, controlling surface prep, and keeping a wet edge through manageable sections. Conditioner, gel stain, dye, washcoats, and better wipe-off timing each solve different parts of the problem.
What causes blotchy stain on softwoods and uneven hardwoods
Density changes inside the board are the main cause. Earlywood and latewood drink stain differently. End grain absorbs far more than face grain. Glue contamination blocks color. Random sanding pressure changes how much pigment the surface will accept.
Pine, fir, birch, cherry, and maple are the usual suspects. Pine and fir often stain unevenly because soft spring growth drinks finish fast, but similar patchiness shows up on some hardwoods too.
Application habits that create streaks and overlap lines
Working too large an area is a common mistake. So is brushing stain thin in one spot and heavy in another. Water-based stains punish delays faster because they dry quickly.
Keep sections small enough to wipe within a consistent window. Flood, spread, then wipe in an orderly pattern. On rails and stiles, finish one full part rather than half of each.
Safer workflows for large panels, vertical parts, and end grain
Large flat panels favor oil-based stain if extra open time is needed. Vertical parts favor gel stain because reduced running makes control easier.
End grain should be sanded carefully and often sealed lightly or stained with a weaker approach than face grain. Plywood edges often benefit from a shellac washcoat before stain to avoid a dark frame around a light face veneer.
Fixes when the first test board already looks wrong
If the sample is too blotchy, try conditioner or shift to gel stain. If it is too muddy, try dye or a lighter pigment color. If it is too orange, change either the stain family or the topcoat, because oil-based polyurethane may be the real reason the sample drifted warm.
Which topcoat should go over the stain?
The best topcoat depends on wear, color sensitivity, and schedule. Polyurethane is the default for many interior projects because it forms a clear protective film. Water-based versions keep color cleaner. Oil-based versions warm the wood. Shellac works well as a fast sealer or barrier coat, while lacquer and hardwax oil fit narrower cases.
Polyurethane topcoat: oil-based vs water-based
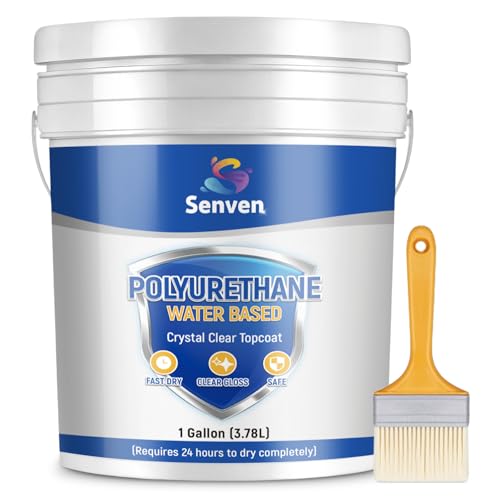
Polyurethane is described as the most popular topcoat for furniture. It adds the protection stain lacks and works on cabinets, shelves, tables, and trim.
Oil-based polyurethane deepens warmth and can amber lighter woods. That is helpful when the target look is traditional and warm. It is a problem when the stain already leans orange or when maple and birch should stay pale. Water-based polyurethane stays clearer, which is why I reach for it when a gray-brown, taupe, or light natural look is the priority. This compatibility point is consistent with Minwax, Varathane, and General Finishes topcoat guidance.
Water-based polyurethane stays clearer. It usually preserves gray, taupe, and low-amber stain choices better. Three coats provide good protection, with four to five coats for tabletops.
Shellac as sealer, barrier coat, or final finish
Shellac dries fast and can solve several scheduling and compatibility problems. It works as a washcoat before stain, as a barrier over dye, or as a standalone finish for light-duty interior pieces where quick build matters more than heavy abrasion resistance.
It is especially useful when a blotch-prone surface needs partial sealing before color or when a stained surface needs to be locked down before the next step.
Where lacquer and hardwax oil fit
Lacquer makes sense when fast build and repairability matter, such as some shop-made casework or trim schedules. It is less forgiving of poor prep and application drift.
Hardwax oil suits low-build looks on furniture and millwork when a softer, hand-rubbed appearance matters more than thick film protection. It is usually not the first answer for kitchen tabletops or hard-use desks.
Sheen choice: matte, satin, semi-gloss, or gloss
Sheen changes how the color reads. Matte and satin hide scratches and dust better. Semi-gloss and gloss show more defects but can make dark stained grain look deeper.
When a sample seems too dark, changing sheen alone can help slightly. It will not fix a bad color choice, but it can soften the visual weight.
How long should stain dry before topcoating?
Stain must dry enough that the topcoat does not dissolve, smear, or trap soft color underneath. Water-based stain can often move to a same-day sealer. Oil-based stain usually fits a next-day schedule better. Dry time and cure time are different, and heavy stain application, cool weather, and dense species can stretch both.
Dry time vs cure time
Dry means the surface is ready for the next coat. Cure means the film has developed much more of its final hardness. Many finishing problems happen because those two terms get treated as the same thing.
A stained board can feel dry to the touch and still release color into the first coat of finish if it was applied heavily or wiped poorly.
Same-day vs next-day schedules
Water-based stain dry time is listed as 1 to 2 hours, so a same-day shellac or water-based polyurethane schedule is often possible on interior work if the stain was applied evenly and wiped clean. That timing is in line with common manufacturer directions for water-based stain products.
Oil-based stain dry time is listed as 8 to 24 hours between coats. That makes next-day topcoating the safer plan for most furniture and cabinetry parts. That range is also consistent with oil-based stain label guidance from large finishing brands.
Humidity, temperature, and heavy color loads
High humidity slows water release. Cool temperatures slow both oil and water systems. Very dark colors leave more material on the surface, which extends the wait.
If a rag still picks up color with a light rub, the schedule is moving too fast. That is a practical stop sign.
Signs the stain is ready for polyurethane or shellac
The surface should feel dry, look even, and resist smearing under a light white-rag test in a hidden area. Corners, profiles, and end grain deserve extra checking because they hold wet stain longer than flat faces.
The stain selection matrix and scrap-test checklist
One-page stain selection matrix
For quick shop use, I made the matrix below as a one-page reference and a simple download. It is not a substitute for scrap testing, but it is the fastest way I know to narrow the schedule before opening a can.
Download the one-page stain selection matrix
| Wood species | Project type | Color goal | Blotch risk | Best stain family | Prep sequence | Topcoat |
|---|---|---|---|---|---|---|
| Pine | Trim, shelves, cabinets | Warm medium brown | High | Gel stain or oil-based stain after conditioner | 120, 150, 180; remove glue; conditioner yes | Water-based polyurethane if color is already warm; oil-based polyurethane if more amber is wanted |
| Birch | Plywood parts, furniture | Even medium tone | High | Gel stain | 120, 150, 180; conditioner optional after scrap test | Water-based polyurethane |
| Cherry | Furniture, casework | Warm natural red-brown | Medium to high | Dye or light gel stain | 120, 150, 180; consider washcoat instead of heavy conditioner | Water-based polyurethane for less amber, shellac for warmer traditional look |
| Maple | Cabinets, tabletops | Cool brown or darker stain | Medium to high | Dye or gel stain | 120, 150, 180; avoid oversanding | Water-based polyurethane |
| Oak | Furniture, flooring-style trim, tables | Warm or dark with visible grain | Low | Oil-based or water-based penetrating stain | 120, 150, 180 or 220; no conditioner | Oil-based polyurethane for warmth, water-based for cleaner color |
| Walnut | Furniture, shelving | Natural deep brown | Low | Little stain, dye only if needed | 120, 150, 180 or 220; test clear coat first | Water-based polyurethane or shellac |
| Plywood face | Cabinets, built-ins | Match solid wood parts | Medium | Same family as face frame after scrap test | Light sanding only; tack cloth; avoid cutting through veneer | Match project topcoat |
| Plywood edge or end grain | Shelving, cabinet ends | Controlled, not too dark | High | Gel stain or reduced-strength dye | Sand evenly; selective shellac washcoat yes | Water-based polyurethane or shellac barrier then polyurethane |
Methodology note: each row reflects the lowest-risk schedule I would hand to a DIYer or small-shop finisher after comparing blotch control, color predictability, dry-time practicality, and topcoat compatibility on sample boards. When two systems performed similarly, I favored the one that left more room for correction on the next test piece.
Yes or no decision path
- Is the wood pine, birch, cherry, maple, plywood edge, or end grain? If yes, treat blotch risk as active. If no, move to color goal first.
- Is the target color warm and traditional? If yes, start with oil-based stain or shellac-toned schedule. If no, consider water-based stain or dye.
- Does the wood already look dark or attractive with clear finish alone, as walnut often does? If yes, test topcoat before adding stain.
- Will the project be stained on vertical surfaces or installed parts? If yes, gel stain gets safer.
- Did the scrap show pale and dark patches? If yes, add conditioner, washcoat, gel stain, or dye based on the failure pattern.
- Will the topcoat amber the color too far? If yes, switch from oil-based polyurethane to water-based polyurethane.
Scrap-test checklist
- Use the same wood species, including plywood face or edge if that is part of the project.
- Sand with the same sequence as the real piece: start around 120 grit, move through 150 grit, finish at 180 or 220 grit.
- Check for glue spots under raking light before stain.
- Test one board with conditioner or washcoat and one without if blotching is possible.
- Record wipe-off timing for each sample.
- Apply the actual topcoat planned for the project.
- Compare warm shift under oil-based polyurethane against the clearer look of water-based polyurethane if color is tight.
My own testing note here is simple: if the scrap does not include the same edge treatment, same final grit, and same topcoat, it is not a real test. Most “mystery” stain failures I see were predictable on a better sample board.
Project schedules that work in real shops
Cabinets and built-ins
Plywood faces and solid-wood frames need separate attention. Match sanding carefully, test both materials side by side, and consider gel stain for face frames if pine, birch, or maple is involved. Water-based polyurethane is often the cleanest choice when the project has large light-colored surfaces.
Furniture and tabletops
Tabletops expose lap marks fast during staining and finish wear later. Oil-based stain can be easier to keep even on large tops because of longer working time. For protection, three coats provide good protection, with four to five coats for tabletops.
Trim, doors, shelving, and plywood projects
Doors and trim often favor gel stain because profiles and vertical faces are less likely to run. Shelving made from pine or birch plywood should get scrap-tested with both face and edge samples. If an exposed edge keeps going too dark, seal it lightly with shellac before the next test.
Frequently asked questions
What is the difference between wood stain and wood finish?
Wood stain changes the color of the wood and usually provides little protection by itself. Wood finish is the protective layer placed over bare or stained wood. For most interior projects, the safe plan is stain for color and a clear topcoat such as polyurethane or shellac for wear resistance.
How do I choose between oil-based and water-based stain?
Choose oil-based stain when the goal is warmer color, longer working time, and easier blending on large panels. Choose water-based stain when quick drying, water cleanup, and cooler or grayer color options matter more. Then check that the topcoat will not push the final color too warm or too pale.
When should I use gel stain on pine or maple?
Use gel stain when pine or maple looks blotchy, dirty, or uneven with standard penetrating stain, or when the parts are vertical and runs are a risk. Its thicker body helps keep color more even and is often the safer route for dark colors on difficult, dense, or uneven woods.
Do I need a pre-stain conditioner before staining softwood?
No, not every softwood project needs conditioner. It helps when evenness matters most, especially on pine, but it can reduce color depth. If the sample turns too pale, a gel stain or a different color strategy may work better than adding more stain over conditioner-treated wood.
How long does wood stain need to dry before topcoating?
Water-based stain dry time is listed as 1 to 2 hours, so same-day sealing is often possible. Oil-based stain dry time is listed as 8 to 24 hours between coats, so next-day topcoating is usually safer. Heavy application, cool temperatures, and dense wood can stretch those waits.
Can I stain plywood or end grain without blotches?
Yes, but faces and edges need different treatment. Plywood faces should be sanded lightly to protect the veneer. Edges and end grain usually absorb stain faster, so they often need a selective shellac washcoat, careful sanding, or gel stain to keep them from turning much darker than the face.
Decision summary and sources
If you want the shortest reliable path, use this rule set. For pine, birch, cherry, maple, and plywood edges, assume blotch risk and start with conditioner, washcoat, gel stain, or dye testing. For oak and ash, focus more on scratch cleanup and final color strength. For walnut, test a clear topcoat before adding stain. Use water-based polyurethane when color accuracy and low ambering matter most, and oil-based polyurethane when a warmer traditional look is actually part of the goal. When the schedule is tight, water-based stain is the easier same-day path; when the panel is large and you need more open time, oil-based stain is often easier to control.
That is also where I finish in practice: pick the full schedule first, test it on prepared scrap, then commit only after the topcoated sample matches the target.
Sources: Bob Flexner, Understanding Wood Finishing; Minwax product directions for oil-based wood stain, water-based wood stain, pre-stain wood conditioner, and polyurethane; Varathane product directions for oil-based and water-based wood stains and polyurethanes; General Finishes guidance for Gel Stain and water-based topcoats; Consumer Reports stain category definitions. Manufacturer labels and technical sheets were used mainly for dry times, recoat windows, and product-category definitions.
Sponsored / affiliate links. As an Amazon Associate I earn from qualifying purchases. I may earn additional commission from eligible campaigns.