Hardwood Floor Care and Maintenance Guide for Homes
Clean and maintain hardwood floors by removing dry grit first, using very little liquid with a pH-neutral cleaner made for finished wood, protecting the finish from abrasion, and treating humidity and finish wear as decision points instead of afterthoughts. In my own work on solid hardwood floors, the safest routine has been consistent across homes: microfiber dust mop or hard-floor vacuum first, cleaner on the pad or cloth rather than flooding the floor, immediate drying of spills and pet accidents, and a hard stop on wet cleaning when I see darkening at joints, cupping, peeling finish, or odor that keeps returning. For indoor conditions, the commonly cited target is about 35% to 55% relative humidity to limit seasonal movement in wood flooring (NWFA installation guidance; USDA Wood Handbook; EPA/ENERGY STAR guidance for indoor comfort and moisture control). When traffic lanes stay dull right after proper cleaning, or water darkens the wood quickly, I stop “cleaning harder” and start thinking screen-and-recoat or refinishing instead (NWFA maintenance guidance; manufacturer care instructions for finished wood floors).
Start with the floor you actually have


How hardwood flooring structure affects cleaning and moisture risk
For care, what matters most is not a dictionary definition of hardwood. What matters is that solid hardwood flooring is hygroscopic wood protected by a finish, and both the wood and the finish respond to moisture, abrasion, and temperature swings. The USDA Forest Service Wood Handbook and NWFA guidance both describe wood as a material that gains and loses moisture with surrounding conditions, which is why the same spill behaves very differently on a sound finish versus a worn one.
A sealed floor and a worn floor do not react the same way to the same spill. On a sound finish, a damp cleaning pass is often low risk. On a floor with thin finish in traffic lanes, that same moisture can darken joints, swell edges, and leave the floor looking dirtier after cleaning. On real floors, I test this in a low-visibility spot with one light cleaner pass and a dry white cloth right after it. If the cloth picks up color, if the sheen changes immediately, or if the board edge darkens within a minute or two, I treat that area as finish-failure risk instead of routine-cleaning territory.
Why species variation changes hardness, stain risk, and wear patterns
Species is not a trivia detail. It tells me how easily a floor dents, how strongly sunlight shifts its color, and how little moisture it takes before problems start. For density and hardness comparisons, I lean on the USDA Wood Handbook and standard Janka values commonly cited by wood-industry references; for color change and practical use traits, I cross-check those references with what the floor is doing in the room.
Oak is widely used for flooring because it is strong and wear-tolerant, and red and white oak both have established flooring histories; white oak is generally more moisture resistant than red oak because of its closed cellular structure and tyloses, which is why white oak tends to give me a wider margin near entries and kitchens (USDA Wood Handbook; NWFA species references). Cherry is valued for appearance but is notably photosensitive, so uneven sun exposure shows up faster; I have seen rug outlines and furniture footprints appear on cherry sooner than on oak in the same home (USDA Wood Handbook). Mahogany is dimensionally stable and decay resistant in many commercial references, but it also changes color with light exposure, so moisture discipline and sun management still matter. Walnut is a flooring species with good dimensional stability and attractive grain, but it is softer than hard maple or oak in common Janka comparisons, so dents and scratch contrast can be more noticeable depending on sheen. Hard maple is durable in traffic but can show fine finish scratching under side light and can be less visually forgiving when residue or abrasion builds up.
Hardness is only one part of the decision. Finish condition controls the cleaning choice you make today. A harder species with worn-through finish can be more vulnerable in practice than a softer species with a healthy topcoat.
How finish condition matters more than wood species in day-to-day care
Most homeowners clean the finish, not the bare wood. If the finish is intact, routine care is about lifting grit, light grime, and residue without scratching or softening that film. If the finish is thinned, cracked, peeling, or gone in lanes, your options narrow fast.
Three symptoms change the decision. Recurring dullness that comes back right after cleaning, visible gray or pale traffic paths where stain color looks intact but the topcoat looks tired, and spots where water darkens the wood at once. The first may still be residue. The second often points to screen-and-recoat territory. The third suggests finish failure or exposed wood. My field rule is simple: if a damp microfiber test patch looks better for less than a day, or if that patch dries darker at board edges than the surrounding area, I stop maintenance cleaning and reassess for coating failure or contamination in the wood.
📊 Ocooch Hardwoods stocks over 30 species and offers kiln-dried solid hardwood. Source: Ocoochhardwoods.
How to clean and maintain hardwood floors
Clean hardwood floors in this order: remove dry grit first, treat isolated spots second, then do a controlled damp clean only if soil remains. That order cuts scratch risk, keeps residue from smearing, and avoids pushing moisture into joints. Most floor-care mistakes I see come from reversing that order or using too much liquid. For a broader solid-wood routine, I also compare notes with our pillar guides on solid hardwood floor care and hardwood floor maintenance.
The safe order: dry soil removal, spot treatment, then controlled wet cleaning
- Dry remove first. Use a microfiber dust mop or a vacuum set for hard floors, with the beater bar off. Focus on entries, chair zones, pet routes, and traffic lanes.
- Check the finish before using cleaner. If the floor has peeling finish, open seams, cupping, or blackened spots, stop routine wet cleaning and treat the issue as repair assessment.
- Spot-treat visible marks. For a sticky drip or shoe scuff, spray cleaner onto a cloth, not across the whole floor, then wipe the spot. Dry it right away.
- Damp clean the field. Lightly mist a pH-neutral wood-floor cleaner onto the pad or in a small section ahead of the mop. The pad should feel barely damp, never loaded.
- Change pads as they load up. A dirty pad drags grit and lays down film. That is a common reason a floor looks dull right after cleaning.
My standard kit is a flat microfiber mop with two or three washable pads, a canister or stick vacuum with the brush roll off, white cotton cloths for transfer checks, felt pads for furniture, and a labeled wood-floor cleaner. On site, I almost never clean a whole floor before testing one closet edge or a corner behind a chair first. That one-minute test spot has saved me from spreading haze on waxed floors, softening problem finish near a sink, and turning pet-darkened seams into larger stains.
Tools that help and tools that quietly damage finishes
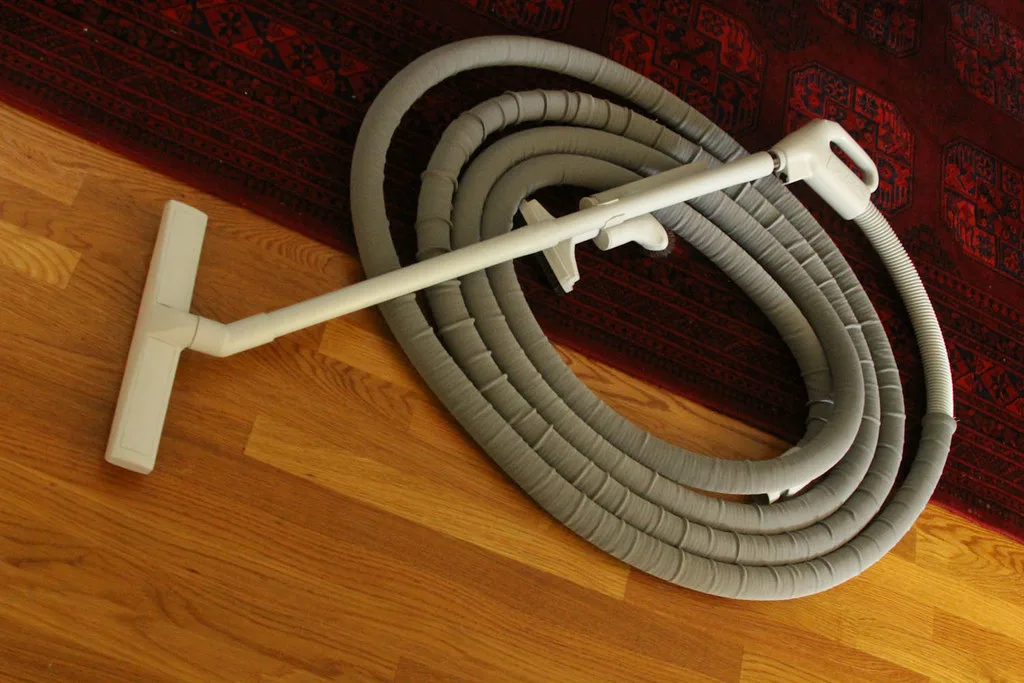
Good tools are simple: a soft dust mop, a vacuum with a hard-floor setting, washable microfiber pads, felt furniture glides, and a cleaner labeled for finished wood floors. They reduce abrasion and keep water in check.
Quietly damaging tools include steam mops, sponge mops that hold too much water, stiff scrub pads, and vacuums that keep the rotating brush engaged. Multi-surface cleaners also cause trouble when they leave glossing agents or soap behind. The floor may look brighter for a day, then show footprints, streaks, and tackiness. Those warnings are not just preference calls; they appear repeatedly in manufacturer care literature for finished hardwood floors, including guidance from major floor and finish brands that specifically warn against excessive water, steam, wax on urethane finishes, and oil-soap residue because of haze, swelling, or recoat-adhesion problems.
How to clean sticky residue, tracked-in grit, and dull film without making it worse
Sticky residue needs targeted cleaning, not more water. Soften it with a cloth lightly dampened with wood-floor cleaner, wipe, then dry. For tracked-in grit, vacuum first and check corners and board edges where fine abrasive dust collects.
Dull film is trickier because dirt is only one cause. If the floor looks cloudy after several cleanings, suspect residue from an incompatible cleaner, wax on a non-wax finish, or a dirty mop pad. Clean a small test area with a fresh pad and the correct cleaner. If the cloudiness remains and lines up with walking paths, the issue is usually finish abrasion rather than dirt. In my own test spots, residue haze usually wipes more evenly and improves immediately with a fresh pad; worn finish stays patchy, especially when I look across the boards in side light from a window.
Choosing a streak-free hardwood mop
A flat microfiber mop with a wringable or spray-dispense system is the top choice for hardwood floors, provided you use low-moisture cleaning to prevent haze, swelling, and a dull finish. Best mop options rank six specific tools based on your floor finish, cleaning frequency, and recurring pad costs.
This matters because the wrong combination of water volume, cleaner type, or dirty pads will permanently damage your finish. The guide breaks down which specific mop models suit daily touch-ups versus deep cleans, helping you match the tool to your polyurethane-sealed or multi-surface floors without guesswork.
What is the best daily, weekly, and seasonal routine?
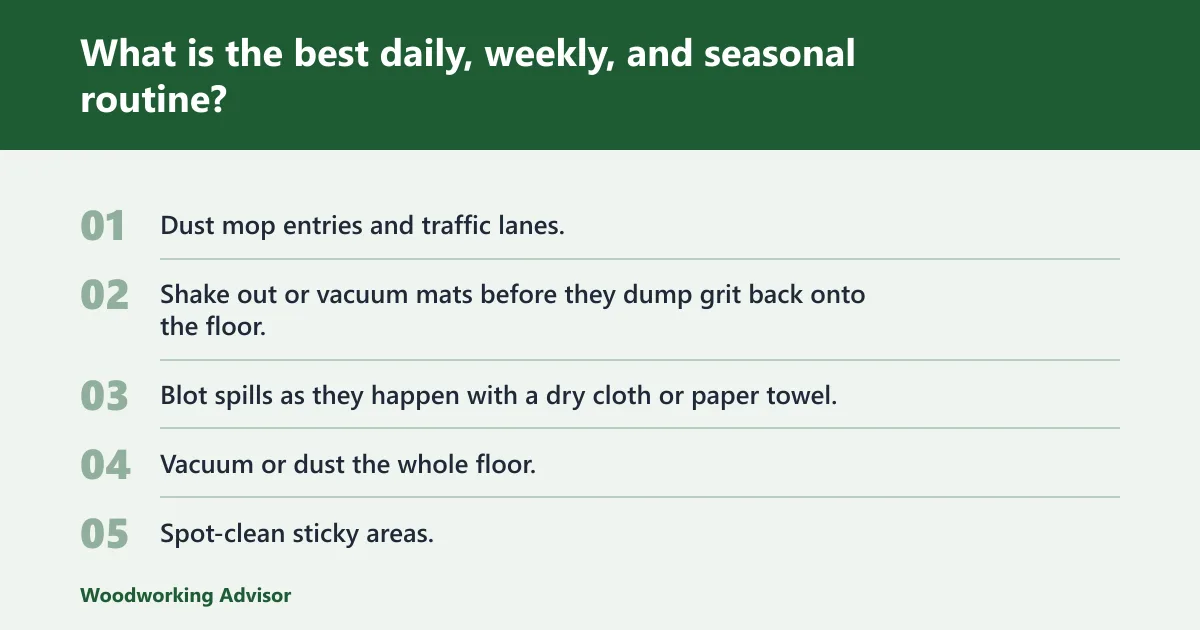
The best routine is frequency by risk, not the same task every day. Dry dust several times weekly, clean weekly in rooms that show film, footprints, or tracked soil, blot spills the minute you see them and dry the spot, inspect monthly, and reset protection seasonally. That schedule keeps grit from grinding into the finish and catches wear before cleaning starts doing harm.
Daily and every-other-day: grit control in traffic lanes and entries
Daily care is mostly about dry soil. In busy homes, entries, kitchen paths, and pet routes should be dusted every day or every other day. In lower-traffic homes, several times weekly is often enough.
- Dust mop entries and traffic lanes.
- Shake out or vacuum mats before they dump grit back onto the floor.
- Blot spills as they happen with a dry cloth or paper towel, then wipe the spot clean and dry it, especially for water, pet accidents, and drink drips.
Weekly: whole-floor cleaning by soil level and household traffic
Weekly cleaning should match what the floor picked up that week. A low-traffic bedroom may need only dust removal. A kitchen, hall, or main living area often needs dry removal plus a controlled damp pass.
- Vacuum or dust the whole floor.
- Spot-clean sticky areas.
- Damp clean only the rooms that still show grime, footprints, or kitchen film after dry cleaning.
- Dry-check the floor afterward for streaks, missed residue, or damp joints.
Monthly and seasonal: inspection, protection resets, and humidity checks
Monthly care is where most preventable wear gets caught. Check felt pads for grit, flattening, or missing pieces. Inspect dining chairs, rolling furniture, pet feeding areas, and sunny strips near glass doors.
Seasonally, look at humidity drift and sun exposure. A commonly used target is roughly 35% to 55% indoor humidity. That range aligns with wood-floor industry guidance for limiting movement and with general indoor-moisture recommendations used to reduce mold and comfort issues, though every house has its own seasonal pattern. I verify it with a small digital hygrometer, one placed in the main living zone and another in a trouble room if needed. Rotate rugs if one side of the room gets strong sun and the other does not. Move or re-pad pieces that have begun to print the finish. If a floor starts to look worn in lanes but still has full stain color, that is often a good point to ask about a screen-and-recoat rather than cleaning harder. For the next step, I usually compare the floor against our hardwood floor refinishing and screen-and-recoat guide.
How do you care for different hardwood species?
Different hardwood species need different caution levels because water resistance, sunlight response, density, and wear visibility are not the same. Finish-safe cleaning stays similar across species, but the margin for error changes. Oak usually gives the widest margin. Cherry and mahogany need tighter sun and moisture control. Walnut and hard maple need traffic-specific attention. When I am unsure how much pressure or moisture a floor will tolerate, I test the least visible board first and adjust from there.
Oak floors: durable and usually forgiving
Oak floors are common for a reason. Oak is a long-established flooring species with good wear performance, and white oak in particular is often favored where a little more moisture resistance is desirable because its structure slows liquid penetration compared with red oak. In homes I maintain, oak usually lets me correct cleaner residue or ordinary soil with the least drama.
Even so, oak is not a license for wet mopping. Worn finish near sinks, exterior doors, and pet bowls still needs fast spill response. Oak’s open grain can also hold grime visually, so a residue-free cleaner matters more than gloss products. For more room-specific detail, I pair this with our oak floor care page.
Cherry and mahogany floors: sunlight color shift and tighter moisture discipline
Cherry wood is used for flooring and other interior projects, but it is notably light sensitive in service. Cherry floors need quick spill cleanup, a lighter touch with wet cleaning, and room layouts that reduce uneven sun fade. On cherry, I have had the best results with shorter damp-clean sections and immediate dry passes, because even slight overuse of cleaner can leave the floor looking patchy in bright afternoon light.
Mahogany is dense, valued for dimensional stability, and often noted as decay resistant, but it also changes color with light exposure. That helps explain why a mahogany floor can be easy to keep physically clean yet still look uneven if rugs never move. Rugs left in one place for long periods can leave strong contrast between covered and exposed zones. For species-specific maintenance schedules, see cherry floor care and mahogany floor care.
Hard maple and walnut floors: traffic durability, scratch visibility, and species cautions
Hard maple handles traffic well when the finish is sound, which is why it is a familiar flooring species. Keep grit down, because fine abrasion dulls the finish long before the wood itself has a problem. Maple can make finish scratches stand out under side light, especially in wide open rooms. I notice this a lot in living rooms with low-angle morning sun, where the floor looks clean from one direction and scratched from another.
Walnut is used for flooring and is prized for color and figure, but common hardness comparisons place it below hard maple and many oak floors, so it can show dents and scratch contrast more readily in active homes. Indoors, routine care is still mostly about grit, furniture movement, and finish preservation. Walnut can also show dents and scratches clearly depending on sheen and traffic pattern. For room-by-room tactics, I would also look at hard maple floor care and walnut floor care.
What should you never use on hardwood floors?
You should never use soaking wet mops, steam mops, harsh chemicals, abrasive pads, wax on polyurethane-finished floors, or residue-heavy multi-surface cleaners unless the finish specifically allows them. Those choices can swell board edges, soften finish, trap dirt, create haze, and turn a maintenance problem into repair work. The “never” here comes from a mix of field experience and repeated manufacturer warnings, not just preference.
Water-heavy methods, steam, and over-wet mopping
Excess water is still the fastest way to push a floor out of maintenance and into repair. Standing moisture finds board edges, joints, and worn finish spots first. Steam adds heat to that moisture load and can stress some finishes even when the floor looks dry moments later. Several major floor-care and finish manufacturers explicitly caution against steam on finished wood because heat and moisture can dull finishes, open seams, or worsen movement-related problems.
Residue-forming cleaners, wax misuse, and incompatible polish products
A floor that looks streaky, smeary, or tacky after cleaning often has too much product on it, not too little. Wax is a classic mistake on factory-finished or site-finished polyurethane floors. Once wax or incompatible polish builds up, future recoating can fail unless the surface is corrected first. That adhesion risk is a standard warning in refinishing practice and in coating manufacturer instructions.
Oil soaps and home mixes are also risky when used by habit rather than finish type. They may leave film, change sheen unevenly, or make later maintenance harder than it needs to be. I have had to strip residue from floors that were not actually dirty at all; they just had months of cleaner buildup that kept grabbing footprints.
Abrasive pads, aggressive vacuums, and DIY mixes that create haze
Scratch damage often comes from tools, not traffic. Scouring pads, stiff brushes, and vacuum heads with active beaters can mark the finish quickly. DIY vinegar-and-water mixes are also poor universal advice. On some floors they leave a dull, light-starved look that gets mistaken for embedded dirt, which leads people to over-clean the same area again and again. My rule is simple: if I would hesitate to rub the tool across a glossy tabletop finish, I do not use it on a wood floor finish either.
How do you protect hardwood floors from scratches and pet damage?
Protect hardwood floors by controlling entry grit, fitting quality felt pads, managing chair movement, trimming pet nails, cleaning pet accidents fast, and keeping food, water, and litter zones contained. Scratch prevention is mostly abrasion control. Pet protection is about moisture timing, odor limits, and stopping finish breaches before the boards absorb contamination. For accidents that have already happened, I usually compare what I see against our pet stain cleanup on hardwood floors guide before deciding whether it is still a cleaning job.
Entry control, furniture glides, and chair movement management
Most scratches start with grit. Put mats outside and inside main entries, then keep those mats clean. Under chairs, use felt or soft glides sized to the leg, and replace them when compressed or dirty.
For rolling office chairs, a chair mat or a different room layout is often safer than asking the finish to take repeated point-load abrasion. Dining chairs are another repeat offender because they move in short, gritty arcs. In one house with walnut floors, replacing dirty felt pads and adding a mat at the patio door improved the look more in two weeks than the previous owner’s monthly polish routine had in a year.
Pet nails, pet bowls, litter scatter, and urine response timing
Pet nails rarely gouge a healthy finish by themselves, but nails plus grit can. Keep nails trimmed. Place feeding stations on a cleanable mat with a breathable underside so trapped water does not sit on the finish for hours.
Urine needs immediate blotting, then a finish-safe cleaner on the surface only. If odor remains after the surface is clean, the liquid likely reached joints, cracks, or worn finish. At that point, cleaning may cut the smell, but it will not reverse absorbed contamination inside the wood. My decision rule is 24 hours: if a cleaned area still smells after fully drying, or if a dark outline reappears at seams, I stop surface cleaning and check for board-level contamination or finish breach.
Sunlight, rugs, and room layout choices that prevent uneven aging
Cherry wood can be harmed by sunlight, and mahogany changes color when exposed to sunlight. That makes rug rotation and furniture shifts part of maintenance, not decoration. Sun-faded zones are not cleaned back to uniform color.
Use rugs where traffic is harsh, but move them now and then in sun-exposed rooms. Otherwise the protected field and the exposed field age at different rates, which becomes obvious when furniture gets rearranged. This matters on oak too, just usually less dramatically than on cherry.
When does maintenance become repair or refinishing?
Hardwood floor cleaning becomes refinishing when the finish no longer separates routine dirt from the wood itself. If traffic lanes stay dull after correct cleaning, if water darkens the surface quickly, or if stains and odor have entered the boards, maintenance has reached its limit. The next step is repair, screen-and-recoat, or full sanding. In practice, I make this call after a test spot, not by appearance alone.
Finish wear symptoms that still qualify for maintenance-only care
Some floors only look tired. If the sheen is uneven from residue, footprints, or cleaner buildup, a change in products and technique may solve it. Light surface scratches that do not catch a fingernail and do not expose bare wood are also usually maintenance issues.
This is the category where less works better. Fresh pads, less cleaner, and better grit control often restore the floor’s look better than stronger chemicals. I have seen “dull finish” complaints disappear after one pass with a clean microfiber pad and a proper wood-floor cleaner because the real problem was loaded pads and too much product.
The screen-and-recoat threshold: when the finish is tired but wood is not exposed
Screen-and-recoat fits floors where the existing finish is worn, lightly scratched, or flattened in traffic lanes, but the stain color remains intact and the wood is not broadly exposed. The finish has lost protection, yet the floor has not crossed into deep damage.
Typical signs include dull lanes that return right after proper cleaning, fine scratch networks, and a floor that soils faster because the topcoat has thinned. This step renews the protective film without full sanding, assuming no wax, incompatible polish, or deep contamination blocks adhesion. That decision framework is standard in wood-floor maintenance and recoating guidance. If I can still clean a small test patch to uniform color but not to uniform sheen, I start thinking recoat rather than deeper cleaning.
The full sand-and-refinish threshold: exposed wood, deep damage, stains, cupping, and repeated failure
Full sanding and refinishing enter the picture when bare wood is visible, deep scratches cut through color and finish, black staining has set in, pet odor keeps returning, or cupping and moisture damage are active concerns. Local board repair may come first if damage is isolated.
If cleaning keeps failing in the same spots, look for the reason: breached finish, absorbed contamination, or movement from moisture. More cleaner will not fix any of those. On floors I have checked after repeated homeowner cleaning attempts, the giveaway is usually one of three things: the white cloth picks up stain color, the board edge stays dark after drying, or the smell comes back as soon as the room warms up.
Hardwood floor care matrix by condition
How to use the one-page matrix
Start with the floor’s present condition, not the product already sitting in the closet. Then match that condition to the safest action, the wrong move to avoid, and the point where the issue shifts from maintenance to repair or refinishing. This is the quick decision sheet many guides leave out.
One-page hardwood floor care matrix
| Floor condition | Safest action | Mistake to avoid | Maintenance, repair, or refinishing? |
|---|---|---|---|
| Dusty | Dry dust mop or hard-floor vacuum with beater bar off; focus on entries and traffic lanes first | Wet mopping before grit removal, which drags abrasive soil across the finish | Maintenance |
| Dull | Test for residue with a fresh pad and pH-neutral wood-floor cleaner; inspect whether dullness follows traffic lanes | Treating all dullness as dirt and adding stronger cleaner or polish | Maintenance if residue; screen-and-recoat if finish is worn but color remains intact; refinishing if wood is exposed |
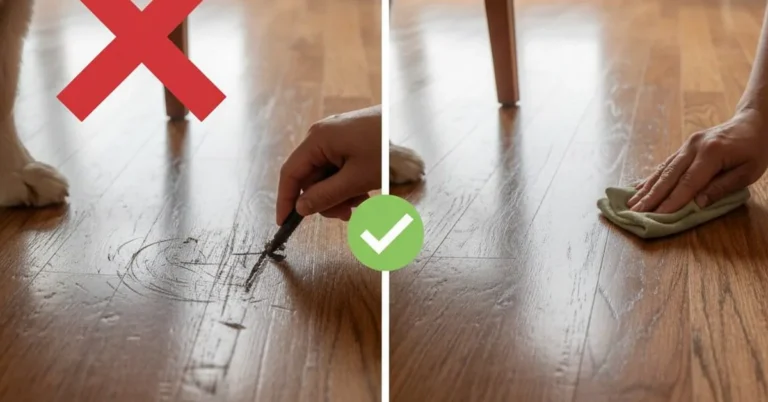
| Scratched | Separate light finish scuffs from wood-level gouges; reduce grit and protect furniture before any touch-up | Using abrasive pads or assuming every scratch needs full sanding | Maintenance for light finish marks; repair for isolated gouges; refinishing for widespread through-finish wear |
| Swollen | Dry the area, stop wet cleaning, identify the moisture source, and monitor board edges and joints | More water, steam, or heavy cleaners on a floor already reacting to moisture | Repair if localized and recent; refinishing only after moisture issues are resolved and surface damage is assessed |
| Sticky | Spot-clean with cleaner on a cloth, then damp-clean with fresh pads to remove residue film | Layering more product, using oil soap, or switching to wax for shine | Maintenance unless finish contamination blocks recoat adhesion |
| Pet-soiled | Blot at once, surface-clean, dry thoroughly, and inspect for joint entry, odor, or dark staining | Flooding the area with deodorizer or assuming odor can always be cleaned out | Maintenance if caught on the finish; repair if localized board contamination begins; refinishing or board replacement if stain and odor have entered the wood |
Dusty, dull, scratched, swollen, sticky, and pet-soiled floor paths
Use the table in sequence. Dusty becomes a dry-cleaning task. Sticky becomes a residue task. Dull must be split into residue versus finish wear. Scratched must be split into finish-level versus wood-level damage. Swollen means moisture first, cosmetics later. Pet-soiled means immediate surface care, then an honest check for penetration. When I walk a floor with an owner, this is almost exactly the sequence I use.
Failure cases homeowners run into most
Why the floor still looks dull after cleaning
The common causes are cleaner residue, dirty pads, abrasion in traffic lanes, or old polish interfering with clarity. If the floor is bright at the edges but flat in walking paths, that points more toward finish wear than dirt. If the haze is everywhere, suspect product film. A quick side-light check near a window usually tells me which problem I am dealing with faster than another round of cleaning.
What causes streaks, haze, and tacky residue
Streaks come from too much cleaner, a pad that is already loaded, or a floor that was never dry-cleaned first. Haze often follows incompatible products or hard-water minerals left by over-wet mopping. Tacky residue usually means soap or polish buildup, not a floor asking for more product. Manufacturer care guides and refinishing practice both back this up, especially where recoat adhesion is concerned.
What swelling, black staining, or recurring odor usually means
Swelling means moisture got where routine cleaning should never go. Black staining points to prolonged moisture and reaction in the wood, often around pet accidents, plant pots, exterior doors, or sink areas. Recurring odor after surface cleaning usually means the contamination passed through a weak finish into cracks, joints, or the wood itself. In my experience, black staining and odor together almost always mean the problem is past basic maintenance.
Frequently asked questions
how to clean and maintain hardwood floors
Start with dry dust removal, then treat isolated sticky or dirty spots, then damp-clean only with a pH-neutral wood-floor cleaner and a barely damp microfiber pad. Keep indoor humidity at 35-55%, blot spills at once and dry the area, and inspect finish wear in traffic lanes so cleaning stays maintenance rather than turning into refinishing. For a broader routine, I also use solid hardwood floor care as the main reference point.
are hardwood floors hard to maintain
Hardwood floors are manageable when the finish is intact and grit control is consistent. They become demanding when traffic is high, pets are present, moisture is common, or the species is more sun- or water-sensitive, such as cherry. Most difficulty comes from delayed maintenance and product mistakes, not from routine dusting itself.
what is the best daily care routine for hardwood floors
The best daily routine is short: dust high-traffic lanes and entries, check for spills, and keep grit from staying underfoot. In pet homes, inspect feeding and accident-prone areas every day. Dry care done often is safer than occasional aggressive cleaning, and it cuts scratching more than any after-the-fact polish.
how often should hardwood floors be cleaned
Dry dusting should happen several times weekly, and in busy homes it may make sense every day or every other day in entries and main paths. Damp cleaning is usually weekly in rooms that show soil or as needed by visible grime. Spot-clean spills at once, and do a monthly inspection of pads, traffic lanes, and finish condition.
what should you never use on hardwood floors
Never use soaking wet mops, steam mops, abrasive scrub pads, harsh chemicals, wax on polyurethane-finished floors, or residue-heavy multi-surface cleaners unless the finish specifically calls for them. Those methods can swell joints, soften the finish, leave haze, and create adhesion problems if the floor later needs a screen-and-recoat.
when does hardwood floor cleaning become refinishing
Cleaning becomes refinishing when the floor stays dull after correct cleaning, the finish is worn through in traffic lanes, water darkens the surface quickly, stains have entered the wood, or odor keeps returning from pet damage. If color remains intact and wood is not exposed, screen-and-recoat may still be enough. I make that call with a test spot and a dry-cloth check, not guesswork.
how do you care for oak floors
Oak floors are usually among the most forgiving, but I still treat them as finish-first surfaces: dry clean often, use minimal liquid, and wipe spills fast near sinks, exterior doors, and pet bowls. White oak generally gives a little more moisture margin than red oak, but neither species should be wet-mopped. For a deeper routine, I would pair this with oak floor care.
how do you care for cherry floors
Cherry floors need normal grit control plus tighter sun management. I keep rugs rotating, clean smaller sections at a time, and dry each section promptly because cherry tends to show uneven light exposure and cleaning patchiness faster than oak. If the room gets strong sun, furniture and rug placement matter almost as much as cleaner choice.
how do you care for hard maple floors
Hard maple handles traffic well, but it can show fine finish scratches and residue under side light. My best results on maple come from frequent dry dusting, clean microfiber pads, and avoiding any cleaner that leaves gloss or film. If the floor looks different from different angles, check for abrasion before assuming it is dirty.
how do you care for mahogany floors
Mahogany floors respond well to low-moisture cleaning, but they also change color with light exposure. I use the same safe cleaning order as on other species, then pay extra attention to sun patterns, rug rotation, and spill timing. A floor can be perfectly clean and still look uneven if one area has aged in stronger light.
how do you care for walnut floors
Walnut floors benefit from gentle, frequent grit removal because they can show denting and scratch contrast more easily than harder species. I avoid aggressive traffic at entries, keep felt pads fresh, and clean pet routes often. On darker walnut, residue and scratches can both read as “dullness,” so test spots help a lot.
how do you clean pet stains from hardwood floors
Blot immediately, clean the surface with a finish-safe wood-floor cleaner, and dry the area thoroughly. If odor returns after drying, or if you see dark seams or blackening, the urine likely moved past the finish into joints or wood fibers. At that point, I stop surface cleaning and use a repair-or-refinish decision instead of adding more liquid. For the full process, see pet stain cleanup on hardwood floors.
what humidity is best for hardwood floors
A practical target is about 35% to 55% indoor relative humidity, which lines up with common wood-floor and wood-material guidance for limiting excessive seasonal movement. I monitor this with a hygrometer rather than guessing, because repeated swings matter as much as the number itself. If a house lives outside that range for long periods, gaps, cupping, and finish stress become more likely.
what cleaners are safest for finished hardwood floors
The safest cleaners are products labeled for finished wood floors, used sparingly with microfiber rather than with a soaking mop. I avoid steam, oil soaps, wax on polyurethane, and heavy multi-surface products unless the finish maker specifically allows them. My default is always to test one hidden section first and look for haze, tackiness, or color transfer before doing the whole room.
Sponsored / affiliate links. As an Amazon Associate I earn from qualifying purchases. I may earn additional commission from eligible campaigns.