How to Stop MDF Joints Cracking: Find the Real Cause and Fix It
An MDF joint that cracks is usually not a sign of weak board. It is one of four separate failures: a paint film cracking over a seam that moves, a glue line starved by the thirsty MDF edge, a screw that split the core, or an unsealed edge that swelled. Each one has a different fix, and using the wrong one is why the same joint reopens a month later.
This guide helps you work out which failure you have, then stop it. It covers sizing the edge before glue, choosing a joint that suits a board with no grain, using caulk instead of hard filler on painted seams, and repairing a joint that has already opened. Splitting at screws and bowing of whole panels have their own pages, so here they only get the part that matters for joints: preventing MDF splitting and stopping MDF warping.
Why MDF Joints Crack: Four Different Failures
Best Flexible Seam Caulk Pick
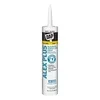 |
DAP Alex Plus Acrylic Latex Caulk with Silicone (10.1 oz) A paintable, flexible caulk is the usual fix for a painted MDF seam that keeps opening up, because it moves with the joint instead of cracking like hard filler.
|
Look at where the crack sits before you reach for glue or filler. The location tells you what failed.
| What you see | What is really failing | What fixes it |
|---|---|---|
| A fine line along a painted seam or mitre, board itself intact | The paint or hard filler film. The joint moves a little with humidity and the rigid film cannot follow | Flexible paintable caulk in the seam, then repaint |
| The two parts pull apart and the glue face looks dry, chalky or fuzzy | Glue line starvation. The bare MDF edge soaked up the glue and left almost nothing in the joint | Size the edge with thinned glue first, then re-glue with clamps |
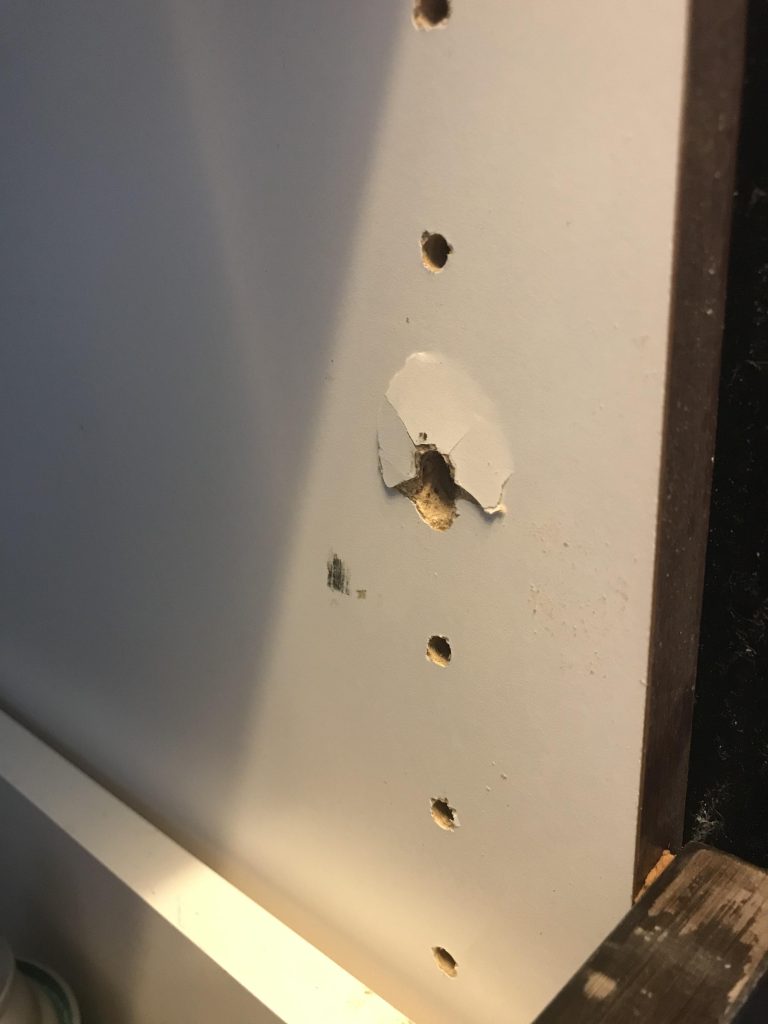
| A crack that runs out from a screw, or a bulge at the edge | Core split by a screw that was too thick, too close to the edge or driven without a pilot hole | Pilot holes, correct edge distance, or a fastener made for MDF |
| Swollen, crumbly edge with a gap opening at the joint | Water got into an unsealed edge and the core swelled | Seal every cut edge, keep the room dry, replace the swollen section |
Many guides tell you to buy denser or moisture-resistant MDF to stop joints cracking. That helps with swelling, but it does nothing for a starved glue line or a rigid paint film, which are the two most common causes on finished furniture and trim. Switching boards without changing the joint just moves the crack to a more expensive panel.
Size the Edge Before You Glue It
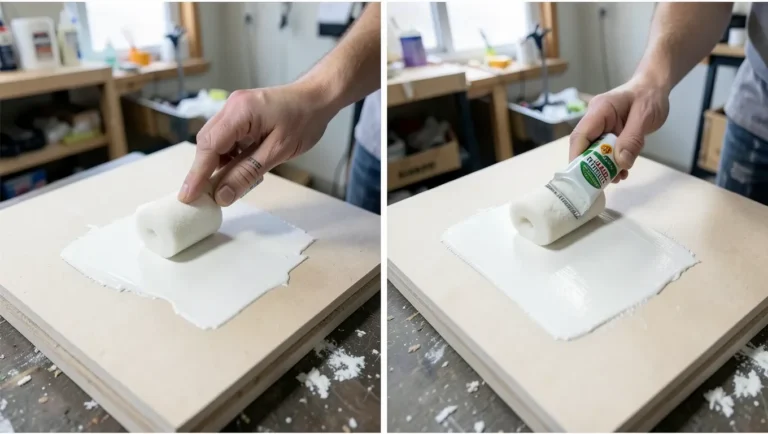
MDF has a dense, resin-rich skin on both faces and a softer, more porous core. The moment you cut it, the core is exposed along the edge, and it drinks glue like a sponge. If you spread PVA straight onto a cut edge and clamp it, much of the glue disappears into the fibres before it can form a film, and the joint ends up weak even though it looked wet when you clamped it.
The fix is called sizing, and it takes a couple of extra minutes:
- Thin standard PVA wood glue with a little water, roughly one part water to one part glue, and brush a thin coat onto each cut edge that will be joined.
- Let the sizing coat dry until it is tacky or dry to the touch. It seals the open fibres.
- Apply undiluted glue over the sized edge, join the parts and clamp them.
- Wipe squeeze-out at once with a damp cloth, because dried glue leaves a hard bead that stops paint or filler sitting flat.
Glue MDF face to face or edge to face wherever you can, and avoid relying on glue alone for an edge-to-edge butt joint. The edge of MDF is a weak gluing surface, so the joint needs mechanical help from a biscuit, dowel or screw.
Pick a Joint That Suits a Board With No Grain
Solid wood joints rely on long grain fibres to carry load. MDF has none, so joints that work in oak can fail in MDF. This table compares common joints on a shelf or cabinet carcass. The ratings are practical guidance from how the material behaves, not lab test figures.
| Joint | Crack resistance in MDF | Notes |
|---|---|---|
| Plain butt joint, glue only | Poor | Edge is starved of glue. Only for light, non-structural trim |
| Butt joint, glue plus screws | Fair | Needs pilot holes and screws well back from the edge |
| Biscuit or dowel with glue | Good | Adds surface area and alignment; size the slots and holes first |
| Confirmat screw with glue | Good | Purpose-built for particleboard and MDF carcasses; coarse thread, needs a stepped pilot hole |
| Pocket screw into an edge | Fair to poor | Fine-thread pocket screws hold poorly in MDF edges; use the coarse-thread version if you must |
| Rabbet or dado with glue | Best | Face-to-face gluing area, and the shoulder carries load so the fasteners do less work |
If you are choosing between these for a specific project, the guide to the best way to join MDF compares them in more detail, and the guide to the best glue for MDF covers adhesives. A standard PVA such as Titebond Original or Titebond II is normally enough for indoor MDF joints.
Screws and Fasteners Without Splitting the Core
A screw acts as a wedge in MDF. Drive it into an unprepared edge and the core splits along the fibres, often invisibly, and the joint cracks later under load or humidity change. Four habits prevent most of it:
- Pilot hole every screw. A pilot slightly smaller than the screw core diameter lets the threads bite without pushing the fibres apart.
- Keep screws away from the edge. A screw driven into the edge of a panel is far more likely to split it than one driven into the face, so keep fasteners well back from any cut edge.
- Use the right screw. For carcass joints, confirmat screws are made for this material: a typical 7 mm confirmat uses a 5 mm pilot for the threaded part, but follow the maker’s chart for your exact screw.
- Stop when the head is flush. Over-tightening crushes the fibres around the screw, and the crushed zone is where the crack starts.
Pilot hole sizes, edge distances and a full split repair are covered in the MDF splitting guide. If a screw hole has already stripped out, see how to repair MDF screw holes.
Painted Seams: Use Caulk, Not Hard Filler
This is the cause most guides miss. On painted MDF trim, baseboard and built-ins, the crack along the seam is often just the paint. Hard filler, spackle or a thick build of paint forms a rigid film. The board underneath swells and shrinks slightly with the seasons, the seam opens a fraction, and the rigid film cracks along the line. Filling the crack with more hard filler repeats the cycle.
The fix is to let the seam move and bridge it with something flexible:
- Cut back any loose or cracked filler with a putty knife and vacuum the seam clean.
- Prime any bare MDF at the seam. Bare edges soak up caulk and paint unevenly.
- Run a thin bead of paintable acrylic latex caulk along the seam, and smooth it with a damp fingertip or a caulk tool so it is nearly flush.
- Let it cure to the maker’s directions, then paint. Do not skip the wait, because painting over wet caulk can wrinkle the film.
- For future joints, glue and pin mitres first so they stay closed, and only caulk the last hairline gap.
Caulk suits hairline seams. A gap wider than roughly a quarter inch needs the parts re-fitted or a proper backing, because thick caulk shrinks and sags as it cures. On inside corners of trim, coping the joint instead of mitring it usually hides small seasonal movement better.
Seal Edges and Control Humidity
Moisture is the slow driver behind every crack in the table above. Cut MDF edges take on moisture far faster than the sealed faces, so an unsealed edge swells first and pushes on the joint. Prime or size every cut edge before assembly and paint, and seal any edge you cut afterwards. The guide to sealing MDF covers primers and edge sealers.
Room conditions matter too. Aim for indoor humidity of roughly 35 to 55 percent and avoid storing MDF against an outside wall or on a concrete floor. A cheap hygrometer tells you what the room is actually doing. For general moisture background, see what moisture level is acceptable in wood.
How to Repair a Joint That Has Already Cracked
Match the repair to the failure you identified in the table:
Cracked paint or filler along a seam
Follow the caulk steps above. There is no need to open the joint.
Glue line has separated
Open the joint as far as it allows, scrape out old glue and crumbs, and size both edges with thinned PVA. Let the sizing dry, apply fresh glue, and clamp until the glue sets. Add a biscuit, dowel or screw if the original joint was glue alone.
Split or swollen core
A split near a screw can often be glued and re-drilled; a swollen edge cannot be shrunk back, so trim it off or replace the piece. How to fix MDF wood walks through filling damaged edges and surfaces.
Safety note: MDF dust is very fine and the board is bonded with resin that can contain formaldehyde, so wear a well-fitted dust mask (N95 or better) and use dust extraction when you sand or cut it.
Frequently Asked Questions
Why do my MDF joints keep cracking?
Most often the joint moves slightly with humidity and something rigid over it cannot follow: hard filler, thick paint or a glue line that was starved. Check the crack location against the table above and fix that specific cause.
What is the best glue to stop MDF joints cracking?
A standard PVA wood glue such as Titebond Original or Titebond II works for indoor MDF joints. Size the cut edge first with thinned glue, because bare MDF edges soak up glue and leave the joint weak.
Can you fill a cracked MDF joint with wood filler?
Wood filler suits small chips and screw holes but is rigid, so on a moving seam it usually cracks again. Use flexible paintable caulk for painted seams, and re-glue a joint whose glue line has failed.
Does moisture-resistant MDF stop joints cracking?
It helps against swelling, but it does not fix a starved glue line, a split from a screw or a paint film cracking over a moving seam. Sealed edges and the right joint matter more than the board grade.
Conclusion
Diagnose the crack first: a paint line, a dry glue face, a screw split or a swollen edge. Then apply the matching fix: flexible caulk, edge sizing with proper clamping, pilot holes and edge distance, or edge sealing and humidity control. Choose joints that give glue and screws something to hold, and MDF joints will stay closed for years.
Sponsored / affiliate links. As an Amazon Associate I earn from qualifying purchases. I may earn additional commission from eligible campaigns.