Pre-Cut Herringbone Wood Floors: Cost, Waste & Install Guide
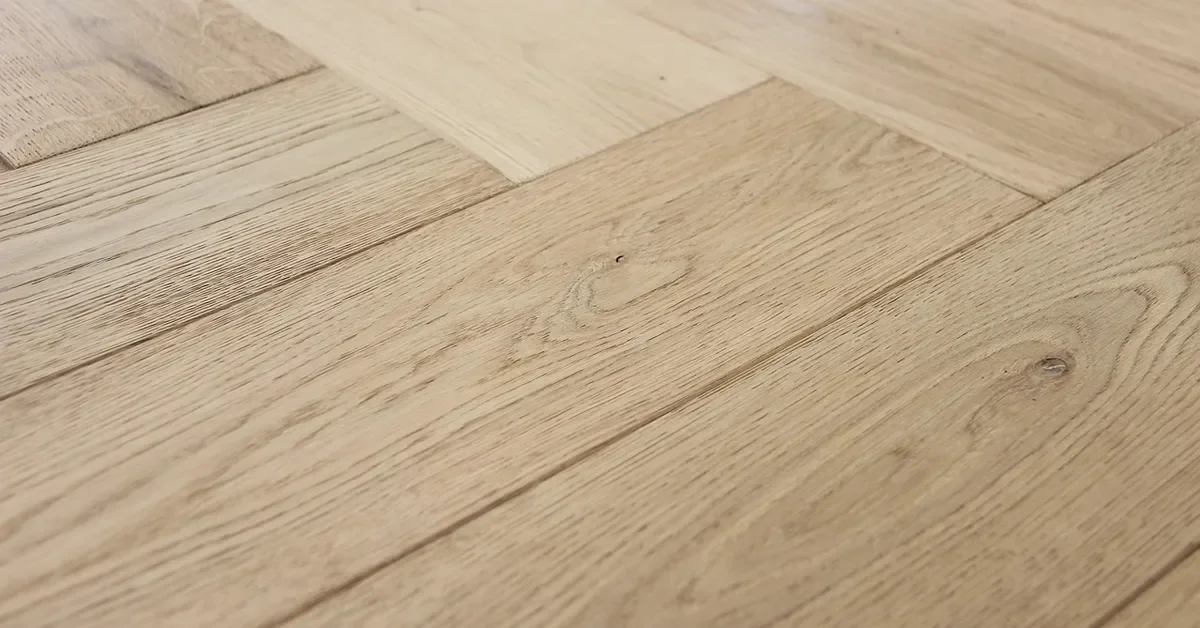
Pre-cut herringbone wood floors are factory-milled rectangular blocks, commonly engineered oak with a 4 mm wear layer, laid at 90-degree angles to form a zigzag. Order at least 15% extra, not the usual 10%, because the pattern eats offcuts, and expect the layout to be harder than the blocks suggest. This guide covers herringbone versus chevron, solid versus engineered, sizes, waste, real cost ranges, and the installation steps that keep the pattern straight.
What Are Pre-Cut Herringbone Wood Floors?
Best Floor Install Kit Pick | |
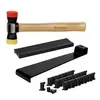 |
Goldblatt Laminate Flooring Tools, Professional Wood LVP Installation Kit A 12 oz double-head mallet, tapping block, pull bar and 30 expansion spacers: the small hand tools that close tongue-and-groove herringbone joints without denting the edges.
|
As an Amazon Associate we earn from qualifying purchases.
Herringbone flooring is a parquet pattern: identical rectangular blocks, each end square-cut, set so every block meets its neighbor at 90 degrees. The name comes from the skeleton of a herring. “Pre-cut” means the blocks are cut to size and calibrated in the factory, usually by CNC, and typically milled with grooves on three sides and a tongue on one long side so they lock together.
Here is the part most product pages skip: pre-cut does not mean easy. It removes the cutting and grooving of every piece, which is the slowest part of a site-built herringbone floor, but the hard part is still the layout. Many tongue-and-groove herringbone products, laminate ones included, ship as left-hand (A) and right-hand (B) planks that are mirror images and cannot be swapped, so you have to build the pattern in sequence. Check the carton labels before you open the first box.
Herringbone vs Chevron: What Actually Changes
The two get mixed up constantly, and some listings use the words loosely. The real difference is the end cut, and it changes both the look and the installation.
| Feature | Herringbone | Chevron |
|---|---|---|
| End cut | Square, 90 degrees | Angled, usually 45 degrees |
| Pattern | Staggered, broken zigzag | Continuous V-shape |
| Look | Traditional, textured | Sleek, uniform |
| Layout | Blocks meet at right angles, offset along the row | Point-to-point V that must line up exactly down the room |
If you are still weighing this pattern against other parquet styles, our parquet vs hardwood flooring comparison covers how block floors differ from ordinary strip flooring on cost and durability.
Solid, Engineered or Laminate: Which Herringbone Construction?
Engineered wood herringbone
Engineered blocks bond a real hardwood wear layer to a layered plywood core. The standard wear layer is 4 mm, with 5 mm and 6 mm options on some lines. The layered core is more stable, which is why engineered is the usual recommendation over radiant heat and for glue-down over concrete. Most pre-cut herringbone sold today is engineered.
Solid wood herringbone
Solid blocks are one piece of hardwood such as oak, walnut or maple. They can be sanded and refinished many times, but they move more with humidity. Under National Wood Flooring Association guidance, the moisture content of the wood and its subfloor should be within 2 percentage points for wide solid flooring (3 in or wider) and within 4 for narrower strips, so acclimation matters more than it does with engineered.
Laminate and vinyl herringbone
Laminate and rigid vinyl planks copy the pattern with a printed surface and click-lock edges. They cost less and tolerate moisture better, but the wear layer cannot be sanded, so a deep gouge means replacing planks rather than refinishing.
Plank Sizes and Wear Layer: What to Look For
Herringbone sold in the US spans a wide range. One supplier lists blocks from 2 1/4 in x 9 in up to 8 in x 40 in, in widths of 2 1/4, 3, 4, 5, 6, 7 or 8 in, and a 3.375 in x 20 in block is a commonly sold size. Length is generally proportional to width.
| Choice | Typical range | What it changes |
|---|---|---|
| Block width | 2 1/4 in to 8 in | Narrow reads busy and traditional; wide reads bold and needs more room |
| Block length | 9 in to 40 in | Longer blocks make a larger, more open pattern |
| Wear layer | 4 mm standard, 5 to 6 mm optional | Thicker layer allows more sanding on engineered floors |
| Edge | Tongue and groove, grooves on three sides | Locks blocks together; needs a tapping block |
How Much Herringbone Flooring Should You Order?
This is the number that catches people out. A straight-plank floor is usually ordered at 10% over the room area. Herringbone is not: the diagonal layout leaves triangular offcuts at every wall, and This Old House says to figure on at least 15% waste. A supplier of herringbone flooring gives 10% to 15%, with at least 15% for diagonal installations.
| Room area | Straight plank (+10%) | Herringbone (+15%) | Extra to buy |
|---|---|---|---|
| 100 sq ft | 110 sq ft | 115 sq ft | 5 sq ft |
| 200 sq ft | 220 sq ft | 230 sq ft | 10 sq ft |
| 400 sq ft | 440 sq ft | 460 sq ft | 20 sq ft |
Herringbone blocks often come from a specific production lot, and reordering later can mean a visible color or size mismatch. Buying the extra up front is cheaper than a second shipment, and leftover blocks are useful for future repairs.
What Pre-Cut Herringbone Costs
Prices move, so treat these as September 2026 published estimates rather than quotes. Basic engineered wood installation runs about $8.25 to $13.32 per sq ft installed, and one cost guide puts a herringbone layout near $12 per sq ft for any species. This Old House reported about $12 per sq ft for its own herringbone floor. The labor premium is the wide variable: sources quote roughly 30% more than straight planks, while our own wood floor installation cost guide notes that herringbone or chevron can double labor because every board is cut and fitted individually.
For a wider budget picture, see the labor cost to install wood flooring breakdown and the new hardwood floor cost by home size guide. Get at least two written quotes that state the pattern, the overage percentage and whether subfloor prep is included.
How Pre-Cut Herringbone Is Installed
Glue-down is the primary method for engineered herringbone, sometimes combined with nailing. Tongue-and-groove blocks are tapped together and, on glue-down jobs, bonded to the subfloor. Always follow your floor manufacturer’s instructions for adhesive and gap size, since they override general guidance.
- Check the subfloor: for glue-down over a wood subfloor, the flatness standard is 3/16 in over 10 ft (or 1/8 in over 6 ft). Low spots weaken the bond and high spots wear faster.
- Acclimate the blocks: leave cartons in the room for the time the manufacturer specifies; one supplier says 24 to 48 hours for engineered.
- Find the centerline: snap a chalk line down the length of the room, then use a trammel or framing square to mark a perpendicular line. Working lines at 45 degrees guide the first rows.
- Build the pattern from the center out: start with the first A and B blocks on the centerline and work outward so the pattern stays square and the cuts land at the walls.
- Tap joints closed: use a tapping block and mallet, never a hammer on the block edge, and keep a perimeter gap with spacers.
- Trim the walls last: cut the partial blocks at the edges to fit the gap, then cover the gap with baseboard or shoe molding.
One reference point on difficulty: This Old House rated its herringbone install 5 out of 5 for difficulty and took about two full days. Its method used site-cut slats, a 3/4 in plywood nailing blank, and a nailer with nails about every 5 in through the tongue, which is a different route than pre-cut click or glue-down blocks, but the layout lessons carry over.
Common Herringbone Mistakes
- Starting at a wall. Walls are rarely straight, so the pattern drifts. Start from a centerline.
- Ignoring a bumpy subfloor. An uneven floor can force you to tear out and start over, so fix flatness before the first block.
- Under-ordering. Ordering 10% instead of 15% is the most common way to run short mid-room.
- Mixing up A and B blocks. On mirrored products the two are not interchangeable, so keep them in labeled stacks.
- Skipping the perimeter gap. Wood and engineered floors need room to move; use spacers set to the manufacturer’s gap.
Caring for a Herringbone Floor
Care is the same as any wood floor: sweep or vacuum with a soft head, wipe spills quickly, and use a cleaner approved for your finish. Grit is what wears the finish, so keep it off the floor. Our hardwood floor care guide covers cleaners and routines. Refinishing depends on wear-layer thickness, so check the block spec first; see can you refinish parquet flooring for how sanding works on block floors.
Is Pre-Cut Herringbone Worth It?
It is worth it if you want the pattern and will pay for a skilled installer or have the patience for a slow, precise DIY job. It is not worth it on a tight budget or in a room with many angles, where the 15% waste and extra labor add up fast. If you like the look but not the cost, a border or inlay is a cheaper way to get pattern; see hardwood floor border ideas, and for the wider picture start with our wood flooring guide.
FAQs About Pre-Cut Herringbone Wood Floors
What is the difference between herringbone and chevron flooring?
Herringbone uses rectangular planks with square ends that meet at a 90-degree angle, giving a staggered zigzag. Chevron uses planks cut at 45 degrees so the ends meet in a continuous V. Herringbone tends to look more traditional and chevron more uniform and modern.
How much extra flooring should I order for herringbone?
Order at least 15% extra. This Old House recommends at least 15% waste for herringbone, compared with the usual 10% for straight-lay floors, and one flooring supplier gives a 10% to 15% range with at least 15% for diagonal layouts. On a 200 sq ft room that means buying about 230 sq ft.
Can you install pre-cut herringbone flooring yourself?
Yes, but it is one of the harder flooring jobs. This Old House rated its herringbone installation 5 out of 5 for difficulty and took about two full days. Pre-cut blocks remove the sawing of every piece, but you still need a flat subfloor, an accurate centerline and patience with the layout.
Is herringbone flooring more expensive than straight planks?
Yes. Herringbone uses more material because of the extra overage and takes longer to lay. Published September 2026 estimates put basic engineered wood installation around $8.25 to $13.32 per sq ft, with herringbone commonly quoted near $12 per sq ft or higher, and labor premiums quoted anywhere from about 30% up to double.
Can herringbone wood flooring go over radiant heat?
Engineered herringbone is the usual choice over radiant heat because its layered core is more dimensionally stable than solid wood. One supplier also suggests rift and quartered sawn boards for heated floors. Always check the manufacturer’s maximum surface temperature and installation method before you buy.
Sponsored / affiliate links. As an Amazon Associate I earn from qualifying purchases. I may earn additional commission from eligible campaigns.