Snowman Wood Decorations: Creative DIY Ideas
Making your own festive decorations can be a lot of fun, especially when the winter holidays arrive. Sometimes, starting a new craft project can feel a little tricky, especially if you’re new to woodworking or crafting. But don’t worry!
If you’ve been looking for easy ways to create charming Snowman Wood Decorations: Creative DIY Ideas, we’ve got you covered. We’ll walk you through simple steps to bring your wooden snowman visions to life. Get ready to make some wonderfully unique decorations!
Creative Snowman Wood Decorations You Can Make
This section is all about inspiring you with a variety of snowman wood decoration projects. We will explore different styles and skill levels, so there is something for everyone. You will find ideas that are quick to assemble and others that allow for more detailed customization.
The goal is to show you how versatile wood can be for holiday crafting. Many of these projects use common materials you might already have at home or can easily find at your local craft or hardware store. Think about how these decorations can add a personal touch to your home or be thoughtful handmade gifts.
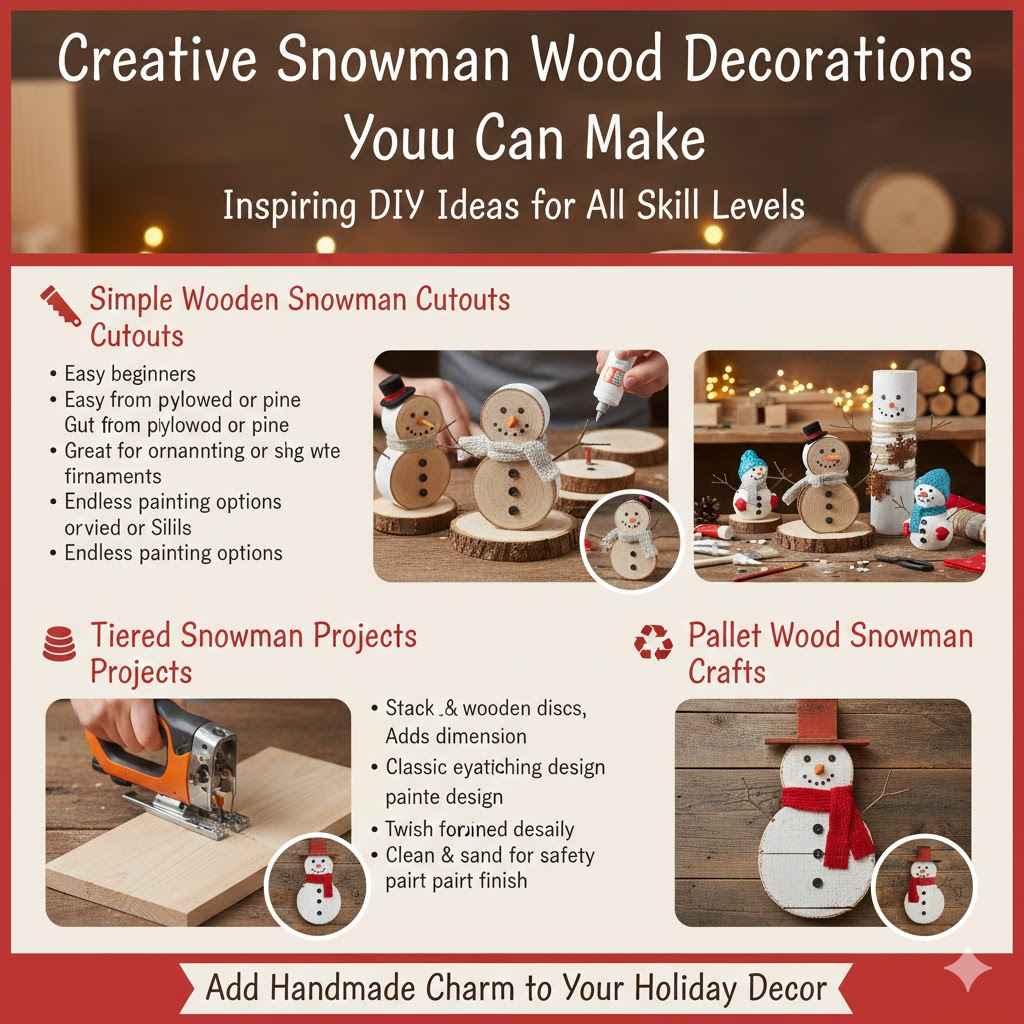
Simple Wooden Snowman Cutouts
One of the easiest ways to start making snowman wood decorations is by cutting out basic snowman shapes. This method is perfect for beginners and can be done with minimal tools. You can use a simple jigsaw to cut out the shapes from a piece of plywood or pine.
Sanding the edges smooth is an important step for safety and a polished look. Once cut and sanded, these shapes can be painted and decorated in countless ways.
Consider the size of your cutouts. Small ones can become charming tree ornaments or part of a decorative garland. Larger cutouts can stand on your porch or be placed on your mantelpiece.
The smooth surface of the wood provides an excellent base for paint, markers, or even fabric scraps. Adding details like button eyes, a carrot nose, and a scarf is where the real fun begins. These simple cutouts are a fantastic starting point for anyone wanting to explore the world of snowman wood decorations.
Tiered Snowman Projects
Tiered snowman designs offer a bit more visual interest and can create a commanding presence. These often involve stacking two or three circular wooden pieces of decreasing size on top of each other to form the snowman’s body. You can use pre-cut wooden discs or cut your own from plywood.
Attaching them securely is key, using wood glue and perhaps small screws for added stability, especially for larger projects.
Painting these tiered snowmen allows for distinct color choices for each section, making the design pop. A classic black hat on the top tier, a scarf around the middle, and a solid white base can create a striking look. Adding embellishments like twigs for arms, small painted dots for buttons, and a charming red or orange carrot nose completes the classic snowman aesthetic.
These can be made freestanding or designed to hang. The layered effect adds dimension that flat designs cannot achieve, making them a popular choice for eye-catching snowman wood decorations.
Pallet Wood Snowman Crafts
Repurposing pallet wood is a popular and eco-friendly way to create rustic snowman decorations. Pallet wood often has a weathered look that lends itself perfectly to a charming, country-style snowman. You can cut individual planks to create a flat snowman shape or build a more dimensional, layered snowman.
The natural imperfections of the wood, like knots and grain, add character to the final piece.
When working with pallet wood, ensure it has been properly cleaned and sanded to remove any splinters or rough spots. You can leave the wood natural for a more primitive look or paint it. Consider using chalk paint for a soft, matte finish or distressing the paint after application for an antique feel.
Twigs work wonderfully for arms on pallet wood snowmen, and painted features can be simple and bold, complementing the rustic texture of the wood. These creations embody the spirit of handmade and are a great way to add character to your festive displays.
Painting and Decorating Your Wooden Snowmen
Once you have your basic wooden snowman shapes, the next exciting step is bringing them to life with paint and decorations. This is where your creativity truly shines. The type of paint you use and the decorative elements you choose will greatly influence the final look of your snowman wood decorations.
Whether you aim for a classic, cheerful snowman or something more unique, painting and decorating are key to achieving your desired aesthetic.
Choosing the Right Paints
For wood decorations, acrylic paints are a fantastic choice. They are water-based, easy to clean up, and dry relatively quickly. They also adhere well to wood surfaces and come in a vast array of colors.
For a classic snowman, you’ll want a good white for the body, black for the hat and eyes, orange for the nose, and various colors for scarves and buttons.
If you’re going for a rustic or vintage look, chalk paints are excellent. They provide a matte finish and can be easily distressed by lightly sanding them after they dry, revealing the wood underneath. This gives your snowman a wonderfully aged appearance.
For outdoor decorations, consider using exterior-grade paints or applying a sealant over your acrylic paints to protect them from the elements. A good quality primer can also help your colors pop and ensure better paint adhesion, especially if your wood has a dark or oily grain.
Adding Facial Features and Details
The face is what truly makes your snowman recognizable. For eyes, simple black dots are traditional and effective. You can achieve this with a fine paintbrush or even a permanent marker.
The nose is often a carrot shape. Paint a small orange triangle or use a small wooden cone or twig for a more dimensional nose. Mouths can be made from small painted dots or even tiny pieces of black string or yarn glued in place.
Buttons can be painted directly onto the snowman’s body, or you can use actual buttons for a tactile effect. Wooden buttons, plastic buttons, or even old mismatched buttons can add charm. Small nails or brads can also serve as buttons if you’re going for a more primitive look.
Don’t forget accessories! A painted or fabric scarf tied around the neck adds a splash of color and personality. A hat can be painted on or made from felt, cardboard, or even a small actual hat for larger pieces.
The more details you add, the more character your snowman wood decorations will have.
Incorporating Natural Elements
Using natural elements can give your wooden snowmen an authentic, woodland feel. Twigs are perfect for creating arms. You can find branches in various sizes and shapes.
Simply glue them into place on the sides of your snowman. For a more secure attachment, you might drill small pilot holes and insert the twigs into them. Pinecones can serve as festive accents, perhaps tucked into a scarf or placed at the base of a freestanding snowman.
Consider using dried berries or small pine sprigs as decorative touches. These can be glued around the base or incorporated into a hat or scarf. For a truly rustic look, you might use rough burlap for a scarf or a hatband.
The texture of these natural materials contrasts beautifully with the smoothness of painted wood. These additions not only enhance the visual appeal but also connect your creations to the winter landscape, making your snowman wood decorations feel even more special and organic.
Advanced Techniques for Unique Snowman Wood Decorations
Once you’ve mastered the basics, you might want to explore more advanced techniques to create truly one-of-a-kind snowman wood decorations. These methods can elevate your craft and allow for more intricate designs and a more professional finish. Experimenting with different woodworking tools and decorative finishes can lead to stunning results that will be admired by everyone who sees them.
Carving and Wood Burning
For a more artisanal touch, consider carving or wood burning onto your wooden snowman. Wood carving involves shaping the wood itself to create features, depth, and texture. You can carve out details for the eyes, nose, or even create a smiling mouth.
This technique requires specialized tools like carving knives and chisels, and it’s important to practice safety and learn proper carving techniques before attempting complex designs.
Wood burning, also known as pyrography, involves using a heated tool to burn designs into the wood. This creates beautiful, permanent lines and shading that can add incredible detail to your snowman. You can use it to draw facial features, patterns on clothing, or even create intricate designs on hats.
The warm, earthy tones produced by wood burning are very appealing and can give your snowman a classic, handcrafted look. Both carving and wood burning can transform a simple wooden shape into a detailed work of art, making your snowman wood decorations truly stand out.
Layering and Dimensional Designs
Creating dimensional snowmen involves layering different pieces of wood or other materials to give the snowman depth. This can be as simple as stacking pre-cut circles as mentioned before, or more complex. You could cut out separate pieces for a hat, scarf, arms, and nose and attach them to a flat snowman base.
This creates a lovely shadow effect and makes the snowman appear more three-dimensional.
For even more advanced dimension, consider using a router to create grooves or recesses where you can inlay different materials. For instance, you could rout out a space for a painted carrot nose or a wooden button. Another technique involves cutting out a snowman shape and then cutting a slightly larger background piece with a hole in the center.
When you attach the snowman shape over the hole, it creates a framed effect with depth. These layering techniques allow for a more dynamic and visually interesting snowman wood decoration.
Adding Whimsical Touches and Accessories
The fun of DIY is the freedom to add whatever whimsical touches you desire. Think beyond the traditional. You could give your snowman a tiny wooden bird perched on its hat, or perhaps a miniature sled at its feet.
Consider adding small bells that jingle with movement, or incorporate elements of other winter themes like snowflakes or icicles. Fabric scraps can be used to create unique scarves, hats, or even little mittens.
For a touch of magic, consider adding glitter or reflective paint to simulate snow or ice. Small battery-operated LED lights can be incorporated into larger snowmen for a glowing effect at night. Even simple things like attaching a small broom made from twigs can add to the story of your snowman.
The key is to have fun and let your imagination guide you. These unique additions make your snowman wood decorations a reflection of your personal style and creativity, turning a simple craft into a delightful holiday statement piece.
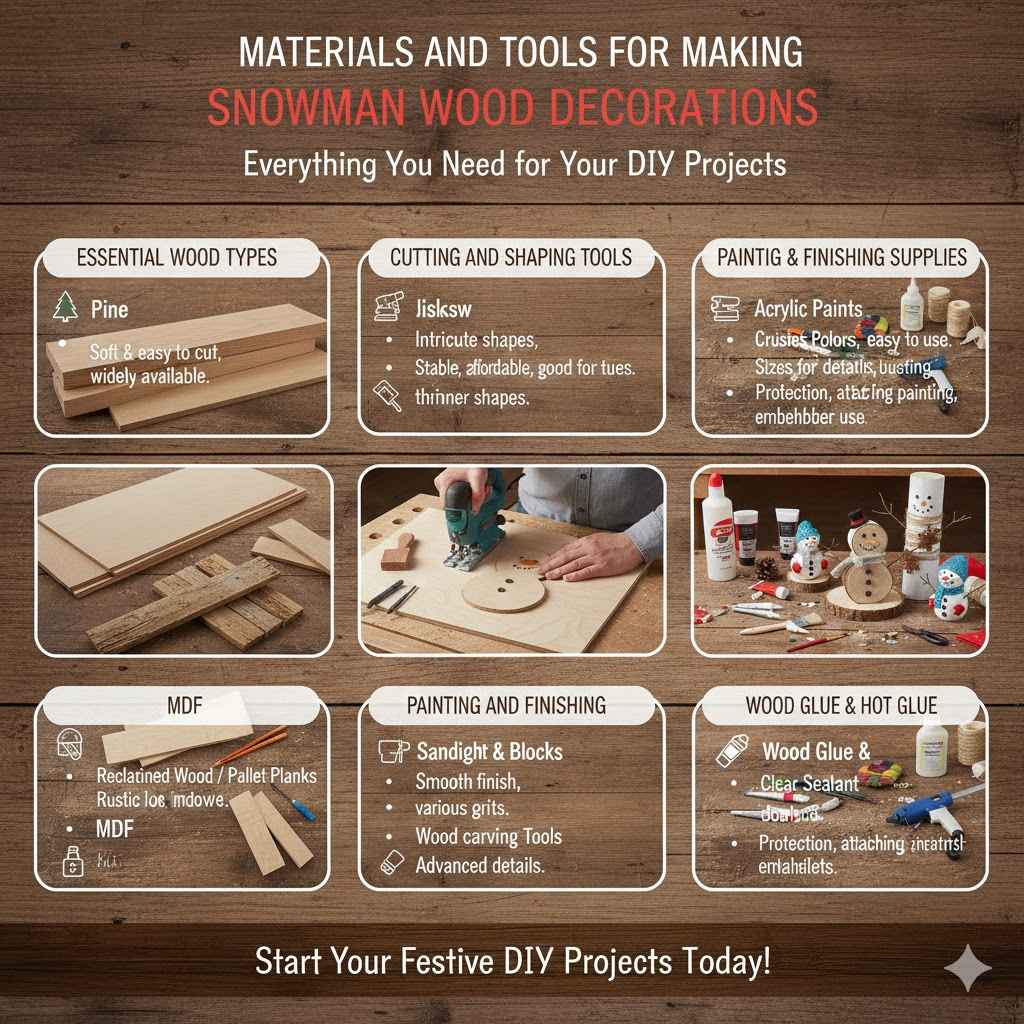
Materials and Tools for Making Snowman Wood Decorations
Creating beautiful snowman wood decorations doesn’t require an extensive workshop. Many projects can be accomplished with basic tools and readily available materials. The key is to choose materials that are easy to work with and suitable for decorative purposes.
Having the right supplies on hand will make your crafting experience smoother and more enjoyable.
Essential Wood Types
For most beginner projects, common and inexpensive wood types are ideal. Pine is a popular choice because it’s soft, easy to cut, and readily available in various thicknesses. Plywood is another great option; it’s stable, affordable, and can be cut into intricate shapes with a jigsaw.
For a more rustic feel, consider reclaimed wood like pallet planks, but always ensure they are clean and free of splinters.
MDF (medium-density fiberboard) can also be used, especially for indoor decorations. It provides a very smooth surface perfect for painting but is not as durable as solid wood for outdoor use. The thickness of your wood will depend on the size and style of the snowman you plan to make.
Thicker wood is more substantial for freestanding figures, while thinner pieces are good for ornaments and wall hangings.
Cutting and Shaping Tools
The most fundamental tool for cutting wood is a saw. A handsaw can be used for straight cuts on thinner wood, but for curves and more intricate shapes, a jigsaw is highly recommended. It’s versatile and relatively easy to learn how to use.
For very simple shapes, a coping saw can also be effective.
Sanding is crucial for a smooth finish. You’ll need sandpaper in various grits, from coarse (around 80-100 grit) for initial shaping and smoothing rough edges, to fine (around 150-220 grit) for a silky-smooth surface ready for painting. Sanding blocks can make this process easier.
If you’re exploring more advanced techniques like carving, you’ll need wood carving tools. For simpler projects, a basic set of sandpaper and a saw will get you started.
Painting and Finishing Supplies
As discussed earlier, acrylic paints are a staple. You’ll also need brushes of various sizes – small, fine-tipped brushes for details like eyes and noses, and larger brushes for covering the main body of the snowman. Foam brushes are great for applying even coats of paint or primer.
For sealing and protecting your finished snowman, a clear sealant is essential, especially for outdoor decorations. Polyurethane or an acrylic sealer will add durability and moisture resistance. You might also consider wood glue for assembling multi-piece snowmen, and a hot glue gun can be useful for attaching smaller embellishments like twigs or fabric.
FAQ
Question: What is the easiest way to cut wood for snowman shapes?
Answer: For simple shapes, a jigsaw is the easiest and most versatile tool for cutting curves and details in wood. If you only have straight cuts to make and thin wood, a handsaw can work.
Question: Can I use any type of wood for outdoor snowman decorations?
Answer: It’s best to use weather-resistant woods like cedar or redwood for outdoor decorations. If using pine or plywood, make sure to seal it thoroughly with exterior-grade paint and a protective sealant.
Question: How do I attach twigs for snowman arms securely?
Answer: You can use strong wood glue or a hot glue gun to attach twigs. For extra security, drill small pilot holes into the wood where you want the arms to go and insert the twigs into these holes before gluing.
Question: What kind of paint is best for wooden snowmen?
Answer: Acrylic paints are highly recommended as they are water-based, easy to clean, and come in many vibrant colors that adhere well to wood. For a rustic look, chalk paint is a great choice.
Question: How can I make my wooden snowman decorations last longer?
Answer: Apply a good quality clear sealant, such as polyurethane or an acrylic sealer, over your painted decorations. This will protect the wood and paint from moisture, UV rays, and general wear and tear.
Summary
Creating your own snowman wood decorations is a rewarding and fun activity for all skill levels. From simple cutouts to more intricate designs, wood offers a versatile medium for festive crafts. With basic tools and a little imagination, you can bring charming wooden snowmen to life.
Enjoy the process of painting, decorating, and personalizing your unique creations to brighten your home this winter season. Happy crafting!