What Does Termite-Damaged Wood Look Like? 5 Signs to Check
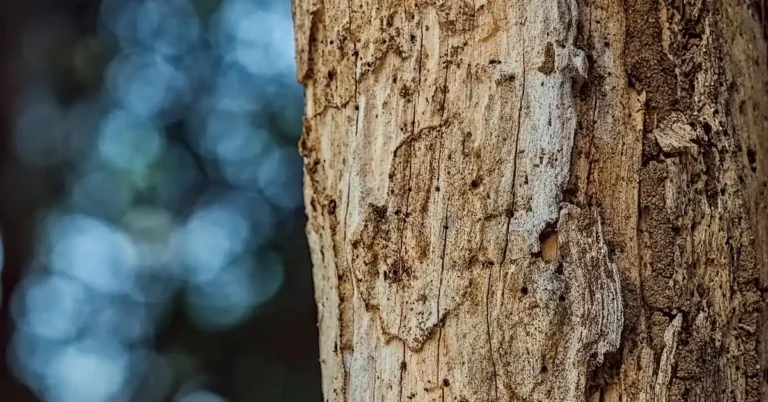
Termite-damaged wood sounds hollow when tapped and shows maze-like tunnels called galleries running with the grain, though the surface often looks untouched until the damage is severe. Termites cause an estimated $6.8 billion in U.S. property damage a year (NPMA, 2026), and standard homeowner’s insurance almost never covers termite damage repairs. This guide covers the five signs to check, how termite damage differs from wood rot or carpenter ants, and the exact steps to inspect your home.
The Telltale Signs: A Visual Guide to Termite Damage
Best Termite Inspection Tool Pick

Klein Tools ET140 Pinless Moisture Meter – $49.97
Confirms what the tap test only suggests — reads relative moisture up to 3/4-inch deep in wood, drywall, and masonry without drilling a hole, so you can tell a genuinely damp, active-infestation spot from a dry board that just sounds hollow.
- Best for: Confirming moisture behind mud tubes or blistered paint before calling a pro
- Why we picked it: Non-destructive — matches this guide’s inspect-first, don’t-disturb-them advice
- Main drawback: Reads relative moisture only, not a species ID — it narrows down suspect areas, it doesn’t replace a professional inspection
Compare more termite inspection tools
 Option 1 Coast G20 Inspection Penlight – $17.01
|
 Option 2 Klein Tools 650 Scratch Awl – $12.99
|
 Option 3 Spectracide Terminate Stakes (15-Ct) – $56.00
|
As an Amazon Associate we earn from qualifying purchases.
Termites are sneaky. They love to eat wood from the inside out, leaving the outer surface intact until the damage is severe. This is why you need to know the subtle clues they leave behind. Think of yourself as a detective looking for evidence. Here are the most common signs you’ll encounter.
1. A Hollow or Papery Sound
This is often the first and easiest sign to check. Since termites hollow out the wood, a solid beam can become nothing more than a thin shell. Grab a screwdriver with a hard handle or just use your knuckles and give the wood a firm tap.
- Normal Wood: A solid, dense thud.
- Termite-Damaged Wood: A hollow, papery, or empty sound. It’s a very distinct difference once you hear it.
This “tap test” is your best friend when inspecting floorboards, support beams, door frames, and window sills. If it sounds hollow where it should be solid, it’s time to investigate further.
2. Maze-Like Tunnels (Galleries)
When you do get a look inside damaged wood, the pattern of destruction is unmistakable. Termites create intricate tunnels and chambers called “galleries.” What’s unique is that they follow the grain of the wood.
Imagine tiny, winding highways carved through the wood. If you break open a piece of infested wood, you won’t see a random pattern of holes. Instead, you’ll see a network of tunnels that look almost like a labyrinth. Sometimes you can see these patterns through a thin layer of remaining wood or paint.
Shelving is the pest-control term for what’s left when that gallery damage progresses: thin, paper-like layers of wood stacked like sheets, with almost nothing solid between them. It’s the same tunnel pattern above, just further along — inspectors use the word specifically once damage has gone from isolated tunnels to fully delaminated layers.
3. Bubbling, Blistering, or Uneven Surfaces
Have you ever seen paint that looks like it has a water bubble underneath? Termites can cause a very similar effect. As they tunnel just below the surface, they compromise the thin layer of wood or paint on top. This can cause the surface to appear:
- Blistered or Bubbled: The paint or wood veneer is pushed outward.
- Wavy or Rippled: The surface no longer feels flat and smooth.
- Darkened or Discolored: Sometimes, the wood looks darker in spots, almost like a faint bruise. This can be due to the moisture termites bring with them.
If you see these signs, especially on window sills, baseboards, or door frames, gently press on the area with your thumb. If it feels soft or crumbles easily, you have a big red flag for termite activity.
4. Mud Tubes on Walls and Foundations
This sign is specific to the most common type of termite in the United States: the subterranean termite. These termites build their colonies in the soil and need a protected way to travel to their food source (the wood in your house). To do this, they construct pencil-sized tubes out of mud, wood, and saliva.
Look for these tubes in places where the ground meets your house. Key inspection points include:
- The exterior foundation walls.
- Interior walls in basements and crawl spaces.
- Pipes and support piers.
According to the U.S. Environmental Protection Agency (EPA), these mud tubes are a definitive sign of an active subterranean termite infestation. If you find one, do not break it open right away. It’s best to leave it for a professional to inspect.
5. Frass (Termite Droppings)
Frass is a less pleasant but very helpful clue, especially for identifying drywood termites. Unlike subterranean termites that use their waste to build tubes, drywood termites like to keep their nests clean. They push their droppings out of small holes in the wood.
What does frass look like? It’s not sawdust. Termite frass is made of tiny, six-sided pellets that are very hard. They might look like a small pile of sand or coffee grounds. You’ll typically find these piles on the floor beneath infested wood, on a window sill, or a shelf.

For a broader rundown of what to check for on framing, trim, and furniture (not just the visual damage), see our guide to identifying signs of termite damage in wood.
📊 Termites cause an estimated $6.8 billion in property damage across the U.S. every year, affecting roughly 600,000 homes — and standard homeowner’s insurance policies almost universally exclude that damage. Source: National Pest Management Association (NPMA), 2026
Is It Termites, Water, or Carpenter Ants? A Clear Comparison
It’s easy to confuse termite damage with issues caused by water or other pests like carpenter ants. Knowing the difference can save you time, money, and a lot of worry. Let’s break down the key differences in a simple table.
| Feature | Termite Damage | Water Damage | Carpenter Ant Damage |
|---|---|---|---|
| Wood Condition | Wood is eaten away from the inside. Often contains soil and mud (subterranean). Feels papery. | Wood is soft, spongy, and easily crumbles when wet or dry. Often accompanied by mold or mildew. | Wood is excavated for nesting, not for food. It’s not eaten, just moved. |
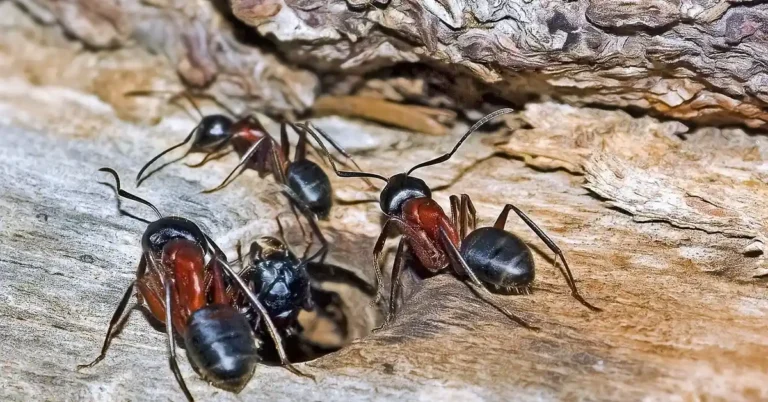
| Tunnels (Galleries) | Rough, gritty tunnels that follow the wood grain. Often filled with mud and debris. | No tunnels. The wood decays and splits in a cube-like or stringy pattern (wood rot). | Very smooth, clean, and sandpapered-like galleries. They look finished and neat. No mud inside. |
| Debris | Tiny, six-sided hard pellets (frass) from drywood termites. Mud and soil from subterranean termites. | No insect-related debris. You might find peeling paint or mold spores. | Piles of coarse sawdust-like material (frass) that contains insect parts and wood fibers. Looks like pencil shavings. |
| Surface Appearance | Blistered, buckled, or wavy surface. Sometimes tiny exit holes are visible. | Swollen, cracked, and discolored. The paint may peel or flake off extensively. | Small, slit-like openings where ants push out debris. The wood surface is often fine. |
Different Termites, Different Clues: Subterranean vs. Drywood Damage
Not all termites are the same. In the U.S., you’ll mostly encounter two types: Subterranean and Drywood. They leave different calling cards, and recognizing them can help you and a pest control expert identify the scope of the problem. Research from the Mississippi State University Extension Service highlights these key differences.
| Feature | Subterranean Termites | Drywood Termites |
|---|---|---|
| Where They Live | They build colonies underground in the soil. They need moisture to survive. | They live directly inside the dry wood they infest. They do not need contact with soil. |
| Key Evidence | Mud tubes on foundations, walls, and crawl spaces. | Frass (hard, six-sided pellets) piling up below infested wood. |
| Damage Pattern | They eat soft wood along the grain, leaving layers of hard wood and mud behind. Galleries look messy and layered with dirt. | They eat both soft and hard wood across the grain, creating large, clean galleries. Their damage can be more widespread within a single piece of wood. |
| Common Locations | Basements, crawl spaces, woodpiles near the house, deck posts, any wood in contact with soil. | Attics, window and door frames, furniture, eaves, structural timbers. They often enter through the roof. |
How to Inspect Your Home for Termite Damage: A Simple 5-Step Guide
Now that you know what to look for, it’s time to do a little inspection. You don’t need to be a professional for this initial check. Just be thorough and patient. Put on some old clothes, grab your tools, and let’s get started.
Your Inspection Toolkit:
- A powerful flashlight: Dark corners are a termite’s favorite place.
- A screwdriver or awl: For tapping wood and gently probing suspicious areas.
- Protective gloves: Good for keeping your hands clean in crawl spaces and basements.
- A keen eye and a patient mindset: The most important tools you have!
The 5-Step Inspection Process:
- Start in the Lowest Areas (Basement or Crawl Space): This is ground zero for subterranean termites. Shine your flashlight along the foundation walls, support piers, and any wooden beams or floor joists. Look carefully for mud tubes. Use your screwdriver to tap on the joists and sill plates (the wood sitting on top of the foundation). Listen for that telltale hollow sound.
- Inspect the Exterior of Your Home: Walk around the entire perimeter of your house. Check the foundation for mud tubes, especially in corners, behind bushes, or around exterior faucets and vents. Look at wooden window sills, door frames, and deck posts. Pay close attention to any areas where wood touches the ground, like siding or lattice work.
- Move to the Interior Living Areas: Now, check inside your home. Inspect baseboards, hardwood floors, window sills, and door frames. Look for wavy or bubbled paint. Gently press on these areas. Do they feel soft? Look for any unexplained piles of frass on the floor or sills. Check for discarded wings near windows, as this is a sign of a recent termite swarm.
- Check the Attic and Upper Levels: Don’t forget the top of your house. In the attic, inspect wooden rafters, support beams, and the roof decking. This is a common area for drywood termites. Look for frass and tiny exit holes. Shine your flashlight across the surfaces of the wood to catch any subtle rippling or damage.
- Document and Probe Suspicious Areas: If you find a spot that sounds hollow or looks wavy, gently probe it with your screwdriver. Don’t go crazy and cause more damage. Just press firmly. If the screwdriver sinks in easily or the wood flakes away in layers, you have confirmed internal damage. Take pictures of any mud tubes, frass piles, or damaged wood you find. This will be incredibly helpful when you talk to a professional.
“When I probe suspect wood with an awl, fresh termite damage feels different from old rot — it gives way in thin, papery layers instead of crumbling into soft chunks. That layered ‘shelving’ texture is the fastest way I’ve found to tell active termite damage from old water damage without cutting the board open.”
Found Termite Damage? Here’s What to Do Next
Finding termite damage is stressful, but you’ve done the hard part by identifying it. Don’t ignore it, and don’t try to fix it with a can of bug spray from the hardware store. Here’s the step-by-step plan.
- Don’t Panic and Don’t Disturb Them: Resist the urge to rip open the wall or break apart all the mud tubes. Disturbing the termites can cause them to abandon the area and move to another part of your house, making them harder for a professional to treat.
- Gather Your Evidence: Collect a sample of the frass in a small plastic bag and keep the photos you took during your inspection. This documentation provides a clear picture of the problem.
- Call a Licensed Pest Control Professional: This is not a DIY job. Termite control requires specialized knowledge, equipment, and chemicals that are not available to consumers. A professional will correctly identify the type of termite, find the source of the colony, and implement a treatment plan to eliminate it completely. Look for a reputable company that is a member of the National Pest Management Association (NPMA).
- Plan for Wood Repairs After Treatment: Do not replace or repair the damaged wood until after the termite infestation has been professionally treated and eliminated. If you replace the wood first, the new wood will just become the termites’ next meal. Once you get the all-clear from your pest control company, you can confidently move forward with repairing the structural or cosmetic damage.
If the professional confirms extensive or structural damage, the next question is usually whether the affected wood needs to come out entirely, or whether it can be treated and kept — see our guide on when termite-damaged wood needs to be removed for how pros make that call.

Frequently Asked Questions About Termite Damaged Wood
What does the beginning of termite damage look like?
The very first signs of termite damage are extremely subtle. It might look like a small, faint, wavy line on a wall or baseboard. You might also notice a tiny bit of bubbling paint or wallpaper that looks like minor water damage. The wood will still feel mostly solid at this stage, but the hollow sound when tapped may be just starting to appear in a small area.
Can you hear termites eating wood?
In most cases, you cannot hear termites eating. They are very quiet creatures. However, some species, particularly soldier termites, can sometimes be heard making a faint clicking or head-banging sound within the walls. This is a defensive action to warn the colony of danger. If you put your ear right up to an infested wall in a very quiet room, you might hear a faint, dry, rustling sound, but it’s not common.
Does termite-damaged wood feel soft?
Yes, but often only when you apply pressure. The outer surface can remain hard, but when you press on it, the wood underneath will crumble or feel spongy and soft because the internal structure has been eaten away. It’s like a piece of bread with a hard crust but a soft inside.
How can you tell the difference between termite holes and nail holes?
Termite exit holes, often called “kick-out” holes, are tiny, round, and about 1/8 of an inch in diameter. They are used by drywood termites to push out frass. These holes are often sealed with a small speck of dried mud or frass. A nail hole, on the other hand, is usually less perfect, may have splintered edges, and won’t have any pellets or mud around it. It will also be empty when you look inside.
Is wood with termite damage still strong?
No, it is significantly weaker. Termites destroy the structural integrity of wood by eating its load-bearing fibers. A piece of wood that looks solid on the outside could have the strength of cardboard on the inside. Never trust termite-damaged wood for any structural purpose, like supporting a deck, a floor, or a roof. It must be repaired or replaced.
Can I just paint over termite-damaged wood to fix it?
Absolutely not. Painting over termite-damaged wood is like putting a bandage on a broken bone. It hides the cosmetic issue but does nothing to solve the underlying problem. The termites will continue to destroy the wood under the paint, and the structural weakness will remain. You must have the termites eliminated and then properly repair or replace the damaged wood.
How much does it cost to repair termite damage?
Costs typically range from about $300 for minor cosmetic patching to $5,000 or more for structural repairs like replacing support beams or subfloors. The total depends mostly on how long the infestation went undetected, which is why catching the signs above early — before damage reaches structural framing — keeps repairs closer to the low end.
Protecting Your Wood and Your Peace of Mind
Knowing what termite damage looks like is one of the most valuable skills a homeowner or woodworker can have. By learning to spot these signs — the hollow sounds, the wavy surfaces, the mud tubes, and the telltale frass — you’ve taken the first, most critical step in protecting your property. If you find any of these signs, the plan is simple: stay calm, document it, call a licensed professional, and hold off on repairs until the infestation is fully treated. Worth remembering too: wood is only part of what put that colony there in the first place – termites eat plenty of non-wood cellulose like cardboard and paper, so cutting off those food sources matters just as much as treating the wood itself.
Sponsored / affiliate links. As an Amazon Associate I earn from qualifying purchases. I may earn additional commission from eligible campaigns.