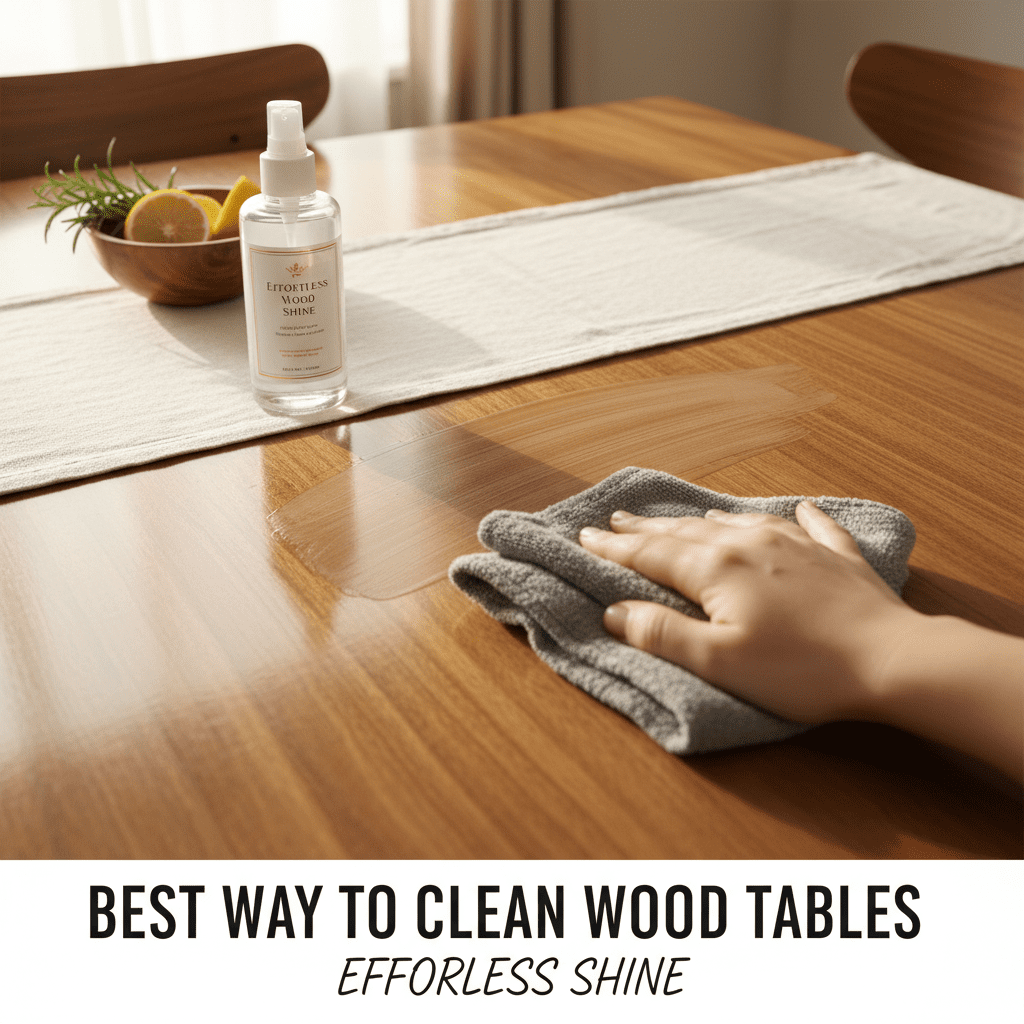
Best Way To Clean Wood Tables: Effortless Shine
The best way to clean wood tables is to use a gentle, damp cloth with mild soap, followed by a dry cloth. For stubborn spots, a specialized wood cleaner or a paste of baking soda and water can work wonders. Regular dusting and quick spill cleanup prevent buildup, keeping your wood tables looking their best with minimal effort.
A beautiful wood table can be the heart of any home, but keeping it clean and looking its best can sometimes feel like a challenge. Spills happen, dust settles, and regular use can leave your table looking dull. Don’t worry, though! You don’t need harsh chemicals or complicated routines to restore that lovely shine. We’ll walk through simple, effective methods to get your wood tables sparkling clean, ensuring they grace your home for years to come. Let’s dive into the easiest way to achieve that effortless shine!
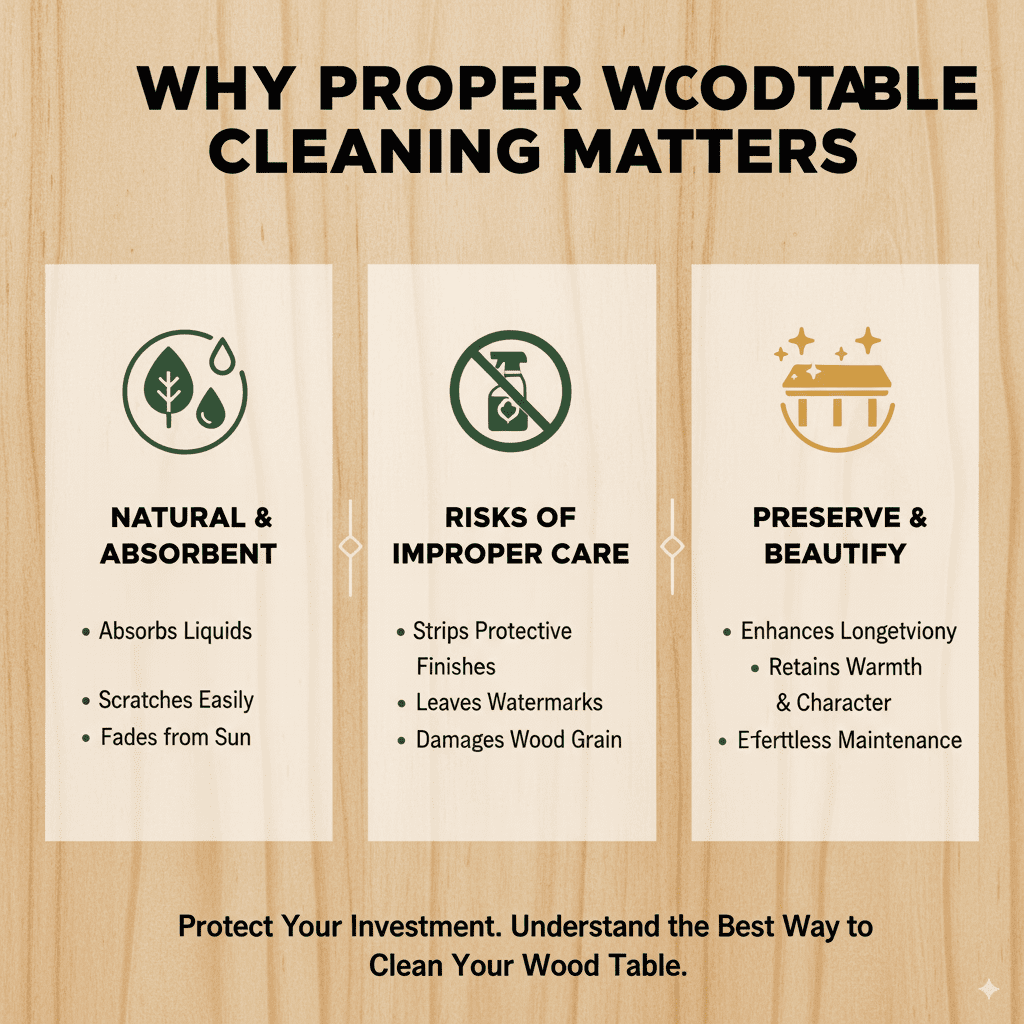
Why Proper Wood Table Cleaning Matters
Wood is a natural material, and like all natural things, it needs care. Unlike a plastic or laminate surface, wood can absorb liquids, scratch more easily, and fade with prolonged sun exposure. Using the wrong cleaning products or techniques can strip away protective finishes, leave watermarks, or even damage the wood itself. This is why understanding the “best way to clean wood tables” isn’t just about aesthetics; it’s about preserving the longevity and beauty of your furniture. A well-maintained wood table adds warmth and character to your space, and with the right approach, keeping it clean is straightforward and rewarding.
Understanding Your Wood Table’s Finish
Before we start cleaning, it’s super helpful to know what kind of finish your table has. Different finishes react differently to cleaning agents. Modern wood tables often have a protective topcoat, like polyurethane, lacquer, or varnish. Older tables might have a more delicate oil or wax finish. If you’re unsure, a good rule of thumb is to always start with the gentlest method. You can often find care instructions from the manufacturer, or if it’s an antique, look for clues about its age and origin. Testing any cleaning solution in an inconspicuous spot (like the underside of the table or a hidden leg) is always a smart first step!
Essential Cleaning Supplies You’ll Need
Gathering the right tools makes any cleaning task smoother. For most wood tables, you won’t need much:
- Soft, Lint-Free Cloths: Microfiber cloths are excellent because they pick up dust and dirt effectively without scratching the wood. Have at least two on hand – one damp and one dry.
- Mild Dish Soap: A tiny amount of pH-neutral dish soap mixed with water is usually safe for most finishes. Avoid soaps with harsh degreasers or additives.
- Warm Water: Just enough to dampen your cleaning cloth. Don’t use hot water, as it can be too harsh.
- Wooden Furniture Cleaner (Optional): If your table has tough grime or needs a bit of reviving, a cleaner specifically designed for wood can be a great option. Look for reputable brands.
- Mineral Oil or Wood Polish (Optional): For occasional conditioning and adding extra shine after cleaning.
- Cotton Swabs: Useful for cleaning edges, corners, and detailed areas.
- Baking Soda (For stubborn spots): A gentle abrasive that can help lift tough stains when made into a paste.
- Vinegar (Diluted, use with caution): Sometimes recommended for specific stains, but always dilute it heavily with water and test first, as it can damage some finishes.
The Best Way to Clean Wood Tables: A Step-by-Step Guide
Here’s the straightforward process to get your wood tables looking their absolute best. This method is effective for daily cleaning and tackling minor messes.
Step 1: Dust Thoroughly
This is your fundamental step and should be done regularly. Dust can be abrasive, and if left to build up, it can scratch the finish over time.
- Start by using a soft, dry, lint-free cloth (microfiber is perfect) to wipe down the entire surface of the table.
- Pay attention to any nooks, crannies, or carved details. A clean, dry paintbrush can be useful for getting into tight spots before you wipe.
- Regular dusting prevents grit from becoming embedded in the wood.
Step 2: Prepare Your Cleaning Solution
For general cleaning, a very mild solution is best.
- Fill a small bowl or bucket with warm water.
- Add just 1-2 drops of mild dish soap. You want the water to be barely sudsy. Think of it as a rinse aid, not a degreaser.
- Stir gently.
Step 3: Damp Wipe the Surface
This is where the actual cleaning happens, but remember, damp, not wet!
- Dip one of your soft cloths into the soapy water and wring it out thoroughly. You want the cloth to be damp, not dripping. Excess water is the enemy of wood.
- Wipe down the table surface using gentle, even strokes. Follow the grain of the wood.
- Work in sections, especially if your table is large.
Step 4: Rinse (If Necessary)
If you used a tiny bit of soap, a quick rinse is a good idea to ensure no residue is left behind.
- Rinse your cleaning cloth thoroughly under clean water.
- Wring it out until it’s just barely damp.
- Wipe the table surface again to remove any faint soap residue. If you used plain water or just a tiny drop of soap, you might be able to skip this step.
Step 5: Dry Immediately
This is a crucial step to prevent water spots and protect the wood’s finish.
- Take your second clean, dry, lint-free cloth.
- Immediately dry the entire table surface with this cloth.
- Ensure there is no moisture left on the wood. Again, follow the grain of the wood.
- Buff gently to bring out the shine.
Tackling Tougher Stains and Spills
Life happens, and sometimes just a damp cloth isn’t enough. Here’s how to handle common issues:
Dealing with Sticky Residue or Food Stains
If you have dried-on food or sticky spots:
- Dampen a soft cloth with your mild soap and water solution.
- Gently rub the sticky area. You might need to apply a little more pressure here, but avoid scrubbing vigorously.
- If the residue persists, try a tiny bit more soap or switch to a cleaner specifically designed for wood furniture. Follow the product instructions carefully.
- Always wipe away any residue and dry the area completely afterward.
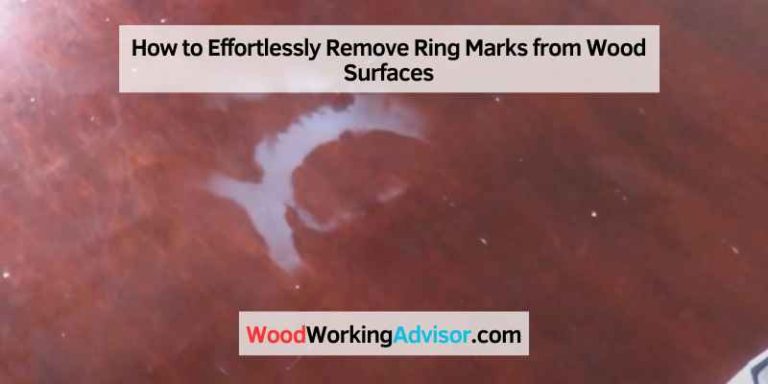
Removing Water Rings and Heat Marks
Water rings are common. The good news is, they can often be removed or at least minimized.
- For light water rings: Try rubbing the spot with a clean, dry finger or a soft cloth. Sometimes the oils from your skin can lift it. If that doesn’t work, try the baking soda paste method below.
- For slightly tougher rings: Make a paste of baking soda and a few drops of water. Gently rub it over the water ring, following the wood grain. Wipe clean with a damp cloth and then dry thoroughly.
- For white heat marks: These are usually within the finish. Try the baking soda paste method. Another old trick is to place a warm (not hot!) iron on a thin cloth over the mark for a few seconds. The gentle heat can sometimes draw the moisture out of the finish. Test this with extreme caution, as too much heat can damage the finish.
- For dark water or heat marks: These often indicate damage to the finish or wood itself. These are much harder to remove and may require professional refinishing.
Getting Rid of Grease or Oil Stains
Grease can be tricky on wood.
- Blot up as much of the fresh grease as possible with a dry cloth or paper towel.
- For slightly older grease stains, you can try sprinkling baking soda directly onto the stain once you’ve blotted it. Let it sit for an hour or two to absorb the grease, then gently brush it off and clean the area with your mild soap and water solution, followed by drying.
- A commercial wood cleaner designed for grease might also be effective.
Dealing with Scratches
Minor scratches can sometimes be masked. Deeper scratches might need a more involved repair.
- Very light surface scratches: Often, a good buffing with a soft cloth or a dedicated furniture polish can help blend them in.
- Slightly deeper scratches: For darker woods, you can try rubbing the scratch with the soft part of a walnut or pecan. The natural oils and color can mask the scratch. Wipe away any excess oil.
- For specific color matching and filling deeper scratches, wood repair markers or touch-up kits can be purchased from hardware stores or craft shops. Follow their instructions carefully. For significant damage, consider consulting a furniture restorer.
When to Use Specialized Wood Cleaners and Polishes
While simple soap and water are great for routine cleaning, dedicated wood cleaning products and polishes can offer additional benefits.
Wood Furniture Cleaners
- Purpose: These are formulated to clean wood without stripping its finish. They often contain mild solvents or conditioning agents.
- When to Use: Good for general cleaning when you want a bit more cleaning power than just soap and water, or for tables with more resistant grime. Also useful for tables with oil or wax finishes where traditional soap might not be ideal.
- How to Use: Always spray onto a cloth, never directly onto the wood. Wipe the surface and then buff with a dry cloth.
Wood Polishes
- Purpose: Polishes often contain a combination of cleaners, waxes, and conditioners to enhance shine, protect the wood, and fill in minor imperfections.
- When to Use: After cleaning, or periodically (every few months) to maintain shine and provide a protective layer. Not recommended for heavily used surfaces like dining tables where spills are frequent, as they can become slippery.
- How to Use: Apply a small amount to a clean cloth and buff into the wood following the grain. Buff off any excess with another clean cloth.
Wood Conditioners/Oils
- Purpose: Revitalizes dry or dull wood, especially those with oil or wax finishes. Think of it as moisturizing for your furniture.
- When to Use: For unfinished wood, antique pieces, or tables with oil/wax finishes looking dull. Less common for sealed, modern finishes.
- How to Use: Apply sparingly with a cloth, let it soak in for a bit, then wipe off any excess.
Things to AVOID When Cleaning Wood Tables
Just as important as knowing what to do is knowing what not to do. A few common mistakes can lead to costly damage.
| What to Avoid | Why It’s Bad for Wood |
|---|---|
| Harsh Chemicals: Ammonia, bleach, abrasive cleaners, window cleaners. | These can strip away the protective finish, dull the wood, and even cause discoloration or permanent damage. |
| Excessive Water: Soaking the surface or using a very wet cloth. | Water can penetrate the finish, causing swelling, warping, or leaving lasting water rings and stains. |
| Abrasive Scrubbing Tools: Steel wool, rough sponges, scouring pads. | These will scratch the finish and the wood, leaving unsightly marks. |
| Steam Cleaners: Not typically recommended for finished wood furniture. | The heat and moisture can damage finishes and warp the wood. |
| Direct Sunlight: Prolonged exposure. | Sunlight can fade the wood and its finish, and can also lead to drying and cracking. |
| Placing Hot Items Directly on the Surface: Use trivets or placemats. | Even sealed finishes can be damaged by intense heat, causing rings or marks. |
DIY Wood Cleaner Recipes (Use with Caution!)
For those who prefer natural solutions or need something quick, here are a couple of simple DIY options. Remember to always test these in an inconspicuous spot first!
Simple Soap and Water Solution
This is your go-to for most situations.
- Ingredients: 1 cup warm water + 1-2 drops mild dish soap.
- Method: Mix in a bowl. Use a damp cloth as described in the step-by-step guide.
Baking Soda Paste for Tough Spots
Excellent for stubborn grime, light water marks, or stuck-on food.
- Ingredients: Baking soda + a few drops of water.
- Method: Mix into a paste. Apply gently to the stained area with a soft cloth, rub in the direction of the wood grain. Wipe clean with a damp cloth and dry immediately.
Diluted Vinegar and Water (Use Sparingly!)
Vinegar has acidic properties that can cut through grime, but it can also damage certain finishes if not used correctly.
- Ingredients: 1 part white vinegar + 10 parts water.
- Method: Mix well. Lightly dampen a cloth, wipe the surface, and immediately follow with a clean, damp cloth to rinse, and then a dry cloth to remove all moisture. Only use this for general cleaning on durable finishes and test first.
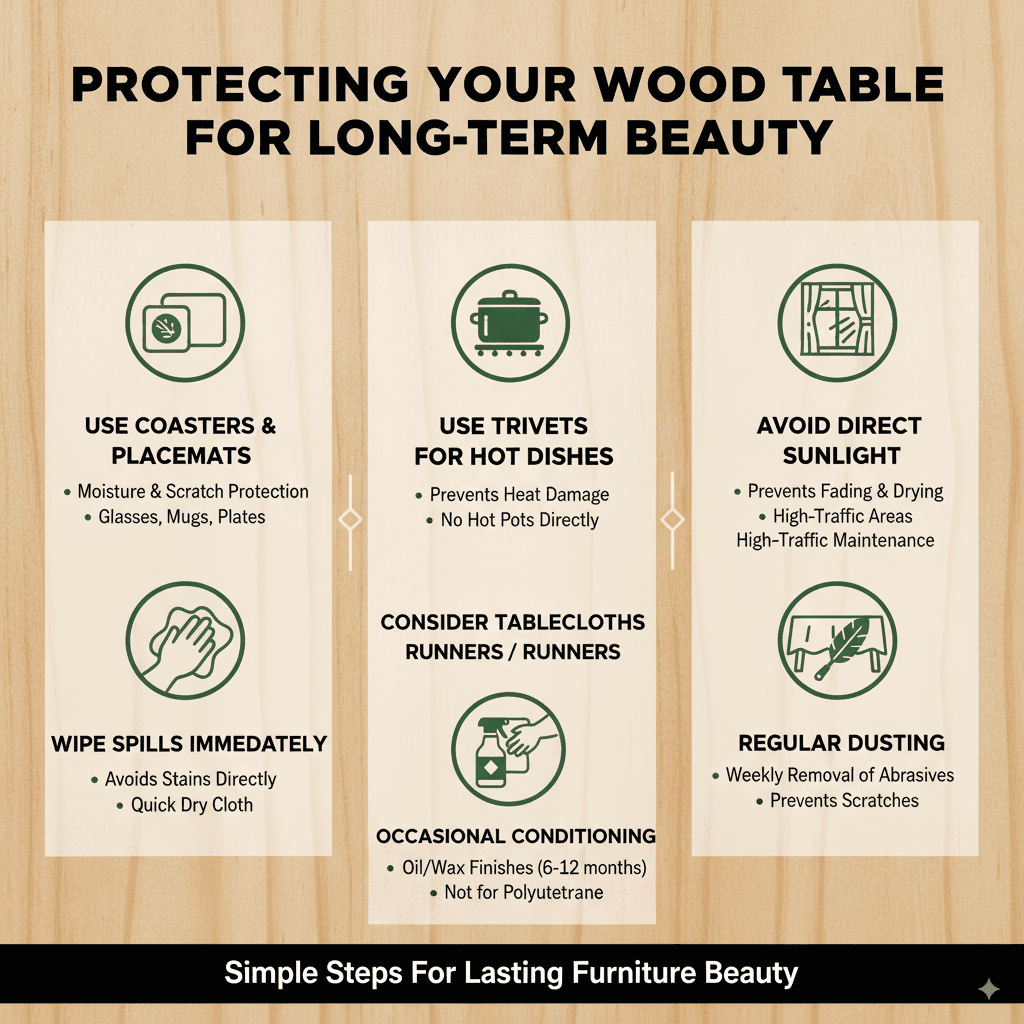
Protecting Your Wood Table for Long-Term Beauty
Prevention is always easier than cure. Here are some tips to keep your wood table looking great:
- Use Coasters and Placemats: This is the simplest way to protect your table from moisture, heat, and scratches from glasses, mugs, and plates.
- Use Trivets for Hot Dishes: Never place hot pots or pans directly onto the wood surface, even if it has a durable finish.
- Wipe Spills Immediately: Don’t let liquids sit on the surface, especially wine, juice, or oily spills. A quick wipe with a dry cloth can prevent stains and watermarks.
- Avoid Direct Sunlight: Position your table away from windows that receive direct, intense sunlight for long periods, as it can cause fading and drying. If that’s not possible, consider using curtains or blinds during peak sun hours.
- Consider a Tablecloth or Runner: For dining tables or high-traffic areas, a tablecloth or runner can offer significant protection during meals and other activities.
- Regular Dusting: As mentioned, this is key. Dusting weekly or even more often will remove abrasive particles before they can scratch the finish.
- Occasional Conditioning: For tables with oil or wax finishes, or if your wood looks dry, a light application of appropriate wood oil or polish every 6-12 months can help maintain its luster and prevent it from drying out. Most modern polyurethane finishes do not require this.
Frequently Asked Questions About Cleaning Wood Tables
Q1: How often should I clean my wood table?
A1: For daily wear and tear, dust your table weekly with a soft, dry cloth. For spills or more noticeable grime, clean it with a damp cloth as needed. Regular maintenance prevents the need for deep cleaning.
Q2: Can I use furniture polish on my dining table?
A2: Many people do, but use it sparingly and after cleaning. Some polishes can make the surface slippery, which isn’t ideal for a dining table where plates and glasses are placed. Opt for a cleaner that also offers some protection instead of a heavy wax polish.
Q3: What if I accidentally used too much water?
A3: Don’t panic! Immediately grab a dry, absorbent cloth and blot up as much moisture as possible. Then, use another dry cloth to ensure the surface is completely dry. If a faint watermark appears, try gently rubbing it with a dry cloth or a paste of baking soda and water (tested first).
Q4: Is it safe to use baby wipes on wood tables?
A4: While convenient, many baby wipes contain chemicals, fragrances, and alcohol that can dry out or damage wood finishes over time. It’s best to stick to mild soap and water or a cleaner specifically designed for wood.
Q5: My table has a very dull finish. What’s the best way to restore shine?
A5: Start by thoroughly cleaning it to remove any dirt or residue. If it’s a sealed finish, try a good quality furniture polish or wax. For tables with oil or wax finishes, reapply a suitable wood conditioner or oil. Testing any product in an inconspicuous area is always recommended.
Q6: Can I clean my antique wood table with the same methods?
A6: Antique wood tables often have more delicate finishes. It’s best to use the gentlest methods possible – primarily light dusting and only using a very slightly damp cloth with plain water or a highly diluted, pH-neutral cleaner. Professional advice might be beneficial for valuable antiques.
Conclusion
Keeping your wood tables looking beautiful doesn’t have to be a chore. By understanding your table’s finish, using the right gentle cleaning methods, acting quickly on spills, and practicing good protective habits, you can ensure your wooden furniture remains a cherished part of your home for years to come.