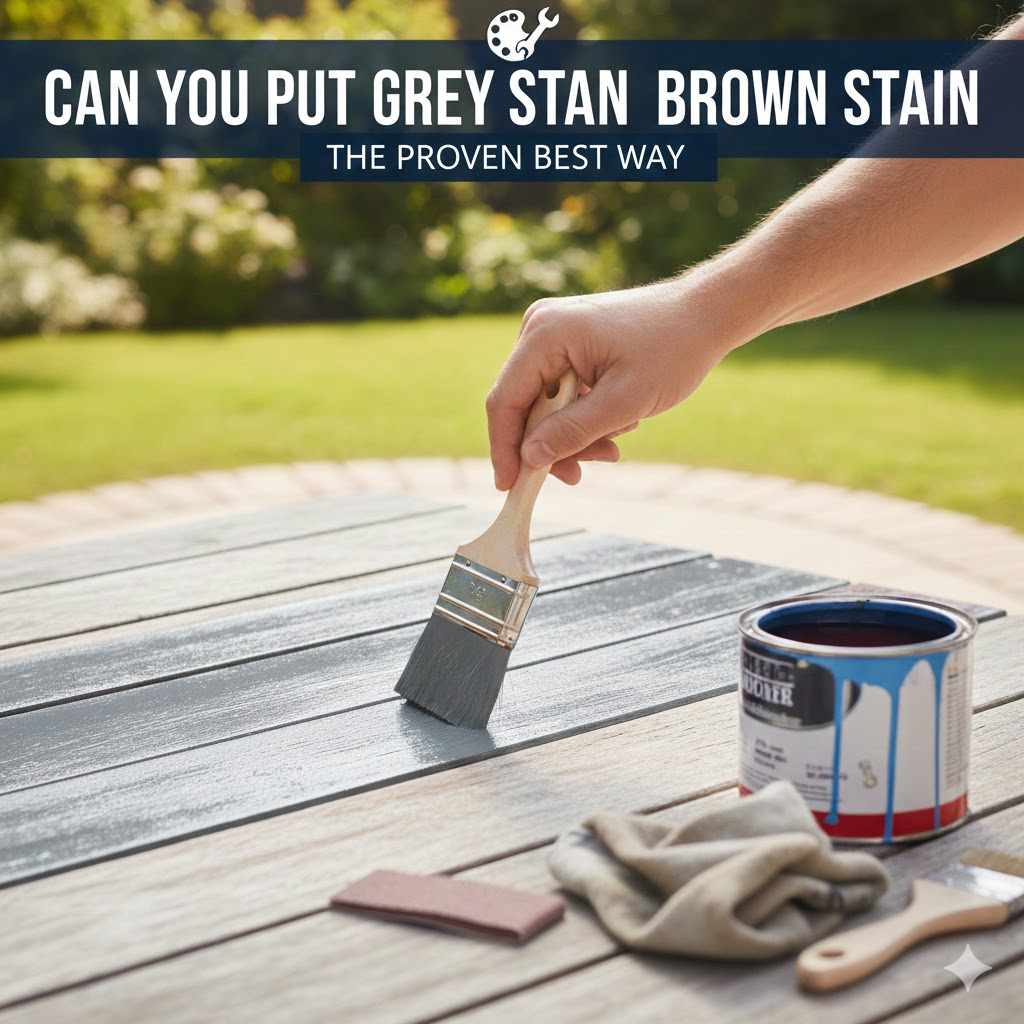
Can You Put Grey Stain Over Brown Stain: The Proven Best Way
Yes, you can put grey stain over brown stain, but for the best result, you must prepare the surface correctly. The proven method is to clean the wood, lightly scuff-sand the old finish to help the new stain adhere, and then use a gel stain. Always test your method on a small, hidden area first to see the final color.
Have you ever looked at an old piece of brown furniture and wished it had a more modern look? That warm, traditional brown might not fit your cool, contemporary style. You’ve seen beautiful grey finishes and wondered, “Can I just put grey stain right over this?” It’s a question I hear all the time in my workshop.
It can feel a little scary to start a project like this. What if it looks blotchy or peels off? Don’t worry. You don’t need to be a professional to get a beautiful, lasting finish. I’m here to walk you through it. We’ll break down the right way to do it, step-by-step, so you can tackle this project with confidence. Let’s get that old furniture looking fresh and new!
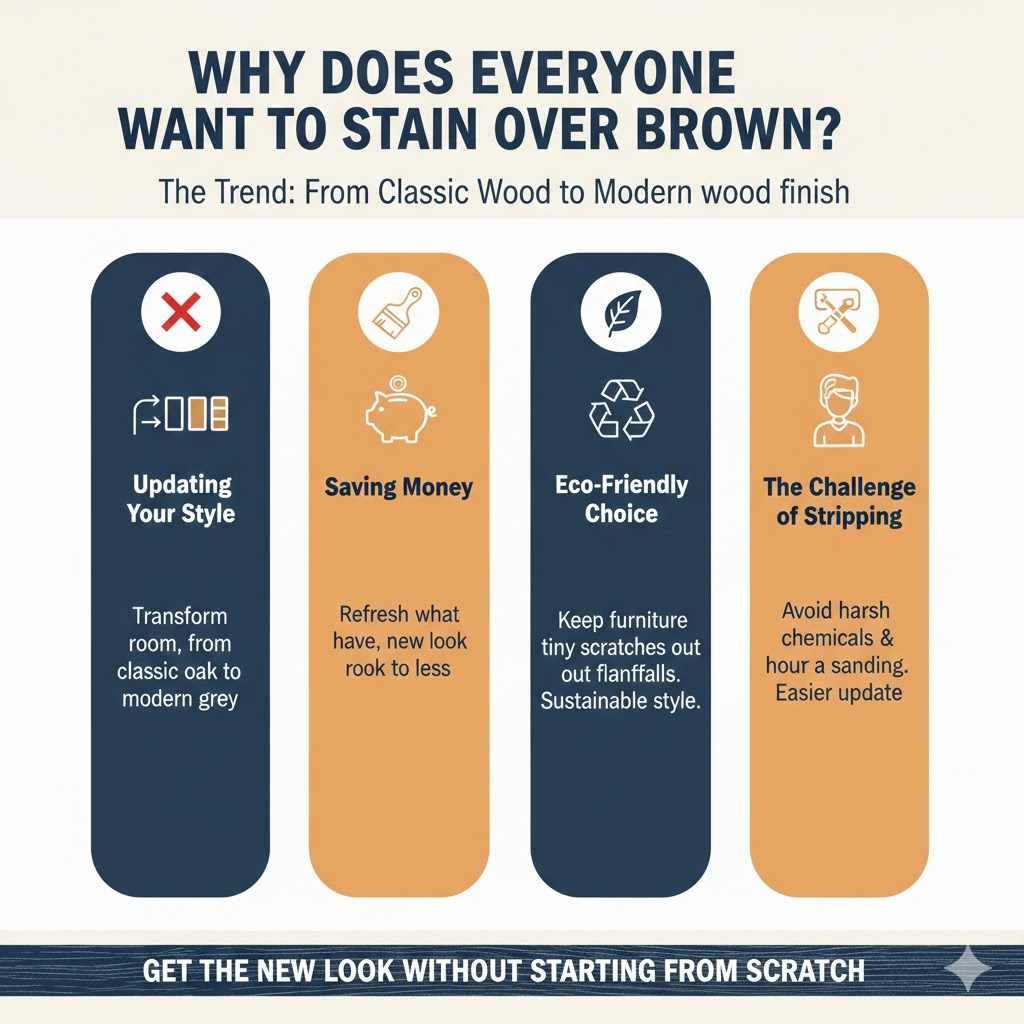
Why Does Everyone Want to Stain Over Brown?
The trend of updating older, dark wood furniture is more popular than ever. Many of us have inherited pieces or found bargains that have great bones but an outdated color. That classic oak or cherry brown was popular for decades, but modern design often favors cooler tones like grey, charcoal, and greige.
Here are a few reasons this project is on so many DIY lists:
- Updating Your Style: A simple color change can completely transform a room. Grey is a versatile neutral that works well with many different color palettes.
- Saving Money: Why buy new, expensive furniture when you can refresh what you already have? A can of stain is far cheaper than a new dining table or dresser.
- Eco-Friendly Choice: Refinishing keeps old furniture out of landfills. It’s a sustainable way to get a new look without creating waste.
- The Challenge of Stripping: The thought of using harsh chemical strippers and sanding for hours is overwhelming for many beginners. Finding a way to stain over an existing finish feels much more achievable.
The good news is that with the right approach, you can get that sleek grey finish you want without starting completely from scratch.
Understanding Wood Stain: Why Layering Can Be Tricky
Before we grab our tools, it helps to understand a little about how stain works. Think of traditional wood stain like watercolor paint, not house paint. It’s designed to be transparent, soaking into the wood fibers to color them while letting the natural grain show through.
Paint, on the other hand, is opaque. It sits on top of the surface, creating a solid film of color. This is the key difference that makes staining over stain a bit of a puzzle.
The Problem with Traditional Stains
If your brown furniture has a protective top coat like polyurethane or lacquer (and most factory-finished pieces do), that layer seals the wood pores. A traditional, thin, oil-based stain can’t penetrate this sealed surface. It will just sit on top, looking greasy, blotchy, and will likely wipe right off, even after it dries.
Even if the wood is only stained and not sealed, the pores are already filled with brown pigment. Adding a lighter grey stain on top will just mix with the existing color, often creating a muddy, disappointing result. You can’t make a dark color lighter with a transparent stain.
This is where our hero comes in: gel stain.
The Magic of Gel Stain for This Project
Gel stain is different. It has a thick, pudding-like consistency. Unlike traditional stain that soaks in, gel stain is designed to sit more on the surface of the wood. It has more pigments and binders, so it acts almost like a hybrid between a stain and a paint. This makes it perfect for our project!
Because it doesn’t rely solely on penetrating the wood, you can apply it over an existing, sealed finish with the right prep. It gives you that beautiful, hand-rubbed look without the messy stripping process.
Gel Stain vs. Traditional Stain: Why Gel is Better Here
| Feature | Gel Stain | Traditional Oil-Based Stain |
|---|---|---|
| Consistency | Thick, like pudding. Doesn’t drip. | Thin and watery. Drips easily. |
| Application | Sits on the surface. Great for covering existing finishes. | Sinks into wood pores. Requires bare or stripped wood. |
| Color Result | More opaque and uniform. Good for hiding minor imperfections. | Transparent. Enhances existing wood grain. |
| Best Use Case | Going darker over a lighter finish, or staining over a sealed surface. | Staining fresh, bare wood to highlight its natural beauty. |
The Proven Best Way: Step-by-Step Guide
Alright, are you ready to transform your furniture? Let’s walk through the process together. Take your time with each step, and you’ll get a result you can be proud of. Remember, good preparation is 90% of the job!
First: Safety Always Comes First!
We’re working with chemicals and creating some dust. Let’s make sure we stay safe.
- Ventilation: Work in a well-ventilated area, like a garage with the door open or outdoors on a calm day. Stain fumes can be strong.
- Eye Protection: Always wear safety glasses to protect your eyes from splashes and dust.
- Gloves: Wear nitrile gloves to keep the stain off your hands. It can be tough to clean off!
- Mask: A dust mask is essential during sanding to avoid breathing in fine particles. When working with stain, a respirator designed for organic vapors is even better. You can find information on choosing the right protection from the U.S. Environmental Protection Agency (EPA).
Tools and Materials You’ll Need
Gathering everything before you start makes the process much smoother.
- TSP (Trisodium Phosphate) cleaner or a good degreaser
- Clean rags or shop towels
- A bucket of clean water
- 220-grit sandpaper or a fine-grit sanding sponge
- A tack cloth
- Grey gel stain (I recommend brands like General Finishes or Minwax)
- Foam brushes or lint-free cloths for application
- Stir stick
- Drop cloth to protect your workspace
- High-quality, oil-based polyurethane or polycrylic top coat
- Mineral spirits for cleanup (if using an oil-based stain and top coat)
Step 1: Clean the Surface Thoroughly
You can’t skip this step! Over the years, furniture collects dirt, grime, oils from our hands, and furniture polish. The new stain won’t stick to a dirty surface.
- Mix your TSP or degreasing cleaner with water according to the directions on the package.
- Wearing your gloves, use a clean rag to scrub the entire piece of furniture. Pay extra attention to areas that get touched a lot, like drawer pulls and tabletops.
- Wipe down the piece with a new rag dampened with clean water to remove any cleaning residue.
- Let the furniture dry completely. This can take a couple of hours. Be patient!
Step 2: Scuff Sand the Existing Finish
We are not trying to remove the old brown stain. I repeat: you do not need to sand down to bare wood! The goal here is just to “scuff up” the shiny top coat. This light sanding creates microscopic scratches that give the new gel stain something to grip onto.
- Take your 220-grit sandpaper or sanding sponge.
- Lightly sand the entire surface. Move in the direction of the wood grain.
- You don’t need a power sander. Gentle, even pressure by hand is perfect.
- When you’re done, the finish should look dull or hazy, not shiny. If you see any shiny spots, go over them again gently.
- Wipe away all the sanding dust with a clean, dry rag. Follow up with a tack cloth to pick up any remaining fine particles. A clean surface is crucial!
Step 3: Test, Test, and Test Again!
This is the most important step for guaranteeing you’ll be happy with the final color. Find a hidden spot on your furniture—the back of a leg, the underside of the tabletop, or the inside of a door. Apply your gel stain to this small area exactly as you plan to for the rest of the piece. Let it dry. This test spot will show you how the grey stain interacts with the brown base. It may look different than it does on the can! Adjust your technique if needed before you commit to the whole project.
Step 4: Apply the Grey Gel Stain
Here comes the fun part! It’s time to see the transformation begin.
- Open your can of gel stain and stir it thoroughly with a stir stick. Don’t shake it! Shaking creates bubbles that can mess up your finish.
- Using a foam brush or a clean, lint-free cloth, apply a thin, even coat of gel stain. I like to wipe it on.
- Work in manageable sections, always moving in the direction of the wood grain.
- The key with gel stain is often to apply it and then wipe off the excess. Apply the stain, let it sit for a few minutes (check the can for recommendations), and then use a clean rag to gently wipe away the excess. The more you wipe off, the more the brown undertone and grain will show through. The less you wipe, the more opaque and solid your grey color will be.
- Let the first coat dry completely. This can take 12-24 hours depending on the brand, temperature, and humidity. Do not rush this!
- If you want a darker, more solid grey color, apply a second coat following the same process. Make sure the first coat is fully dry before starting the second.
Troubleshooting Common Stain Problems
| Problem | Cause | Solution |
|---|---|---|
| Stain is blotchy or streaky. | Uneven application or wiping; applying the stain too thickly. | While the stain is still wet, you can often fix it by wiping the whole section again with a clean rag to even it out. If it’s dry, you may need to apply another thin coat to even the color. |
| Stain feels sticky after 24 hours. | Stain was applied too thickly; high humidity or low temperature is slowing the drying time. | Give it more time. Increase air circulation with a fan (don’t point it directly at the piece) to help it dry. If it’s still sticky after 48 hours, you may need to wipe it down with a rag lightly dampened with mineral spirits to remove the excess. |
| The color is not what I expected. | The brown base color is influencing the final grey tone more than anticipated. | This is why testing is so important! You can try a second coat for a more opaque color, or you might need to try a different shade of grey gel stain. |
Step 5: Seal and Protect Your Beautiful New Finish
Once your final coat of stain is completely dry (give it at least 24-48 hours), you need to protect it. Stain itself provides color, not protection.
- Choose a high-quality top coat. An oil-based polyurethane will provide a very durable, slightly amber finish. A water-based polycrylic will dry crystal clear and has lower odor, but can be slightly less durable. Choose the right one for your project.
- Stir the top coat gently. Just like with the stain, don’t shake it.
- Apply a thin, even coat with a high-quality natural bristle brush (for oil-based) or a synthetic brush (for water-based).
- Let it dry completely, following the can’s instructions.
- Lightly sand with 220-grit sandpaper, wipe away the dust, and apply a second coat. For high-use surfaces like a tabletop, I recommend three coats for maximum durability.
And that’s it! Step back and admire your work. You just gave an old piece of furniture a new life.
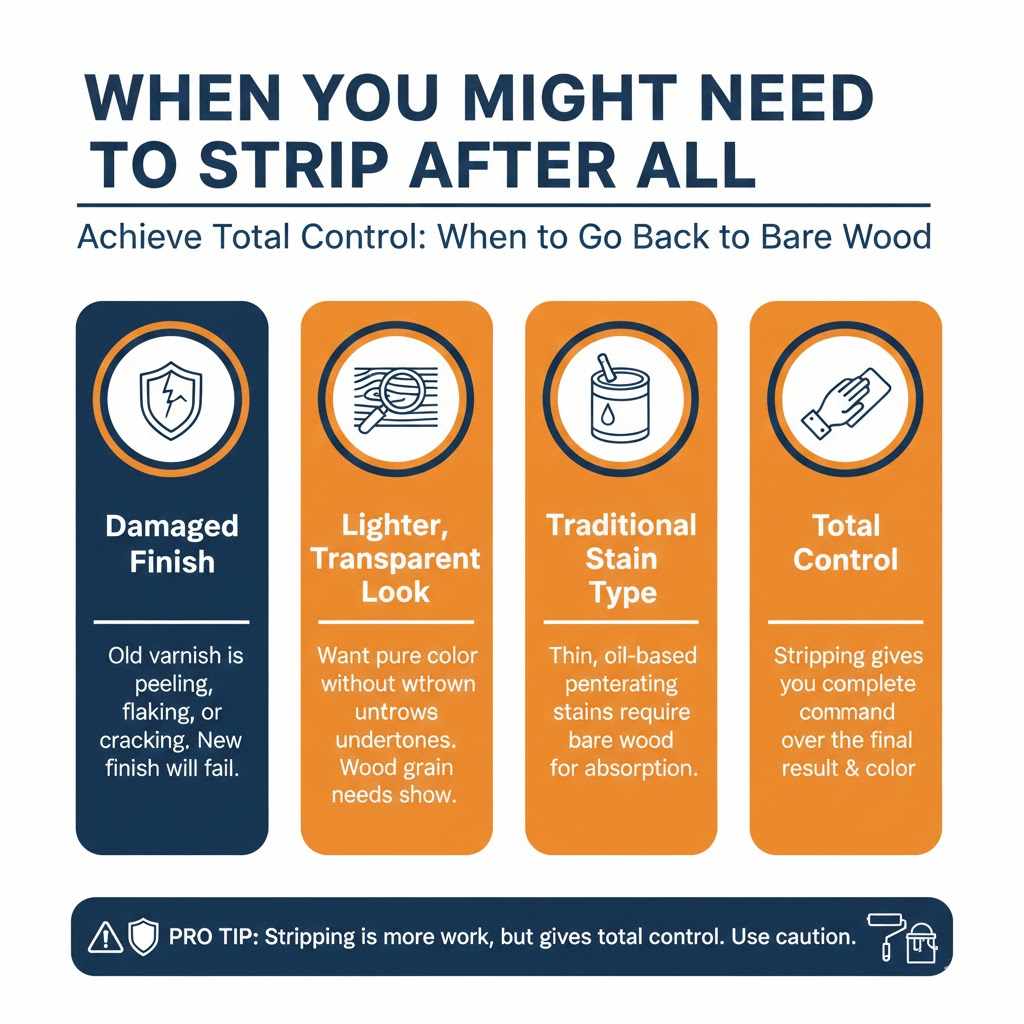
When You Might Need to Strip After All
Sometimes, the “stain over stain” method isn’t the best choice. You may need to fully strip and sand the furniture down to bare wood if:
- The existing finish is damaged: If the old varnish is peeling, flaking, or cracking, the new stain won’t have a stable base. It will fail.
- You want a lighter, more transparent look: If you want the wood grain to really pop and the grey to be pure without brown undertones, you must start with a clean slate. Gel stain can look a bit more “painted on” than a traditional stain.
- You’re using a traditional, penetrating stain: If you want to use a thin, oil-based stain instead of a gel stain, it absolutely must be applied to bare wood.
Stripping is more work, but it gives you total control over the final result. It usually involves using a chemical stripper to remove the old finish, followed by thorough sanding. The Purdue University Extension has excellent resources on furniture refinishing that can guide you through that more advanced process.
Frequently Asked Questions (FAQ)
Can I use regular grey stain instead of gel stain?
It’s not recommended. Regular, thin, oil-based or water-based stains are meant to penetrate wood. If the brown furniture has any sealer on it, the stain will not absorb properly and will likely fail, resulting in a splotchy, sticky mess. Gel stain is designed to work on sealed surfaces, making it the ideal choice for this project.
What if my brown furniture is really dark, like espresso or mahogany?
You can still use this method on dark brown furniture, but your final color will be a very dark grey or charcoal. The dark base will show through and deepen the grey tone significantly. A light grey gel stain will not make a dark espresso finish look light grey. Always test in a hidden spot to see the final color before you commit.
How many coats of grey gel stain will I need?
This depends on the look you want. One coat will often give you a translucent finish where some of the brown and wood grain shows through. A second coat will create a much more solid, opaque grey color. Most projects will look best with two thin coats.
Do I need to sand between coats of gel stain?
No, you do not need to sand between coats of gel stain. Just make sure the first coat is completely dry (wait at least 12-24 hours) before applying the next one. You will only sand before applying the first coat of stain and between coats of the final protective top coat.
Can I just paint over the brown stain with grey paint?
Yes, painting is another option! If you want a completely solid, opaque grey finish, painting is often easier. You would still need to clean and scuff-sand the piece, then apply a good quality primer before your grey paint. The difference is that paint hides the wood grain completely, while gel stain can still allow some of it to show through for a more classic stained look.
Will the new grey finish be durable?
Absolutely, as long as you finish with a protective top coat! The gel stain provides the color, but the polyurethane or polycrylic top coat provides the durability. For a piece that gets a lot of use, like a coffee table or dining table, applying 2-3 coats of a high-quality sealer is essential to protect it from scratches, spills, and wear.
Conclusion: You Can Do This!
So, can you put grey stain over brown stain? The answer is a confident yes, as long as you use the right materials and the right method. By choosing a quality gel stain and taking the time to properly clean and scuff-sand the surface, you can completely change the look of your old furniture without the intimidating process of chemical stripping.
Remember the most important rules: clean well, sand lightly, and always test in a hidden spot first. This simple project is a fantastic way to build your DIY skills and bring a fresh, modern feel to your home. Don’t be afraid to pick up that sandpaper and give it a try. You’ll be amazed at what you can accomplish, and you’ll have a beautiful piece of “new” furniture to show for it.
Happy building!