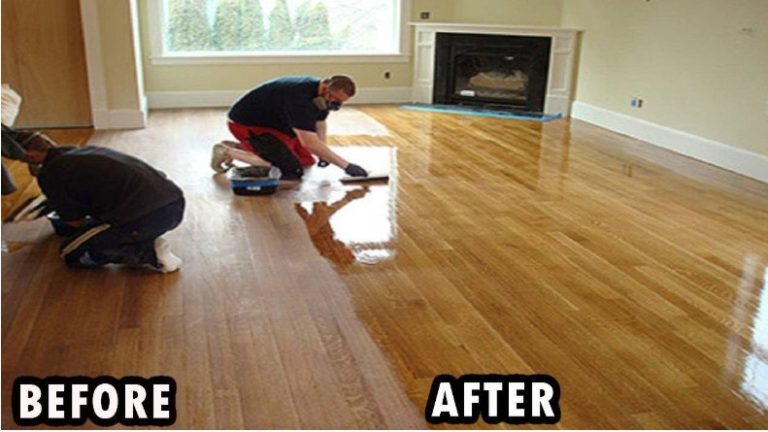
Can You Put Polyurethane Over Wood Stain Without Sanding?
Yes, you can put polyurethane over wood stain. For the best results, ensure the stain is completely dry and properly prepped. Applying a test patch first is always a good idea. This prevents issues like the polyurethane lifting the stain or causing uneven color. It’s a common and effective finishing method.
Understanding Wood Stains and Polyurethane
Wood stain is all about color. It soaks into the wood’s pores. It changes how the wood looks.
It doesn’t add much protection on its own. Polyurethane is a clear protective coating. It forms a tough layer on top of the wood.
This layer shields the wood from spills, scratches, and wear. So, they do very different jobs.
Think of it like painting a wall. The paint is the color, like the stain. The clear coat on top is like varnish.
It keeps the paint from getting scuffed up. The stain colors the wood. The polyurethane seals and protects that color.
Why Most Stains Are Compatible with Polyurethane
Most common wood stains are designed to work with protective topcoats. This is good news! Oil-based stains and water-based stains are the two main types.
Both can be covered by polyurethane. However, the type of polyurethane you choose matters.
Oil-based polyurethanes are strong. They offer good durability. They can sometimes react with certain water-based products if not applied carefully.
Water-based polyurethanes are less likely to yellow over time. They also clean up with soap and water. They are often a bit softer than oil-based versions.
Stain Types and Topcoat Harmony
Oil-Based Stains: These penetrate deep. They often contain solvents. They work well with oil-based polyurethanes.
They can also work with water-based ones if dry and prepped.
Water-Based Stains: These dry faster. They are easier to clean up. They are compatible with water-based polyurethanes.
They also work with oil-based ones with proper drying.
Gel Stains: These sit more on the surface. They offer more control. They are very compatible with polyurethane.
They dry quickly too.
The Crucial Step: Ensuring Stain is Dry
This is the MOST important part. If the stain isn’t totally dry, disaster can strike. Polyurethane can trap moisture.
It can cause the stain to look patchy or uneven. It might even lift the stain right off the wood. This is something I learned the hard way.
I was working on a small table once. I was in a rush to finish it. I thought the stain felt dry to the touch.
I put on the first coat of poly. Within an hour, I saw streaks. The stain looked like it was melting.
It was a complete mess. I had to sand it all down and start over. It taught me patience.
Drying times vary a lot. They depend on the stain type. They depend on humidity.
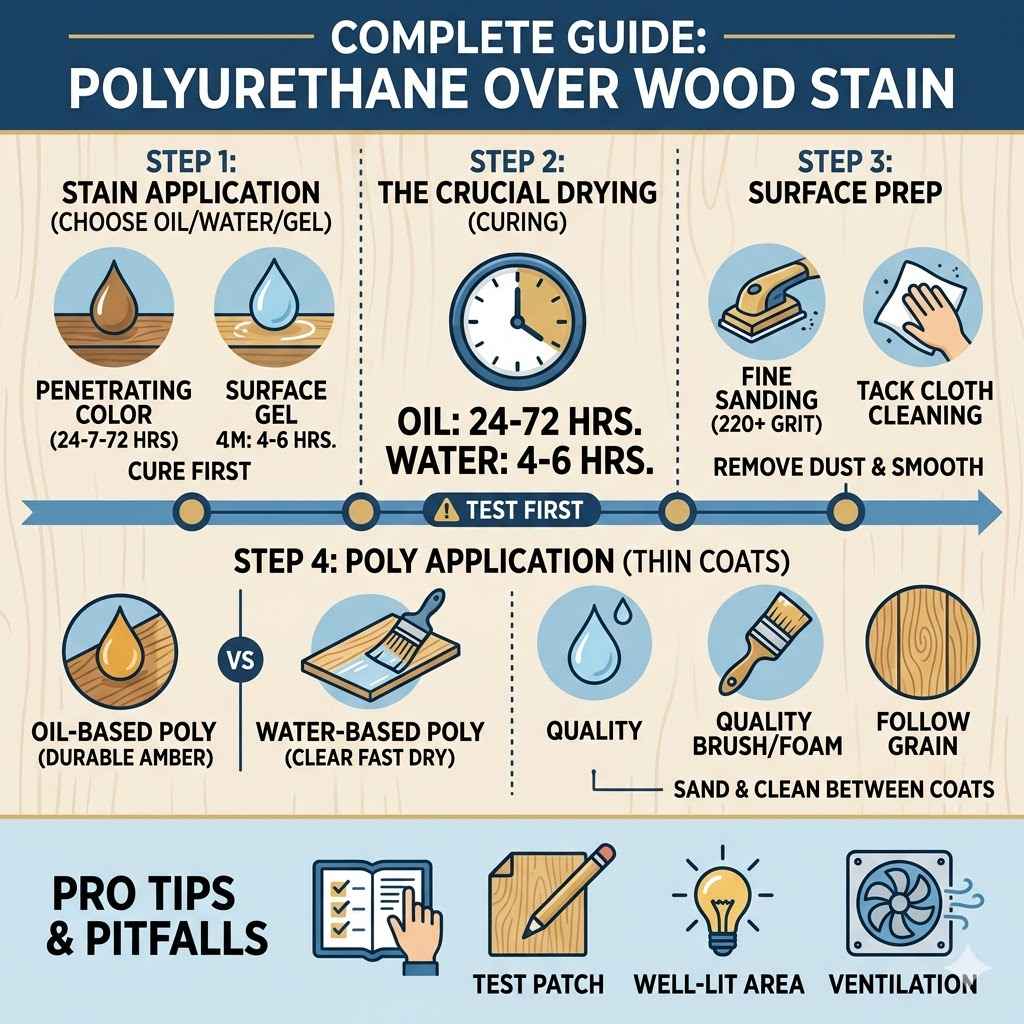
They depend on temperature. Always check the can’s instructions. For oil-based stains, this can be 24-72 hours.
Water-based stains might be ready in just a few hours. But “dry to touch” is not “dry through.” Give it at least 24 hours, even for water-based. Better yet, wait 48 hours if you can.
This ensures the stain has fully cured.
Drying Time Do’s and Don’ts
DO: Read the stain can for recommended drying times.
DO: Wait at least 24 hours for oil-based stains, 48 hours is safer.
DO: Wait at least 4-6 hours for water-based stains.
DON’T: Rush the process. Patience saves you work later.
DON’T: Rely only on the “dry to touch” feel.
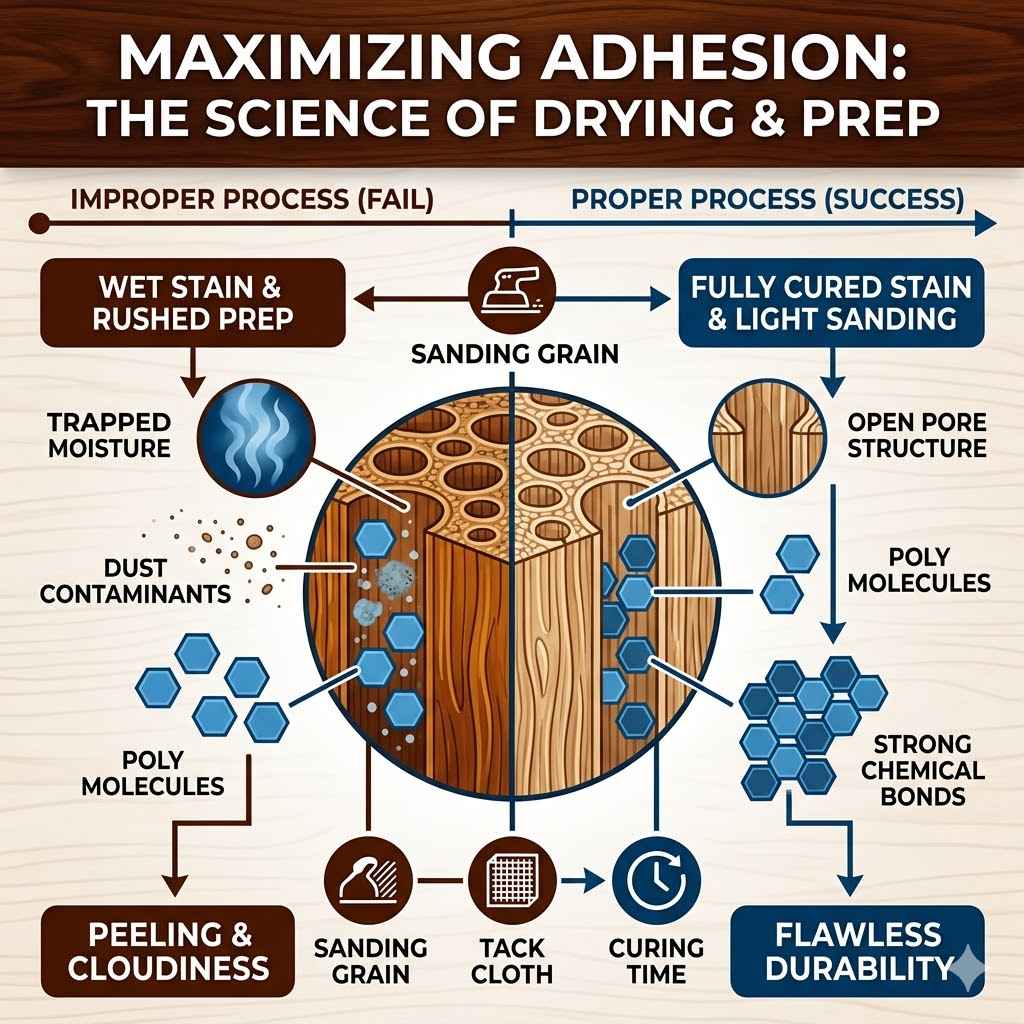
Surface Preparation: The Key to a Smooth Finish
Once the stain is dry, you need to prep the surface. This removes dust. It smooths out any rough spots.
It makes the polyurethane stick better. Good prep means a professional-looking job. Poor prep means a finish that might peel or look bumpy.
Start by lightly sanding the stained wood. Use a fine-grit sandpaper. Think 220-grit or higher.
This isn’t to remove the stain. It’s to create a smooth surface. It also slightly “opens up” the wood pores.
This helps the polyurethane adhere. Sand in the direction of the wood grain. Always.
After sanding, you MUST remove all dust. A tack cloth is your best friend here. It’s a sticky cloth.
It lifts dust particles. Wipe the entire surface gently. You can also use a damp cloth.
Make sure it’s just damp, not wet. Let the surface dry completely again. Dust is the enemy of a smooth finish.
I learned this when I thought wiping with a dry rag was enough. Big mistake. Dust specks looked like mountains under the poly.
It was awful.
Surface Prep Checklist
- Sand Lightly: Use 220-grit or finer sandpaper.
- Follow Grain: Always sand with the wood grain.
- Remove Dust: Use a tack cloth or a slightly damp cloth.
- Wipe Clean: Ensure the surface is completely dust-free.
- Let Dry: Allow any moisture from cleaning to evaporate.
Choosing the Right Polyurethane
There are different types of polyurethane. Each has its own pros and cons. The one you pick can affect how well it bonds with the stain.
And how the final finish looks.
Oil-Based Polyurethane: This is very durable. It offers good water resistance. It tends to give a slightly amber tone to the wood.
This can warm up some stain colors nicely. It takes longer to dry than water-based. It also has stronger fumes.
You’ll need mineral spirits for cleanup.
Water-Based Polyurethane: This dries clear. It won’t yellow over time. This is good if you want the stain color to stay true.
It dries much faster than oil-based. It has fewer fumes. Cleanup is with soap and water.
It can sometimes be less durable than oil-based. But modern formulas are very good.
Polyurethane Varnish: Sometimes you’ll see this term. It’s essentially the same thing. It’s a clear protective coating.
For most projects, either type will work. If you used an oil-based stain, an oil-based poly will often be a natural pairing. If you used a water-based stain, a water-based poly is a good match.
However, you can mix them. Just be extra sure the stain is bone dry if you’re putting oil-based poly over water-based stain. And vice-versa, though less common.
Application Techniques for a Flawless Coat
How you apply the polyurethane is just as important as the prep. Rushing this step leads to brush marks or an uneven finish. It’s frustrating.
Use a good quality brush or foam applicator. Synthetic brushes work well for water-based poly. Natural bristles are better for oil-based.
Foam brushes give a very smooth finish. They are great for smaller projects.
Apply the polyurethane in thin, even coats. Don’t overload the brush. Wipe off excess poly before touching the wood.
Apply in long, smooth strokes. Always follow the direction of the wood grain. Overlap each stroke slightly.
Work from the edges inwards. This helps avoid drips. If you do get a drip, smooth it out quickly before it dries.
It’s much harder to fix later.
Let each coat dry completely. Check the can for drying times between coats. This is usually several hours.
For oil-based, it might be 12-24 hours. For water-based, 2-4 hours. After the first coat dries, very lightly sand it again.
Use a 320-grit or higher sandpaper. This knocks down any dust nibs or tiny bumps. Wipe away the dust.
Then apply the next coat.
Most projects need 2-3 coats of polyurethane. Some high-traffic items might need 4 or more. Each coat adds protection.
It also deepens the sheen. The final coat should not be sanded.
Application Tips
- Use Quality Tools: Good brushes or foam applicators matter.
- Thin Coats: Apply thin, even layers. Don’t glob it on.
- Follow the Grain: Always brush in the direction of the wood.
- Overlap Strokes: Overlap each stroke for smooth coverage.
- Work Edges First: This helps prevent drips.
- Sand Between Coats: Use fine grit (320+) to smooth.
- Wipe Dust: Always remove dust after sanding.
- Multiple Coats: Build up protection with 2-4 coats.
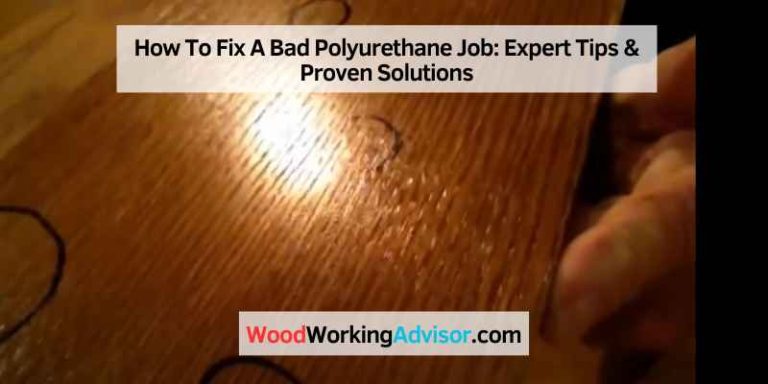
Potential Pitfalls and How to Avoid Them
Even with the best intentions, things can go wrong. Knowing common issues helps you avoid them. Or fix them if they happen.
1. Stain Lifting: This is the most common problem. It happens when the stain isn’t fully dry.
Or when you apply poly too thickly. Or if the poly is too aggressive. Using thin coats of poly helps prevent this.
Also, letting the stain cure longer is key. If it happens, you’ll need to sand back down. And let the stain dry even longer.
2. Streaky or Uneven Finish: This often comes from poor application. Or not enough coats.
Or applying in a dusty environment. Make sure you are using enough light. This helps you see where you’ve applied.
And where you’ve missed. Work in a well-lit, dust-free area. Always maintain a wet edge when brushing.
This means overlapping your strokes into the wet area.
3. Brush Marks: This happens if you use a cheap brush. Or if you apply too much pressure.
Or if you don’t smooth out your strokes. Always use a good brush. Apply light pressure.
Finish each stroke smoothly.
4. Poor Adhesion: If the surface wasn’t prepped well, the poly won’t stick. Or if you applied it over a wax or silicone finish.
Always clean the surface thoroughly. Make sure there’s no waxy residue from the stain itself.
When to Use an Oil-Based Polyurethane
Oil-based polyurethane is a classic choice for a reason. It’s tough. It’s durable.
It offers excellent protection against water and chemicals. This makes it ideal for tabletops, bar tops, and kitchen cabinets. Pieces that see a lot of use and potential spills.
The slight ambering effect can be a benefit. It adds warmth to woods like oak or pine. It can also deepen the look of certain stains.
Like dark walnut or cherry stains. If you want that rich, classic look, oil-based is a great pick. Just be prepared for longer drying times.
And for the stronger fumes. Good ventilation is a must.
I remember refinishing an old oak dining table. The original finish had a warm, deep look. I used an oil-based stain.
Then I followed up with three coats of oil-based polyurethane. The result was stunning. The wood grain popped.
The color was rich. And it felt incredibly solid. It looked like it did when it was brand new, maybe even better.
Best Uses for Oil-Based Poly
- High-traffic surfaces (tables, desks, floors).
- Areas needing strong water and chemical resistance.
- When a warm, amber tone is desired.
- Projects where maximum durability is the goal.
When to Opt for a Water-Based Polyurethane
Water-based polyurethanes have come a long way. Modern formulas offer excellent durability. They dry clear, so they won’t alter the color of your stain.
This is perfect if you’ve achieved a specific look with a light or natural stain. Or if you’re worried about ambering over time.
Their fast drying time is a huge plus for busy projects. You can often apply a second coat in just a few hours. This means you can finish a project in a day or two.
Instead of waiting several days for oil-based to cure between coats. The low VOCs (volatile organic compounds) mean fewer fumes. This makes working indoors much more pleasant.
I used a water-based poly on a set of maple bookshelves. I wanted the natural, light color of the maple to show through. I used a very light, clear stain.
Then I applied four coats of a high-quality water-based poly. The finish was crystal clear. It protected the wood perfectly.
And it didn’t add any yellow tint at all. It looked super clean and modern.
Best Uses for Water-Based Poly
- Projects where stain color must remain true.
- When fast drying time is important.
- Indoor projects with limited ventilation.
- Lighter woods or finishes that shouldn’t yellow.
Can You Put Polyurethane Over Water-Based Stain?
Yes, absolutely. This is a very common and effective combination. The key is still proper drying.
Water-based stains typically dry much faster than oil-based ones. This makes the process quicker. Again, “dry to the touch” is not “fully cured.” Give it ample time.
At least 4-6 hours is a minimum. 24 hours is even better for peace of mind.
When you cover a water-based stain with polyurethane, you have a choice. You can use a water-based poly. This is a natural pairing.
Or you can use an oil-based poly. If you choose oil-based poly, just be extra cautious. Ensure the water-based stain is completely dry and cured.
This prevents any chance of the solvents in the oil-based poly interacting poorly with the water-based stain. Lightly sanding and wiping down after the stain is dry helps create a stable surface.
Can You Put Polyurethane Over Oil-Based Stain?
Yes, this is also very common. Oil-based stains create a rich, deep color. They often need more time to cure than water-based stains.
This can be 24 to 72 hours. Never rush this. If the stain is not fully cured, the oil-based poly can react with it.
This can cause blotching or a cloudy appearance.
You can use either oil-based or water-based polyurethane over an oil-based stain. Using oil-based poly will give a consistent oil-based finish. It will add to the warm amber tone.
Using water-based poly will provide a clear protective coat. It will keep the stain color exactly as it is. You just need to be sure the oil-based stain is completely dry before you apply the water-based poly.
This is because water-based poly is thinner and can potentially react if the oil-based stain is still “breathing” solvents.
What About Gel Stains and Polyurethane?
Gel stains are a bit different. They don’t penetrate the wood as deeply. They sit more on the surface.
This makes them great for very hard woods. Or for when you want to achieve a specific look like a faux finish. Because they sit on the surface, they dry relatively quickly.
Gel stains are generally very compatible with polyurethane. Whether oil-based or water-based. The surface is usually smooth.
Prep is still important, of course. Light sanding and dust removal are key. Since gel stain is often applied thicker, make sure it’s fully dry.
You don’t want to trap any of that gel stain. It’s usually ready for a topcoat within 24 hours.
Myth vs. Reality: Stain and Polyurethane
Myth: Polyurethane will always change the color of the stain.
Reality: Water-based polyurethane dries clear and won’t change the stain color. Oil-based polyurethane adds a slight amber tone.
Myth: You can’t put water-based poly over oil-based stain.
Reality: You can, as long as the oil-based stain is completely dry and cured. Proper prep is vital.
Myth: If the stain feels dry, it’s ready for poly.
Reality: “Dry to the touch” is different from “fully cured.” Always wait longer than you think you need to.
Real-World Context: Common Scenarios
Imagine you’re refinishing an old wooden desk. You’ve sanded off the old finish. You’ve applied a nice rich brown stain.
Now you need to protect it. This desk will see papers, laptops, and maybe coffee cups. So, durability is key.
You’ll want at least 3-4 coats of a good quality polyurethane. An oil-based poly would offer excellent protection here. Or a high-solids water-based poly.
Or consider a wooden picture frame. This doesn’t get much abuse. You might have stained it a beautiful cherry color.
A couple of thin coats of water-based polyurethane would be perfect. It will protect the frame. And keep the color looking fresh.
The quick drying time means you can frame your photo in no time.
In American homes, wood furniture and floors are common. Whether it’s a pine table in a country kitchen or oak flooring in a living room, these surfaces need protection. The way you stain and finish them impacts their longevity and appearance.
Understanding the interaction between stain and poly helps ensure these pieces last for generations.
What This Means for You: Normal vs. Concerning Signs
So, when is your stained and polyurethaned project looking great? And when should you be worried?
Normal Signs: A smooth, even sheen. The stain color looks vibrant and consistent. The wood feels protected.
You might see a slight sheen or gloss. This is the polyurethane doing its job. If you used oil-based poly, a subtle amber tone is normal and often desirable.
Concerning Signs:
- Tackiness: If the surface feels sticky after days of drying, the polyurethane may not have cured properly. This could be due to poor ventilation, low temperatures, or applying too thick.
- Peeling or Chipping: This usually means poor adhesion. The surface wasn’t prepped correctly.Or there was oil or wax on the wood.
- Blotching or Streaking: If the color is uneven under the poly, it often points to the stain not being fully dry before the poly was applied.
- Cloudiness or Haziness: This can happen if moisture gets trapped. Or if the poly was applied in very humid conditions. It can also be a sign of incompatible finishes.
If you see concerning signs, don’t panic. Often, you can fix them. It might involve light sanding to remove the problematic layer.
Then re-applying properly. It’s always better to address issues early.
Quick Tips for Success
Here are some easy tips to help you get that perfect finish:
- Test First: Always test your stain and polyurethane combo on a scrap piece of wood. This is your safety net.
- Work in a Dust-Free Area: Close windows and doors. Avoid fans blowing directly on your work.
- Good Lighting is Key: You need to see what you’re doing. Use bright lights.
- Thin Coats are Better: It’s easier to build up thin coats than to fix one thick, gloppy one.
- Clean Up Immediately: Don’t let polyurethane dry on your brushes or tools. Clean them right away.
- Ventilation is Important: Even with low-VOC products, fresh air helps.
Frequently Asked Questions
Can I apply polyurethane over a pre-stained furniture piece?
Yes, but only if the original stain is completely dry and cured. You’ll also need to lightly sand the surface and wipe it clean to ensure the new polyurethane adheres properly. Always test in an inconspicuous area first.
Will polyurethane make my stained wood look plasticky?
The sheen level of the polyurethane determines how “plasticky” it looks. Polyurethanes come in matte, satin, semi-gloss, and gloss finishes. A matte or satin finish will look more natural.
A high-gloss finish will be very shiny. Choosing the right sheen for your project is important.
How many coats of polyurethane should I use over stained wood?
For most projects, 2 to 3 coats are sufficient. For high-traffic items like tabletops or floors, 3 to 4 coats are recommended for extra durability. Always follow the manufacturer’s instructions for your specific product.
Can I use a spray polyurethane over wood stain?
Yes, spray polyurethane can be a great option. It often provides a very smooth, even finish. Ensure the surface is properly prepped and dust-free.
Follow the spray can’s instructions for distance and application. Practice on scrap wood first to get the hang of it.
What happens if I put polyurethane on too soon after staining?
If the stain is not completely dry, the polyurethane can cause the stain to lift, streak, or become blotchy. It can trap moisture, leading to a cloudy or discolored finish. It’s crucial to allow adequate drying and curing time for the stain before applying any topcoat.
Can I mix oil-based and water-based polyurethanes on the same project?
It’s generally not recommended. While it’s sometimes possible if done carefully with proper preparation, it can lead to adhesion problems or an uneven finish. Sticking to one type of polyurethane throughout the project is the safest bet for a durable and consistent result.
Conclusion
So, the answer is a resounding yes! You can put polyurethane over wood stain. The key is patience and proper preparation.
Make sure your stain is completely dry. Lightly sand and clean your surface. Then apply thin, even coats of your chosen polyurethane.
By following these steps, you’ll protect your beautiful stained wood. You’ll also ensure it looks great for years to come. Happy finishing!