Can You Sand Plywood Smooth? Best Methods That Work Fast
You can sand plywood smooth for a better finish on your projects. It involves choosing the right sandpaper grits and using proper sanding techniques. Careful sanding helps prepare the wood for paint or stain, making it look professional and feel nice to the touch.
Understanding Plywood Surfaces
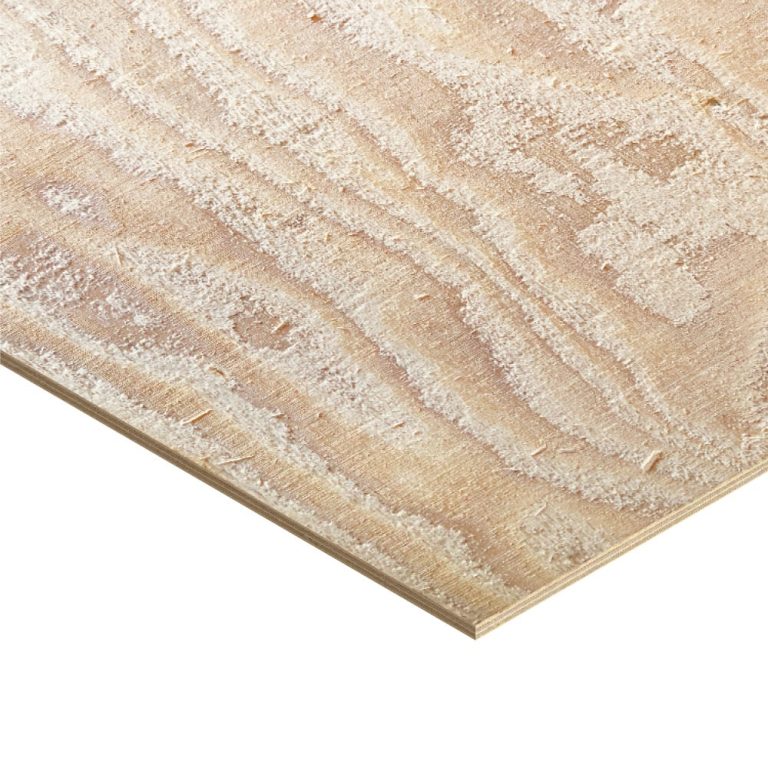
Plywood is made from thin layers of wood veneer. These layers are glued together with the grain running in different directions. This cross-graining makes plywood very strong.
However, it also means the surface can be a little uneven. You might see small gaps or raised wood fibers. This is especially true on the cheaper grades of plywood.
Even the good stuff can have a few rough spots. These imperfections can ruin a smooth paint job or a slick stain finish. That’s why sanding is so important.
The type of plywood matters too. Hardwood plywood, often used for cabinets and furniture, usually has a smoother face veneer. This makes it easier to sand.
Softwood plywood, common in construction, might have more knots and a rougher texture. Knowing your plywood helps you pick the best sanding approach.
The Art of Sanding Plywood Smooth
Sanding is all about removing the high spots and filling the low spots. You use abrasive materials to do this. Think of it like gently scraping away the rough bits.
When done right, it creates a flat, smooth surface. It’s crucial to sand with the wood grain. Going against the grain makes scratches that are hard to remove.
For plywood, the main grain direction is usually on the surface layer. Always try to follow that main direction.
It’s not just about rubbing sandpaper on the wood. It’s a process. You start with a rougher grit to take off the big bumps.
Then, you move to finer grits. Each finer grit removes the scratches left by the one before it. This step-by-step approach is key to getting that super smooth finish.
Rushing this can leave you with a surface that looks okay at first but shows marks later.
My Plywood Sanding Nightmare (And What I Learned)
I remember working on a custom bookshelf project a few years ago. I’d bought this beautiful birch plywood. It looked so smooth in the store.
I thought, “Great, I can just give it a quick once-over and paint it.” Oh, how wrong I was. I grabbed some medium-grit sandpaper and started going at it with an orbital sander. I was trying to be fast.
Within minutes, I noticed it wasn’t getting smoother. Instead, it felt… fuzzy. Tiny wood fibers were standing up everywhere.
It looked awful!
Panic set in. I had a deadline! I switched to a finer grit, but the fuzzy bits just got smoother, not gone.
I spent hours trying to fix it, only to make it worse. My buddy, a seasoned woodworker, came over. He took one look and just chuckled.
He explained that I hadn’t used the right grits in the right order. He showed me how to start with a slightly coarser grit to level it, then work my way up carefully. He stressed going with the grain, even when using a power sander.
He also showed me how to wipe down the surface with a damp cloth between grits. This lifts those stray fibers for the next sanding pass. That day, I learned that sanding plywood smooth is a skill, not just a chore.
It requires patience and the right tools.
Key Sanding Grits Explained
Starting Grit: Use this to remove rough patches or old finishes. For plywood, 80-100 grit is often a good start.
Middle Grits: These remove the scratches from the starting grit. Move to 120-150 grit.
Finishing Grits: These create the final smooth surface. Use 180-220 grit for most projects. For very fine finishes, you might go higher.
Choosing the Right Sandpaper for Plywood
The type of sandpaper is super important. Sandpaper comes in different grits. Grit is the number of abrasive particles on the paper.
Higher numbers mean finer grit and a smoother finish. Lower numbers mean coarser grit and faster material removal.
For plywood, you’ll likely need a few different grits. Start with something like 80 or 100 grit. This is for initial leveling and removing any major imperfections.
Then, move to 120 or 150 grit. This grit refines the surface and removes the scratches from the coarser grit. Finally, you’ll want 180 or 220 grit.
This is your finishing grit. It makes the surface feel incredibly smooth, ready for paint or stain.
Don’t skip grits. If you jump from 80 to 220, you’ll leave coarse scratches under the fine ones. They might not show right away, but they will when you paint.
Always use each grit until the surface is uniform. Then, move to the next finer grit.
Sanding Tools: Hand vs. Power
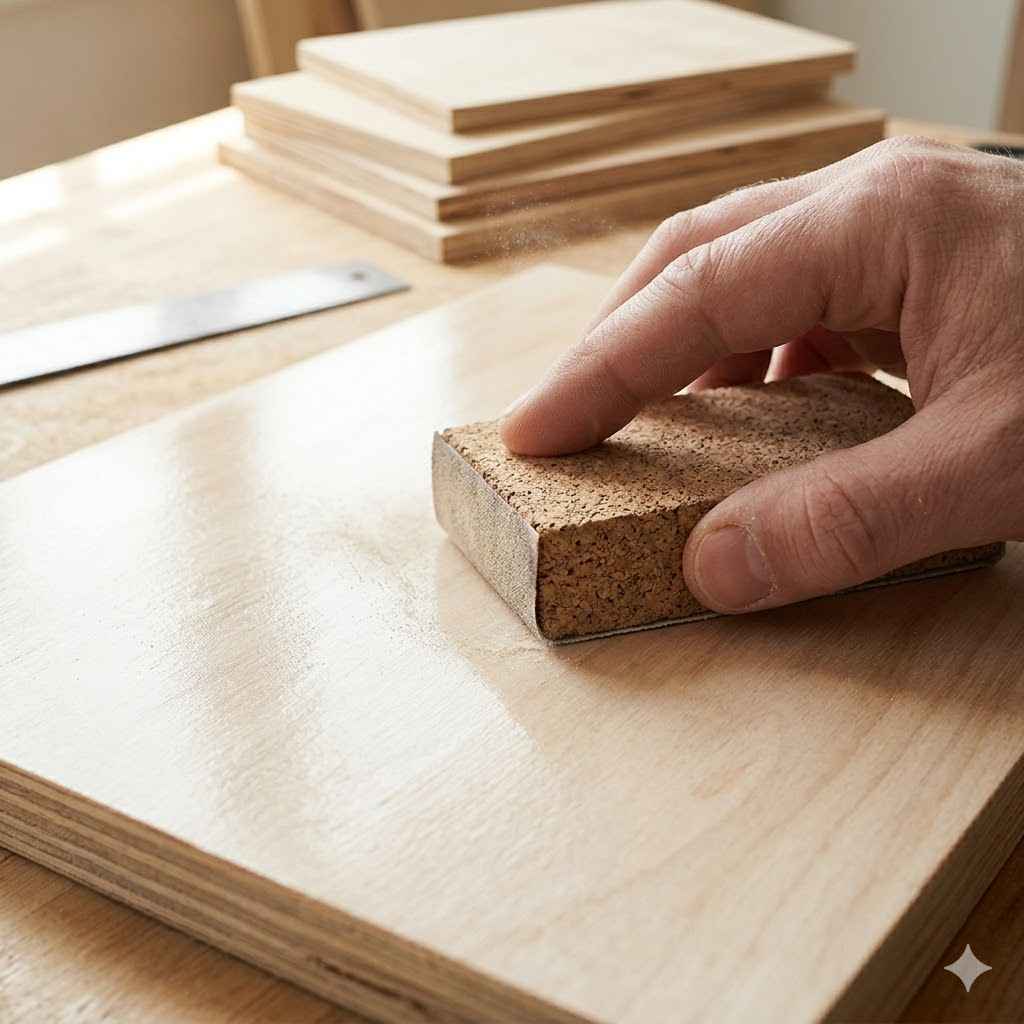
Hand Sanding: Great for small areas or when you want total control. Use a sanding block for even pressure.
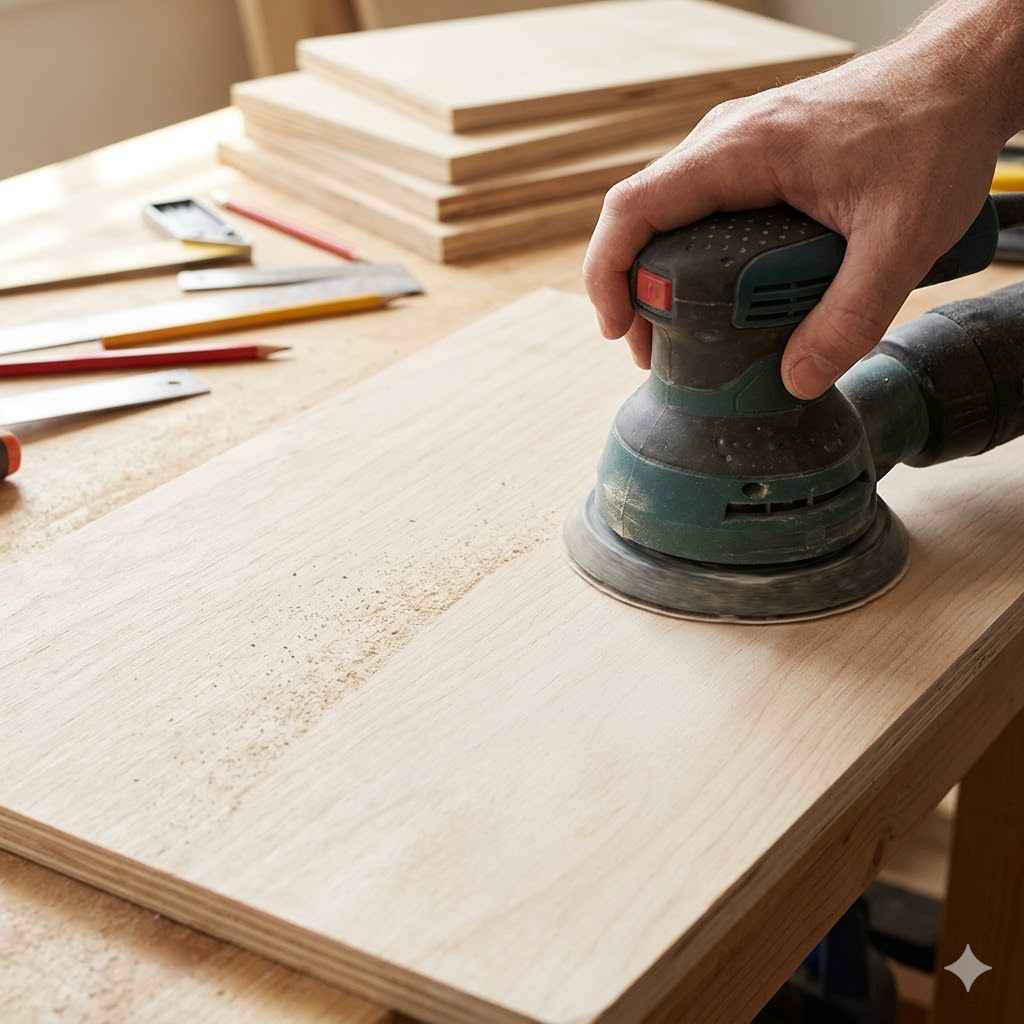
Orbital Sander: Much faster for large surfaces. Makes it easier to get an even finish. Keep it moving to avoid sanding too much in one spot.
Detail Sander: Useful for corners and edges. Smaller and more precise than an orbital sander.
Mastering the Sanding Technique
How you sand makes a big difference. For hand sanding, always use a sanding block. This helps you apply even pressure across the surface.
Without a block, your fingers will create uneven spots. Rub the sandpaper back and forth, always following the direction of the wood grain. You’ll feel when the surface starts to become smooth.
Don’t press too hard. Let the sandpaper do the work.
When using a power sander, like an orbital sander, keep it moving. Don’t let it sit in one spot for too long. This can create swirl marks or deep gouges.
Move the sander slowly and steadily across the plywood surface. Again, always follow the grain. Overlap your passes slightly to ensure you cover everything evenly.
Dust is also a big issue. Wear a mask and use a vacuum attachment if your sander has one. Clean the surface often.
After each grit, it’s a good idea to clean the surface. A dry brush or vacuum works well. Some people like to wipe the surface with a slightly damp cloth.
This raises any stray wood fibers. Then, you sand again with the same grit. This second pass removes those raised fibers.
This makes the surface even smoother for the next grit. This extra step can make a huge difference, especially for fine finishes.
Quick-Scan Table: Grit Progression
| Goal | Grit Range | Tool Type |
|---|---|---|
| Initial Leveling | 80-100 | Orbital Sander / Hand Block |
| Smoothing | 120-150 | Orbital Sander / Hand Block |
| Final Finish Prep | 180-220 | Orbital Sander / Hand Block |
Dealing with Plywood’s Unique Challenges
Plywood has unique traits that can make sanding tricky. One common issue is the possibility of sanding through the top veneer. This is especially a risk with thinner plywood or if you sand too aggressively.
The top veneer is often very thin. If you go too deep, you’ll expose the layer underneath, which has a different grain pattern. This looks terrible, and it’s very hard to fix.
Always be mindful of how much material you’re removing.
Another challenge is the edge banding or tape you might apply. If you sand over these edges too hard, they can lift or become uneven. Take extra care when sanding near edges.
Feather your sanding strokes. This means gradually reducing pressure as you approach the edge. This blends the sanded area smoothly without damaging the edge treatment.
Glue is also a factor. Sometimes, there are small dried glue spots on the surface. These can clog your sandpaper quickly.
You might need to scrape these off before sanding. If your sandpaper keeps clogging, it’s time for a fresh sheet. Clogged sandpaper doesn’t sand; it just smears.
Myth vs. Reality: Plywood Sanding
Myth: You can use just one grit of sandpaper.
Reality: Multiple grits are needed to remove scratches and achieve a smooth finish.
Myth: Power sanders always give a better finish.
Reality: Power sanders are faster but require skill to avoid mistakes. Hand sanding offers more control for delicate areas.
Myth: Once it feels smooth, it’s ready for paint.
Reality: You must check for scratches under good light and dust off thoroughly before finishing.
Preparing for Paint or Stain: The Critical Step
Once you’ve finished sanding with your final grit (usually 220), the surface should feel wonderful. But you’re not quite done yet. The most important step before applying any finish is cleaning off ALL the dust.
Wood dust is incredibly fine. It gets everywhere. You need to remove every last speck.
Start by vacuuming the surface thoroughly. Then, use a tack cloth. A tack cloth is a sticky cloth designed to pick up fine dust particles that vacuuming might miss.
Wipe the entire surface with the tack cloth. You’ll see dust come off onto the cloth. Fold the cloth over to expose a clean sticky surface and continue wiping.
For really dusty areas, you might even wipe it down with a slightly damp (not wet!) cloth after vacuuming, then let it dry completely before using the tack cloth. This is especially important for certain types of finishes like lacquers or clear coats, where dust can be very visible.
Inspect the surface under good light. Look at it from different angles. Any remaining dust or missed scratches will stand out.
If you see any, you might need to do a light touch-up sanding with your finest grit. Then, clean again. This thorough preparation ensures your paint or stain will go on smoothly and look professional.
Tips for Dust Control
- Work in a well-ventilated area, ideally outdoors or in a garage.
- Use a shop vacuum with a good filter attached to your sander if possible.
- Wear a good quality dust mask or respirator.
- Clean up all sanding dust with a vacuum and then a tack cloth.
- Consider using a water-based pre-stain conditioner on some plywoods to help even out absorption.
Sanding Specific Plywood Types
Not all plywood is the same. The type you are working with might require slightly different approaches. For example, baltic birch plywood is known for its strength and stability.
It has multiple thin plies with no voids, making it very strong. Its surface is usually smooth and consistent, making it a pleasure to sand. You can often get away with starting with a slightly higher grit, like 120, if the surface is already in good shape.
Always end with 220 grit for a perfect finish.
Cabinet-grade plywood, often made from hardwoods like maple, oak, or cherry, is also designed for a smooth, fine finish. The face veneers are usually chosen for their appearance and smoothness. These sand beautifully.
Follow the same grit progression: 80 or 100 to start, then 150, and finish with 220. Be careful not to sand through the thin, decorative top veneer.
Construction-grade plywood, like CDX, is not typically meant for visible surfaces. It’s rougher and has more imperfections. While you can sand it smoother, it might be more challenging.
You may need to start with a coarser grit, like 60 or 80, to deal with deeply embedded wood fibers or small knots. It will still be harder to achieve a perfectly smooth surface compared to hardwood plywood. For these, focus on getting it smooth enough for its intended purpose, which might be as a subfloor or wall sheathing.
Understanding Plywood Grades
A-A: Both sides are smooth and sanded. Good for visible surfaces.
B-B: Both sides are solid but may have some minor imperfections like small knots.
C-D: One side (C) is solid with some knots and rougher texture. The other side (D) is rough and may have large knots or open defects.
CDX: Used for construction. ‘C’ for the face, ‘D’ for the back, and ‘X’ for exterior glue. Not for fine finishes.
When to Worry: Signs You’ve Sanded Too Much
It’s possible to over-sand plywood. This is a real concern, especially with thinner sheets or when using power tools. The most obvious sign is when you start to see the underlying ply layer.
This happens if the top veneer is very thin. If you see a different wood color or grain pattern showing through, you’ve gone too far. This is called sanding through the veneer.
Another sign of over-sanding is if the surface starts to feel weak or soft in certain spots. This can happen if you’ve removed too much material, making the veneer fragile. Swirl marks from an orbital sander that won’t disappear can also indicate aggressive sanding.
If you can’t remove them with finer grits, you might have an issue.
If you do sand through a veneer, it’s not always a total disaster, but it’s difficult to fix. For small spots, you might be able to fill them with wood filler that matches the veneer color. Then, you’d have to sand that area very carefully.
For larger areas, you might need to consider applying a new veneer layer or painting the entire piece a solid color to hide the blemish. This is why starting with a slightly less aggressive grit and building up is always safer.
Sanding Edges and Corners
The edges of plywood often need special attention. The exposed plies on the edges can be rough and splintery. You’ll want to sand these smooth as well.
Start with the same grit you used for the surface. Follow the grain of the plies. You can use a sanding block wrapped around the edge for even pressure.
Take your time here. The edges need to be smooth so they don’t snag or feel rough to the touch.
When sanding corners, be careful not to round them over too much unless that’s the look you want. Use a sanding block or a folded piece of sandpaper. Apply gentle pressure.
For inside corners, a folded piece of sandpaper or a sanding sponge can get into those tight spots. The goal is to soften any sharp edges without creating a rounded profile, unless that is intended.
If you have applied edge banding to your plywood project, you will need to sand it very carefully. Start with a medium grit and work your way up. Feather your sanding strokes as you approach the edge banding to prevent lifting the tape or veneer.
Ensure the edge banding is flush with the plywood surface before starting. If it’s slightly proud, you’ll need to sand it down carefully. If it’s set in, you can fill the gap with wood filler and then sand.
Alternatives to Sanding
While sanding is the most common way to get a smooth plywood surface, there are a few alternatives or complementary techniques. Wood filler can be used to fill small holes, dents, or even some of the minor voids in lower-grade plywood. After it dries, you sand the filler smooth.
This is a great way to fix specific problem areas.
Wood conditioner or pre-stain can help. This is especially useful when staining plywood. Plywood can soak up stain unevenly.
A conditioner helps the wood absorb the stain more uniformly. It doesn’t make the wood smooth, but it helps the stain look better on a properly sanded surface. It can also raise some fibers, which you then lightly sand off with a very fine grit (like 220 or even 320) before staining.
For painted projects, if the plywood is particularly rough and you don’t want to spend hours sanding, you could consider using a high-build primer. This type of primer is thicker and can help fill in minor imperfections. You’ll likely still need to do some light sanding between coats of primer to get a smooth surface for your paint.
This can be easier than trying to sand out every flaw in the raw wood.
Frequently Asked Questions About Sanding Plywood
Can I sand plywood with just my hands?
Yes, you can hand sand plywood. It takes more time and effort than using a power sander. For very small projects or delicate areas, hand sanding with a sanding block is often best.
It gives you maximum control and helps avoid mistakes. Make sure to use enough sandpaper and replace it when it gets worn out.
How do I know if my plywood is smooth enough?
Your plywood is smooth enough when it feels consistently smooth to the touch across the entire surface. Hold it up to a light source at an angle to look for any scratches, gouges, or fuzzies you might have missed. Run your hand over it gently.
If you feel any roughness or high spots, keep sanding with the appropriate grit. For a perfect finish, it should feel like silk.
What is the best grit of sandpaper to finish plywood?
The best grit to finish plywood for most projects is 180 or 220 grit. This is considered a fine grit that removes the scratches left by coarser grits and leaves the wood surface very smooth. For extremely fine finishes, like on high-gloss furniture, you might even go up to 320 or 400 grit.
Always end with a fine grit after progressing through the necessary coarser grits.
Can I use steel wool on plywood?
You can use steel wool on plywood, especially for final smoothing or between coats of finish. However, for initial sanding and leveling, sandpaper is much more effective. Steel wool can leave behind tiny metal fragments that can rust later, especially if the wood is exposed to moisture.
If you use steel wool, opt for fine grades (like #0000) for finishing touches and always clean the surface very thoroughly afterward to remove all metal dust.
Why does my plywood feel fuzzy after sanding?
Fuzziness after sanding is often due to raised wood fibers. This can happen when the wood fibers swell slightly from friction or moisture during sanding. The best way to combat this is to lightly mist the surface with water after sanding with a medium grit (like 120 or 150), let it dry completely, and then sand again with the same grit or a slightly finer one (180).
This process, called “raising the grain,” removes the fuzzy fibers for a smoother final finish. Ensure you thoroughly clean off all dust after each sanding step.
How long does it take to sand a sheet of plywood?
The time it takes to sand a sheet of plywood can vary greatly. Factors include the size and type of sander used, the condition of the plywood, the number of grits you use, and your technique. Hand sanding a 4×8 sheet might take several hours.
Using a random orbital sander could take as little as 30 minutes to an hour per sheet, depending on how much work is needed. Patience is key; rushing the process often leads to a less-than-ideal finish.
Final Thoughts on Achieving Smooth Plywood
Getting plywood smooth is totally doable. It’s not a secret trick, but a clear process. Start with the right sandpaper grits.
Work your way from coarser to finer. Always sand with the wood grain. Use a sanding block or a power sander carefully.
Clean up all the dust before you apply any finish. If you take these steps, your plywood projects will have that beautiful, smooth finish you’re looking for. Enjoy your finished piece!