How to Remove a Stuck Drill Bit: Step-by-Step Fix
A stuck drill bit in a keyless chuck almost always comes free with penetrating lubricant and a few minutes of gentle tapping — no repair shop needed. Forcing it with pliers or a metal hammer is what actually breaks chucks, so patience matters more than strength here. This guide covers why bits get stuck, the exact step-by-step release method, and how to stop it from happening again.
Why Do Drill Bits Get Stuck in Keyless Chucks?
Best Penetrating Lubricant Pick
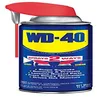
WD-40 Multi-Use Product with Smart Straw
The exact penetrating lubricant used in Step 2 of this guide — sprays two ways so you can target the gap between the chuck jaws precisely.
- Best for: freeing stuck bits and general shop lubrication
- Why we picked it: Smart Straw lets you aim directly into the chuck jaw gap without oversaturating
- Main drawback: not a long-term lubricant — wipe off excess after freeing the bit
Compare more chuck-release supplies
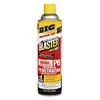 Option 1 PB Blaster Penetrating Oil Spray
|
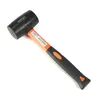 Option 2 Edward Tools Rubber Mallet Hammer, 16 oz
|
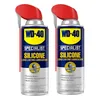 Option 3 WD-40 Specialist Silicone Lubricant
|
As an Amazon Associate we earn from qualifying purchases.
Keyless chucks are fantastic for quick bit changes, but sometimes, the jaws grip the bit a little too tightly, especially after drilling into tough materials or using a lot of force. This can happen for a few reasons:
- Debris Buildup: Sawdust, metal shavings, or even tiny bits of the material you were drilling can get lodged between the chuck jaws and the bit shank, acting like a wedge.
- Over-tightening: Sometimes, we instinctively tighten the chuck more than necessary to ensure the bit stays put, which can cause the jaws to grip too firmly.
- Heat Expansion: Drilling can generate heat, causing the metal chuck jaws and the bit to expand slightly. When they cool down, they can contract onto the bit, making it harder to release.
- Worn Chuck Jaws: Over time, the jaws themselves can wear down unevenly, leading to a less precise grip that can sometimes hold onto bits too tightly.
- Bent Bits: If a drill bit bends slightly while in use, it can get caught at an angle in the chuck, making it very difficult to release.
Understanding these reasons helps us approach the solution correctly. It’s usually not a sign of a broken tool, just a bit of mechanical stubbornness.
Gather Your Supplies: What You’ll Need
Before we get to work, let’s make sure you have everything ready. You probably have most of these items already in your workshop or home. This method is designed to be accessible and require minimal special tools.
- Safety Glasses: Always protect your eyes.
- Gloves: To protect your hands from sharp edges or grease.
- Rubber Mallet or a Wooden Block: For gentle tapping.
- Penetrating Lubricant (like WD-40 or a graphite-based lubricant): To help loosen seized parts.
- Rag or Paper Towels: For cleaning up.
- Adjustable Wrench or Pliers (optional, for stubborn cases): Use with extreme caution.
- Another Drill (optional, for an assist): Only if the chuck won’t turn at all.
Having these items on hand will make the process smooth and efficient. Remember, the goal is to free the bit without forcing the chuck or the bit itself, which could cause damage.
The Genius Solution: Step-by-Step Guide
This method combines a bit of leverage, lubrication, and gentle persuasion. It’s often the simplest approach that yields the best results. Let’s get that bit out.
- Assess the Situation: Take a good look at your drill and the chuck. Is the chuck itself stuck, or just the bit inside? Try turning the chuck collar to loosen it. If it turns freely but the bit doesn’t release, the problem is likely with the bit being held too tightly.
- Apply Penetrating Lubricant: Spray a small amount of penetrating lubricant directly onto the chuck jaws where they grip the drill bit shank. Aim for the gap between the jaws and the bit. Let it sit for 5-10 minutes so it can seep in and break down any corrosion holding the bit.
- Gentle Tapping: Use a rubber mallet or wooden block to tap lightly around the chuck collar — small vibrations, not force. Tap on the sides of the collar, not directly on the jaws or the bit. Always wear safety glasses during this step.
- Attempt to Loosen the Chuck: Try turning the chuck collar counter-clockwise by hand again. With the lubrication and gentle tapping, it should be easier to open. If it still feels tight, repeat with more lubricant and a few more gentle taps.
- The “Push and Twist” Technique: If the chuck collar turns but the bit just spins with it, grip the drill body firmly with one hand. With your other hand, rotate the chuck collar counter-clockwise as you simultaneously try to pull the drill bit straight out.
- The “Impact Assist”: For a stubborn chuck collar, place the drill so the chuck faces upward or sideways, hold the drill body securely, and give the edge of the chuck collar a few firm, sharp taps with the mallet in the loosening direction.
- Using a Second Drill (last resort): If the chuck collar still won’t turn by hand, chuck a screwdriver bit into a second drill, set it to lowest torque in reverse, and gently engage it into a groove on the stuck chuck collar to power the rotation. Stop immediately if you hear grinding.
- Clean and Maintain: Once the bit is out, remove sawdust or debris from inside the chuck jaws with a cotton swab or small brush, then work the jaws open and closed with a light spray of lubricant.
For more official guidance on lubricating and maintaining a drill between projects, see WD-40’s official drill maintenance guide.
When to Seek Professional Help
While these methods are usually effective, there are rare occasions when a chuck might be genuinely damaged or seized due to extreme force or wear. If, after trying these steps, your chuck remains completely immobile or you hear grinding noises that suggest internal damage, it might be time to consult a professional tool repair service or consider replacing the chuck. However, for most beginners and intermediate users, the above steps are highly effective.
Tips for Preventing Future Stuck Bits
Prevention is always better than cure. Here are some habits to adopt:
- Don’t Over-Tighten: Tighten the chuck just enough to firmly grip the bit. You should feel resistance, but it shouldn’t require excessive force.
- Clean After Use: Make it a habit to clear debris from your chuck after each project. A quick blast of compressed air works wonders.
- Use the Right Bits: Ensure you’re using the correct type and size of drill bit for your material.
- Lubricate Regularly: A tiny drop of light machine oil or grease applied sparingly to the chuck mechanism periodically can keep it running smoothly.
- Center Punch for Starting: When starting a hole in metal or hard materials, using a center punch first helps guide the drill bit and reduces the chance of it slipping and binding.
Adopting these simple practices will save you a lot of frustration in the long run and extend the life of your drill and its chuck. For more on choosing and caring for your tools, see our full woodworking tools guide.
Table: Troubleshooting Common Chuck Issues
| Problem | Likely Cause | Solution |
|---|---|---|
| Chuck won’t loosen | Debris, over-tightening, corrosion | Lubricant, gentle tapping with rubber mallet, try pliers for better grip (carefully) |
| Bit spins but won’t release | Jaws not opening fully, bit shank burred | Lubricant, “push and twist” technique, inspect bit shank for damage |
| Chuck is stiff/hard to turn | Lack of lubrication, internal debris | Penetrating lubricant, work chuck open/closed, clean thoroughly |
| Chuck jaws are not gripping firmly | Worn jaws, debris preventing full closure | Clean jaws, try lubricating, if persistent consider chuck replacement |
Frequently Asked Questions (FAQ)
Will using WD-40 damage my drill chuck?
In most cases, a small amount of WD-40 used as directed won’t harm your chuck. It’s designed to lubricate and free up metal parts. Avoid saturating the chuck, and wipe away any excess. For long-term lubrication, a dedicated drill grease might be better, but for an emergency release, WD-40 is effective.
Is it safe to use a hammer on my drill chuck?
You should never use a metal hammer directly on your drill chuck. Always use a rubber mallet or a wooden block to cushion the impact. Excessive force or direct hammer blows can easily damage the chuck mechanism, the drill motor, or even the drill bit itself.
My drill bit is bent. How do I get it out?
A bent drill bit can be extra tricky. Try the lubrication and tapping methods first. If it’s still stuck, use adjustable pliers (wrapped in tape to protect the bit if you plan to reuse it) on the exposed shank of the bit to wiggle it free while turning the chuck collar. Be patient, as bent bits are inherently harder to remove.
Should I try to force the chuck open if it’s really stuck?
It’s generally best to avoid forcing things. While you want to apply firm pressure, excessive force can strip the threads inside the chuck, break the chuck collar, or even damage the drill’s motor. Stick to lubrication, gentle tapping, and controlled leverage. If it feels like something is about to break, stop and reassess.
How often should I clean my drill chuck?
A good rule of thumb is to clean your chuck after every significant project, or at least at the end of each workday if you’re using the drill frequently. Remove any visible dust or debris with a brush or compressed air. Regular cleaning prevents the buildup that leads to stuck bits and extends the life of your chuck.
Can I use heat to remove a stuck drill bit?
Heat can expand metal and sometimes help loosen seized parts, but it’s generally not recommended for drill chucks. The heat could damage the internal components of the chuck or the drill motor, and it introduces a fire risk, especially with flammable lubricants present. The methods described above are safer and usually just as effective.
Conclusion
Dealing with a stuck drill bit can seem like a major setback, but as you’ve seen, it’s a problem with straightforward solutions. By using a little penetrating lubricant, some gentle tapping with a rubber mallet, and the right technique, you can free that bit and get back to creating. Remember these steps, keep your tools clean, and don’t be afraid to apply a bit of strategic persuasion.
For more drilling guides and troubleshooting, browse our full drilling hub.
Sponsored / affiliate links. As an Amazon Associate I earn from qualifying purchases. I may earn additional commission from eligible campaigns.