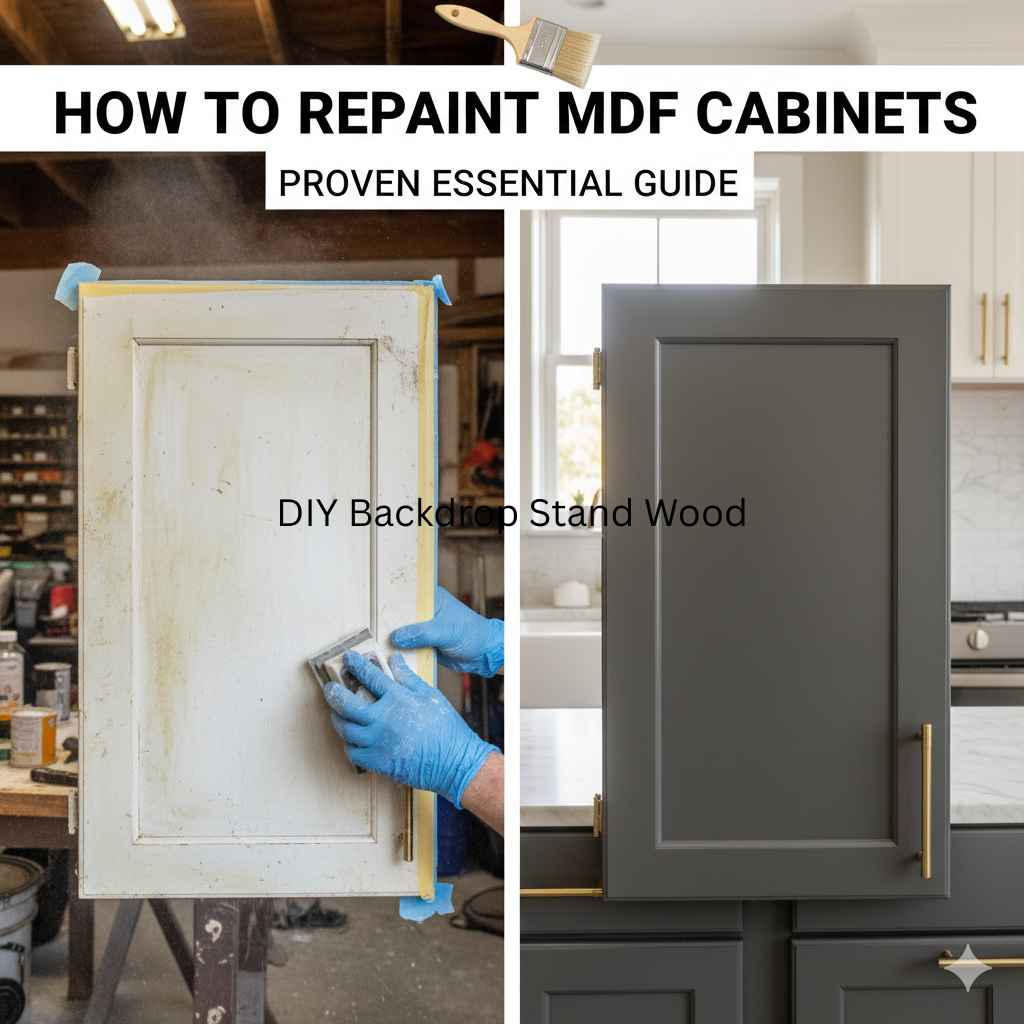
How to Repaint MDF Cabinets: Proven Essential Guide
Repainting MDF cabinets involves thorough cleaning, sanding, priming with an oil-based or high-quality hybrid primer, and applying multiple thin coats of your chosen paint. This guide provides a proven, essential process for achieving a smooth, durable, and professional-looking finish on your MDF cabinets, even for beginners.
Hello there, fellow DIYers and home improvers! Are your MDF cabinets looking a little tired, outdated, or just plain dull? You’re not alone! Many of us have MDF cabinets that have seen better days. The good news is that giving them a fresh new look with a coat of paint is an incredibly rewarding project that can totally transform your space without breaking the bank.
It might seem a bit daunting at first, especially if you’re new to painting furniture, but I’m here to walk you through it, step-by-step. We’ll cover everything you need to know to get a beautiful, long-lasting finish on your MDF cabinets. Ready to make them look brand new?
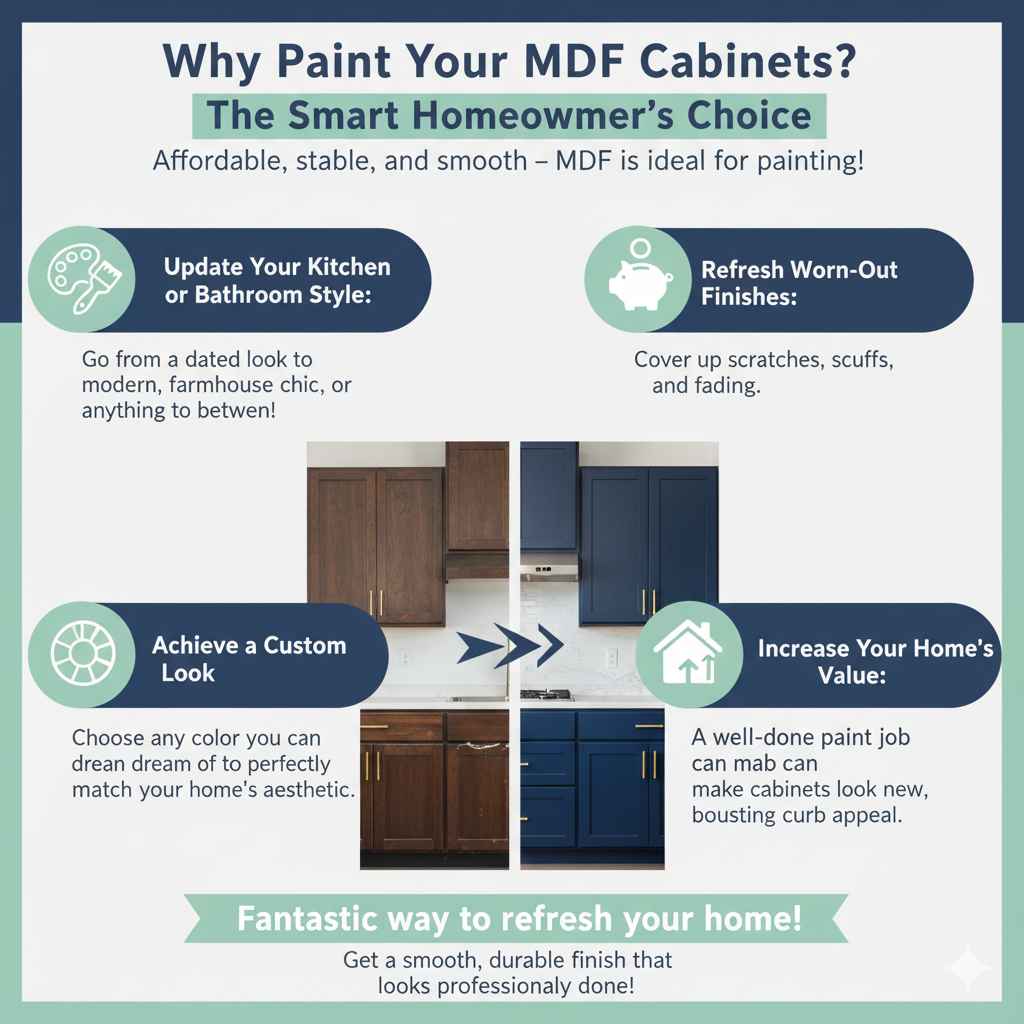
Why Repaint Your MDF Cabinets? The Smart Homeowner’s Choice
MDF, or Medium-Density Fiberboard, is a popular material for cabinets because it’s affordable and provides a smooth surface that’s easy to paint. Over time, however, even the best MDF cabinets can start to show wear and tear, or their original finish might just not match your current décor. Instead of replacing them entirely, which can be a massive expense, repainting is a fantastic alternative. It’s a budget-friendly way to:
- Update your kitchen or bathroom style: Go from a dated look to modern, farmhouse chic, or anything in between!
- Refresh worn-out finishes: Cover up scratches, scuffs, and fading.
- Achieve a custom look: Choose any color you can dream of to perfectly match your home’s aesthetic.
- Increase your home’s value: A well-done paint job can make cabinets look new, boosting curb appeal.
Many homeowners worry about MDF absorbing paint or having a rough surface. With the right preparation and techniques, these concerns are easily overcome. This guide is designed to demystify the process, ensuring you get a smooth, durable finish that looks professionally done, even if you’ve never painted cabinets before.
Gathering Your Essential Supplies: What You’ll Need
Before we dive into the painting process, let’s make sure you have all your tools and materials ready. Having everything on hand will make the project go much smoother. Think of this as your painter’s toolkit for MDF cabinets!
Tools for the Job
- Screwdriver or drill for removing cabinet doors and hardware.
- Sandpaper (120-grit and 220-grit) or an orbital sander for smoother results. A sanding block is also useful.
- Clean cloths or tack cloths for dusting.
- Painter’s tape for precision.
- Paint trays and roller covers (foam rollers are great for smooth finishes).
- High-quality paint brushes (synthetic bristles for latex/water-based paints, natural bristles for oil-based).
- Drop cloths or old sheets to protect your workspace.
- Safety glasses to protect your eyes.
- A dust mask to avoid inhaling dust particles.
- Optional: A degreaser or TSP (trisodium phosphate) substitute cleaner.
Paint & Primer Options
Choosing the right primer and paint is crucial for MDF. MDF can be porous and sometimes has a slick surface, making adhesion a challenge without the proper products.
- Primer: This is arguably the MOST important step for MDF. For best results, use an oil-based primer or a high-quality hybrid primer specifically designed for tricky surfaces. These primers offer excellent adhesion, block stains, and create a smooth base for your paint. Brands like Zinsser B-I-N (shellac-based, great for blocking stains and odors) or Kilz Original (oil-based) are highly recommended by pros.
- Paint: For cabinets, you want a durable, washable paint. High-quality enamel paints are ideal. Options include:
- Water-based Alkyd Enamels: These offer the durability of oil-based paints with the easier cleanup of latex. Look for products labeled “cabinet paint” or “enamel.”
- Cabinet-specific Paints: Many brands offer paints formulated specifically for cabinets, providing a hard, durable finish.
Tip: Always check the paint manufacturer’s recommendations for priming and painting MDF.
Step-by-Step Guide: How to Repaint MDF Cabinets
Let’s get to it! Follow these steps for a beautiful, professional finish on your MDF cabinets. Patience and thoroughness in the preparation stages will yield the best results.
Step 1: Preparation is Key – Remove and Clean
This is where we lay the foundation for a great paint job. Don’t rush this part!
- Remove Doors and Hardware: Carefully take off all cabinet doors, drawer fronts, and any attached hardware (knobs, pulls). It’s a good idea to label each door and its corresponding cabinet frame with painter’s tape so you know exactly where everything goes back. This prevents mix-ups later.
- Clean Thoroughly: MDF can absorb grease and grime. Wipe down every surface that will be painted with a mild degreaser or a TSP substitute cleaner. Rinse with clean water and a damp cloth, then let the cabinets dry completely. Cleaning removes any surface contaminants that could affect paint adhesion or finish. You can find helpful cleaning guides on reputable home improvement sites, like This Old House.
Step 2: Sanding – Creating a Smooth Surface
MDF can have a slightly uneven texture or a factory finish that paint might not stick to well. Sanding creates a smooth, workable surface.
- Initial Sanding: Using 120-grit sandpaper, lightly scuff the entire surface of the MDF doors, drawer fronts, and cabinet frames. You’re not trying to remove the material, just to create a dull, matte finish so the primer has something to grip onto. Pay attention to any glossy areas.
- Smooth Sanding: After the initial sanding, switch to 220-grit sandpaper for a finer finish. This step removes any rough spots or sanding marks from the coarser grit.
- Dust Removal: This is crucial! After sanding, use a shop vacuum with a brush attachment to remove as much dust as possible. Then, wipe everything down with a clean, dry cloth or, even better, a slightly damp tack cloth to pick up the finest dust particles. The surface must be perfectly clean before priming.
Step 3: Priming – The Miracle Worker for MDF
This is the most critical step for a successful MDF cabinet repaint. The right primer seals the MDF, prevents bleed-through, and ensures your paint adheres beautifully.
- Choose Your Primer Wisely: As mentioned, an oil-based or high-quality hybrid primer is best for MDF. These primers are designed to seal the porous material and provide excellent adhesion.
- Apply a Thin, Even Coat: Using a good quality brush or a foam roller, apply a thin, even coat of primer. Avoid applying it too thickly, as this can lead to drips and an uneven surface. Work with the grain of the wood if there’s any visible texture, or simply in smooth, consistent strokes.
- Allow Proper Drying Time: Let the primer dry completely according to the manufacturer’s instructions. This is usually a few hours, but check the can.
- Light Sanding (Optional but Recommended): Once dry, lightly sand the primed surface with 220-grit sandpaper. This knocks down any tiny bumps and creates an ultra-smooth surface for the paint.
- Second Coat of Primer (Optional): For very porous MDF or if you’re painting a dark color over a light one (or vice versa), a second coat of primer might be necessary. Repeat the priming, drying, and light sanding process.
- Final Dusting: Again, thoroughly clean off all dust with a reusable tack cloth or a slightly damp microfiber cloth after sanding the primer.
Step 4: Painting – Bringing Your Vision to Life
Now for the fun part! Applying your chosen paint color.
- Stir Your Paint: Always stir your paint thoroughly before and during use. Don’t shake it, as this can create air bubbles.
- Apply Thin Coats: This is a golden rule for cabinet painting. Apply the first coat of paint using thin, even strokes with your brush or roller. Avoid overloading your brush or roller. Work in manageable sections.
- Allow Drying Time Between Coats: This is crucial for durability. Let each coat of paint dry completely according to the manufacturer’s instructions. Rushing this step can lead to peeling, chipping, or a gummy finish.
- Second Coat (and possibly Third): Most projects will require at least two coats of paint for good coverage and color depth. If you see any inconsistencies or thin spots after the second coat, apply a third coat.
- Light Sanding Between Coats (Optional): For an even smoother finish, you can very lightly scuff each dried coat of paint with 220-grit sandpaper or a sanding sponge (sometimes called a “grey scuff pad”). This helps subsequent coats adhere better and smooths out minor imperfections. Always clean off dust thoroughly after sanding.
Step 5: Reassembly and Enjoy!
You’re almost there! Time to put it all back together.
- Reattach Hardware: Once the final coat of paint is fully cured (this can take several days, even though it feels dry to the touch), reattach your hardware. If you’re using new hardware, you might need to drill new holes, so measure carefully.
- Rehang Doors and Drawers: Using your labels from Step 1, reattach the cabinet doors and drawer fronts to the cabinet frames.
- Admire Your Work: Step back and enjoy the amazing transformation you’ve created!
Tips for a Professional Finish
Want to elevate your painted MDF cabinets from good to gallery-worthy? Here are a few pro tips:
- Spray Painting: For the smoothest, most factory-like finish, consider spray painting. This requires a spray gun (like an HVLP sprayer) and a well-ventilated area, plus practice. It’s a more advanced technique but offers unparalleled results. If you’re new to spraying, practice on scrap wood first.
- Use High-Quality Tools: Cheap brushes and rollers leave brush marks and lint. Invest in good quality tools – they make a real difference.
- Don’t Forget the Edges: Pay attention to the edges of the doors and drawer fronts. These get a lot of wear and tear, so ensure they’re well-primed and painted.
- Allow for Curing Time: Paint needs time to harden fully, or “cure.” This can take 7 to 30 days, depending on the paint type. During this time, be gentle with your cabinets to avoid nicks and scratches. Avoid harsh cleaning.
MDF vs. Wood Cabinets: A Quick Comparison for Painting
It’s helpful to understand how MDF differs from solid wood when it comes to painting. Each has its pros and cons for DIY projects.
| Feature | MDF Cabinets | Solid Wood Cabinets |
|---|---|---|
| Surface Smoothness | Naturally very smooth, ideal for painting. | Can have natural grain, knots, or imperfections that may show through paint if not properly filled and sanded. |
| Porosity/Absorption | Highly porous; requires thorough priming to prevent excessive paint absorption and potential swelling. | Less porous than raw MDF, but still requires a good primer. Different wood types absorb differently. |
| Cost | Generally more affordable. | Typically more expensive. |
| Durability | Can be susceptible to water damage and chipping if not sealed properly. Doesn’t expand/contract like solid wood, so paint is less likely to crack due to wood movement. | More resistant to moisture and impact. Can expand/contract, potentially causing paint to crack over time if not properly managed. |
| Ease of Painting | Sanding and priming are critical to prevent issues. Can be more forgiving for beginners on surface texture. | May require wood filler for imperfections, stain-blocking primers for certain woods (like pine or redwood), and careful sanding to achieve a smooth finish. |
As you can see, while both can be painted beautifully, MDF requires specific attention to priming to ensure a lasting finish. The key takeaway is that with the right preparation, MDF is an excellent candidate for a DIY cabinet repaint.
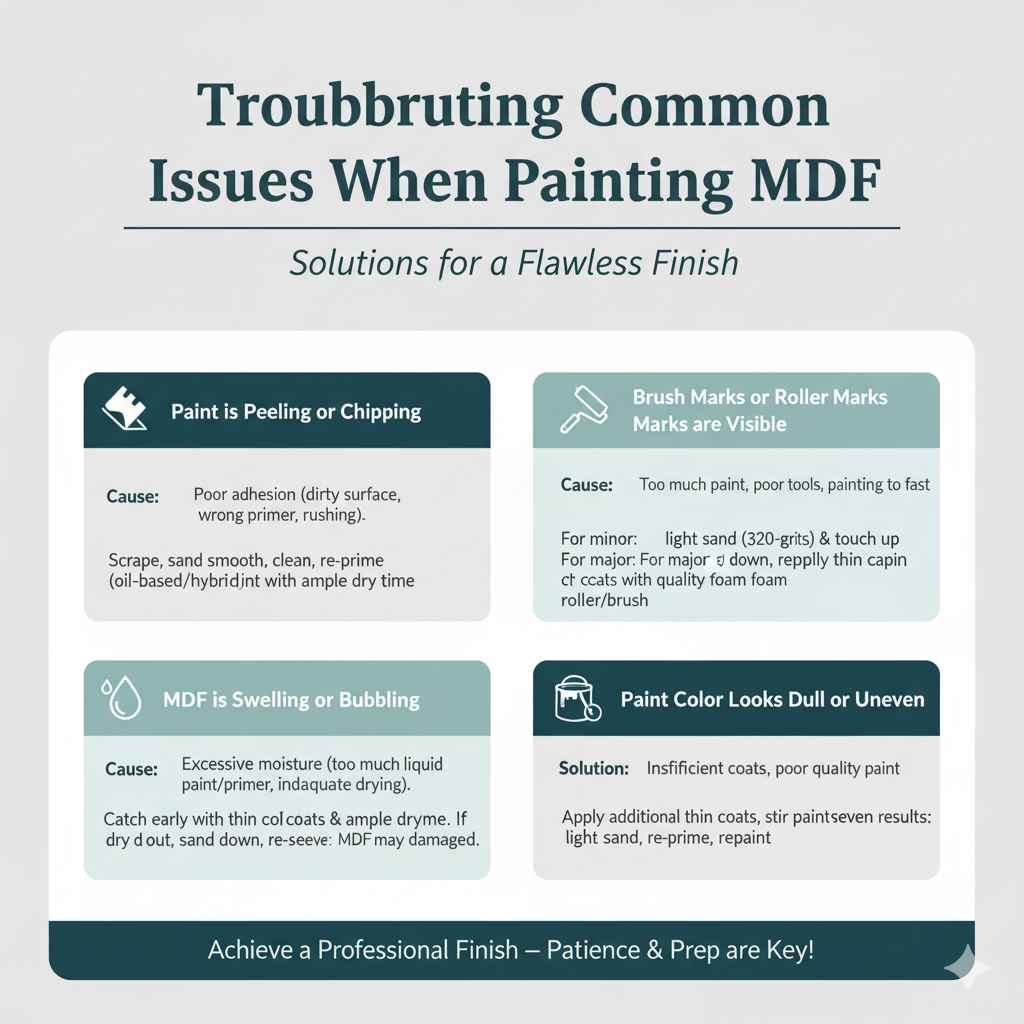
Troubleshooting Common Issues
Even with the best intentions, sometimes things don’t go exactly as planned. Here are a few common issues and how to fix them:
Issue: Paint is peeling or chipping.
Cause: Poor adhesion. This usually happens when the surface wasn’t cleaned or sanded properly, or the wrong primer was used, or the paint topcoat was applied too soon.
Solution: Scrape away the peeling paint with a paint scraper. Sand the affected area smooth, then clean thoroughly. Re-prime with a good quality oil-based or hybrid primer and reapply your paint, ensuring you allow adequate drying and curing time between coats.
Issue: Brush marks or roller marks are visible.
Cause: Too much paint on the brush/roller, not using quality tools, or painting too quickly.
Solution: For minor marks, you can try very lightly sanding with 320-grit sandpaper after the paint has dried completely, then touch up. For significant marks, you may need to sand down the entire section and reapply thin, even coats using a high-quality foam roller or brush, working with steady, even strokes. Ensure you’re not overloading your applicator.
Issue: The MDF is swelling or bubbling.
Cause: MDF is highly susceptible to moisture. Too much liquid from paint or primer, or inadequate drying time, can cause it to swell.
Solution: This is tough to fix perfectly once it’s happened. Ideally, catch this early by using very thin coats and allowing ample drying time. If swelling occurs, you may need to let it dry out completely, then sand it down as much as possible and try to re-seal and repaint. In severe cases, this might indicate the MDF is damaged beyond repair for a smooth finish.
Issue: Paint color looks dull or uneven.
Cause: Insufficient coats of paint, or poor quality paint.
Solution: Apply additional thin coats of paint, allowing proper drying time. Ensure the paint is well-stirred. For drastically uneven results, you might need to sand back lightly, re-prime, and repaint.
Frequently Asked Questions (FAQ)
Q1: Can I just paint over my old cabinet finish without sanding?
A: While some “no-prep” paints exist, for the best adhesion and durability on MDF, sanding is highly recommended. Sanding creates a slightly rough surface (a “mechanical bond”) that allows your primer and paint to grip better, preventing future peeling.
Q2: What’s the best type of paint for MDF cabinets?
A: You’ll want a durable enamel paint. High-quality water-based alkyd enamels or paints specifically formulated for cabinets are excellent choices. They offer a hard, scrubbable finish that can withstand daily use.
Q3: How many coats of primer do I really need on MDF?
A: At least one good coat is essential. Two coats are often recommended for MDF, especially if it’s raw or has a very porous surface, to ensure it’s fully sealed and you don’t get any “ghosting” from the original finish or wood grain.
Q4: Can I use a latex primer on MDF?
A: While some latex primers can work, oil-based or shellac-based primers (like Zinsser B-I-N) or high-quality hybrid primers are generally preferred for MDF. They offer superior sealing and stain-blocking properties that are crucial for this material.
Q5: My MDF cabinet doors have warped. Can I still paint them?
A: Warping can be a sign of moisture damage or internal stress in the MDF. While you can still technically paint them, the warped shape will be evident under the paint. It’s best to try and flatten them if possible (e.g., by weighting them down) before painting, or consider if the warping is significant enough to warrant replacement of the doors.