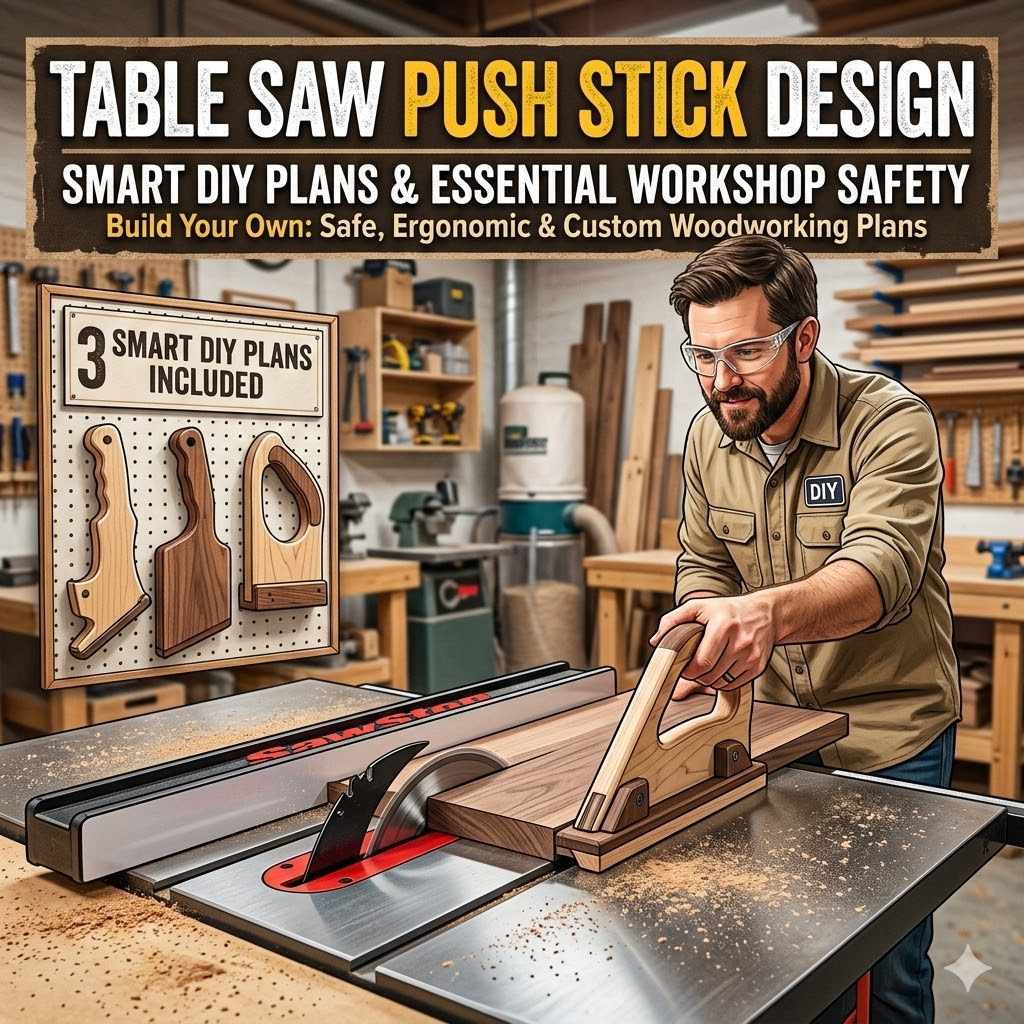
Table Saw Push Stick Design: Smart DIY Plans
Making your own safety tools for the workshop can feel a bit tricky at first. For new woodworkers, thinking about Table Saw Push Stick Design: Smart DIY Plans might seem like a puzzle. You want something safe and useful, but where do you start?
Don’t worry! We’ll walk through everything step by step. You’ll learn how to build a great push stick that keeps you safe.
Simple Table Saw Push Stick Design Ideas
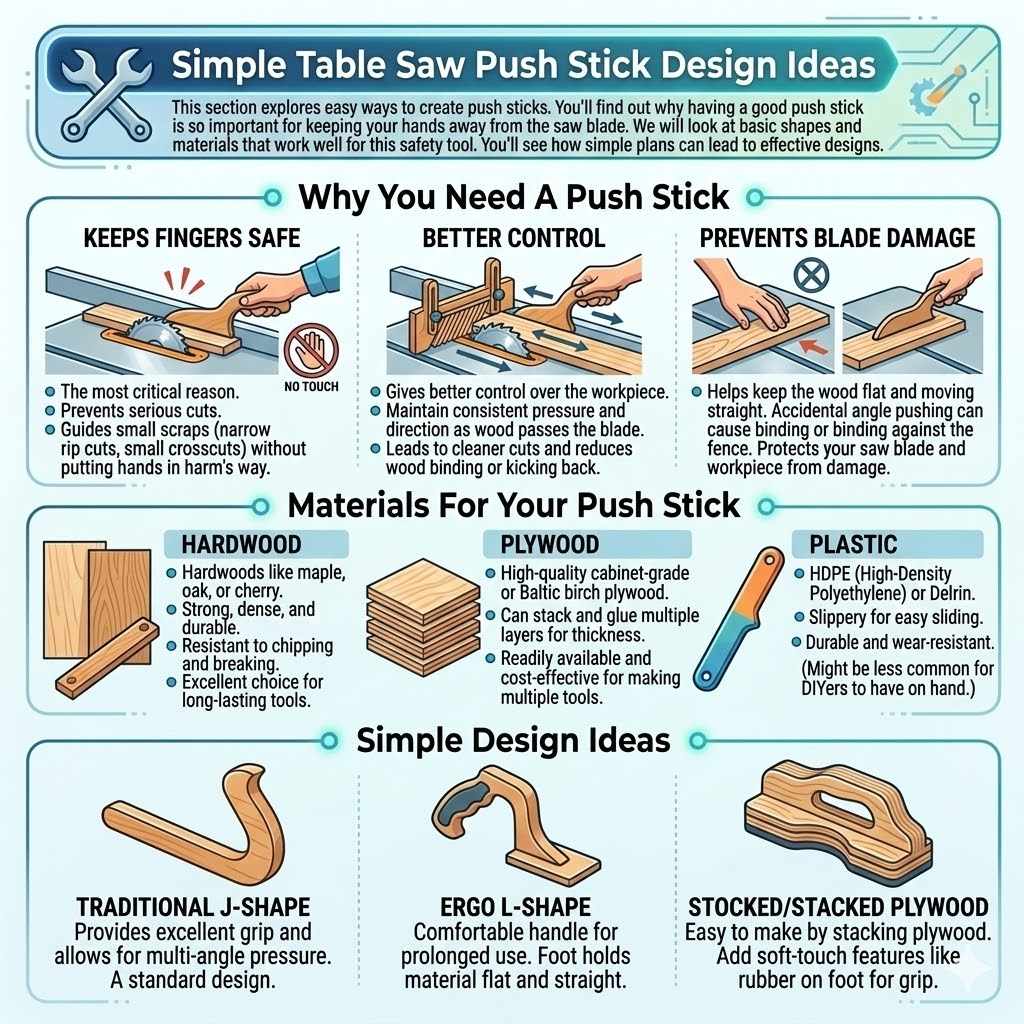
This section explores easy ways to create push sticks. You’ll find out why having a good push stick is so important for keeping your hands away from the saw blade. We will look at basic shapes and materials that work well for this safety tool.
You’ll see how simple plans can lead to effective designs.
Why You Need A Push Stick
A push stick is a simple tool, but it’s a lifesaver in the workshop. Its main job is to help you push wood through your table saw safely. When you cut small pieces, your fingers get very close to the spinning blade.
A push stick acts as an extension of your hand. It keeps your fingers a safe distance away from danger.
- Keeps Fingers Safe
The most critical reason for using a push stick is to prevent serious cuts. Small scraps of wood can easily get kicked back or slip under the blade. With a push stick, you can guide these pieces without putting your hands in harm’s way.
This is especially important when working with narrow rip cuts or small crosscuts.
- Better Control
Push sticks also give you better control over your workpiece. They help you maintain a consistent pressure and direction as the wood passes the blade. This leads to cleaner cuts and reduces the chance of the wood binding or kicking back.
Good control means fewer mistakes and a safer experience overall.
- Prevents Blade Damage
Sometimes, if you try to push small pieces by hand, you might accidentally push them at an angle. This can cause the wood to bind against the blade or the fence. A well-designed push stick helps you keep the wood flat and moving straight, which can prevent damage to your saw blade and the workpiece.
Materials For Your Push Stick
Choosing the right materials for your push stick is key to its durability and safety. You want something strong enough to push wood firmly, but also something that won’t damage your saw or blade if it accidentally hits it. Common and effective materials are readily available in most workshops or hardware stores.
- Hardwood
Hardwoods like maple, oak, or cherry are excellent choices for push sticks. They are strong, dense, and durable. A piece of hardwood scrap from another project works perfectly.
This material is resistant to chipping and breaking, ensuring your push stick lasts a long time.
- Plywood
High-quality plywood, especially Baltic birch or cabinet-grade plywood, can also make good push sticks. You can stack and glue several layers together to create a thick, sturdy tool. Plywood is often readily available and can be a cost-effective option for making multiple push sticks.
- Plastic
Certain types of plastic, like HDPE (High-Density Polyethylene) or Delrin, are sometimes used for push sticks. These materials are slippery, which helps the wood slide easily. They are also durable and resistant to wear.
However, they might be less common for DIYers to have on hand.
Advanced Table Saw Push Stick Design: Smart DIY Plans
This section goes deeper into creating more sophisticated push sticks. We’ll explore designs that offer enhanced safety features and better ergonomics. You’ll learn about advanced features like anti-kickback pawls and specialized grip areas.
These plans can help you build a push stick that feels like a natural extension of your hand.
Ergonomic Handle Designs
A comfortable handle makes using a push stick much easier and more effective. If your push stick is hard to hold, you’re less likely to use it consistently. Thinking about how your hand will grip the tool is important for long woodworking sessions.
- Curved Grips
A simple curve added to the handle can make a big difference in comfort. This mimics the natural shape of your hand, allowing for a more secure and relaxed grip. You can achieve this by shaping the wood with a rasp, file, or even a router.
A good curve reduces hand fatigue during long cutting tasks.
- Finger Notches
Adding shallow notches for your fingers can provide extra stability and prevent your hand from slipping. These notches should not be too deep, as they are only meant to guide your fingers, not fully cup them. The goal is to allow a firm but not overly tight hold on the tool.
- Textured Surfaces
For even better grip, you can add texture to the handle. This could be done by scoring the wood with a sharp chisel or knife, or by applying a rubberized coating. Textured surfaces help prevent your hand from slipping, especially if your hands are sweaty or dusty from woodworking.
Anti-Kickback Features
Kickback is one of the most dangerous hazards when using a table saw. It happens when the wood is suddenly thrown back towards the operator. Advanced push stick designs can incorporate features to help prevent or mitigate kickback.
- Angled Push Surfaces
Some push sticks have an angled surface at the end that contacts the wood. This angle can help push the wood down and away from the blade as it passes through, making it less likely to catch. It provides an extra layer of control by directing the wood’s path.
- Integrated Pawls
More advanced designs might even incorporate small, spring-loaded pawls. These are like little teeth that grip the wood. If the wood starts to move backward, these pawls can catch it and stop it from coming back towards you.
This is a significant safety upgrade.
- Wide Base
A push stick with a wider base provides more stability on the table saw’s surface. This wider contact area helps prevent the wood from tilting or twisting during the cut. A stable base leads to more predictable movement and reduces the risk of the wood binding.
Multi-Purpose Push Stick Designs
Why make just one tool when you can make one that does a few things? Smart DIY plans often combine features to create tools that are more versatile and useful in the workshop. These designs think about common woodworking tasks beyond just pushing wood.
- Multiple Thickness Options
A single push stick might not be ideal for all wood thicknesses. A smart design can incorporate different notches or angles to accommodate a range of wood thicknesses. This means you can use the same push stick for thin veneers and thicker lumber, making it more versatile.
- Riving Knife Assist
Some push sticks are designed to work in conjunction with a riving knife, which is a blade-like metal piece that follows the saw blade. The push stick can be shaped to guide the wood against the riving knife, helping to keep it perfectly aligned. This improves cut quality and safety.
- Hold-Down Functionality
A more advanced concept is a push stick that can also act as a temporary hold-down. This might involve a clamp-like mechanism or a shape that wedges against the fence. This is particularly useful for very small pieces that might otherwise float or lift off the saw table.
Building Your Table Saw Push Stick: Step-by-Step DIY Plans
Now, let’s get to building! This section provides clear, step-by-step instructions. We’ll cover everything from selecting your wood to the final finishing touches.
These plans are designed to be easy to follow, even if you’re new to woodworking. You’ll create a safe and effective push stick.
Step 1 Preparing Your Materials
Before you start cutting, make sure you have everything you need. This includes your chosen wood, measuring tools, safety gear, and cutting tools. Having your workspace organized will make the process much smoother and safer.
- Select Your Wood
- Choose a piece of hardwood or good quality plywood that is at least 3/4 inch thick. A good size to start with is about 1 inch wide and 10-12 inches long. Ensure the wood is free from knots or defects that could weaken the push stick.
- Gather Tools
- You will need a tape measure, pencil, safety glasses, hearing protection, a dust mask, a saw (like a table saw, miter saw, or handsaw), and sandpaper. If you plan on shaping the handle, you might also need a rasp, file, or a router.
- Safety First
- Always wear safety glasses to protect your eyes. Use hearing protection when operating loud machinery. Wear a dust mask to avoid inhaling wood dust.
Make sure your saw blade is sharp and set to the correct height.
Step 2 Cutting The Basic Shape
This is where your push stick starts to take shape. We will cut the main body of the push stick. Accuracy here ensures the tool functions correctly.
- Mark Your Dimensions
- Using your tape measure and pencil, mark the length and width of your push stick on the wood. A common size is about 12 inches long and 1.5 inches wide. Make sure your lines are straight and clear.
- Make The Cuts
- Use your chosen saw to carefully cut along the lines you marked. If using a table saw, you can set up a fence to ensure straight cuts. For a handsaw, take your time and follow your line precisely.
- Cut one piece at a time.
- Smooth The Edges
- Once cut, use sandpaper to smooth all the edges and surfaces. This removes any splinters and makes the push stick comfortable to hold. Start with a coarser grit sandpaper (like 80 or 120) and finish with a finer grit (like 220).
Step 3 Adding The Push Feature
The end of the push stick is what actually contacts the wood. This is where we add the part that pushes your material through the saw. There are a few simple ways to do this.
- The Notch Method
- On one end of your push stick, measure and mark a small notch. This notch should be deep enough to hook under the edge of the wood you’re cutting. A good size is often about 1/4 inch deep and 1/2 inch wide.
- You can cut this notch with a handsaw or a bandsaw.
- The Angled Cut Method
- Another effective method is to cut a slight angle on the push end. This angle helps to push the wood down onto the saw table as you guide it. Set your saw to a 15-20 degree angle and make a cut on the end of the push stick.
- This creates a wedge shape that contacts the wood.
- The Hook Method
- For pushing thin strips, a small hook can be very useful. This hook can be cut into the end of the push stick. It allows you to grab the edge of the thin strip and push it through the saw.
This requires careful cutting to make sure the hook is strong enough.
Step 4 Shaping The Handle
Making the handle comfortable is important for usability. A well-shaped handle feels better in your hand and encourages you to use the push stick every time.
- Comfortable Grip
- Gently round over the edges of the handle area with sandpaper or a rasp. You can also shape it to fit the natural curve of your hand. Think about where your fingers will rest and make that area smooth and comfortable.
- Adding Finger Grooves
- If you want extra grip, you can carefully carve shallow grooves for your fingers into the handle. These should be comfortable indentations, not deep cuts. Use a carving tool or even the edge of a chisel.
- Test the grip as you go to make sure it feels secure.
- Adding Texture
- For added grip, you can create a textured surface on the handle. This can be done by lightly scoring the wood with a sharp blade or a specialized texturing tool. You can also consider applying a thin coat of a grippy material, like rubberized paint, if desired.
Step 5 Finishing Touches
The final steps involve making your push stick look good and last longer. A nice finish not only improves appearance but also protects the wood.
- Sanding
- Do a final sanding with fine-grit sandpaper (220 or higher) to make the entire push stick super smooth. Pay attention to all edges and surfaces to remove any rough spots. A smooth surface prevents splinters and makes it easy to slide across the wood.
- Applying Finish
- You can apply a wood finish like polyurethane, tung oil, or wax. These finishes will protect the wood from moisture and wear. They also make the push stick easier to clean.
- Apply thin coats and allow each to dry completely before applying the next.
- Testing
- Once the finish is dry, test your new push stick on your table saw. Make sure it pushes wood easily and that the grip feels secure. You might need to make minor adjustments, but it should feel good to use.
Table Saw Push Stick Design: Smart DIY Plans For Various Saw Types
This section focuses on how push stick designs can be adapted for different types of table saws. While the core principles remain the same, certain saw features might influence the ideal push stick shape or size. We will explore these considerations to ensure your DIY push stick works perfectly with your specific saw.
Push Sticks For Cabinet Saws
Cabinet saws are powerful machines often found in professional shops. They typically have larger tables and more robust fences. Push sticks for these saws need to be equally sturdy.
- Robust Construction
Cabinet saws handle larger, heavier pieces of wood. Therefore, push sticks designed for them should be exceptionally strong. Using thicker hardwoods or multiple layers of plywood laminated together is recommended.
The push stick needs to withstand significant force without flexing or breaking.
- Longer Reach
The larger tables of cabinet saws mean you might need a push stick with a longer reach. This allows you to comfortably push longer workpieces from the front of the saw without overextending your arms. Aim for a length that allows you to maintain a stable position.
- Wider Contact Points
To ensure maximum stability when pushing larger boards, a wider contact point on the push stick can be beneficial. This wider end helps to keep the board flat and stable as it moves through the blade, preventing any unwanted tilting.
Push Sticks For Benchtop Saws
Benchtop or portable table saws are smaller and lighter, making them popular for hobbyists and on-site work. Push sticks for these saws can often be simpler but still require careful design.
- Compact Designs
Since benchtop saws have smaller tables, overly long push sticks might be cumbersome. A more compact design is often more practical. This allows for easy maneuverability around the saw’s limited workspace.
- Lightweight Materials
While strength is still important, lighter materials can be used for benchtop saw push sticks. Plywood is often an excellent choice here, as it offers good strength without adding excessive weight. The focus is on practicality and ease of use.
- Specific Notches
Benchtop saws are often used for smaller projects. Therefore, push sticks with specialized notches or hooks for gripping smaller scraps are particularly useful. These can help ensure that even very thin pieces are pushed safely.
Push Sticks For Hybrid Saws
Hybrid saws blend features of cabinet and benchtop saws. They offer a good balance of power and size. Push sticks for these saws can often be quite versatile.
- Adaptable Designs
Hybrid saws can handle a decent range of material sizes. A push stick that can adapt to different thicknesses and widths would be ideal. Consider a design with multiple gripping options or adjustable features.
- Balanced Strength
You need a push stick that is strong enough for moderate workloads but not so heavy that it becomes difficult to handle. Hardwood is a great option, or you can laminate thinner pieces of plywood for a strong yet manageable tool.
- All-Around Functionality
A push stick that can perform multiple tasks, like pushing, holding, and guiding, is very useful for hybrid saw users. Think about incorporating a slightly angled push surface or a small ledge that can assist in keeping the wood stable.
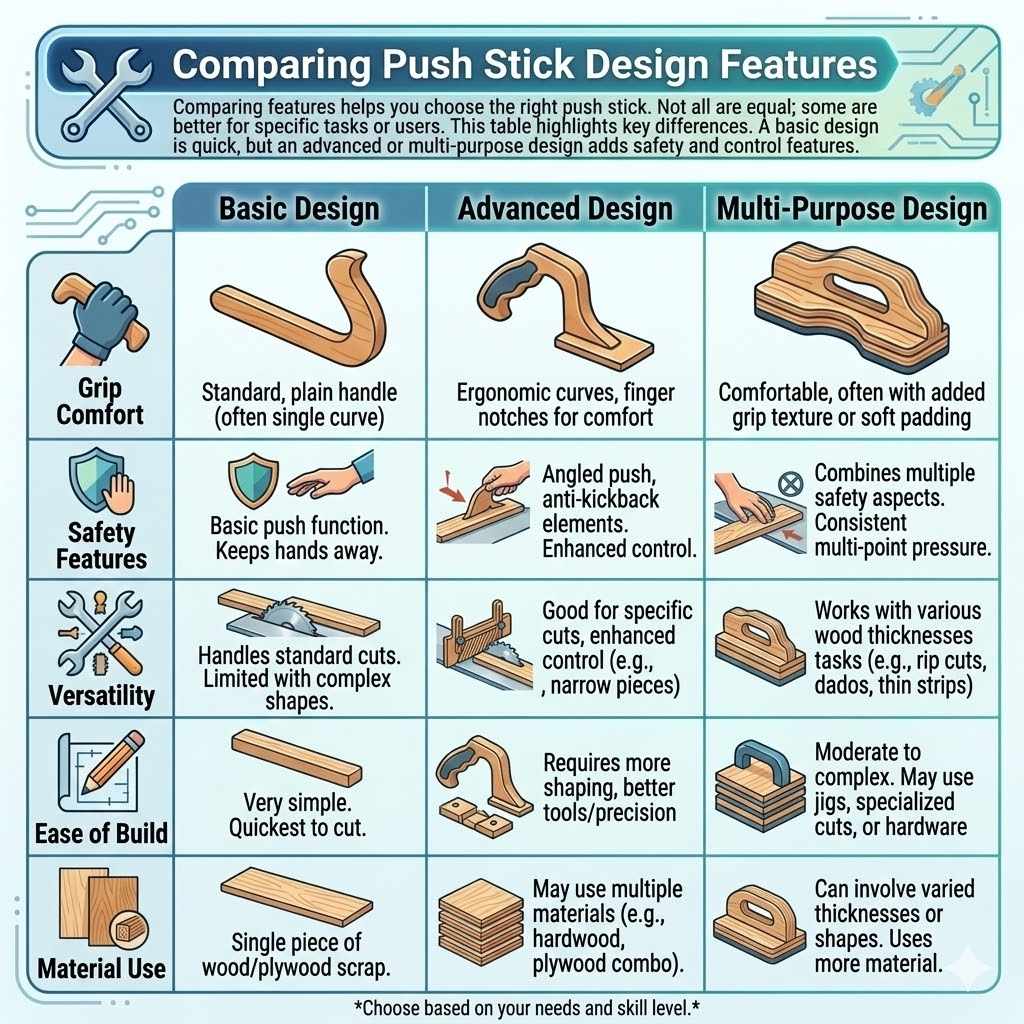
Comparing Push Stick Design Features
When you’re looking at different Table Saw Push Stick Design: Smart DIY Plans, it’s helpful to compare the features. Not all push sticks are created equal, and some designs are better suited for certain tasks or users. This comparison table highlights key differences you might encounter.
| Feature | Basic Design | Advanced Design | Multi-Purpose Design |
|---|---|---|---|
| Grip Comfort | Standard, can be plain | Ergonomic curves, finger notches | Comfortable, often with added grip |
| Safety Features | Basic push function | Angled push, anti-kickback elements | Combines multiple safety aspects |
| Versatility | Handles standard cuts | Good for specific cuts, enhanced control | Works with various wood thicknesses and tasks |
| Ease of Build | Very simple | Requires more shaping/tools | Moderate to complex |
| Material Use | Single piece of wood/plywood | May use multiple materials or components | Can involve varied thicknesses or shapes |
For instance, a basic design is quick to make and serves its primary purpose. An advanced design might add features like a slight hook or an angled surface that improves safety and control. A multi-purpose design tries to solve several workshop problems with one tool, such as accommodating different wood sizes or offering a better grip.
Frequently Asked Questions
Question: What is the best wood to use for a table saw push stick?
Answer: Hardwoods like maple, oak, or cherry are excellent because they are dense and durable. Good quality plywood, such as Baltic birch, is also a great option. The key is to use wood that is strong and won’t easily break or splinter.
Question: How long should a table saw push stick be?
Answer: The ideal length depends on your table saw size and your arm length. A common length is around 10 to 12 inches, which provides enough reach for most tasks without being unwieldy. You should be able to comfortably push wood across the blade from a safe standing position.
Question: Can I use a piece of PVC pipe for a push stick?
Answer: While PVC pipe might seem like an option, it’s generally not recommended for push sticks. It can be brittle and may shatter under pressure, creating sharp fragments. Solid wood or dense plywood offers much better strength and reliability for this safety tool.
Question: How do I store my table saw push sticks?
Answer: You can store them in a toolbox, a drawer, or hang them on a pegboard. Some woodworkers attach magnetic strips to their table saws and stick the push sticks there for easy access. The main thing is to keep them where you can easily find them when needed.
Question: Is it okay if my push stick touches the saw blade?
Answer: Ideally, your push stick should not touch the saw blade. However, if it does accidentally, a well-made push stick from strong material should not be damaged. It’s better to avoid contact by maintaining good control and using the push stick correctly.
Conclusion
Building your own push sticks through simple Table Saw Push Stick Design: Smart DIY Plans is a rewarding project. You’ve learned about the importance of these tools, the materials to use, and how to build them step-by-step. Creating these safety aids ensures your woodworking remains enjoyable and safe.
Now you have the knowledge to make effective, personalized push sticks for your workshop.