Best Way To Clean Wooden Chopping Boards: Effortless, Stain-Free Brilliance
The best way to clean a wooden chopping board involves simple, natural methods to remove stains and sanitize effectively, ensuring a hygienic and beautiful kitchen tool. Regular cleaning with mild soap, hot water, and occasional deep cleaning with salt and lemon, followed by proper drying and oiling, keeps your boards pristine and long-lasting.
Hey there, fellow makers and home chefs! Md Meraj here, your friendly guide to all things wood. You know that beautiful wooden chopping board you love? The one that looks so much better than plastic? Well, keeping it looking and smelling great, especially after tackling garlic, beets, or that juicy steak, can sometimes feel like a mystery. Stains appear, odors linger, and you might wonder if you’re doing it right. Don’t worry! Cleaning a wooden chopping board is actually quite simple if you know a few tricks. We’ll walk through easy, effective, and natural ways to banish stains and keep your board hygienic and brilliant for years to come. Get ready, because your chopping board is about to get a whole lot happier!
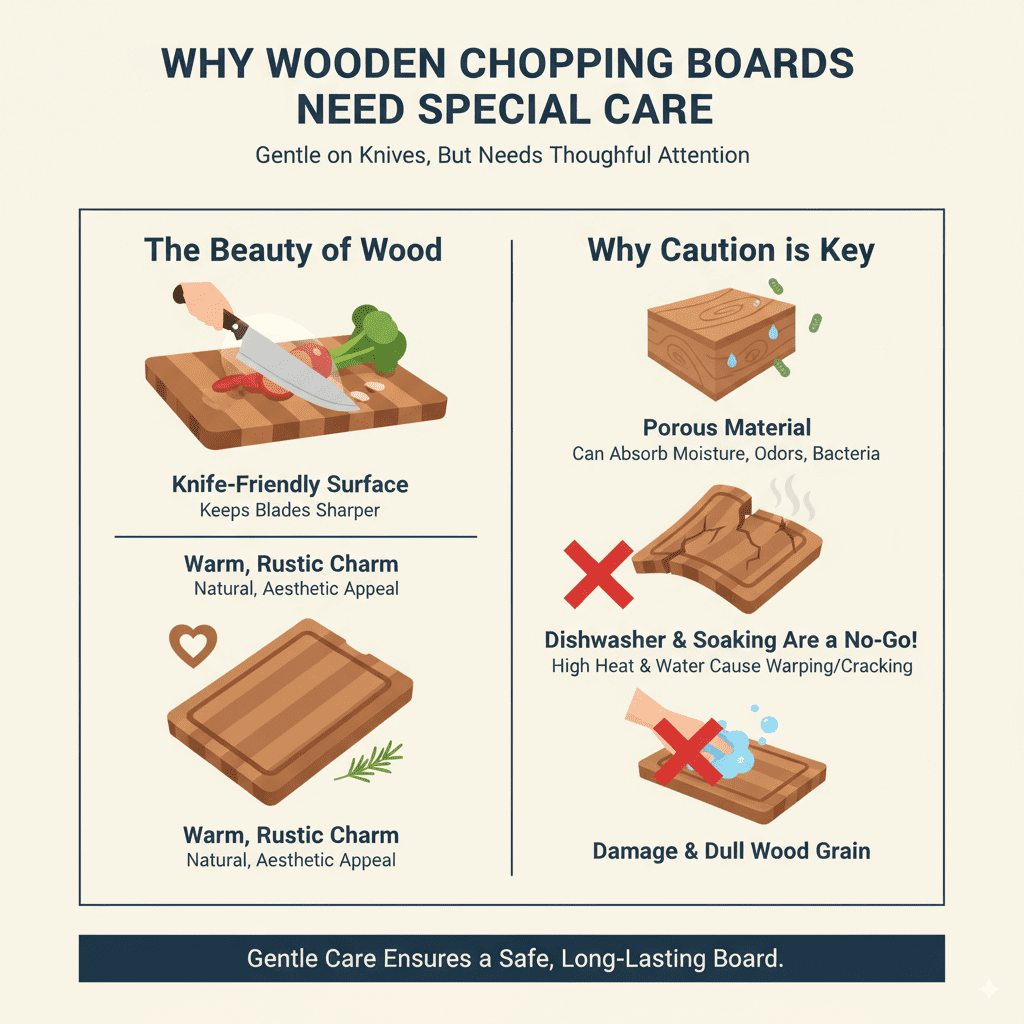
Why Wooden Chopping Boards Need Special Care
Wooden chopping boards are fantastic for your knives; they’re gentler on the blades, which means your favorite chef’s knife stays sharper for longer. Plus, let’s be honest, they add a warm, rustic charm to any kitchen countertop. But wood is a natural material, and like any natural material, it needs a bit of thoughtful attention. Unlike plastic boards that can be thrown into a hot dishwasher (though that’s often not recommended either, as high heat can warp them!), wood can absorb moisture, odors, and even bacteria if not cared for properly. This is why we need to use specific cleaning methods that respect the wood’s integrity while ensuring it’s safe for food preparation.
Think of it like this: you wouldn’t scrub a fine piece of furniture with harsh chemicals, right? Your chopping board deserves that same level of gentle, effective care. The good news is, the best way to clean a wooden chopping board uses readily available, natural ingredients you probably already have in your kitchen. No need for fancy, expensive cleaners! We’re going to dive into simple techniques that will keep your board spotless, odor-free, and ready for your next culinary adventure.
Understanding Your Chopping Board: Material Matters
Before we get our hands wet, it’s good to know what your chopping board is made of. Most wooden boards are crafted from hardwoods like maple, walnut, cherry, or bamboo. These woods are dense and less porous than softwoods, making them more resistant to stains and bacteria. Bamboo, while technically a grass, is very dense and a popular, sustainable choice.
The construction of the board also plays a role:
- Edge-grain boards: These are made by joining strips of wood with the grain running vertically. They are durable and relatively stable.
- End-grain boards: These are made by gluing blocks of wood together, with the wood fibers running perpendicular to the cutting surface. This makes them the kindest to your knives and excellent at “self-healing” minor knife marks, but they require more diligent care and seasoning.
- Face-grain boards: These are the most common and often the most affordable, made from wider planks of wood. They can be prone to warping and scratching over time if not maintained.
No matter the type, the fundamental cleaning principles remain the same. We want to remove food particles, kill any lurking bacteria, and prevent the wood from drying out or cracking. Let’s get to the practical stuff!
The Go-To Method: Everyday Cleaning for a Pristine Board
This is your daily driver method. It’s quick, effective, and perfect for after every use. Consistency is key here, just like washing your dishes!
What You’ll Need:
- Mild dish soap (a little goes a long way)
- Warm water
- A soft sponge or dishcloth
- A clean, dry towel
Step-by-Step: The Daily Clean
- Scrape Off Debris: Immediately after use, scrape away any large food scraps with your knife or a bench scraper. This prevents food from drying on and making deeper stains.
- Gentle Wash: Dampen your soft sponge or dishcloth with warm water. Add just a drop or two of mild dish soap. Gently scrub the entire surface of the board, paying attention to any areas with residue. Avoid soaking the board in water.
- Rinse Thoroughly: Rinse the board under warm running water, making sure to wash away all traces of soap and food particles from both sides and the edges.
- Immediate Drying: This is CRUCIAL. Use your clean, dry towel to thoroughly dry the board. Get into the grain and wipe down all surfaces. Never let a wooden board air dry, as this can lead to warping and cracking.
- Upright Storage: Once dry, stand your chopping board on its edge in a dish rack or on a clean counter. This allows air to circulate around it, ensuring it dries completely and prevents moisture from being trapped, which could lead to mold or mildew.
Remember, the goal of daily cleaning is to remove surface residue and prevent anything from setting in. We’re not deep cleaning here, but setting a great foundation for a healthy board.
Tackling Tough Stains and Odors: The Deep Clean Ritual
Even with daily care, some ingredients like turmeric, berries, or strong-smelling onions and garlic can leave their mark. When stains and odors persist, it’s time for a slightly more robust, yet still natural, deep cleaning. This method is also excellent for sanitizing your board more thoroughly.
What You’ll Need:
- Coarse salt (like kosher salt or sea salt)
- A lemon (cut in half)
- A clean, dry cloth or paper towels
- Optional: Mild dish soap and warm water for a final rinse if needed
Step-by-Step: The Stain Eraser
- Start with a Bare Board: Ensure your board is clean from any loose food particles. If it’s very dirty, give it a quick daily wash and dry first.
- Generous Salt Scrub: Sprinkle a generous amount of coarse salt over the entire surface of the wooden chopping board. You want enough salt to create a good scrubbing layer.
- Lemon Power: Take your halved lemon and use it as a scrubber. Dip the cut side of the lemon into the salt, and then use it to scrub the salt into the wood. The coarse salt acts as an abrasive to lift stains and residues, while the lemon juice’s natural acidity helps to bleach stains and neutralize odors.
- Scrub Away: Really work the lemon and salt into the grain. You’ll see the salt start to absorb juices and lift colored residue from the wood. Spend a few minutes scrubbing the entire board. If you have particularly stubborn stains, you can let the salt and lemon juice sit for about 5-10 minutes before scrubbing.
- Rinse and Wipe Clean: After scrubbing, use a damp cloth to wipe away the salt and lemon mixture. Rinse the board thoroughly under warm running water. Again, avoid soaking. You can use a tiny bit of dish soap if you feel the need to remove any residual lemon scent, but rinse it off very well.
- Dry, Dry, Dry! As always, dry the board immediately and thoroughly with a clean towel. Stand it on its edge to air dry completely.
This salt and lemon method is remarkably effective and completely food-safe. It’s a time-tested technique that brings many wooden boards back to life!
Preventing Cracks and Warping: The Art of Seasoning
Wood is a living material; it expands and contracts with changes in humidity and temperature. Without proper conditioning, it can dry out, become brittle, and eventually crack or warp. This is where seasoning, also known as conditioning or oiling, comes in. It’s not just for the initial prep; regular seasoning is part of good maintenance!
Why Seasoning is Essential:
- Moisture Barrier: Oil penetrates the wood, creating a barrier that repels water and prevents it from seeping in and causing damage.
- Prevents Drying and Cracking: It keeps the wood nourished and flexible, reducing the risk of unsightly and functional cracks.
- Reduces Staining and Odor Absorption: A well-oiled board is less likely to absorb liquids, which means fewer stains and lingering smells.
- Enhances Beauty: Oil brings out the natural rich tones and grain patterns of the wood, making your board look stunning.
Choosing the Right Oil:
Not all oils are created equal for wood conditioning. You want a food-safe, non-drying oil. Avoid common cooking oils like olive oil, vegetable oil, or canola oil. These can go rancid over time, leaving a sticky, unpleasant residue and smell. Here are the best choices:
- Food-Grade Mineral Oil: This is the most common and recommended oil. It’s inexpensive, odorless, tasteless, and won’t go rancid. You can find it at most pharmacies or hardware stores. Look for grades labeled as USP (United States Pharmacopeia). You can find more information on its uses in woodworking from resources like Woodworking Handbooks.
- Beeswax/Mineral Oil Conditioners: Many commercially available cutting board conditioners are a blend of mineral oil and food-grade beeswax. The beeswax adds an extra layer of protection and a smoother finish.
- Walnut Oil or Tung Oil (Pure): These are drying oils, often used for furniture finishing. While food-safe once cured, they can be more expensive, harder to find in food-grade, and require more careful application. Pure tung oil is highly durable but can be tricky to work with. Be sure to use 100% pure tung oil, as “tung oil finish” products often contain varnishes. The Popular Mechanics often has great comparisons for wood finishes.
Step-by-Step: Seasoning Your Board
- Ensure the Board is Clean and Dry: This is the most important precursor. Any dirt or moisture trapped under the oil will remain there.
- Apply Liberally: Pour a generous amount of your chosen food-grade mineral oil (or conditioner) directly onto the board.
- Work it In: Use a clean, lint-free cloth or paper towel to rub the oil all over the board – top, bottom, and sides. Ensure you get into the end grain if it’s an end-grain board.
- Let it Soak: Allow the oil to penetrate the wood. For the first seasoning, or if the wood looks very dry, let it sit for at least 4-6 hours, or even overnight. You might see dry spots appear as the wood absorbs the oil; simply add more oil to those areas.
- Wipe Off Excess: After the soaking period, use a clean, dry cloth to wipe off any excess oil that hasn’t been absorbed. You want the board to feel smooth and conditioned, not greasy.
- Repeat if Necessary: For a new board or one that’s particularly dry, you might need to repeat this process 2-3 times until the wood stops absorbing oil readily.
How often should you season? Aim to season your board at least once a month, or more often if you notice it looks dry, dull, or water is starting to bead up less effectively. Frequent use and washing will dictate the frequency.
Troubleshooting Common Chopping Board Problems
Even with the best intentions, you might run into a few common issues. Here’s how to handle them:
Problem 1: Persistent Odors (Garlic, Onion, Fish)
Solution: The salt and lemon scrub is your best friend here. For really stubborn odors, you can try a paste of baking soda and water. Apply it to the board, let it sit for 15-20 minutes, then scrub with a damp cloth and rinse thoroughly. Always follow with immediate thorough drying.
Problem 2: Deep Scratches
Solution: Superficial scratches are normal and part of a well-loved board. If scratches are deep or numerous, you can lightly sand the board with fine-grit sandpaper (around 150-220 grit). Sand in the direction of the wood grain. Once smooth, clean off all dust, let it dry, and then re-season the board thoroughly. This process can be repeated if the board becomes heavily scored over time.
Problem 3: Board Seems Dry or Lifeless
Solution: This is a clear sign it’s time for some seasoning! Apply a good coat of food-grade mineral oil and let it soak in. If the wood feels rough even after oiling, it might be time for a light sanding and re-oiling. Ensure you’re not using it for things that require excessive moisture for prolonged periods, like marinating meats directly on the board.
Problem 4: Warping or Cupping
Solution: This is the trickiest issue and often a result of uneven drying or prolonged exposure to moisture. If it’s slight, sometimes standing the board on its edge in a slightly humid environment (not wet!) for a few days can help it relax. For more severe warping, it might be difficult to fully correct. Consistent drying and seasoning are the best preventative. For some guidance on wood movement, Wood Magazine offers excellent insights into how wood behaves.
A Quick Comparison: Cleaning Methods
To make things super clear, here’s a quick look at the main cleaning approaches and when to use them:
| Method | Best For | Pros | Cons | Frequency |
|---|---|---|---|---|
| Daily Wash (Soap & Water) | Everyday use, removing fresh residue | Quick, easy, readily available | Doesn’t deeply sanitize or remove tough stains/odors | After mỗi use |
| Salt & Lemon Scrub | Stains, odors, general sanitizing | Natural, effective for stains/odors, food-safe | Requires a bit more time, needs thorough rinsing | As needed for tough issues, or weekly/bi-weekly |
| Seasoning (Mineral Oil) | Wood conditioning, protection, beauty | Prevents drying/cracking, repels moisture, enhances look | Takes time to soak in, requires regular upkeep | Monthly or as board appears dry |
The Essential Care Checklist for Your Wooden Chopping Board
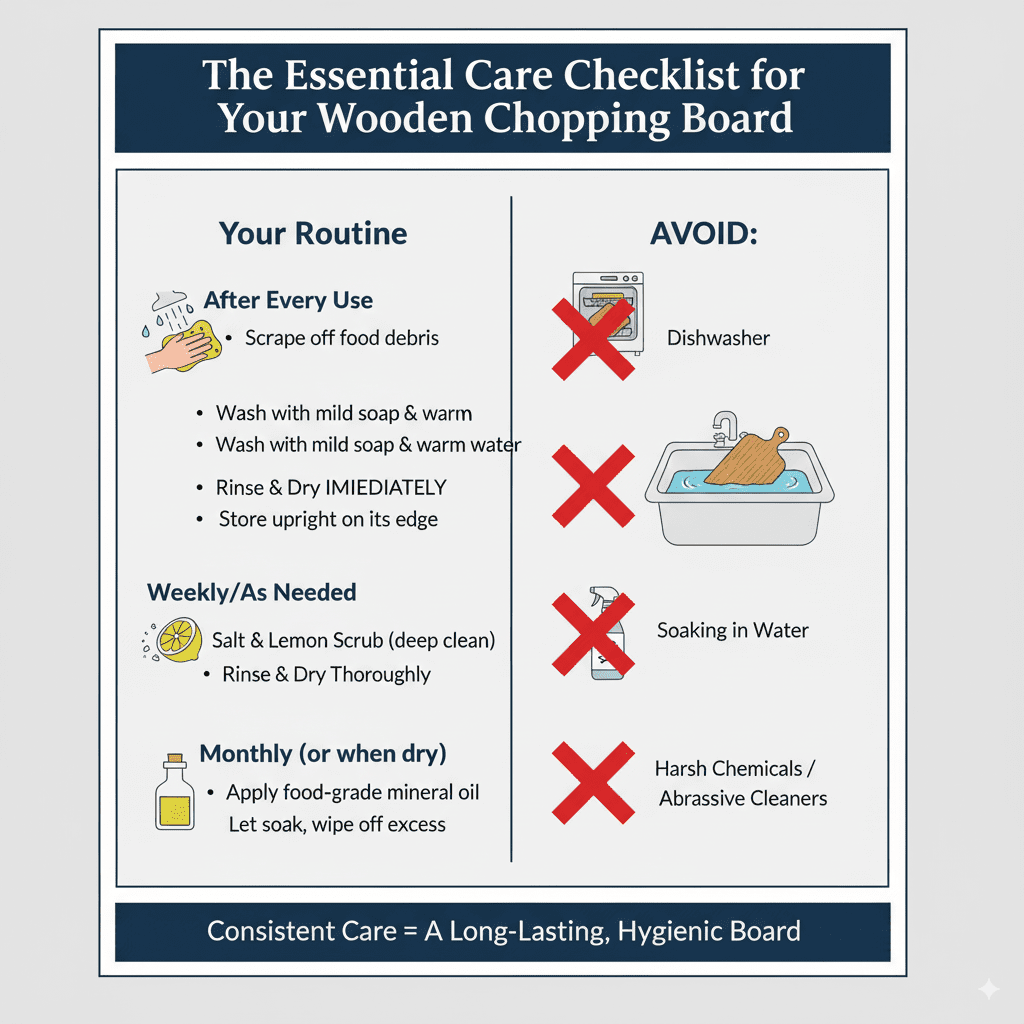
To keep your beloved wooden chopping board in top-notch condition, here’s a simple checklist to integrate into your routine:
- After Every Use: Scrape off food debris. Wash with mild soap and warm water using a soft cloth/sponge. Rinse thoroughly. Dry IMMEDIATELY and completely with a towel. Store upright on its edge.
- Weekly/As Needed: If stains or odors persist, perform the salt and lemon scrub deep clean. Rinse well and dry thoroughly.
- Monthly (or when dry): Apply a generous coat of food-grade mineral oil. Let soak for several hours or overnight. Wipe off excess.
- Avoid: Never put wooden chopping boards in the dishwasher. Never let them soak in water. Avoid harsh chemicals or abrasive cleaners.
This consistent care routine is the secret to a long-lasting, hygienic, and beautiful wooden chopping board. Embrace these simple steps, and your board will be a trusted kitchen companion for many meals to come.
FAQ: Your Chopping Board Cleaning Questions Answered
Q1: Can I use dish soap on my wooden chopping board?
A1: Yes, a mild dish soap is perfectly fine for everyday cleaning. Use it sparingly with warm water and a soft sponge or cloth. The key is to avoid soaking the board and to rinse off all soap residue thoroughly.
Q2: How often should I oil my wooden chopping board?
A2: It’s best to oil your board at least once a month. You’ll know it needs oiling when the wood looks dry, dull, or water no longer beads up on the surface. Frequent board users might need to oil more often.
Q3: Is it okay to use my wooden board for raw meat?
A3: Yes, but with caution. Wooden boards can harbor bacteria if not cleaned properly. Always wash your board immediately and thoroughly after contact with raw meat, poultry, or fish using hot, soapy water. The salt and lemon scrub is also a good way to ensure it’s sanitized. It’s a good practice to have separate boards for raw meats and other foods.