Can A Fiberglass Door Be Stained? The Honest Answer Inside
So, can a fiberglass door be stained? The short answer is yes, but not with traditional wood stain. Fiberglass itself is not porous like wood.
Before painting or staining your door, make sure the frame is in good shape — our guide on how to fix a door frame covers cracks, hinge splits, and kick-in damage with step-by-step instructions.
It doesn’t soak up stain the way wood does. Instead, you need special products designed for fiberglass. These products mimic the look of stain without needing to penetrate the material.
Think of it this way. Wood has tiny little holes, like a sponge. Stain goes into those holes and changes the color.
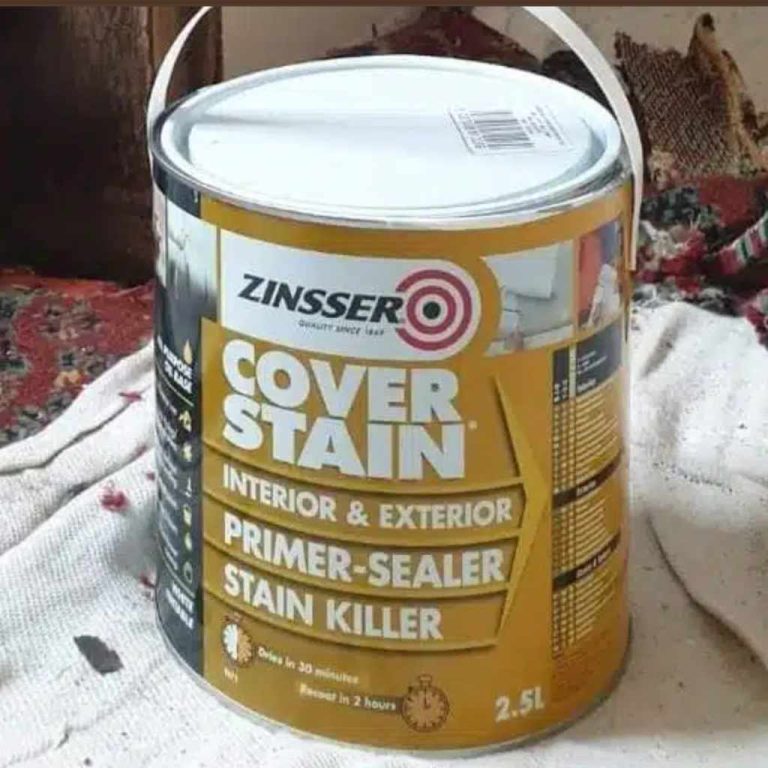
Fiberglass is smooth and solid. It’s more like plastic. So, regular Wood Stain” data-wpil-monitor-id=”22221″>wood stain will just sit on top and likely peel off.
You need a coloring agent that bonds to the surface. This is usually a gel stain or a specialized fiberglass door finish.
Most people asking this question want that classic wood grain look. Fiberglass doors often come with a molded wood grain pattern already in them. This is a huge plus!
It gives you a nice base to work with. You’re not trying to create wood grain. You’re trying to enhance the wood grain that’s already there.
The goal is to make your fiberglass door look like a real wood door. This can be done. It takes the right materials and a little patience.
You’ll be working with products that create a beautiful, deep color. They adhere to the surface. They can also add depth and shading to the molded grain.
This makes it look much more realistic.
My Own Fiberglass Door Adventure
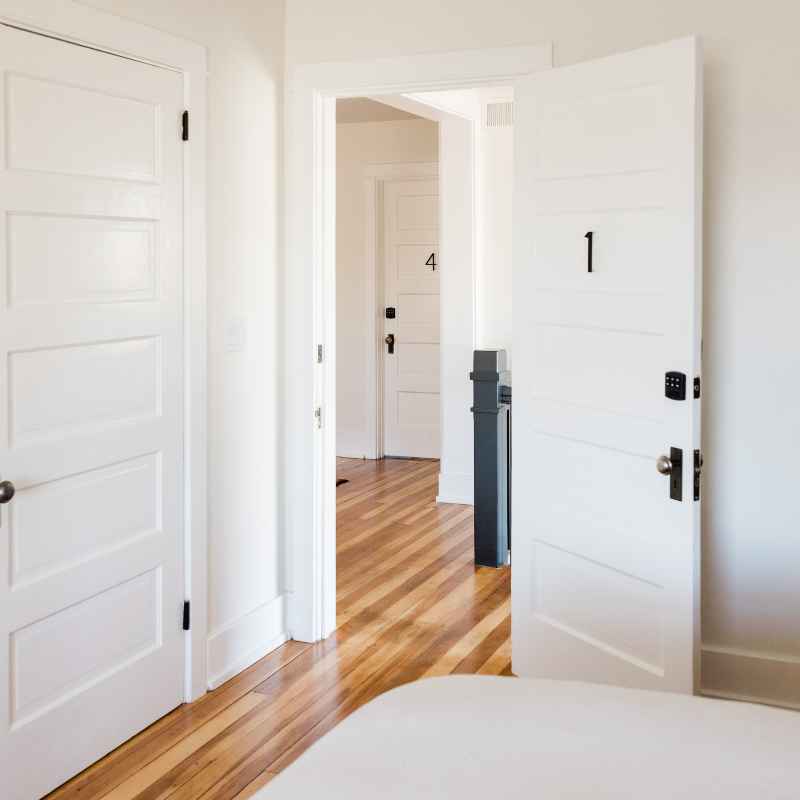
I remember staring at my old front door. It was a standard fiberglass model. It was a plain white.
I had just finished redoing the porch. I wanted something warmer. Something with more character.
I kept seeing these gorgeous stained wood doors. They just made a house feel so inviting.
My door had a nice, subtle wood grain pattern molded into it. I thought, “Surely I can just slap some stain on this!” So, I bought a can of my favorite dark walnut wood stain. I even picked up a nice brush.
I was so excited. I opened the can, poured a little into a tray, and started brushing it onto the door. It looked… streaky.
And not in a good way. It was just this uneven, muddy brown coating. It wasn’t soaking in.
It was just sitting there, looking sad.
Panic set in. I had just made my door look worse. I had spent money.
I had wasted time. And it was starting to get dark. I remember feeling a knot in my stomach.
“What did I do wrong?” I asked myself. I scraped off as much as I could. Then I did some serious research.
That’s when I learned the big secret: fiberglass doors need special treatment. They don’t take wood stain like wood. That night, I felt a bit defeated, but also determined.
I knew there had to be a way to get that rich look I wanted.
The next day, I went to a specialty paint store. I explained my problem. The expert there was super helpful.
He told me all about gel stains and fiberglass door finishing kits. He showed me samples. It was a game-changer.
He explained that these products are formulated differently. They are meant to stick to smooth surfaces. They also allow you to build up color and depth.
It felt like I had unlocked a secret level in home improvement. I left with a new set of products and a renewed sense of hope.

Understanding the “Why” Behind Fiberglass Finishing
Fiberglass doors are built to last. They are strong and tough. They resist weather and dents.
This is great for durability. But it also means they are not very friendly to traditional wood stains. The surface of a fiberglass door is very smooth.
It’s often coated with a protective layer. This coating, sometimes called a gel coat, is designed to seal out moisture. It also provides a uniform finish.
Because this surface is so non-porous, wood stain cannot penetrate it. Wood stain relies on the wood’s pores to seep in and color the material from within. Without that absorption, the stain just sits on the surface.
It can look patchy. It can also chip and peel over time. This is why the results are often disappointing when using regular wood stain on fiberglass.
The molded wood grain on many fiberglass doors is a pattern pressed into the fiberglass material. It’s not actual wood. This pattern gives you texture.
It gives you high and low areas. This is important for applying a finish that looks like real wood. You can use darker colors in the lower areas.
You can use lighter colors on the raised areas. This creates a natural-looking contrast. It mimics the way light hits real wood grain.
So, when we talk about “staining” a fiberglass door, we’re really talking about applying a specialized coating. This coating adheres to the smooth surface. It then gets manipulated to create the appearance of natural wood grain and color variations.
It’s more like painting with a staining effect than actual staining.
Fiberglass Door Finishing: The Key Components
The Base Coat: This is usually a primer. It helps the color coat stick well. It also evens out the surface.
The Color Coat (Gel Stain): This is the main product. It’s thicker than wood stain. It adheres to the surface.
It often comes in wood tones like oak, mahogany, or walnut.
The Glaze/Highlight Coat: This is an optional but recommended step. It adds depth. It helps define the wood grain.
It can also create variations in tone.
The Sealer Coat: This is a protective topcoat. It seals in the color. It protects against UV rays and weather.
It adds durability.
Choosing the Right Products for Your Fiberglass Door
The most important step is picking the right materials. This is where many DIYers go wrong. They grab what they think is stain.
But it’s not the right kind. For fiberglass doors, you need specific products. These are often sold as “fiberglass door finishing kits” or “gel stain kits.”
Gel Stains: These are your best bet. Gel stains are thicker. They don’t soak into the material.
Instead, they sit on top and create a layer of color. This makes them ideal for non-porous surfaces like fiberglass. They are designed to bond well.
They also allow for layering and blending, which is key to creating a realistic wood look.
Specialty Door Kits: Many companies offer complete kits. These kits usually include a primer, the gel stain color, a glaze or highlight product, and a protective topcoat. They might also come with application tools like foam brushes or rags.
These kits simplify the process. They ensure you have compatible products.
Exterior Paint or Enamel: Some people opt for exterior-grade paint. They use it in a wood-tone color. Then, they use a dark glaze to create the wood grain effect.
This can work, but it requires more skill. It can sometimes look more like painted wood than stained wood.
Avoid Traditional Wood Stains: We can’t stress this enough. Regular oil-based or water-based wood stains will not work. They will not adhere properly.
They will likely peel and fade. You’ll end up with a mess. You’ll have to strip it all off and start again.
This is a common mistake. It’s worth repeating to avoid it.
When you are shopping, look for labels that specifically mention “for fiberglass,” “for doors,” or “gel stain.” If you’re unsure, ask a store associate. They can guide you to the correct products. Getting this right is half the battle.
It sets you up for success.
Quick Product Checklist
- Cleaner/Degreaser: To prep the surface.
- Light Grit Sandpaper (e.g., 220 grit): For light scuffing.
- Primer: Specifically for fiberglass or exterior use.
- Gel Stain: In your desired wood tone.
- Glaze or Highlight Product (optional but recommended): For depth and realism.
- Protective Topcoat/Sealer: For durability and UV protection.
- Applicators: Foam brushes, high-quality paint brushes, clean rags.
The Prep Work: Making Your Door Ready
No matter what product you use, proper preparation is crucial. This is true for any painting or finishing project. For a fiberglass door, it’s even more important.
The smooth, non-porous surface needs to be clean and slightly roughened. This helps the new finish stick properly.
1. Clean the Door: Start by washing your door thoroughly. Use a mild detergent and water.
You want to remove all dirt, grime, grease, and any old wax or polish. Rinse it well. Let it dry completely.
A clean surface is the first step to a lasting finish.
2. Light Sanding: This step is key. You don’t need to remove the existing finish.
You just need to create a “tooth” for the primer and stain to grab onto. Use a light-grit sandpaper, around 220 grit. Gently scuff the entire surface of the door.
Pay attention to any smooth, glossy areas. Wipe away all the sanding dust with a tack cloth or a damp rag. Make sure the surface is dust-free.
3. Masking: Protect any areas you don’t want to finish. Use painter’s tape to mask off the door frame, hardware (like the doorknob and hinges), and any glass inserts.
Make sure the tape is pressed down firmly to prevent bleed-through.
Good preparation might seem boring. But it’s the foundation of your success. A door that is properly cleaned and scuffed will hold the finish much better.
You won’t have to worry about peeling or chipping later on. This step ensures the finish bonds securely. It lasts for years to come.
Prep Steps at a Glance
Clean: Mild soap and water.
Scuff: Light sanding (220 grit).
Dust Off: Tack cloth or damp rag.
Mask: Protect hardware and frame.
Applying the Gel Stain: Creating the Wood Look
Now for the fun part! This is where you transform your door. Applying gel stain to create a wood grain effect takes patience.
It also requires a bit of artistic touch. The goal is to build up color and depth gradually.
1. Apply the Primer: If your kit includes a primer, apply it first. Follow the manufacturer’s instructions.
Let it dry completely. A good primer will create a uniform base. It will help the gel stain adhere better.
2. Apply the Gel Stain: Work in small sections. Use a foam brush or a good quality natural bristle brush to apply a thin, even coat of gel stain.
Don’t try to cover the entire door at once. You want to be able to work the stain while it’s wet.
3. Working the Grain: This is where you create the wood look. You can use a clean, dry brush to lightly drag through the wet stain.
This will create streaks that mimic wood grain. You can also use a sea sponge or a crumpled rag to dab and swirl the stain. This creates natural-looking variations in color and texture.
4. Blending and Softening: Use a clean, dry brush to gently blend any harsh lines. You want the color transitions to be smooth.
You can also use a rag to wipe away excess stain. This helps control the color depth.
5. Building Color: Gel stain often requires multiple thin coats to achieve the desired depth. Let each coat dry completely according to the product instructions.
Then, apply another thin coat. You can also use a slightly darker or lighter shade of gel stain for highlighting or shading. This adds realism.
6. Using the Glaze (Optional but Recommended): If you have a glaze product, this is where it comes in. A glaze can add depth.
It can make the wood grain pop. It can also add subtle color variations. Apply it thinly.
Then, wipe or blend it away to reveal the underlying color. This technique is what really makes the faux wood grain look convincing.
It’s important to experiment on a scrap piece of material first. This helps you get a feel for the product. It lets you practice your graining technique.
Don’t rush this process. The more time you spend building up the color and texture, the more realistic your door will look.
Gel Stain Application Tips
- Thin Coats are Best: Apply multiple thin layers.
- Work in Sections: Don’t let the stain dry too fast.
- Feather Edges: Blend where one section meets another.
- Direction Matters: Always brush or wipe in a vertical direction to mimic grain.
- Less is More: You can always add more color. It’s harder to take it away.
Adding Depth with Glazes and Highlight Colors
To truly elevate the look of your stained fiberglass door, consider using glazes or highlight colors. These products are not about covering the surface. They are about enhancing the existing color and texture.
They help create those beautiful, natural variations you see in real wood.
What is a Glaze? A glaze is a translucent coating. It’s much thinner than gel stain. It can be tinted.
When applied over a base color (your gel stain), it adds depth and subtle color shifts. It can be used to darken recessed areas. It can also be used to highlight raised grain patterns.
How to Use a Glaze: You typically apply the glaze in thin layers. Then, you use a rag, sponge, or brush to wipe or blend it away. This allows the glaze to settle into the crevices of the molded wood grain.
It also highlights the raised areas. You can create dramatic effects or subtle enhancements. It depends on how much glaze you leave behind.
Highlighting the Grain: One common technique is to use a lighter glaze or a dry-brushing technique with a lighter color. This lightens the raised parts of the wood grain. It makes them stand out against the darker recessed areas.
This contrast is what makes wood grain look three-dimensional.
Experimentation is Key: Glazing can be a bit tricky. It’s very similar to how a professional woodworker might “antique” furniture. Practice on a scrap piece.
See how the glaze reacts. Learn how to wipe it off to get the effect you want. The goal is to make the molded grain look natural.
You want it to look like it’s catching the light in different ways.
Using a glaze can take your DIY door finish from looking good to looking truly professional. It’s that extra step that makes a big difference. It adds richness and authenticity.
It’s worth the effort.
Glazing: The Realism Booster
Purpose: Adds depth, highlights grain, creates color variation.
Application: Thin layers, then wiped/blended.
Technique: Settle into crevices, highlight raised areas.
Result: More authentic, dimensional wood look.
The Final Coat: Protecting Your Work
Once you are happy with the color and grain on your fiberglass door, it’s time for the final step: protection. This is where you seal your work and make it last. A good topcoat is essential, especially for an exterior door that faces the elements.
Choose a Durable Topcoat: Look for a clear, protective topcoat or sealer. It should be designed for exterior use. It should also be compatible with the gel stain or finish you used.
Many fiberglass door kits include a specific topcoat. If yours doesn’t, ask for recommendations at the paint store.
Types of Topcoats: Common choices include clear polyurethane or a water-based acrylic sealer. Some are satin finish, while others are high gloss. Choose a finish that matches the look you are going for.
A satin or semi-gloss finish often looks more like natural wood than a high gloss finish.
Application: Apply the topcoat in thin, even coats. Follow the manufacturer’s instructions for drying times between coats. Usually, two or three coats are recommended for good protection.
Avoid applying too much at once. This can lead to drips or an uneven finish.
UV Protection: Make sure the topcoat offers UV protection. Sunlight can fade the color over time. A good UV-blocking topcoat will help preserve your beautiful finish.
This is especially important if your door gets direct sun for most of the day.
This final step seals everything in. It protects your door from rain, sun, and everyday wear and tear. It gives your hard work a professional, lasting finish.
When it’s done, step back and admire your work. You’ve transformed your door!
Topcoat Essentials
- Purpose: Protects finish, adds durability, UV resistance.
- Type: Exterior-grade clear coat or sealer.
- Finish: Satin or semi-gloss often looks most natural.
- Application: Thin, even coats.
- Layers: 2-3 coats recommended.
Real-World Scenarios and Considerations
When you’re thinking about staining your fiberglass door, it’s helpful to picture it in different settings. What works best in one home might look different in another. Let’s look at a few common scenarios.
Scenario 1: The Sun-Soaked Front Door
If your front door faces south or west, it gets a lot of direct sunlight. This can be tough on any finish. You’ll need to be extra diligent with your prep work and your topcoat.
Use a high-quality exterior gel stain. Make sure your clear sealer has excellent UV protection. You might also need to reapply the topcoat every few years to maintain its protection.
Scenario 2: The Distressed Wood Look
Maybe you like the look of weathered wood. You can achieve this with your gel stain. Apply a darker base coat.
Then, use a lighter glaze to create highlights. You can even use a stiff brush to add fine, random lines that mimic the look of aging or natural wear. This can give your door a rustic charm.
Scenario 3: Matching Existing Wood Trim
If your home has a lot of natural wood trim or accents (like porch posts or window frames), you’ll want your door to match. Take a good look at the color and grain of that existing wood. Try to find a gel stain color that’s a close match.
You can also use a bit of artistic license. Sometimes, a slightly different shade can add character without clashing.
Scenario 4: Low-Maintenance Appeal
One of the benefits of fiberglass is its low maintenance. Staining it properly means you can keep that benefit. Once finished and sealed, you won’t need to do much more than an occasional cleaning.
This is a big win for busy homeowners.
Humidity and Climate: Your local climate can play a role. In areas with high humidity or lots of rain, a good sealant is even more critical. Ensure all coats are fully cured before exposing them to extreme weather.
The manufacturer’s drying and curing times are important guidelines.
Real-World Checkpoints
Sun Exposure: Prioritize UV protection.
Desired Look: Rustic, modern, classic wood tone?
Surroundings: Match or complement existing home features.
Climate: Ensure adequate weatherproofing.
What This Means for You: When is it Worth It?
So, can you stain a fiberglass door? Yes. Should you?
That depends on what you’re looking for and how much effort you’re willing to put in. If you’re expecting to grab a can of Minwax and get perfect results in an hour, then no, it’s not worth it.
But if you’re willing to use the right products and follow the steps, then yes, it’s absolutely worth it. Here’s why:
- Cost Savings: A stained fiberglass door can look as good as a solid wood door. But it will cost significantly less. You get the look without the hefty price tag of real wood.
- Durability: Modern fiberglass doors are incredibly durable. When you finish them correctly, they resist rot, warping, and insect damage far better than wood.
- Customization: You can choose any wood tone you like. You can create a look that perfectly matches your home’s style. You are in control of the final appearance.
- Increased Curb Appeal: A beautiful front door makes a huge difference to your home’s exterior. A well-finished fiberglass door can boost your home’s curb appeal and value.
When to Potentially Reconsider:
- Very Old or Damaged Doors: If your fiberglass door is old, cracked, or has significant damage, finishing it might not be the best use of your time. Replacement might be a better option.
- No Patience for Detail: If you prefer quick fixes and get easily frustrated with detailed work, this project might not be for you. It requires patience and attention to detail.
- Perfect Wood Grain is Essential: While you can create a very convincing look, a truly discerning eye might still be able to tell it’s not solid wood. If only 100% authentic wood grain will do, you’ll need a real wood door.
Ultimately, staining a fiberglass door is a rewarding DIY project. It allows you to achieve a high-end look affordably. It just requires the right knowledge and the right materials.
Is It Worth It?
Pros: Cost-effective, durable, customizable, high curb appeal.
Cons: Requires specific products, patience, and attention to detail.
Best For: Homeowners seeking a high-end wood look affordably.
Quick Tips for Success
If you’re ready to tackle this project, here are a few extra tips to make sure it goes smoothly:
- Test Your Colors: Always test your gel stain and glaze colors on an inconspicuous area. This could be the inside edge of the door or a scrap piece of fiberglass.
- Work in Good Light: Natural daylight is best. It helps you see the true color and any inconsistencies in your application.
- Ventilation is Key: Make sure the area is well-ventilated, especially when working with primers and sealers.
- Clean Your Brushes: Clean your brushes thoroughly after each use with the appropriate cleaner recommended by the product manufacturer. This will keep them in good condition for future projects.
- Don’t Rush Curing: Allow adequate drying and curing time. This is more than just being dry to the touch. Full curing means the finish is fully hardened. This is vital for durability.
- Consider the Weather: Avoid working on very humid or very cold days. Extreme temperatures can affect how the finish dries and cures.
Key Takeaways for a Great Finish
- Test First: Always sample your colors.
- Use Good Light: See your work clearly.
- Stay Safe: Ensure good ventilation.
- Care for Tools: Clean brushes properly.
- Be Patient: Allow full curing time.
- Watch the Weather: Pick the right day.
Frequently Asked Questions About Staining Fiberglass Doors
Can I use regular wood stain on my fiberglass door?
No, traditional wood stains will not adhere properly to fiberglass. They are designed to penetrate porous wood. On fiberglass, they will likely peel and fail.
You need special gel stains or fiberglass door finishing kits.
What kind of products should I use to stain a fiberglass door?
You should use gel stains or specialized fiberglass door finishing kits. These products are formulated to bond to smooth, non-porous surfaces like fiberglass. They allow you to build color and create a wood grain effect.
How do I prepare my fiberglass door for staining?
Preparation is crucial. First, clean the door thoroughly with a mild detergent. Then, lightly scuff the entire surface with a 220-grit sandpaper to create a “tooth.” Wipe away all dust with a tack cloth or damp rag.
Mask off any areas you don’t want to finish.
How long does it take to stain a fiberglass door?
The total time can vary, but plan for at least a full day, possibly two. This includes cleaning, sanding, priming, applying multiple thin coats of gel stain, possibly glazing, and applying the topcoat. Allow ample drying and curing time between coats, which can add several days to the overall process.
Will the finish look like real wood grain?
With the right products and techniques, you can achieve a very convincing faux wood grain look. Fiberglass doors often have a molded wood grain pattern. Gel stains and glazes can highlight this pattern, creating depth and realistic color variations that mimic natural wood.
How do I make my stained fiberglass door last longer?
Proper preparation and the use of a durable, exterior-grade protective topcoat are key. Ensure the topcoat offers UV protection. Keep the door clean.
Reapply the topcoat every few years as needed, especially if the door receives a lot of direct sunlight.
The Final Word on Fiberglass Door Finishing
So, there you have it. You absolutely can achieve a beautiful stained wood look on your fiberglass door. It just takes knowing the right products and using the correct methods.
It’s not as simple as grabbing any old can of stain, but the results are well worth the effort. You can transform your entryway affordably. You can add warmth and character to your home.