How Do You Seal Wood: Proven, Essential Guide
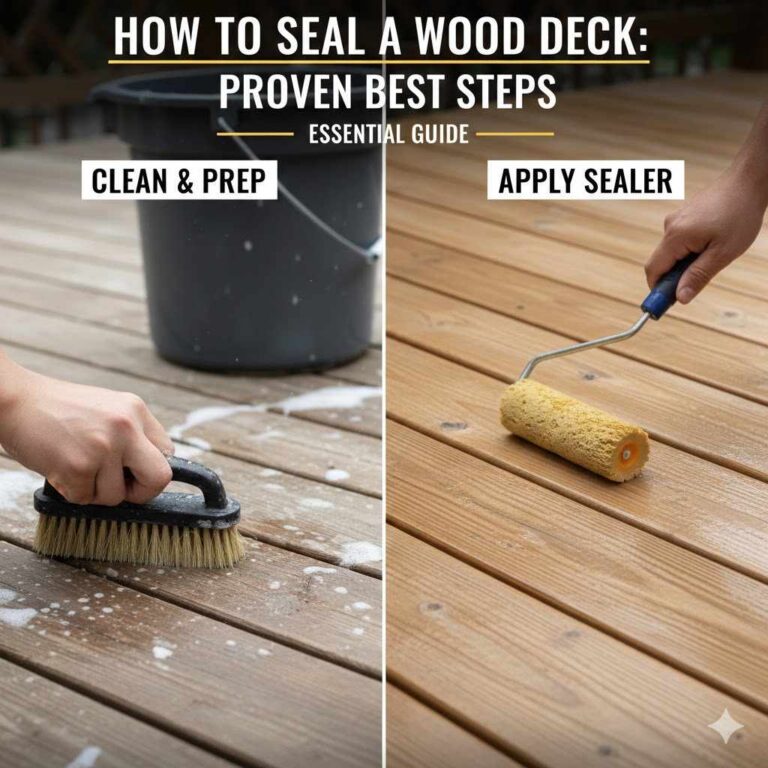
To seal wood properly, clean the surface thoroughly, sand it smooth for optimal adhesion, and apply 2-3 thin coats of your chosen sealant (like polyurethane or lacquer), allowing proper drying time between each coat for a durable, beautiful finish.
You look at that lovely piece of pine or oak, ready for your next project. Then the question hits: “How do I protect this wood?” Sealing wood seems tricky. Maybe you’re worried about making it look dull or sticky. Don’t sweat it! Sealing is simple once you know the steps. It’s just about giving your wood a strong shield against water, dirt, and time. This guide will walk you through sealing wood perfectly, from the very first sanding grit to the final smooth coat. Let’s get started on making your project last for years to come!
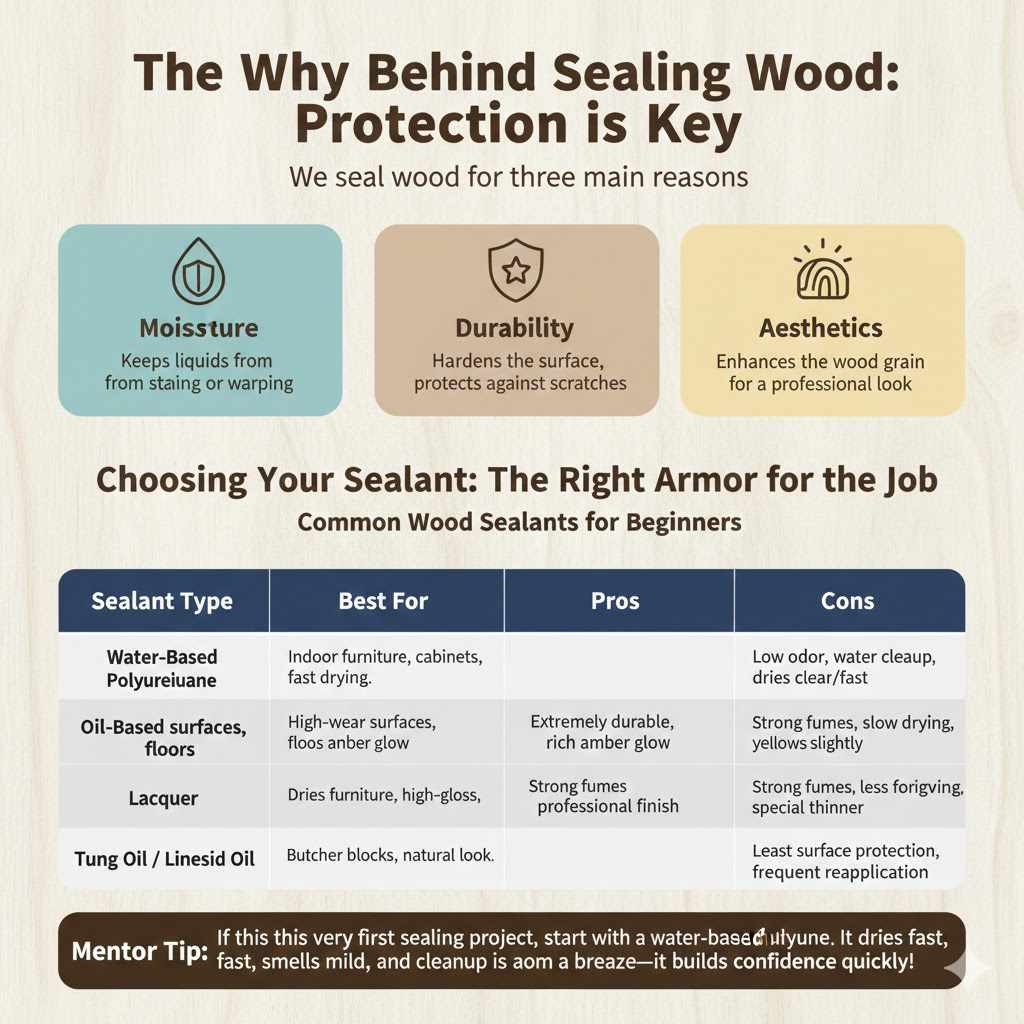
The Why Behind Sealing Wood: Protection is Key
Why do we bother sealing wood? Think of sealing as giving your wood project a strong raincoat. Wood is naturally porous, meaning it breathes and absorbs things easily. Without a good seal, spills soak in, humidity warps it, and sunlight fades the color. For any wood piece that lives in a kitchen, bathroom, or even outside, sealing is non-negotiable. It’s the difference between a project that lasts a few months and one that becomes a treasured heirloom.
We seal wood for three main reasons:
- Moisture Resistance: This keeps liquids from staining or causing the wood to swell (warp).
- Durability: It hardens the surface, protecting against everyday scratches and dings.
- Aesthetics: It enhances the wood grain, giving it that professional, finished look, whether matte or glossy.

Choosing Your Sealant: The Right Armor for the Job
The term “sealant” covers many products, each with strengths suited for different environments. Choosing correctly depends on where the wood will live. Are you finishing an indoor dining table, or a deck exposed to rain?
Common Wood Sealants for Beginners
For most beginner home projects—like shelving, picture frames, or indoor furniture—you will typically choose between an oil-based product and a water-based product.
| Sealant Type | Best For | Pros | Cons |
|---|---|---|---|
| Water-Based Polyurethane | Indoor furniture, cabinets, areas needing fast drying. | Low odor, cleans up easily with water, dries clear fast. | Slightly less durable than oil-based. |
| Oil-Based Polyurethane | High-wear surfaces like floors or tabletops needing maximum protection. | Extremely durable, offers rich amber glow that enhances wood tone. | Strong fumes (needs ventilation), takes longer to dry, yellows slightly over time. |
| Lacquer | Fine furniture, projects requiring a high-gloss, very hard shell. | Dries almost instantly, beautiful professional finish. | Fumes are strong, less forgiving for mistakes, requires special thinner. |
| Tung Oil / Linseed Oil (Penetrating Sealers) | Butcher blocks, natural look projects where you want the wood to feel “real.” | Penetrates deep, easy to repair or reapply, very natural look. | Offers the least amount of surface protection; needs frequent reapplication. |
Mentor Tip: If this is your very first sealing project, start with a water-based polyurethane. It dries fast, smells mild, and cleanup is a breeze—it builds confidence quickly!
Tools and Materials: Preparation is Half the Battle
Having the right gear ready before you start makes the whole sealing process smooth and enjoyable. Never skimp on preparation—it’s where most projects succeed or fail.
Essential Gear Checklist
- The Wood: Cleaned and sanded piece, ready for finishing.
- Safety Gear: Nitrile gloves (to avoid getting oils/finish on skin) and, crucially, a respirator mask if using oil-based products or lacquers (protect your lungs!).
- Sandpaper: Grit progression, usually starting around 120, moving to 180, and finishing with 220.
- Tack Cloth: This sticky cloth picks up all the fine dust that regular dusting misses. Essential!
- Applicator: High-quality natural bristle brush (for oil-based) or high-density synthetic foam/foam brushes (for water-based). Small pieces are best finished with a soft, lint-free rag (for wiping on oils).
- Ventilation: A well-ventilated space, or an outdoor area. Good airflow speeds curing and reduces fumes.
Ventilation is extremely important when dealing with finishing products. Always ensure you are working where fresh air can move through. For more information on safe solvent usage, you can check resources like those provided by the National Institute for Occupational Safety and Health (NIOSH) regarding airborne contaminants.
Step-by-Step: How Do You Seal Wood Perfectly
We are going to seal the wood using a standard protective topcoat, like polyurethane. Follow these ten steps carefully, and you’ll achieve a fantastic, lasting finish.
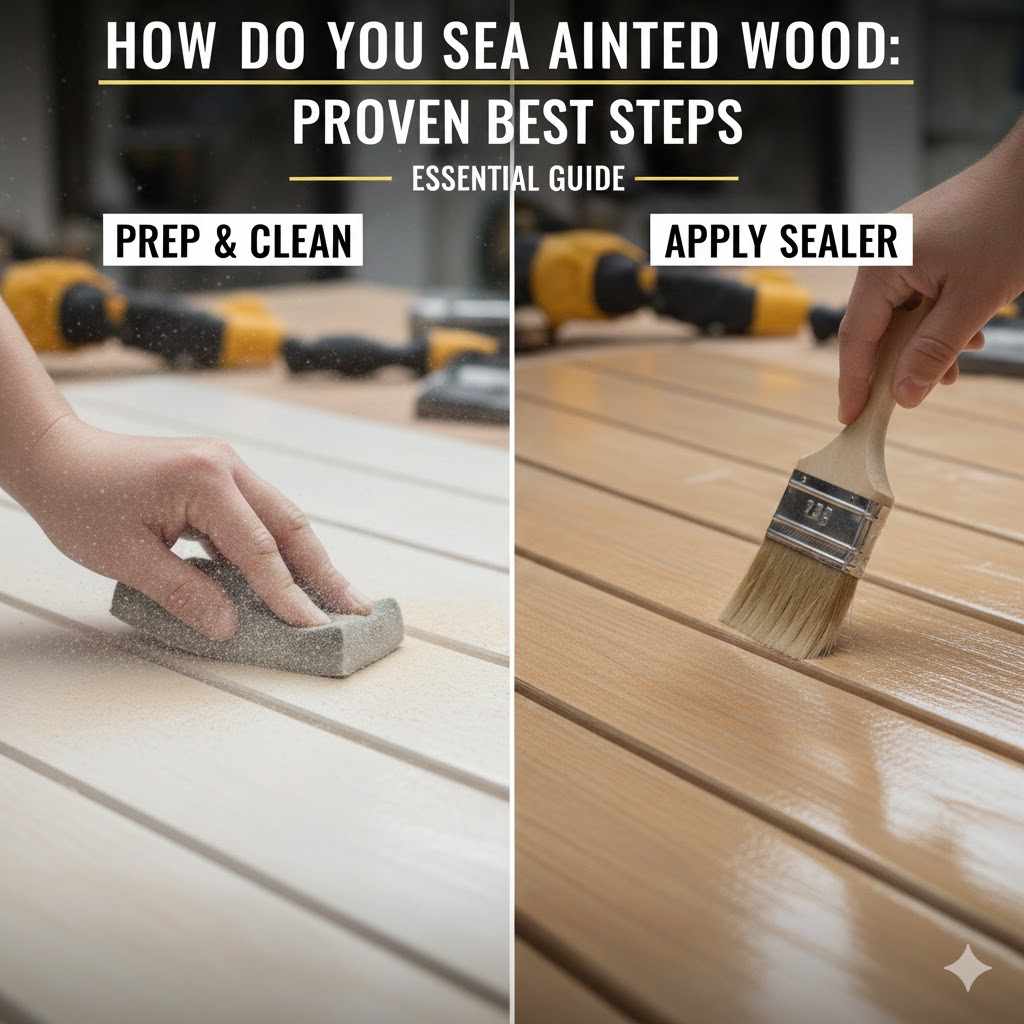
Phase 1: Surface Perfection (Sanding and Cleaning)
This is the most important phase. The finish only sticks well to a clean, properly textured surface. If you skip sanding, the finish will look patchy and peel off later.
- Inspect and Repair: Look closely for dents, stray glue spots, or pencil marks. Scrape off any dried glue using a plastic scraper, as sealant will not stick to dried glue.
- Initial Sanding: Start with a medium grit sandpaper, like 120-grit. Sand in the direction of the wood grain. If you sand against the grain, you leave visible scratches.
- Progressive Sanding: Move to a finer grit, like 180-grit, and sand the entire surface again. This removes the deeper scratches left by the 120-grit paper.
- Final Sanding (The Seal-Key): Finish with 220-grit. This creates a smooth surface texture that the sealant can grip onto perfectly. Do not sand finer than 220-grit for most topcoats, as ultra-smooth wood makes it hard for the finish to adhere.
- Dust Removal – The Critical Clean: This step cannot be rushed. First, wipe down the entire piece with a clean, dry microfiber cloth. Next, use a slightly dampened cloth (water or mineral spirits, depending on your finish type) to remove embedded dust. Allow the surface to dry completely—about 15–20 minutes. Finally, wipe everything down one last time with a tack cloth. Press the cloth gently onto the surface, letting its natural stickiness pull up any remaining invisible dust particles.
Phase 2: Application (Thin Coats are Best)
Now it’s time to apply your protective coat. Remember: thin coats build durability; thick coats result in drips and streaks.
- Prepare the Environment: Ensure your workspace is dust-free. Turn off fans, close windows if it’s dusty outside, and put on your gloves and respirator (if needed).
- Stir, Don’t Shake: Open your can of sealer. If using polyurethane, stir it thoroughly with a stir stick. Never shake the can, as this creates bubbles that will transfer to your wood surface.
- Apply the First Coat (The Seal Coat): Dip your brush about one-third of the way into the finish. Wipe off the excess on the inside rim of the can. Using long, even, overlapping strokes, apply the finish in the direction of the grain. Work quickly but smoothly. Do not overwork any area. For your first coat, keep it light—we are sealing the pores.
- Drying Time: Check the can for specific drying times. For most finishes, this can be 2 to 4 hours before it is “dry to the touch.” You must respect this drying time. If you sand or coat too early, you peel up the first layer.
- Lightly Sand (De-Nibbing): Once the first coat is fully dry (it should feel hard), you may see tiny raised fibers (nibs) that cause roughness. Use a very fine abrasive like 320-grit sandpaper or fine-grade (0000) steel wool. Sand the surface very lightly—just enough to knock down the roughness. Do not sand through the finish to the bare wood.
- Second Dust Removal: Clean this light sanding dust off immediately using a tack cloth, just as you did in Step 5.
- Apply Subsequent Coats: Apply the second coat the same way you applied the first—thin and even. Most projects look great with two coats, but high-use items like tabletops need three coats for maximum protection. Allow this final coat to cure completely (this is different from drying time; curing takes days or even weeks).
Phase 3: Curing (Patience Pays Off)
Curing is when the chemical solvents completely evaporate, and the sealant hardens to its final, strongest state. Always check the manufacturer’s label, as curing times vary greatly between oil-based and water-based products.
A general guideline is:
- Dry to Touch: 1–4 hours.
- Ready for Light Use (Placing objects on it): 24–48 hours.
- Fully Cured (Safe for Water/Heat/Heavy Use): 7 to 30 days.
Resist the urge to place a hot coffee mug or a damp glass on your newly sealed wood before the full cure time. Doing so risks permanent surface rings, even if the finish feels hard to the touch!
Special Considerations for Specific Wood Projects
Not all wood is created equal. Some woods require special preparation before you seal them, or they might bleed sap or tannins into your clear coat.
Sealing Oily or Exotic Woods
Woods like Teak, Rosewood, or highly figured Maple contain natural oils that repel standard finishes, causing them to feel greasy or remain sticky long after application. You must deal with these oils first.
The common method is to wipe down the wood several times using a chemical cleaner that breaks down surface oils. For many oily woods,:
- Wipe down with mineral spirits (paint thinner) and let it evaporate completely.
- Wipe down again with a dedicated solvent like Naphtha (sometimes called “VM&P Naphtha”). This solvent is excellent for removing oils without raising the wood grain too much.
- Allow ample flash-off time—sometimes overnight—before applying your first thin sealer coat.
Sealing Plywood Edges
Plywood looks great on cabinet boxes, but the raw edges show the layered construction, which can look unfinished. Sealing these edges requires a slightly different technique to prevent the finish from soaking in unevenly (called blotching).
- Use a Sealer/Wood Conditioner First: Before applying your final topcoat, use a specialized wood conditioner or apply a very thin coat of shellac specifically to the raw edges. This pre-seals the compressed layers.
- Brush Application: Since the edges soak up finish fast, use a smaller, more precise artist’s brush to carefully apply your polyurethane right to the edge lines.
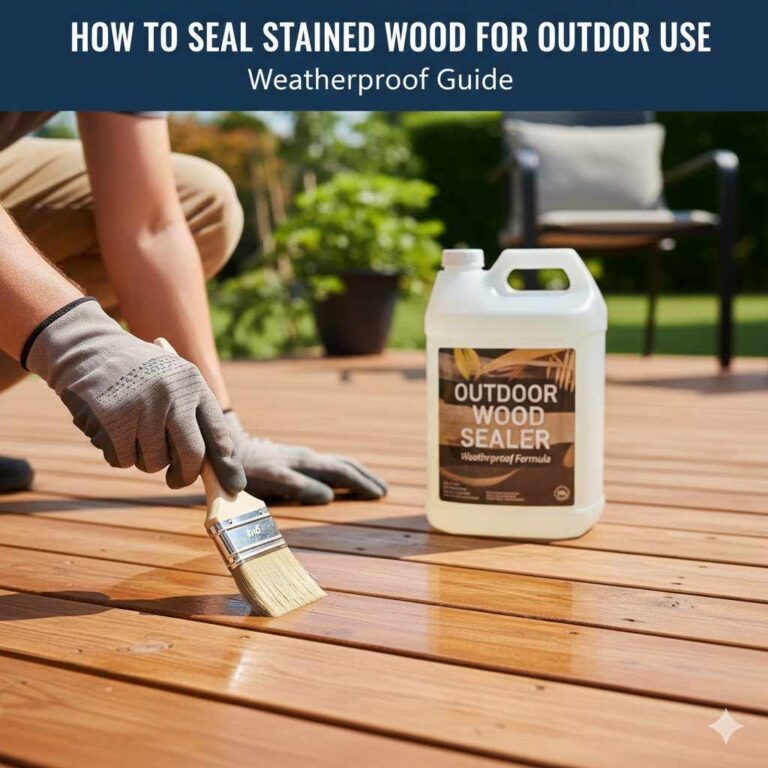
Sealing Exterior Wood
Exterior wood sealing is a battle against UV rays and weather. Standard interior polyurethane will fail quickly outdoors.
You must use finishes specifically labeled for exterior use. These usually contain UV absorbers. Spar Varnish is a classic, flexible, oil-based exterior sealer famous for handling the expansion and contraction caused by changing outdoor temperatures. When finishing outdoor projects, frequent reapplication (yearly) is the secret to long-term success.
Troubleshooting Common Sealing Problems
Even mentors run into trouble sometimes! Here are the most common issues beginners face when sealing wood and how to fix them with confidence.
Issue 1: The Finish Remains Sticky
This means the product hasn’t cured (dried fully). It often happens because the coats were too thick or the humidity is too high.
The Fix: Increase airflow. If possible, place a gentle fan aimed near (not directly onto) the piece to increase air movement. Keep the temperature moderate (65°F–75°F is ideal). If it’s oil-based, be patient; it may take several days if the air is cold or damp.
Issue 2: Bubbles or Foaming on the Surface
This happens if you shake the can, stir too vigorously, or apply the finish in direct sunlight (which dries the surface before the bubbles underneath can pop).
The Fix: Stop applying new finish. Let the current coat dry completely. If the bubbles remain after drying, gently sand the entire surface with 320-grit paper until smooth, wipe clean with a tack cloth, and reapply a very thin coat, stirring gently instead of shaking.
Issue 3: Blotching and Uneven Color
This is common with soft, porous woods like pine, maple, or birch. Some areas soak up the finish quickly, resulting in dark patches.
The Fix: You need a pre-sealer. For next time, apply a dedicated commercial wood conditioner or a very thin first coat of Shellac (it seals the wood pores quickly and evenly). If the piece is already sealed and blotchy, you must sand it all back down to bare wood, apply conditioner or shellac, and start the sealing process again. For future reference on wood blotching, guides from organizations like the Forest Products Laboratory (FPL) often detail the science behind why certain species react differently to stains and finishes.
Beginner Q and A FAQ
Q: Can I seal wood without sanding first?
A: Technically, yes, but you should never. If the wood is rough, the sealant will look uneven, feel rough, and won’t adhere well, leading to peeling later. Sanding creates a surface texture for the sealant to grip.
Q: Which is better for a tabletop—oil or water polyurethane?
A: Oil-based polyurethane provides the highest surface hardness and durability, making it fantastic for heavy-use tables. However, water-based polyurethane is far easier for beginners to apply with less odor.
Q: How do I know when my finish is totally cured?
A: Curing takes much longer than drying. Always read the can. A finish that is dry to the touch might only be 5% cured. Full cure (where it is safe from spills and pressure) often takes 7 to 30 days. Use your nose; if you can still smell strong solvent odors, it is not cured.
Q: Should I seal the bottom of my project too?
A: Yes, absolutely! You must seal both the top and the bottom surfaces equally. If you only seal the top, the bottom side will absorb moisture differently than the sealed top, causing the piece to bow or cup over time. Sealing both sides balances the pressure.
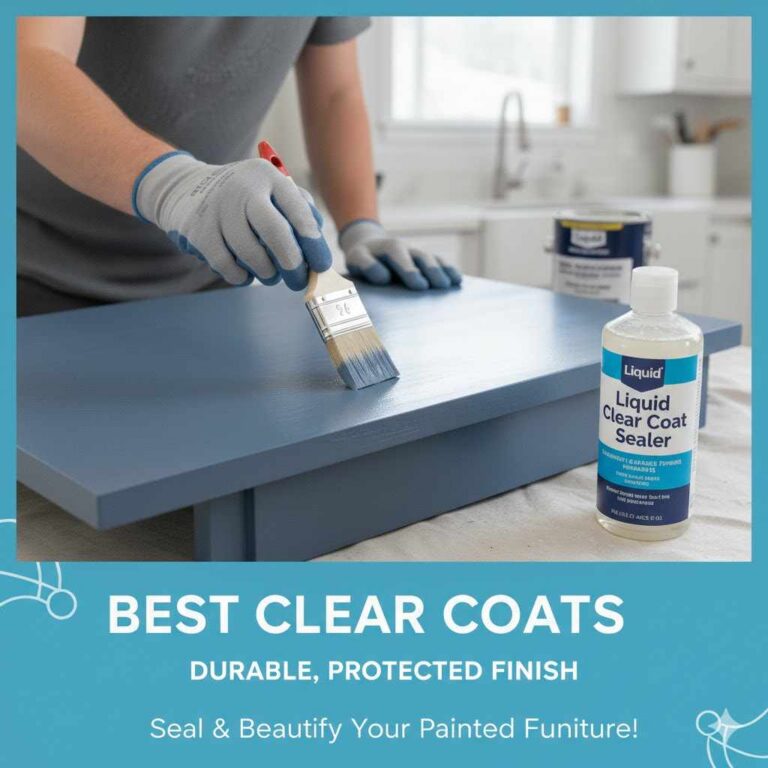
Q: Can I paint and then seal the wood?
A: Yes, this is called a topcoat or clear coat over paint. After your paint is fully dry (usually 24 hours), you apply a thin coat of clear sealer (like water-based poly) on top. This protects the color and makes the surface durable and cleanable.
Q: What if I get a drip? How do I fix it?
A: Drips usually happen when the coat is too thick. Let the coat dry completely (sometimes waiting a full day). Then, gently sand the hardened drip down with 220-grit or 320-grit paper until it is flush with the rest of the surface. Wipe the dust and apply a new, thinner coat over that area.
Maintaining Your Sealed Wood: Longevity Tips
Congratulations! You have successfully sealed your wood. Now, treat it right so your hard work lasts. Maintenance is easy when you know what to avoid.
Keep these points in mind for happy, long-lasting sealed wood:
Avoid Harsh Cleaners: Skip ammonia-based window cleaners or bleach. These break down the finish. Use warm water and a tiny bit of mild dish soap, or dedicated wood cleaners.
Use Coasters and Trivets: Even the toughest finishes (like marine varnish) can fail against high heat (steam) or prolonged moisture contact. Coasters save finishes from needing immediate repair.
Check for Wear Annually: Inspect high-traffic areas like armrests or edges. If the finish feels slightly rougher or you notice the wood color starting to fade, it’s time to lightly scuff sand (using 320-grit) the worn area and apply one fresh, thin maintenance coat.
Conclusion: You Are a Wood Finishing Pro
Learning how to seal wood isn’t about having expensive tools; it’s about mastering preparation and patience. We walked through selecting the right finish, preparing a pristine surface by sanding correctly, applying thin coats that build strength layer by layer, and knowing what to do when common problems pop up. Remember my most important advice: preparation (sanding and dusting) determines 90% of your final result.
Once you get past that hurdle, applying the sealant itself is straightforward. Feel confident in your new skill! Whether you are sealing a beautiful heirloom project or simply protecting that new set of garage shelves, you now have the proven blueprint to give your wood the beautiful, durable armor it deserves. Get sanding, and enjoy that professional-looking finish!