How to Make Wood Grain Stand Out: 7 Techniques That Work
To make wood grain stand out, work in this order: sand to 150-220 grit, raise the grain with water and re-sand, color the wood with a dye, a pigment, or both, fill the pores only if you want a smooth surface, and seal with a clear oil before any film finish. The exception is species with weak grain, such as pine and poplar, where no finish creates contrast that the wood does not already have. Below is each step, the reason it works, and a species chart for choosing which steps to skip.
The 7 Techniques That Make Grain Pop, in Order
Best Grain Filler Pick | |
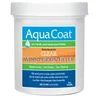 |
Aqua Coat Water-Based Clear Wood Grain Filler Gel, $24.23 A water-based gel that fills the open pores on oak, ash and mahogany, and can be mixed with water-soluble dye or pigment, which is the pore-contrast trick covered in the filler section below.
|
As an Amazon Associate we earn from qualifying purchases. | |
Order matters more than any single product, because each step either opens the grain or buries it. Here is the full sequence in short form, with the sections below explaining the reasoning.
- Pick wood with grain worth showing. Ring-porous species and quartersawn oak do most of the work for you.
- Sand to the right grit. Finer is not better, because over-sanding can burnish the surface and cut stain absorption.
- Raise the grain and re-sand. This removes fuzz so that color and finish do not feel rough.
- Color with dye, pigment, or both. Dye colors the fibers, and pigment colors the pores.
- Fill the pores, or deliberately skip it. Filled pores read as smooth, and open pores read as textured.
- Apply oil first. Penetrating oil deepens contrast, and a shellac or film topcoat follows once it has cured.
- Finish with a satin or matte sheen. Less glare keeps the depth of the grain visible.
Start With Wood That Has Grain Worth Showing
Species sets the ceiling. Ring-porous woods such as oak and ash have large earlywood pores that form a visible band in every growth ring, which gives them bold lines. Diffuse-porous woods such as maple, cherry and birch have small pores spread evenly, so their figure is quieter and depends more on how you color them. If you are choosing boards for a grain-forward piece, the types of wood guide compares the common species, and if you are working with reclaimed stock, identifying barn wood species by grain, rays and endgrain tells you what you actually have before you pick a stain.
How the board was cut matters as much as the species. Quartersawn white oak shows medullary ray fleck, the shimmering flakes that run across the face. Finishers describe those flecks as taking color differently from the surrounding wood, so they stand out against it, and they show through a clear finish with no stain at all. That is why a quartersawn board often needs only oil, while a flat-sawn board of the same species needs the full dye-and-glaze sequence to look as rich. A second effect is chatoyance, the shifting shimmer seen in curly and quilted figure, which appears as the light angle changes and is what clear, thin finishes preserve best.
Sand to the Right Grit, Not the Finest Grit
Finish sanding sets how much stain the wood will accept. Finer grits close the surface pores, which is why over-sanding is a common reason that stain looks pale and flat. The ranges below are drawn from finishing forums and manufacturer-style prep guidance, so treat them as starting points and test on scrap.
| Situation | Final grit | Why |
|---|---|---|
| Most hardwoods with oil-based or gel stain | 150-180 | Leaves enough tooth for even absorption |
| Hardwoods that will take clear oil only | 180-220 | Smooth to the touch, and scratches are less visible under oil |
| Walnut with gel stain or dye | About 150 | Going to 220 can make stain sit on the surface |
| Anything sanded past 220 | Not advised before staining | Burnished pores take less color, so contrast drops |
Oil is unforgiving about scratches, because wet oil highlights every cross-grain mark that sanding left behind. Sand in the direction of the grain, work up through each grit without skipping more than one step, and look at the board under low raking light before you open the can. If your wood is prone to blotching, as pine, birch and cherry often are, see whether you need wood conditioner before stain before you choose a grit.
Raise the Grain Before You Add Color
Raising the grain means wetting bare wood so that fibers flattened by sanding swell upright, then sanding them off once dry. Wipe the surface with a damp cloth, let it dry completely, and sand lightly with the grit you finished on. Water-based dyes and finishes cause the same swelling, so skipping this step means they raise it for you, after the color is already on and the surface can no longer be sanded without lifting the dye.
Dye or Pigment: Choose by Species, or Layer Both
A dye is dissolved and colors the wood fibers themselves, while a pigment stain is made of fine particles that settle in pores and scratches. That difference explains most of what people call stain not popping the grain. On a diffuse-porous wood like maple, a pigment sits mostly on the surface, so it blurs figure. On an open oak board, a dye alone can leave the pores looking light. The table summarizes which does what.
| Colorant | What it does to grain | Best on |
|---|---|---|
| Dye (water or alcohol soluble) | Even color shift, strongest in figured areas, little pore emphasis | Curly or quilted maple, cherry, birch |
| Pigment stain or glaze | Collects in pores and marks, emphasizes texture | Oak, ash, mahogany, walnut |
| Dye first, glaze second | Colors the fibers and the pores separately | Quartersawn white oak, or any species where you want maximum depth |
Marc Spagnuolo of The Wood Whisperer shows the dye method on figured maple: mix TransTint dye into dewaxed shellac, wipe it on, then sand back with 220 grit so that dye remains mostly in the wild figure while flat areas lighten, and finish with an oil-based varnish. He notes that darker dye makes the effect stronger, and suggests skipping the process on dark woods such as walnut and mahogany, which already show their figure.
“Dyes (especially water-born dyes) often leave the pores looking white.”
Paul Snyder, technical advisor, via WOODWEB, “Enhancing Oak Grain with Dyes and Glazes”
That quote is the reason for the two-step approach WOODWEB’s advisor describes for quartersawn white oak: apply a diluted water-based dye, seal with a washcoat, sand lightly, then add a darker pigmented glaze to color the pores before the clear topcoat. The dye brightens the rays, and the glaze adds the dark pore lines that make the grain read at a distance. Before committing, compare the behavior of gel stain and oil stain on scrap, since a gel behaves much more like a pigment glaze. If your piece is painted rather than bare, staining over paint is a different job with different limits.
Fill the Pores, or Deliberately Leave Them Open
Filling is a design decision rather than a mandatory step. On a tabletop under a film finish, open pores in oak or ash show up as dimples in the surface, and a grain filler gives a flat, glass-like result. On a piece that will get a rubbed oil finish, many woodworkers leave the pores open because the texture is part of the look.
- Fill for smooth: tabletops, desks and cabinet doors under varnish or polyurethane.
- Leave open for texture: oil-finished chairs, shelves and anything handled often by hand.
- Tint the filler for contrast: some finishers add pigment to a stainable filler so the pores turn into dark lines against lighter wood, which is a way to increase grain definition while still leveling the surface.
- Skip filler on diffuse-porous species: maple, cherry and birch have pores too small to need it.
Check the label for coats and dry times, since they vary by product, and sand the excess off the surface so the filler stays only in the pores. Water-based gel fillers such as the one in the box above are listed by their maker as usable before or after staining and mixable with water-soluble dyes and pigments.
Oil First, Then Shellac or a Film Topcoat
Penetrating oil is the single most reliable way to deepen contrast. It soaks into the wood rather than sitting on top, which saturates the color and keeps the surface texture. Finishers on the Fine Woodworking forum make the same point from the opposite direction: shellac and varnish do not penetrate as deeply as oil, so if you want to see into the wood, oil goes on first. The details of the two common oils are in tung oil vs Danish oil, including cure behavior.
A film finish then does the protecting. Let the oil cure fully, as directed on the can, before applying a topcoat, because uncured oil can wrinkle or stay tacky under film. Many finishers add a coat of dewaxed shellac between oil and varnish as a barrier, and how to apply varnish to wood covers building thin coats. Pick a satin or matte sheen, because high gloss reflects light across the surface and flattens fine grain. Oil-based finishes also amber over time, so expect pale woods like maple to warm up, while water-based finishes stay closer to the original color.
Safety note on oily rags: linseed oil, tung oil and oil-based finishes cure by an exothermic reaction, so rags piled together can heat up and ignite. ToolGuyd’s guidance is to lay rags flat on concrete to dry, soak them in water with detergent, and dispose of them in a sealed metal container, and never to wad them or throw them in a trash can. Check the can’s label as well, since manufacturers add their own instructions.
Wire Brushing, Glazing and Fuming: Optional Drama
Wire brushing scrubs away the soft earlywood in species like pine, fir and cedar so the harder latewood stands proud, giving a weathered, tactile grain. It does little on tight-grained hardwoods such as maple. A glaze or wash adds a translucent tinted layer, or a wiped-back diluted paint or stain, to leave color in the low spots and pores. Both are low-risk and can be tested on scrap.
Ammonia fuming is the most dramatic technique, and it is also the one to treat carefully. It darkens oak through a reaction with tannins, so it works best on tannin-rich white oak and gives less predictable results on red oak. The concentrated ammonia that fuming uses is hazardous to breathe and to get on skin or in eyes, so it belongs outdoors or in a very well-ventilated space with a respirator, gloves and eye protection, and you should follow a dedicated safety guide rather than improvising. Most projects will get the look they want from dye, glaze and oil without it.
Species Cheat Sheet: What to Do and What to Skip
| Species | Grain type | Do this | Usually skip |
|---|---|---|---|
| Red oak | Ring-porous, open pores | Pigment stain or glaze, oil, optional filler | Heavy gloss film |
| White oak (quartersawn) | Ring-porous, ray fleck | Dye, then dark glaze, satin topcoat | Over-sanding past 220 |
| Ash | Ring-porous, pale | Pigment or glaze for pore lines, oil | Dye alone, which leaves pores pale |
| Curly or tiger maple | Diffuse-porous, figured | Dye, sand back, oil-based clear coat | Pigment stain, which blurs figure |
| Cherry, birch | Diffuse-porous, blotch-prone | Conditioner or washcoat, thin dye, oil | Grain filler |
| Walnut, mahogany | Naturally rich color | Clear oil, and filler on mahogany if you want it smooth | Heavy dye |
| Pine, poplar | Soft, low contrast | Conditioner, gel stain, or wire brushing | Expecting oak-like drama |
Common Mistakes That Flatten the Grain
- Sanding to very fine grit before staining, which burnishes the pores and cuts absorption.
- Skipping the grain-raising step and sanding after a water-based dye has gone on.
- Wiping pigment stain off too thoroughly on open woods, which removes the pore color you wanted.
- Testing on offcuts of a different cut or species, then being surprised by the real board.
Frequently Asked Questions
How do you make wood grain stand out without stain?
Sand to 180 or 220 grit, raise the grain with a damp cloth and re-sand, then wipe on a clear penetrating oil. Oil deepens the contrast between earlywood and latewood without adding color. Quartersawn oak needs even less help, because its ray fleck shows through almost any clear finish.
Is raising the grain with water really necessary?
Yes, if you plan to use a water-based dye, stain or finish. Water swells the fibers that sanding bent over, and they stand up fuzzy in the finish if you have not raised them first. Wipe on water, let the wood dry fully, then sand lightly at the same grit before color goes on.
Should I use dye or pigment stain on oak?
Use both if you want maximum grain contrast. Dye colors the wood fibers evenly, and pigment settles into the open pores. A WOODWEB finishing advisor notes that water-based dyes often leave oak pores looking pale, so a darker pigment glaze over the dye fills that gap and makes the rays and pores stand out.
Should I fill the grain or leave it open?
It depends on the look. Filling the pores gives a smooth, glass-like surface that suits tabletops under a film finish. Leaving them open keeps a tactile, textured look that suits oil finishes. Filler tinted darker than the wood turns the pores into dark grain lines, which can increase contrast.
What grit should I sand to before an oil finish?
For most hardwoods, finish sanding at 150 to 220 grit is the usual range. Going much finer can burnish the surface and reduce how much stain it takes. Oil also highlights scratches, so remove sanding marks before you apply it, and check the surface under raking light.
Can oily rags from Danish oil or linseed oil catch fire?
Yes. Drying oils such as linseed and tung oil give off heat as they cure, and a crumpled pile of rags traps that heat. Lay used rags flat outdoors to dry, or submerge them in water in a metal container, before disposal. Never leave them wadded in a trash can or a heap.
Conclusion
Grain looks best when each step leaves it more open than the last: right-grit sanding, raised and re-sanded fibers, color that suits how the species absorbs it, a deliberate choice about the pores, and oil before film. For the wider picture of products and cure times, see the wood finishing guide, and once the piece is done, the wood care and maintenance guide explains how to keep the finish from dulling.
Sponsored / affiliate links. As an Amazon Associate I earn from qualifying purchases. I may earn additional commission from eligible campaigns.