How To Change A Drill Chuck Without Stripping It (Guide)
Changing a drill chuck without stripping its threads involves using the right tools and a careful, steady approach. First, ensure the drill is unplugged. Loosen the chuck’s locking mechanism if present.
Then, use a chuck key or a vise grip to unscrew the chuck from the drill’s spindle. Always turn counter-clockwise. If it’s tight, a gentle tap might help.
Reversing the process to attach a new chuck requires aligning the threads properly and tightening securely, but not excessively.
Understanding Your Drill Chuck
A drill chuck is like the handshake of your drill. It’s what holds the drill bit. It needs to grip tightly.
But it also needs to let go easily when you want it to. Most drills have a keyless chuck. You just twist it.
Some older or heavy-duty drills have a keyed chuck. This needs a special tool. That tool is called a chuck key.
The chuck itself screws onto the drill’s spindle. This spindle is the metal rod that spins. It has threads on it.
These threads are where the chuck attaches. When you change a chuck, you are unscrewing it from these threads. You are then screwing a new one on.
Or, you might be tightening or loosening the existing one.
Stripping these threads is the big worry. It happens when you force something. Or when the parts aren’t lined up right.
It’s like trying to screw in a bolt crooked. The threads get ruined. They can’t grip anymore.
Then, the chuck won’t stay on. Or it will feel loose. This is frustrating and can be expensive to fix.
Knowing how your chuck works is the first step. Look at your drill. Does it have three small holes on the side of the chuck?
If yes, it’s likely a keyed chuck. You’ll need a chuck key that fits those holes. If it doesn’t have these holes, it’s probably keyless.
You just use your hands or maybe some pliers for extra grip.
Why Does a Chuck Need Changing?
You might need to change a drill chuck for a few reasons. Maybe your current chuck is damaged. Perhaps a jaw broke.
Or it doesn’t grip bits well anymore. Sometimes, you might want an upgrade. A new chuck could offer better grip or be easier to use.
Think about a high-quality keyless chuck for frequent bit changes.
Another common reason is when a chuck gets stuck. This is very common. Bits get hot.
Metal expands. Then, when it cools, it can seize up inside. Or, rust can form.
Dirt and grime can also build up. This makes it hard to open or close the chuck. It might just refuse to release a bit.
In some cases, the whole chuck might need to be replaced to free the stuck bit.
Sometimes, drills get old. The chuck might just wear out. It won’t hold bits straight.
Or it makes a lot of noise when spinning. Replacing it can give your drill new life. It’s often cheaper than buying a whole new drill.
Especially for good quality tools.
For some jobs, you might need a specialized chuck. Like a right-angle chuck. Or a self-tightening one.
These attach just like a regular chuck. So, you’d be removing the old one to fit the new type. Understanding why you’re changing it helps you pick the right replacement.
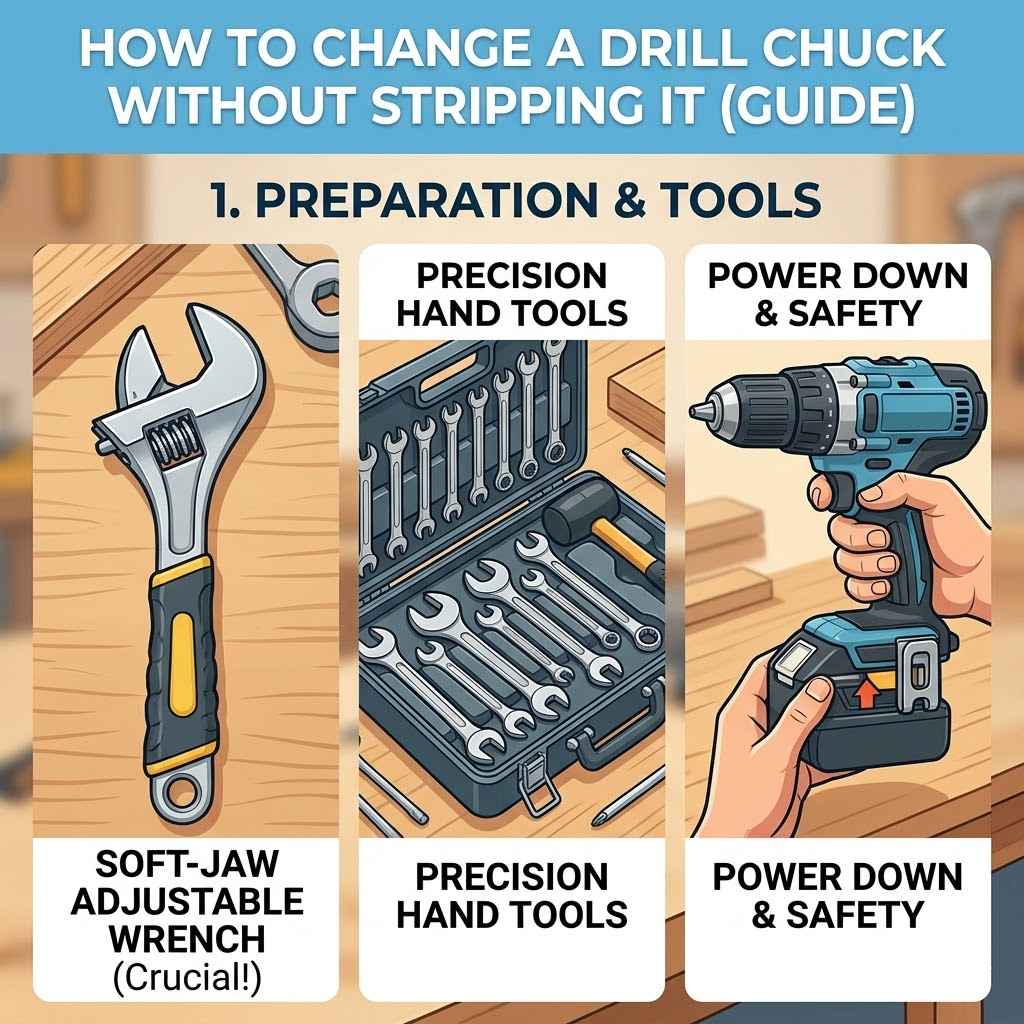
Tools You’ll Need
Getting the right tools makes this job much easier. And safer for your drill. You don’t want to improvise here if you can avoid it.
The most common tools are:
- Chuck Key: If your drill has a keyed chuck, this is essential. Make sure you have the right size. They often come with the drill. If not, check the drill’s model number to find the correct one.
- Adjustable Pliers (e.g., Vise-Grips): For keyless chucks, or if a keyed chuck is really stubborn, you might need extra grip. Vise-Grips are great because they lock onto the chuck. This lets you apply steady force.
- Gloves: Work gloves protect your hands from sharp edges. They also give you a better grip.
- Safety Glasses: Always protect your eyes. Bits and chuck parts can fly off unexpectedly.
- A Soft Cloth or Rag: For cleaning. Also, to protect surfaces if you set parts down.
- Penetrating Oil (Optional): If the chuck is old or rusty, a little penetrating oil can help loosen it.
- A Vise (Optional but helpful): If you have a workbench vise, you can use it to hold the drill body steady. This frees up your hands.
The most crucial item is the correct chuck key for your drill. If you’re unsure about your drill type, look it up online. Or check the drill’s manual.
Using the wrong size key can damage the chuck holes. Using pliers on a keyed chuck without a key can also bend or break the chuck itself.
For keyless chucks, your hands are usually enough. But if it’s stuck, pliers are your best friend. Just be careful not to crush the chuck.
Gentle, firm pressure is key. You don’t want to dent or deform it. That could make it impossible to use.
Preparing Your Drill
Safety first. Always. Before you even think about touching the chuck, do this one thing:
Unplug your drill.
Seriously. Do not skip this step. If the drill is battery-powered, remove the battery pack.
A drill can turn on accidentally. If it does this while you’re holding the chuck, it can cause serious injury. It can also damage the chuck or drill.
Make sure the trigger is not engaged before unplugging or removing the battery.
Once unplugged, it’s a good idea to clean the area. Wipe down the drill body and the chuck. Remove any loose dirt, sawdust, or grease.
This makes it easier to see what you’re doing. It also prevents debris from getting into the drill’s motor housing when the chuck is off.
If you have a vise, now is a good time to use it. Clamp the drill’s body gently. Make sure it’s secure but not so tight that you could crack the plastic.
This gives you a stable platform. It frees both your hands for the actual chuck removal. If you don’t have a vise, find a stable surface to rest the drill on.
A non-slip mat can help keep it from moving.
Think about where you’re working. You want good lighting. You don’t want to be fumbling in the dark.
Clear the space around you. Make sure you have room to work without bumping into things. This also means a place to put the removed chuck safely.
Step-by-Step: Changing a Keyed Chuck
Keyed chucks have a bit more involved process. But once you know it, it’s quite simple.
First, locate the three holes on the side of the chuck. Insert your chuck key into one of these holes. You’ll notice the chuck has two parts that can turn relative to each other.
One part is the sleeve that opens and closes the jaws. The other part is the base that screws onto the spindle.
For most drills, the outer sleeve has a line or mark on it. The base often has a similar mark or is a different color. To loosen the chuck, you need to hold the base part very still.
Then, turn the outer sleeve using the chuck key. Most chucks tighten by turning clockwise and loosen by turning counter-clockwise. So, you want to turn the sleeve counter-clockwise.
Here’s a common trick for stubborn keyed chucks. Many keyed chucks have a locking mechanism. You might need to put the key in two holes at once.
Or turn one hole, then another. Check your drill’s manual if you’re unsure. Often, you just need to insert the key and turn.
For very tight chucks, you might need to use a bit of force. But avoid jerky movements.
If you can’t get it to turn, try a different hole. Sometimes the chuck has a specific sequence. If it’s really stuck, a quick spray of penetrating oil might help.
Let it sit for a few minutes. Then try again. Hold the base of the chuck firmly.
You might need to brace the drill against a table or use your other hand.
Once you feel it loosen, continue turning counter-clockwise. The entire chuck should unscrew from the drill’s spindle. Be prepared to catch it.
It might be a bit heavy. Once it’s off, set it aside.
To attach a new chuck, reverse the process. Make sure the threads on the new chuck and the drill’s spindle are clean. Align the new chuck with the spindle threads.
Screw it on clockwise by hand. Get it as tight as you can by hand. Then, use the chuck key to tighten it further.
Again, use firm, steady pressure. You don’t need to overtighten. Just make sure it’s snug and secure.
You’ll feel it stop turning easily.
A good way to check if it’s tight enough is to insert a drill bit. Try to twist the bit with your hand. It should not move.
Then, try turning the drill on briefly at a low speed. Listen for any wobble or strange noises. If it seems secure, you’re good to go.
Step-by-Step: Changing a Keyless Chuck
Keyless chucks are generally easier. You don’t need a special key. Your hands are usually the primary tool.
First, make sure the drill is unplugged. Grip the chuck body firmly with one hand. With your other hand, try to twist the chuck in the counter-clockwise direction.
Most keyless chucks have two distinct parts that you can grip and twist. One part is the sleeve that opens and closes the jaws. The other is the base that attaches to the spindle.
You want to twist the outer sleeve counter-clockwise.
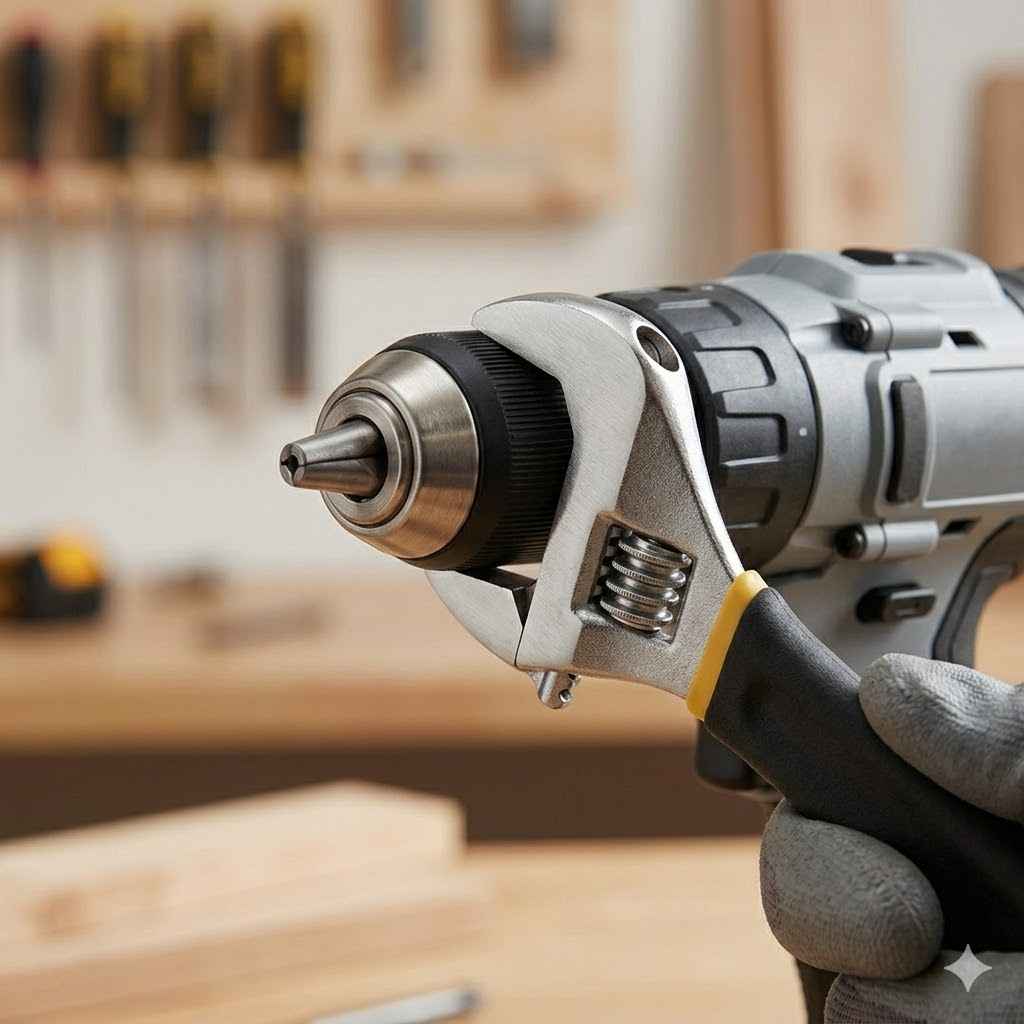
If it’s not moving, you might need more grip. This is where adjustable pliers or Vise-Grips come in handy. Wrap a cloth around the chuck first.
This protects the metal. Then, grip the outer sleeve with the pliers. Grip the rear part of the chuck (the part closer to the drill body) with your other hand or another set of pliers if needed.
Turn the outer sleeve counter-clockwise.
Remember, the goal is to unscrew the entire chuck from the spindle. The spindle has threads on it. The chuck screws onto these threads.
So, you’re loosening the connection between the chuck and the spindle. Keep turning counter-clockwise until the chuck comes free. It will unscrew completely.
Be ready to catch it.
When attaching a new keyless chuck, start by aligning the threads. Screw the new chuck onto the spindle clockwise by hand. Get it as snug as you can this way.
Then, grip the chuck again with your hands or pliers. Tighten it firmly. You’ll feel resistance when it’s tight.
Do not overtighten. You don’t want to strip the threads. Just make it secure.
A good test is to insert a drill bit. Close the jaws on it. Then try to wiggle the bit.
It should be held very firmly. Then, turn on the drill at a medium speed. Listen for any wobbling.
If it feels solid, it’s likely attached correctly.
Common Keyless Chuck Gripping Tips
Problem: Chuck is too tight to turn by hand.
Solution: Use a cloth to protect the chuck. Grip the outer sleeve firmly with adjustable pliers. Hold the rear of the chuck steady with your other hand or a second pair of pliers.
Turn the outer sleeve counter-clockwise.
Problem: Chuck spins, but doesn’t loosen.
Solution: You might be turning the wrong part. Ensure you’re twisting the outer sleeve counter-clockwise relative to the drill body. The base of the chuck should stay still.
If it’s still not working, consider penetrating oil.
What If It’s Really Stuck?
Sometimes, a chuck is fused onto the spindle. Rust, corrosion, or extreme heat can cause this. Don’t panic.
Forcing it too hard is how you strip the threads. Take a breath. Try these steps:
Penetrating Oil is Your Friend: Spray a good quality penetrating oil. Like PB B’laster or WD-40 Specialist Penetrant. Aim it right at the seam where the chuck meets the spindle.
Let it soak. For an hour. Or even overnight if it’s really bad.
The oil seeps in. It helps break down rust.
Gentle Heat: Be careful with this one. Too much heat can damage the drill. A hairdryer on its highest setting can help.
Aim it at the chuck. Warm it up for a few minutes. Heat causes metal to expand.
When it cools, it contracts. This expansion and contraction can break the bond. Try turning the chuck again after it cools slightly.
A heat gun on a very low setting might work too, but be very cautious.
Impact: For keyed chucks, a few gentle taps with a rubber mallet on the chuck key can sometimes shock it loose. Don’t wail on it. Just a few firm taps.
For keyless chucks, you can try very gently tapping the outer sleeve with a rubber mallet. Again, be gentle. You’re trying to break static friction, not pound it apart.
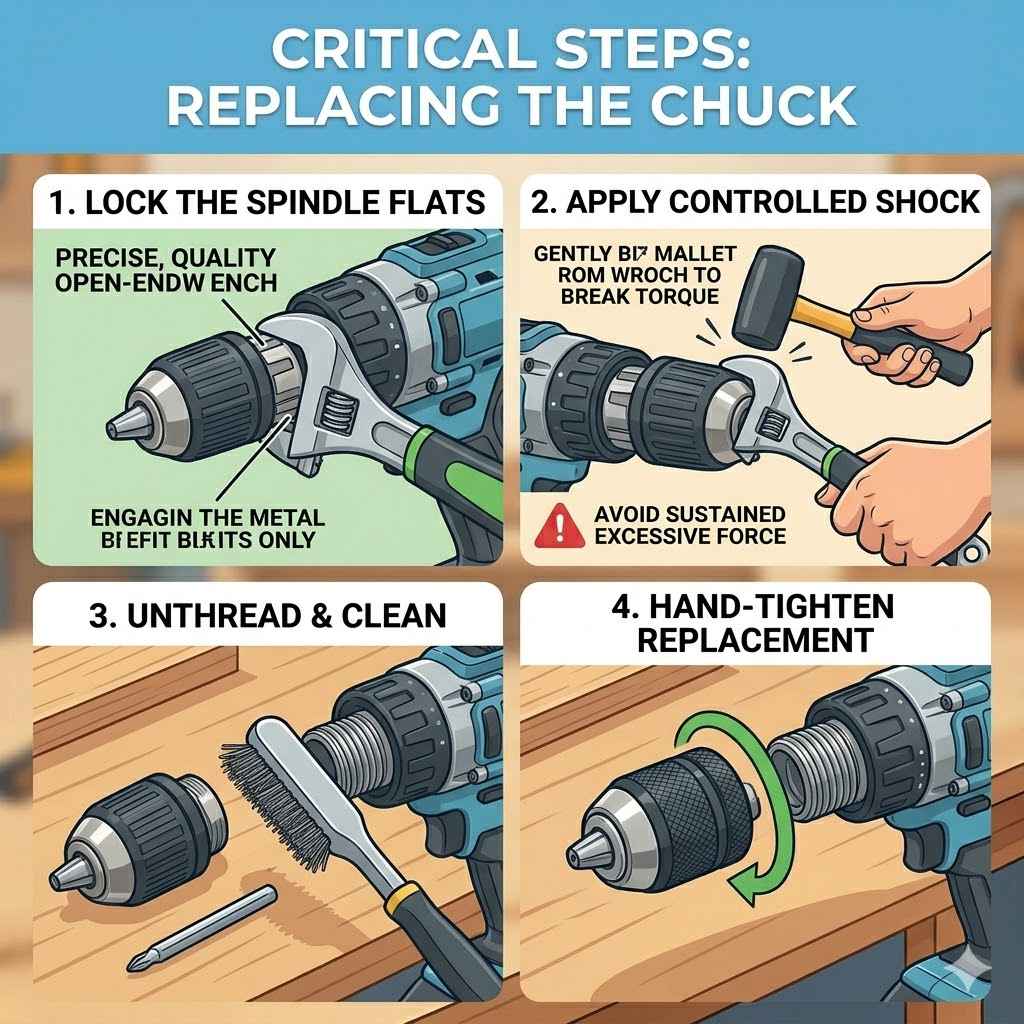
The Vise Grip Trick: If you’re using vise grips, really lock them on tight. Ensure they won’t slip. Then, apply slow, steady, increasing pressure.
If you feel the threads start to deform, stop immediately. You’re close to stripping.
Professional Help: If none of these work, and you’re really worried about damaging the drill, it might be time to take it to a tool repair shop. They have specialized tools and experience. It might cost a bit, but it’s cheaper than a new drill if they can save it.
Stuck Chuck: Troubleshooting Flowchart
Is it a keyed or keyless chuck?
Keyless:
- Try hand strength.
- Use cloth + pliers.
- Add penetrating oil. Wait.
- Gentle heat + pliers.
- Gentle taps with rubber mallet.
- Seek professional help.
Keyed:
- Insert key. Turn counter-clockwise.
- Try other key holes.
- Add penetrating oil. Wait.
- Gentle taps on key with rubber mallet.
- Use pliers on chuck base if needed.
- Seek professional help.
Attaching the New Chuck Securely
Putting on a new chuck is the reverse of taking one off. But this is where most people can make a mistake and strip threads.
Cleanliness is Crucial: Make sure the threads on the drill spindle are clean. Use a wire brush or a clean cloth. Any dirt or debris can cause cross-threading.
This means the threads don’t line up. It feels like it’s going in. But it’s damaging the threads.
The new chuck threads should also be clean.
Align Them Carefully: This is the most important part. Hold the new chuck. Line it up with the spindle.
Start turning it clockwise by hand. You should feel the threads catch easily. If you feel resistance right away, stop.
You are likely cross-threading. Back it off. Try again.
Rotate the chuck slightly. Realign it. You want that smooth feeling as the threads engage.
Hand Tighten First: Once the threads are properly engaged, screw the chuck on as tight as you can by hand. This ensures it’s seated properly. It also means you’ve engaged the full length of the threads.
If it feels loose at this point, there might be an issue with the threads on either part. Or you haven’t tightened it enough by hand.
Final Tightening (Don’t Overtighten!): Now, use your chuck key (for keyed chucks) or pliers (for keyless chucks) to tighten it further. For keyed chucks, turn clockwise until snug. For keyless, tighten firmly.
The goal is secure, not impossible to loosen later. Overtightening can damage the chuck or the spindle threads. It also makes it very hard to remove next time.
Test It Out: Insert a drill bit. Close the chuck jaws. Try to wiggle the bit.
It should not move. Then, turn the drill on at a moderate speed. Listen for any unusual sounds.
Check that the bit is spinning true. If everything feels solid and the bit is held securely, you’ve done it right.
Quick Check for New Chuck Installation
- Threads Clean? Yes/No
- Engaged Easily by Hand? Yes/No
- No Grinding Sensation? Yes/No
- Hand Tightened Firmly? Yes/No
- Final Tightening Done Securely? Yes/No
- Drill Bit Held Firmly? Yes/No
- Spinning True (Drill On)? Yes/No
If you answered “No” to any early steps, stop and re-align.
What It Means When a Chuck Strips
A stripped chuck means the threads are damaged. They can’t grip properly anymore. This is bad news.
It often means the chuck is no longer usable. It might still screw onto the spindle, but it will be loose. Or it might not screw on at all.
If the chuck is stripped, it won’t hold drill bits securely. This is dangerous. A spinning bit can come loose.
It can fly out. This can cause injury. It can also damage your workpiece.
So, a stripped chuck is a problem that needs fixing.
Sometimes, it’s just the chuck threads that are stripped. In this case, you replace the chuck. Easy enough.
But if the threads on the drill’s spindle are also damaged, that’s a bigger issue. The spindle is part of the drill’s motor assembly. Repairing or replacing a spindle can be very difficult and expensive.
Often, it means the drill itself is beyond repair.
This is why taking care during the change is so important. It’s better to go slow. To ensure proper alignment.
Than to rush and end up with a stripped spindle. That’s a costly mistake.
The best way to avoid this is preventative. When changing a chuck, always work on an unplugged drill. Use the correct tools.
And take your time. If a chuck is stuck, use penetrating oil or gentle heat. Don’t force it with brute strength.
That’s a fast track to stripping.
When to Worry and When It’s Okay
It’s normal for a chuck to feel a bit stiff sometimes. Especially if it hasn’t been used in a while. Or if it’s exposed to dust.
A little resistance when opening or closing is usually fine.
You should start to worry if:
- The chuck won’t open or close at all.
- Drill bits feel loose even when the chuck is tightened.
- The chuck makes grinding noises when you turn it.
- The drill bit wobbles significantly when the drill is running, even with a properly tightened bit.
- You feel or hear threads stripping when trying to remove or attach a chuck.
- The chuck feels like it’s cross-threading when you try to screw it on.
If your chuck is seized shut, and you can’t get it open, that’s a sign it might need replacing. If a bit spins freely in a fully tightened chuck, the jaws might be worn out. Or the internal mechanism is broken.
These are all reasons to consider a change.
It’s okay if a new chuck requires a bit of force to tighten properly by hand. That means it’s gripping the bit well. It’s also okay if it takes a firm twist with the key or pliers to get it fully seated.
The key is that it feels secure and spins true.
The main signal that something has gone wrong is if you feel the threads grinding or slipping unnaturally when screwing the chuck on or off. That’s when the damage is happening.
Quick Tips for a Smooth Chuck Change
Here are some final tips to make your chuck change a breeze:
- Always unplug the drill or remove the battery. This is non-negotiable.
- Use the correct tools. A proper chuck key is vital for keyed chucks.
- Cleanliness counts. Wipe down threads before installing a new chuck.
- Align threads carefully. Start by hand. Feel for smooth engagement.
- Don’t overtighten. Secure is good. Impossible to remove is bad.
- If stuck, be patient. Use penetrating oil and gentle methods before forcing.
- Protect your hands and eyes. Wear gloves and safety glasses.
- When in doubt, ask for help. A friend or a professional can save you trouble.
Changing a drill chuck doesn’t have to be a daunting task. By following these steps, you can do it safely and effectively. You’ll keep your drill in top shape.
And you’ll avoid the frustration and cost of stripped threads.
Frequently Asked Questions
Can I use regular pliers to change a keyed chuck?
It’s not recommended. Keyed chucks use specific holes for the chuck key to engage the internal mechanism. Using regular pliers might slip, damage the chuck’s locking mechanism, or bend the chuck itself.
Always try to find the correct chuck key first. If the chuck is extremely stubborn, some gentle gripping on the outer sleeve of the chuck might be possible with adjustable pliers, but focus on using the key.
How tight should I make a new chuck?
You want it snug and secure, but not excessively tight. Hand-tighten it as much as you can. Then, use the chuck key or pliers for a final firm tightening.
It should hold drill bits firmly without slipping. You should also be able to loosen it again without extreme effort. Overtightening can damage the threads or the chuck itself.
My drill chuck is spinning freely. What should I do?
If the chuck spins freely without opening or closing the jaws, the internal mechanism might be stripped or broken. This usually means the chuck needs to be replaced. Ensure the drill is unplugged.
Then, try to unscrew the chuck from the spindle following the steps for your type of chuck (keyed or keyless). If you can’t remove it, you may need professional help.
How can I tell if I’m cross-threading the chuck?
When you start screwing the chuck onto the spindle by hand, it should feel smooth. If you feel any immediate resistance, grinding, or a “crunchy” sensation, you are likely cross-threading. Stop immediately.
Back the chuck off. Realign the threads carefully and try again. It should engage and spin on easily at first.
What is the spindle of a drill?
The spindle is the metal shaft that extends from the drill’s motor. It’s the part that rotates when you pull the trigger. The drill chuck screws onto the end of the spindle.
The chuck’s job is to hold the drill bit, which is then rotated by the spindle.
My drill bit is stuck in the chuck. How can I get it out?
First, ensure the drill is unplugged. For keyless chucks, try to open them as wide as possible. Sometimes wiggling the bit can help.
If it’s still stuck, a little penetrating oil can help. For keyed chucks, ensure the key is inserted correctly and try to loosen the chuck. If it won’t budge, gentle tapping on the key with a rubber mallet might help.
Extreme cases might require replacing the chuck entirely.
Conclusion
Changing a drill chuck doesn’t have to be a source of anxiety. With the right approach and tools, you can confidently swap out your chuck. You’ll prevent damage to your drill.
Remember to prioritize safety and patience. A little care now saves a lot of headaches later. Keep your tools working well!