How to Cut a Dowel: Straight, Splinter-Free Cuts Every Time
The most reliable way to cut a dowel is to clamp it against a backer board, score the cutting line first with a sharp blade, then cut slowly with a fine-tooth saw or a miter box – rotating thin dowels a quarter-turn as you cut prevents the blowout that ruins a clean end. A power miter saw is faster for a stack of dowels, but a hand saw and miter box give more control on a single piece.
Most guides stop at “use a saw,” which is why so many first attempts end in a splintered, torn-out end grain instead of a clean one. The techniques below cover the part that actually causes trouble: keeping round stock from spinning or chipping as the blade exits, cutting a whole batch to the exact same length, and trimming a dowel pin flush after it’s already glued in – a step almost no other dowel-cutting guide covers, even though it’s the step most woodworkers actually search for once the dowel is already in the joint.
Tools You Need to Cut a Dowel Cleanly
You don’t need a full shop to get a clean cut. For most dowel diameters (1/4″ to 1″), a fine-tooth pull saw or hand saw paired with a miter box outperforms a table saw for control, since the miter box holds the round stock from rolling and guides the blade at a fixed angle.
BEST MITER BOX FOR SMALL-STOCK CUTS
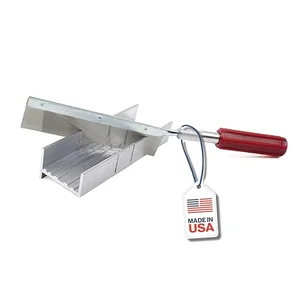 |
Excel Blades Mini Miter Box & Razor Saw Set – $18.96 The aluminum channel keeps a dowel from rolling as you cut, and the fixed 45°/90° slots do the squaring for you – the single biggest fix for crooked dowel ends.
|
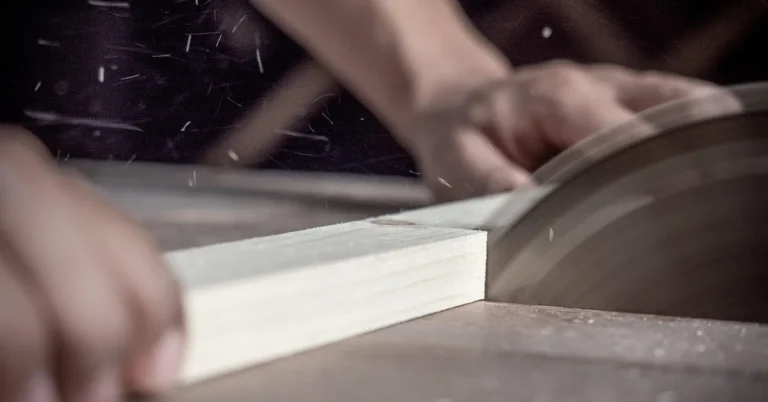
For larger dowels (1″ and up) or a big batch, a power miter saw or table saw with a crosscut sled is faster, as long as the dowel is clamped or held in a V-block jig so it can’t spin against the blade. A band saw is the safer choice for very thin dowels, since its downward-only cutting action is far less likely to grab and kick the piece than a circular blade.
Types of Dowels You’ll Run Into
Cutting technique changes depending on what the dowel is made of and what it’s for. A quick reference before you pick up a saw:
| Dowel Type | Material | Typical Use | Cutting Note |
|---|---|---|---|
| Hardwood dowel (oak, mahogany, maple) | Wood | Furniture joints, load-bearing pins | Splinters easily – score first, cut slow |
| Softwood dowel (pine, poplar) | Wood | Shelving, crafts, toys | Cuts fast but compresses – keep the blade sharp to avoid a fuzzy end |
| Fluted/spiral dowel pin | Wood or hardwood composite | Glue-up joinery (grooves let glue and air escape) | Cut to length before gluing, then flush-trim after – see below |
| Steel or brass dowel pin | Metal | Machinery alignment, jigs | Needs a hacksaw or metal-cutting blade, not a wood blade |
Preventing Splintering and Tear-Out
Splintering on a dowel almost always happens for one of two reasons: the blade exits the far side of round stock before the near side is fully cut, or the wood fibers aren’t supported where the blade leaves the material. Three habits fix nearly every case.
Score the Line Before You Cut
Run a sharp utility knife or marking gauge around the full circumference of the dowel at your cut line before the saw ever touches it. This severs the surface fibers cleanly, so the saw teeth are cutting into a pre-cut edge instead of tearing fibers loose as they exit – the single most effective trick for hardwood dowels, which splinter more than softwood.
Roll the Dowel as You Cut
On a hand saw or miter box, cut about a third of the way through, then rotate the dowel a quarter turn and continue. Repeating this all the way around means the blade is always cutting into supported material rather than punching through unsupported fibers on the far side – this one habit does more for a clean end than blade choice does.
Back It Up and Clamp It Down
Clamp the dowel against a piece of scrap wood positioned right where the blade will exit. The backer board gives the fibers something to push against instead of blowing out into open air. Combine this with a fine-tooth blade (a 46+ TPI pull saw or a crosscut blade, not a rip blade) and slow, steady strokes – forcing the cut is what causes chipping, not the tool itself.

Cutting a Batch of Dowels to the Exact Same Length
Measuring and marking each dowel by hand almost guarantees small length variations across a batch – a problem for shelf pins, drawer pulls, or any project where several dowels need to match. The fix is a stop block, not a tape measure:
- Clamp a scrap block to your miter box or saw fence at the exact distance you want each dowel to be.
- Butt the first dowel against the stop block and cut.
- Slide the next dowel against the same stop block and cut again – no re-measuring needed.
- Repeat for the full batch; every piece comes out the same length because it’s referenced off the same physical point, not a tape measure reading that can shift by an eighth of an inch each time.
This is the same principle a production shop uses on a chop saw, scaled down to a hand tool – it’s faster than it sounds and removes the compounding error that comes from measuring each piece individually.
How to Flush-Trim a Glued Dowel Pin or Plug
Cutting a dowel to length before assembly is only half the job on most joinery projects – the more common real-world problem is a dowel or plug that’s already glued in place and sticking up slightly above the surface. Cutting that flush without gouging the surrounding wood needs a different technique than cutting a free dowel to length.
- Use a flush-cut (pull) saw, not a standard saw. A flush-cutting saw has teeth set on only one side of a flexible blade, so the back of the blade rides flat against the surrounding wood instead of digging in.
- Cut on the pull stroke, not the push stroke. Pulling keeps the blade flat and under control; pushing tends to lift the blade and dig a shallow scratch into the surrounding surface.
- Leave it slightly proud, then sand flush. Stop the saw about 1/32″ above the surface and finish with a sanding block – this avoids the scenario where the saw blade rides slightly into the surrounding wood and leaves a visible dip.
- Sand with the grain of the surrounding wood, not the dowel. The dowel’s end grain sands differently than the surrounding face grain; blending the two takes a light touch and a fine grit (180+) at the very end.
If you don’t have a saw on hand at all, a controlled scoring-and-snapping method can also get a dowel to length – our guide to cutting a dowel without a saw covers that method in more depth.
Cutting Large or Hardwood Dowels Safely
Dowels over 1″ in diameter, and any hardwood dowel, need a bit more caution than a standard pine dowel. Wider stock has more mass and more surface for a blade to grab, and hardwood dulls a blade faster, which increases the chance of binding.
| Situation | Recommended Approach |
|---|---|
| 1/4″-1/2″ softwood dowel | Hand saw or pull saw in a miter box; light pressure |
| 3/4″-1″ dowel, any wood | Miter box with a fine crosscut blade, or a miter saw with the dowel clamped in a V-block |
| Over 1″ hardwood dowel | Band saw or table saw with the dowel clamped in a V-block jig – never free-hand a large round on a table saw |
| Any dowel on a power saw | Clamp it; a round piece that isn’t restrained can spin against the blade and kick back |
Whatever the size, keep a sharp saw blade on hand – a dull blade is one of the most common causes of both splintering and kickback, since it needs more force to cut, and more force means less control.
Troubleshooting Common Problems
| Problem | Likely Cause | Fix |
|---|---|---|
| Splintered or torn end | No scoring line, or cutting too fast | Score first, roll the dowel as you cut, slow down |
| Cut came out at an angle | No guide holding the saw square | Use a miter box or clamp a square block as a fence |
| Dowel spun while cutting | Not clamped, or a round jig wasn’t used on a power saw | Clamp it, or use a V-block/dowel jig before running it through a power tool |
| Cut too short | Marked from the wrong end, or measurement error | Join with wood glue and clamp if it’s still usable; otherwise re-cut from stock |
| Cut too long | Left extra for trimming | Sand or flush-trim down to fit – see the flush-trim section above |
| Batch of dowels came out slightly different lengths | Measured each one individually | Use a stop block instead of re-measuring for each piece |
Frequently Asked Questions
What Is the Best Tool to Cut a Dowel With?
A miter box with a fine-tooth pull saw is the best all-around choice for most dowel sizes, since it holds the round stock from rolling and squares the cut for you. A power miter saw or band saw is faster for a large batch or thicker stock, as long as the dowel is clamped or held in a V-block so it can’t spin against the blade.
How Do You Cut a Dowel Without Splintering It?
Score the cutting line with a sharp knife before you saw, clamp the dowel against a backer board where the blade will exit, and rotate the dowel a quarter turn every few strokes instead of sawing straight through in one pass. A sharp, fine-tooth blade matters more here than the type of saw you’re using.
How Do You Cut Several Dowels to the Exact Same Length?
Clamp a stop block to your miter box or saw fence at the length you need, then butt each dowel against the same stop block before cutting. Referencing every cut off the same physical point removes the small measuring errors that add up when you measure each dowel individually.
How Do You Trim a Dowel Pin Flush After Gluing It In?
Use a flush-cut pull saw, which has teeth on only one side of a flexible blade so the back rides flat against the surrounding wood. Cut on the pull stroke, stop just shy of the surface, and finish flush with a sanding block to avoid the saw digging a shallow groove into the wood around the dowel.
Conclusion
A clean dowel cut comes down to three habits: score the line first, support the exit point with a backer board or a miter box, and rotate round stock instead of forcing the blade straight through. Add a stop block when you need several dowels to match, and a flush-cut saw for trimming a pin after glue-up, and you’ve covered every situation this skill actually comes up in – not just the initial cut. Once the dowel is cut, see how to taper a wood dowel for a lead-in chamfer or a point.
Sponsored / affiliate links. As an Amazon Associate I earn from qualifying purchases. I may earn additional commission from eligible campaigns.