How to Make Cherry Wood Furniture Look Modern (No-Paint Options)
Cherry wood furniture looks modern once you swap brass hardware for matte black or brushed nickel pulls and lighten the finish with gel stain instead of grey paint. Full paint jobs were the default fix for years, but 2026 design trends favor exposed wood grain, so a rushed grey-wash can date a piece faster than the cherry ever did. This guide covers gel stain vs. paint costs, the sanding grit sequence, and the primer step that stops blotching.
Is Cherry Wood Furniture Outdated in 2026?
Best Cabinet Pull Pick
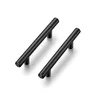
Ravinte Matte Black Cabinet Handles (30-Pack)
A full 30-pack covers a dresser or a whole kitchen’s worth of drawers in one order, in the matte black finish that pairs well with cherry’s warm tone.
- Best for: Refitting an entire dresser or cabinet run in one matching finish
- Why we picked it: Bulk pack keeps the per-pull cost down versus buying single handles
- Main drawback: Fixed 3-inch hole spacing — measure your existing holes before ordering
Compare more hardware options
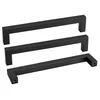 Option 1 Goldenwarm 8" Matte Black Handles
|
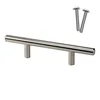 Option 2 Rok Brushed Nickel Euro Handles
|
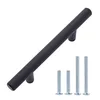 Option 3 Amazon Basics Euro Bar Handles
|
As an Amazon Associate we earn from qualifying purchases.
No — cherry wood furniture is not outdated, and current design coverage actually points the other way. Designers moving away from the all-grey and all-white finishes of the past decade are returning to walnut, stained oak, and cherry pieces that show off natural grain and depth, according to 2026 color-trend roundups from paint and design publications. The dated look was never the wood itself — it was pairing a traditional, ornate cherry piece with none of the neutral tones, matte hardware, or clean-lined decor that make wood furniture read as current.
That’s genuinely useful news if you were about to reach for a paint sprayer: a cherry dresser with its grain intact, finished in a satin or matte topcoat and paired with simple hardware, fits 2026’s warm-wood direction better than a flat grey repaint does. Paint is still the right call for pieces with damaged or blotchy original finish — but if the wood itself is in good shape, lightening or toning the existing finish usually gets you a more current look for less work.
The Color Palette: Modernizing With Paint
When paint is the right call — damaged veneer, mismatched pieces, or a finish too far gone to save — neutral colors like warm grey, charcoal, or soft white tone down cherry’s reddish undertones best. Bold colors like navy or forest green work too, as long as the rest of the room stays neutral enough to let one piece carry the color.
Choosing The Right Shades
Grey, white, and black read as the most contemporary options, while blue or green add a color accent without looking dated in a few years. Whatever shade you pick, test it on the underside of the piece first — cherry’s tannins can shift a color slightly warmer than the paint chip shows.
Application Techniques For A Sleek Finish
Sand the surface first, wipe it free of dust, then apply thin, even coats with a high-quality brush or foam roller — 2 to 3 coats is standard for full opacity over cherry’s dark base color. A spray gun gives the smoothest, most factory-like finish if you have the setup and ventilation for it.
Gel Stain vs. Paint vs. Traditional Stain: Cost and Results Compared
If you want a modern look without hiding the wood entirely, gel stain is the option most guides skip over — and it happens to be the one built for cherry’s biggest finishing problem. Cherry is a splotch-prone wood (same category as birch, maple, and pine), which means thin traditional stain soaks in unevenly and leaves blotchy patches. Gel stain sits on the surface instead of soaking in, so it goes on evenly without a separate wood conditioner step.
| Option | Typical Cost | Best For | Watch Out For |
|---|---|---|---|
| Gel stain | ~$16 per quart | Even color on cherry without blotching; keeps some grain visible | Needs 2 thin coats; longer open time than liquid stain |
| Traditional stain | ~$7 per quart | Budget refinishing on non-blotchy sections | Blotches on cherry without a pre-stain wood conditioner |
| Paint | $50 to $200 per gallon | Damaged veneer or a full color change to grey, white, or black | Requires a stain-blocking primer or tannin bleed-through ruins the topcoat |
📊 Gel stain is specifically recommended for splotch-prone woods including cherry, birch, maple, and pine because it sits on the surface rather than soaking in unevenly. Paint requires an oil- or shellac-based stain-blocking primer on cherry to prevent tannin bleed-through — skipping it is the single most common mistake in cherry refinishing.
Stripping Down: Removing Old Finishes
Skip this section if you’re staining rather than painting and the existing finish is in good shape — stripping is only necessary when you’re painting over a damaged finish or bleaching the wood lighter. If you are painting, start with a clean slate: strip the old finish, then sand and prime before color goes on.
Tools And Materials Needed
- Paint stripper
- Scraper
- Protective gloves and eye protection
- Drop cloth
- Disposable brushes
- Steel wool
- Clean rags
Step-by-Step Stripping Process
- Protect your workspace: Lay a drop cloth and put on gloves and eye protection before opening any stripper.
- Test on a hidden spot: Apply stripper to a small, hidden section first and follow the product’s recommended dwell time.
- Scrape the softened finish: Use a scraper to lift the old finish once it has softened, working gently so you don’t gouge the wood.
- Repeat across the piece: Reapply stripper and scrape section by section until the whole piece is bare.
- Scrub with steel wool: Go over the surface with steel wool to remove residue and even out the texture.
- Wipe down completely: Clean the piece with rags to remove dust before moving on to sanding.
Sanding Techniques For A Smooth Canvas
Once the old finish is off (or if you’re staining and skipped stripping), sanding creates the smooth base a modern finish needs. Work through the grits below in order — skipping grits leaves scratch marks that show through paint or stain.
Grades Of Sandpaper To Use
| Grade | Description |
|---|---|
| Coarse (60-80 grit) | Initial sanding to remove rough surfaces and imperfections |
| Medium (100-150 grit) | Further smoothing after coarse sanding |
| Fine (180-220 grit) | Even surface prep before finish goes on |
| Extra Fine (320-400 grit) | Final pass for a polished, flawless surface |
Sanding Tips For Even Textures
- Start with the coarsest grit and work up to finer grits — never skip a step
- Sand with the wood grain, not across it, to avoid visible scratches
- Use even pressure so you don’t create low spots
- Clear dust between grits to prevent scratches in the next coat
- A sanding block or sponge keeps pressure more even than sanding by hand alone
Stains And Finishes: Selecting Modern Options
If you’re staining instead of painting, the color and the sheen both matter for a modern result. Grey, black, and blue stains all read as contemporary on cherry; the finish sheen you choose changes how dramatic the shift looks.
Popular Stain Colors For A Contemporary Look
- Grey: tones down cherry’s reddish undertones for a cool, calm result
- Black: the most dramatic option, best on pieces with simple lines that won’t look too heavy in solid dark color
- Blue: an accent-piece color — works best on one statement item rather than a full room of furniture
Types Of Finishes And Their Effects
| Finish Type | Effect On Appearance |
|---|---|
| Gloss | Shiny, reflective — reads sleek but shows every fingerprint and dust speck |
| Satin | Smooth, even sheen that softens cherry’s natural grain without hiding it |
| Matte | Flat, non-reflective — the most common choice for a minimalist, modern look |
Hardware Makeover: Updating Knobs And Pulls
Hardware is the fastest, cheapest way to modernize cherry wood furniture — often under an hour of work with a screwdriver and a tape measure, no refinishing required at all.
Metal Finishes That Complement Modern Design
Matte black and brushed nickel both read as current against cherry’s warm tones; brushed nickel leans slightly softer, matte black gives more contrast. Stick to one finish throughout a piece — mixing metals on the same dresser looks unfinished rather than eclectic.
Installing New Hardware
Before buying, measure your existing hole spacing (“center-to-center”) so new pulls line up with the holes you already have, or you’ll need to fill and redrill. Once installed, check that each pull sits flush and level before moving to the next.
Accessorizing And Styling
Once the furniture itself is updated, the room around it finishes the modern look. Sleek, minimalist decor with clean lines reads as current; ornate or heavily patterned accessories fight against the update you just made.
Choosing Accessories That Enhance Modernity
- Metallic accents like brushed nickel or chrome, matched to your new hardware finish
- Geometric shapes in vases, sculptures, or lighting
- Mirrors to open up the space around a large piece
Styling Tips For A Cohesive Look
- Pair cherry pieces with neutral-colored upholstery for contrast
- Add one or two bold accent colors through pillows or a rug, not the whole room
- Swap in contemporary lighting — pendant lights or a simple floor lamp
Common Mistakes To Avoid When Modernizing Cherry Wood Furniture
These are the mistakes that undo an otherwise good modernization — all four are easy to avoid once you know to check for them.
- Skipping stain-blocking primer before painting: cherry’s natural tannins bleed through regular primer as dark, blotchy spots within days — use an oil-based or shellac-based stain-blocking primer specifically.
- Using traditional stain without a conditioner: cherry is splotch-prone, so thin stain soaks in unevenly; use gel stain or a pre-stain wood conditioner instead.
- Choosing a glossy topcoat: high-gloss finishes read as dated and show every fingerprint — matte or satin is the modern default.
- Mixing hardware finishes on one piece: combining matte black pulls with brass hinges (or vice versa) looks unfinished rather than eclectic — pick one metal finish per piece.
Maintaining Your Modern Cherry Wood Furniture
Whatever finish you chose, upkeep is the same: dust with a soft cloth, clean occasionally with a mild wood cleaner, and skip harsh chemicals that can dull a new finish. Coasters and placemats prevent water rings, and keeping the piece out of direct sunlight prevents fading and uneven color shifts over time.
DIY Vs. Professional Refurbishing
Hardware swaps and a coat of gel stain are realistic DIY projects for a first-timer with a weekend free. Full strip-and-paint jobs on multiple pieces, or anything with structural repairs needed first, are where hiring a professional refinisher starts to pay for itself — mistakes on a fully stripped piece (uneven stripping, tannin bleed-through, drips in the topcoat) usually cost more to fix than the professional job would have in the first place.
Frequently Asked Questions
How Do You Make Cherry Wood Look Modern?
Swap the hardware for matte black or brushed nickel pulls, then either lighten the finish with gel stain or, if the existing finish is damaged, strip and repaint in a neutral color like grey, white, or black. Pairing the piece with simple, clean-lined decor finishes the look.
How Do You Tone Down Cherry Wood?
Bleach and lime wax is the most direct method — it lightens the wood and neutralizes cherry’s reddish/pink undertone at the same time. A grey gel stain works too, and needs less prep than full bleaching.
Can You Change The Color Of Cherry Wood Furniture?
Yes. Dyeing, chemical staining, or gel stain all change cherry’s color while keeping the grain visible; painting changes the color completely and hides the grain.
Is Cherry Wood Furniture Dated?
No. Cherry works with traditional and modern styles alike — 2026 design trends actually favor wood tones like cherry over the all-grey finishes that were common a few years ago. Updated hardware and a lighter finish are usually enough to modernize a piece.
Does Gel Stain Work Well On Cherry Wood?
Yes, better than traditional stain in most cases. Cherry is splotch-prone, and gel stain sits on the surface instead of soaking in unevenly, so it goes on without the blotchy patches thin stain can leave.
How Much Does It Cost To Modernize Cherry Wood Furniture?
A hardware swap runs $15 to $40 in pulls for a typical dresser. Gel stain refinishing adds roughly $16 to $35 in stain and topcoat for a mid-size piece. A full strip-and-paint job costs more — paint alone runs $50 to $200 per gallon, plus primer and supplies.
Conclusion
Cherry wood furniture doesn’t need a full repaint to look current in 2026 — hardware, sheen, and finish color do most of the work. Start with the cheapest change (hardware), move to gel stain if you want a lighter color without losing the grain, and save full stripping and painting for pieces with damaged finish. If you’re weighing cherry against another wood for a new piece instead of updating what you have, our walnut vs. cherry wood comparison covers how the two compare for modern furniture design, and if the piece in question is cabinetry rather than furniture, see can you paint cherry cabinets for the cabinet-specific version of this process. For a different wood with the same “is it dated” question, see are oak cabinets outdated, and for a same-format guide on another species, how to make maple cabinets look modern. For staining basics that apply beyond cherry, dye vs. stain for wood is a useful next read. Browse more cherry wood guides for species-specific care and finishing tips. Wondering if your piece is even real cherry? See our fruitwood quality guide.
Sponsored / affiliate links. As an Amazon Associate I earn from qualifying purchases. I may earn additional commission from eligible campaigns.