How To Polyurethane Wood The Right Way (Step-By-Step)
Polyurethaning wood correctly involves careful preparation, multiple thin coats, and proper drying. This ensures a durable, smooth, and attractive protective finish. Key steps include surface prep, applying thin, even coats with the right brush, and allowing adequate drying time between layers.
Understanding different polyurethane types also helps.
What is Polyurethane and Why Use It?
Polyurethane is a type of plastic coating. It’s used to protect wood surfaces. Think of it as a tough shield for your furniture, floors, or crafts.
It keeps wood safe from water, spills, scratches, and everyday wear and tear. Without it, wood can get damaged easily. It can get water spots or start to look dull.
Polyurethane helps your wood projects look good for a long time.
There are two main types of polyurethane you’ll find. One is oil-based. The other is water-based.
Oil-based poly is tougher. It offers great protection. It also dries to a more amber color.
This can give wood a warmer look. Water-based poly dries clear. It smells less strong.
It also cleans up with soap and water. It dries faster, too. Knowing which kind to use depends on your project and what look you want.
Using polyurethane is like giving your wood a superhero cape. It defends against the everyday battles wood faces. It keeps finishes from fading.
It stops scratches from becoming permanent marks. It makes cleaning up messes super easy. A well-polyurethaned piece of furniture can last for generations.
It’s a crucial step for any serious woodworker or DIYer. It turns a nice piece of wood into a lasting treasure.
My Own Polyurethane Mishap
I remember one time, I was working late. I had just finished sanding a small side table I made. It was for my living room.
I was so excited to finish it. I grabbed a can of oil-based polyurethane. I thought one good coat would be enough.
I didn’t really sand between coats. I just wanted it done. I applied the finish.
It looked okay at first. But then I noticed drips. They were running down the legs.
There were also some fuzzy bits stuck in the finish. It wasn’t smooth at all.
The next morning, it was hard and sticky. It looked bumpy and uneven. I was so disappointed.
All that work seemed wasted. It felt like a cheap piece of furniture. That’s when I realized I had skipped some really important steps.
I learned that haste truly makes waste. You can’t just slap it on and expect perfection. Good results need patience and care.
It taught me a valuable lesson about respecting the finishing process. I had to sand it all down and start over. This time, I did it right.
The second try was amazing. The table looked professional and felt super smooth.
Your Polyurethane Checklist
Surface Prep:
- Sand wood smooth.
- Remove all dust.
Applying Poly:
- Use a good brush or roller.
- Apply thin coats.
- Brush in one direction.
Between Coats:
- Let it dry fully.
- Lightly sand if needed.
- Clean off dust again.
Final Coat:
- Apply one last smooth layer.
- Let it cure completely.
The Step-by-Step Process to Perfect Polyurethane
Let’s break down how to get that perfect finish. It’s not complicated, but each step matters. Following this will save you headaches later.
It ensures your wood looks its best and stays protected. We’ll go from raw wood to a beautiful, shiny surface.
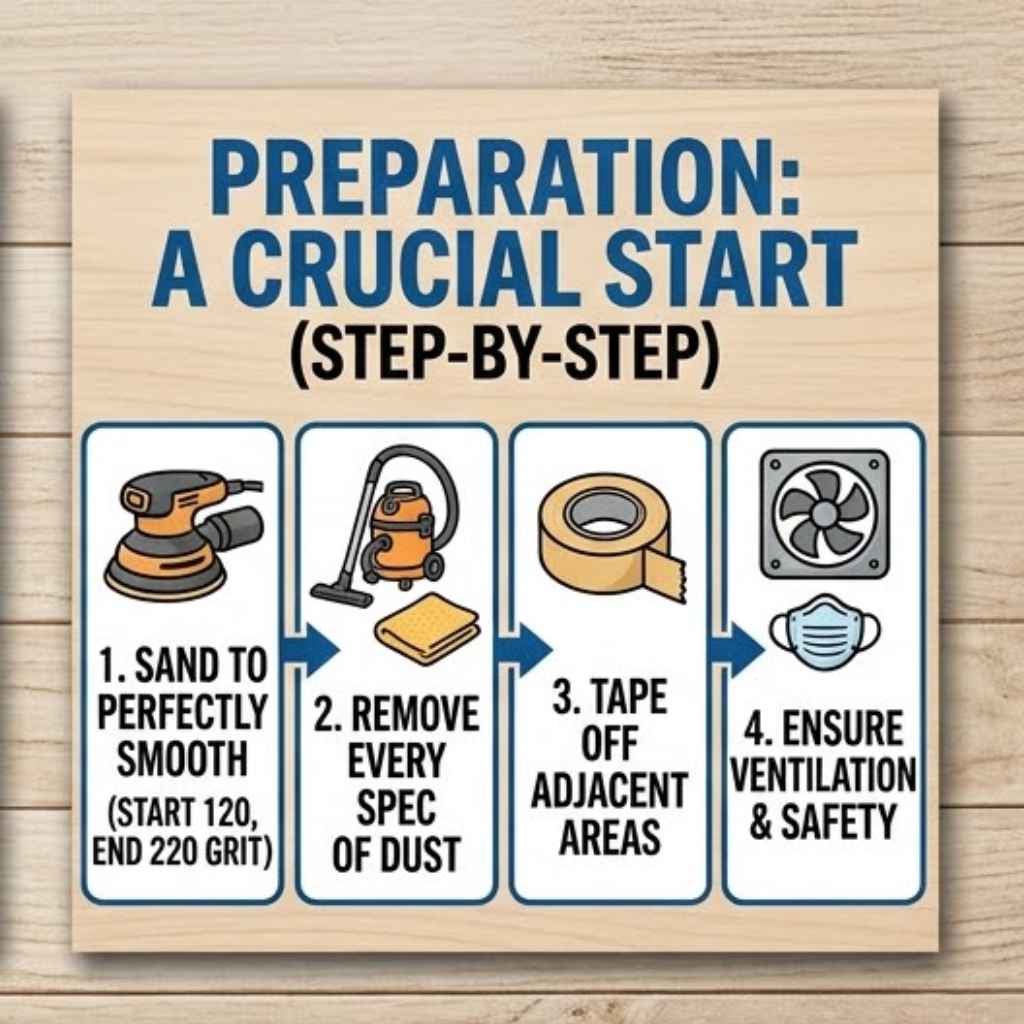
Step 1: Prepare Your Wood Surface
This is the most critical step. If your wood isn’t prepped right, the finish won’t stick well. It will also show every little flaw.
Start by sanding your wood. Use sandpaper that’s not too coarse. For most projects, start with 120-grit sandpaper.
Then move to 180-grit. Finish with 220-grit. This makes the wood feel smooth to the touch.
After sanding, you MUST remove all the dust. Dust is the enemy of a good finish. Use a vacuum cleaner with a brush attachment.
Then, wipe the wood down with a tack cloth. A tack cloth is sticky. It picks up even the tiniest dust particles.
Make sure you get into all the corners and grooves. If you skip this, dust will end up in your polyurethane. This will make the finish look rough.
Wipe down the area where you will be working too. Dust settles everywhere. You want a clean space.
A clean environment helps prevent dust from landing on your wet finish. If you are using oil-based polyurethane, you might want to wipe the wood with a mineral spirit. This helps remove any remaining oils or sap.
For water-based, a damp cloth is usually enough. Just let it dry fully.
Step 2: Choose Your Polyurethane and Tools
As we talked about, there are oil-based and water-based polyurethanes. For high-traffic areas like tabletops or floors, oil-based offers superior durability. It’s also more forgiving of application errors.
Water-based is great for projects where you want a clear, natural look. It’s also good for faster drying times and easier cleanup. For beginners, water-based might be a little easier to work with due to its faster drying and easier cleanup.
You’ll need good tools. A high-quality natural bristle brush is best for oil-based poly. For water-based, a synthetic bristle brush works well.
You can also use foam brushes or rollers for larger, flat surfaces. Make sure your brushes are clean and lint-free. Even a small bit of fuzz can ruin a coat of finish.
Have plenty of clean rags on hand too.
Consider the sheen you want. Polyurethane comes in different sheens: matte, satin, semi-gloss, and gloss. Matte gives a very flat look.
Gloss is very shiny. Satin and semi-gloss are popular choices. They offer a balance of protection and subtle shine.
Satin is often used for furniture. Gloss is more for dramatic effects or where you want maximum light reflection.
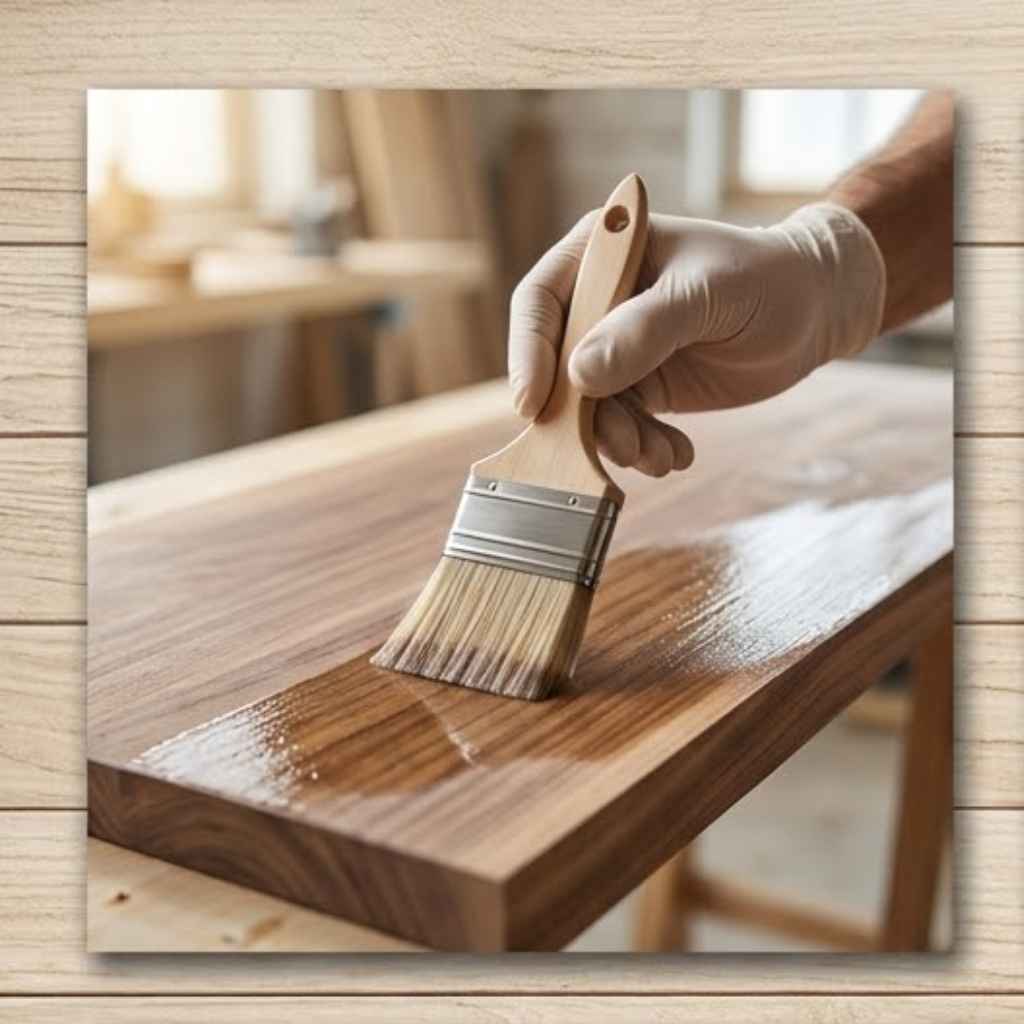
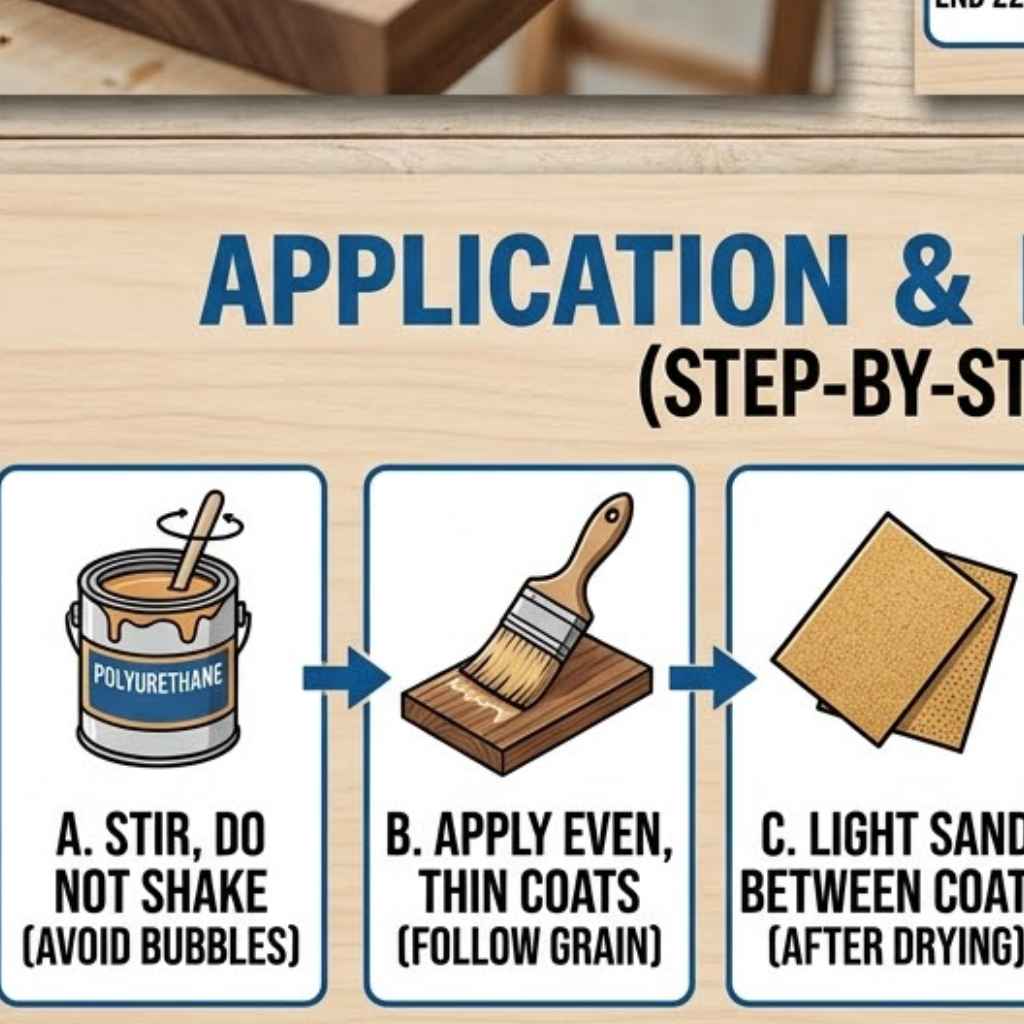
Step 3: Apply the First Coat
Now for the actual application. Open the can of polyurethane gently. Stir it slowly.
Do NOT shake the can. Shaking creates bubbles. Bubbles in the can will transfer to your wood.
Dip your brush into the polyurethane. Load it just enough to coat the bristles. You don’t want it dripping off.
Start applying the polyurethane to your wood. Brush it on in long, smooth strokes. Always brush in the direction of the wood grain.
This is very important for a smooth finish. Try to maintain a wet edge. This means the area you just brushed should slightly overlap the area you are about to brush.
This helps avoid lap marks. Lap marks are lines where one coat meets another, and they look bad.
Apply a thin, even coat. It’s better to apply three thin coats than one thick coat. Thick coats drip easily.
They also take much longer to dry. They can stay soft for a long time. Thin coats dry faster and harder.
If you see any drips forming, brush them out immediately. Don’t let them dry. Work steadily and try to cover the whole surface without stopping too much.
Contrast Matrix: Oil vs. Water-Based Poly
| Feature | Oil-Based Polyurethane | Water-Based Polyurethane |
|---|---|---|
| Durability | Very high, best for floors. | Good, but slightly less than oil. |
| Appearance | Amber tone, can yellow over time. | Clear, stays clear. |
| Drying Time | Longer (6-8 hours to touch). | Faster (1-2 hours to touch). |
| Cleanup | Mineral spirits or paint thinner. | Soap and water. |
| Odor | Strong, chemical smell. | Mild, less offensive. |
Step 4: Drying and Sanding Between Coats
After applying the first coat, let it dry completely. Check the can for drying times. This is usually several hours.
For oil-based, this might be 6 to 8 hours. For water-based, it could be as little as 1 to 2 hours. Do not rush this.
If you try to sand or add another coat too soon, you can mess up the finish.
Once the coat is fully dry, you’ll lightly sand it. Use fine-grit sandpaper, like 220 or 320-grit. The goal here is not to remove the polyurethane.
It’s to smooth out any tiny bumps or dust specks. It also creates a slightly rough surface. This helps the next coat stick better.
Sand very gently. You don’t want to sand through the coat.
After sanding, you MUST clean off all the dust again. Use a vacuum and a tack cloth. This is just as important as the first time.
Any dust left will be sealed into the next coat. This step is key to getting that smooth, glass-like finish. It makes a huge difference.
It might seem tedious, but it’s worth it.
Step 5: Apply Additional Coats
Repeat steps 3 and 4 for each additional coat. Most projects need at least 2 to 3 coats of polyurethane. Some, like tabletops or floors, might need 4 or even 5 coats for maximum protection.
Always apply thin, even coats. Always let each coat dry fully. Always sand lightly and clean off dust between coats.
Pay attention to how the wood looks after each coat. The grain might start to fill in. The color might get richer.
This is normal. You’re building up a protective layer. The more coats you apply, the stronger and more durable the finish will be.
Don’t try to make up for a thin coat by applying a really thick second coat. Stick to thin and even.
If you notice any areas that seem thin or missed, touch them up carefully. You can use a small artist’s brush for touch-ups. Make sure to feather the edges.
This means blending the new poly into the existing coat. This helps avoid visible lines. You want the entire piece to have a uniform finish.
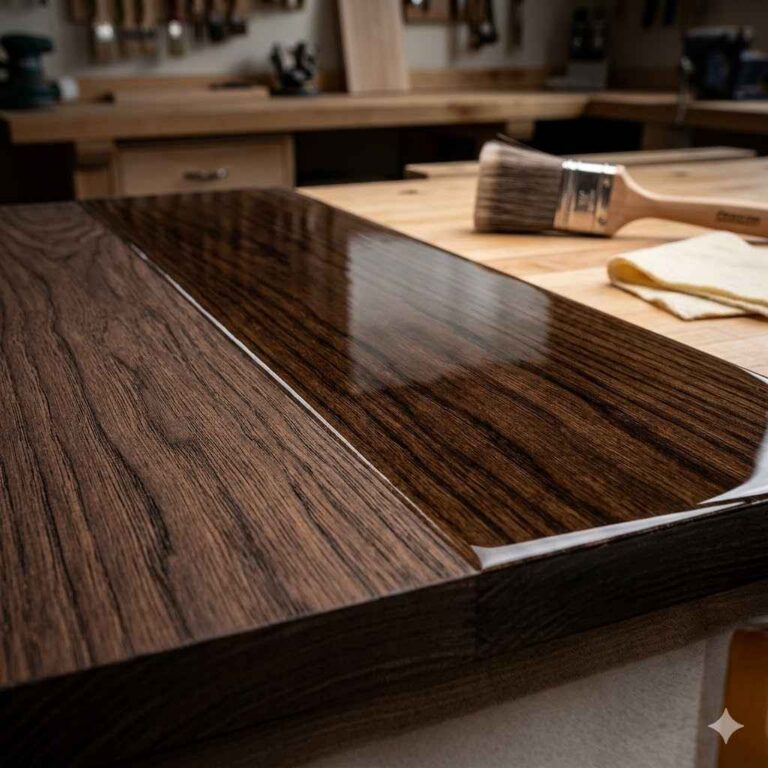
Step 6: The Final Coat and Curing
The final coat is applied just like the others. Brush it on smoothly and evenly. Try to do this in a dust-free environment.
This coat is the one everyone sees. You want it to be perfect. Do not sand the final coat.
You might lightly buff it later if needed, but you don’t sand it after it dries.
After the last coat, you need to let the polyurethane cure. This is different from drying. Drying means it’s no longer sticky.
Curing means the polyurethane is hardening completely. This process can take several days, or even weeks for oil-based poly. Read the product label for specific curing times.
During this time, be gentle with the furniture. Avoid placing heavy items on it. Avoid spills.
Let it reach its full hardness.
Even after it feels hard, it’s still a good idea to be careful for the first month. This allows the finish to reach its ultimate durability. Proper curing ensures your polyurethane finish will last for years.
It will withstand daily use without damage. Patience here pays off big time.
Quick Scan: Polyurethane Sheens
Matte: Very flat, no shine. Good for a natural wood look.
Satin: Low sheen, soft glow. Popular for furniture.
Semi-Gloss: More shine than satin, reflects light well.
Gloss: High shine, mirror-like finish. Very reflective.
How To Polyurethane Wood The Right Way (Step-By-Step)
Real-World Context: Where You’ll Use Polyurethane
You’ll find yourself reaching for polyurethane in many situations. It’s a go-to finish for furniture. This includes tables, chairs, cabinets, and dressers.
Any piece of wood that gets handled or needs protection from spills benefits from it. A coffee table, for example, needs a tough finish to resist drink rings and scratches.
Floors are another common place. Hardwood floors are often finished with multiple coats of a durable polyurethane. This protects them from foot traffic and makes them easy to clean.
Kitchen cabinets and countertops also get this treatment. It keeps them looking great despite daily use and exposure to moisture and grease.
Smaller projects like picture frames, wooden toys, or decorative items can also be polyurethaned. It adds a professional touch. It also makes them more durable and resistant to damage.
Even wooden cutting boards can be finished with a food-safe mineral oil and beeswax blend, though specialized cutting board oils are better. Standard polyurethane is not food safe.
Think about the environment. A kitchen or bathroom requires a finish that can handle moisture. A living room might need protection from sunlight fading or accidental spills from drinks.
A workshop bench might need extreme durability against tools and heavy objects. The type of polyurethane and the number of coats can be adjusted for these different needs.
User behavior plays a role too. Do you have pets that might scratch furniture? Do you have young children who are prone to spills?
If so, you’ll want a more durable finish. This might mean choosing oil-based poly and applying extra coats. Understanding how the item will be used helps you decide on the best approach.
Observational Flow: Applying Polyurethane
Start: Prepare wood thoroughly.
1st Coat: Apply thin, even strokes with the grain.
Wait: Allow full drying time.
Sand: Gently with fine grit sandpaper.
Clean: Remove all dust with tack cloth.
2nd Coat: Apply thin, even strokes.
Repeat: Continue drying, sanding, cleaning, and applying.
Final Coat: Apply one last smooth layer.
Cure: Allow days to weeks for full hardening.
What This Means for You
Understanding how to properly polyurethane wood means you can achieve professional-looking results at home. You can protect your beautiful woodworking projects and heirlooms. It means your furniture will look better for longer.
It also means you can tackle more ambitious projects with confidence.
When is a slight imperfection normal? A tiny dust speck in an out-of-the-way spot on a coat that will be sanded might be okay. A subtle brush mark on a non-critical surface that’s not the final coat can often be fixed.
However, drips, runs, or visible brush strokes on the final coat are not normal and should be avoided.
When should you worry? If the polyurethane is not drying at all after many hours, something is wrong. It could be too cold or too humid.
Or you might have applied it too thick. If you see major issues like runs, sags, or a bumpy texture on the final coat, you may need to sand it back down and reapply. Don’t panic if this happens.
It’s a learning process.
Simple checks you can do: Run your finger lightly over the surface after it has dried for the recommended time. It should feel smooth. Look at the piece from different angles in good light.
You should not see obvious streaks or imperfections. The sheen should be consistent across the entire surface.
If you’re unsure about a specific wood type, do a test piece first. Use a scrap piece of the same wood. Apply the polyurethane there.
This helps you see how the finish will look. It also lets you practice your application technique. It’s a low-risk way to get comfortable with the process.
Stacked Micro-Sections: Common Polyurethane Issues
Bubbles: Caused by shaking the can or applying too fast.
Drips/Runs: Too much poly applied, or applied too thickly.
Brush Marks: Poor brush quality or applying in inconsistent strokes.
Dust Specks: Inadequate cleaning before or between coats.
Yellowing: Common with oil-based poly over time, especially on light woods.
Cloudy Finish: Moisture in the air during application or curing.
Quick Tips for a Smoother Finish
Always work in a well-ventilated area. Polyurethane fumes can be strong. Good ventilation helps it dry faster too.
Try to work in a dust-free environment. Close windows and doors if dust is blowing around outside. Turn off fans that might blow dust onto your wet finish.
Apply polyurethane in thin coats. This is the golden rule. It’s far better to have more thin coats than fewer thick ones.
This ensures even drying and a harder finish. Always brush in the direction of the wood grain. Never go against it.
Clean your brushes thoroughly after each use. If you used oil-based poly, clean them with mineral spirits. For water-based, use soap and water.
Proper brush cleaning means they’ll be ready for your next project and won’t leave debris in your finish.
If you get a drip or a fuzzy spot, don’t leave it. Try to gently brush it out while the finish is still wet. If it dries, you’ll have to sand it smooth.
It’s always easier to fix small issues as they happen.
Consider the temperature and humidity. Most polyurethanes apply best between 65-75°F (18-24°C). High humidity can cause water-based poly to dry slowly or appear cloudy.
Very cold temperatures can also slow drying. Check the product instructions for ideal conditions.
For very large surfaces like tabletops, a foam roller designed for polyurethane can be a great tool. It helps apply an even coat quickly. Just be sure to roll in one direction and avoid overworking the material.
Essential Tools & Materials
Polyurethane: Oil-based or Water-based (your choice).
Sandpaper: Grits from 120 to 220, and 320 for between coats.
Brushes: Natural bristles for oil, synthetic for water. Or foam brushes/rollers.
Tack Cloths: For dust removal.
Rags: Clean, lint-free rags.
Mineral Spirits/Paint Thinner: For oil-based cleanup.
Gloves: To protect your hands.
Mask: For ventilation and fume protection.
Frequently Asked Questions About Polyurethane
How many coats of polyurethane should I apply?
For most furniture projects, 2 to 3 coats are usually enough. For high-wear surfaces like tabletops or floors, 4 to 5 coats are recommended for maximum durability.
Can I use polyurethane on painted wood?
Yes, you can. Make sure the paint is fully dry and cured. Then, lightly sand the painted surface to create a surface for the polyurethane to adhere to.
Apply thin coats just like you would on bare wood.
What if I see bubbles in my polyurethane?
Bubbles usually come from shaking the can or applying too quickly. If you see them while the finish is wet, gently brush them out. If they dry, you’ll need to sand them down and apply another thin coat.
How long does polyurethane take to cure completely?
Drying times are usually a few hours. Curing takes much longer. Oil-based polyurethane can take 30 days or more to cure fully.
Water-based poly cures faster, often within 7 days. Always check the product label.
Can I polyurethane over an existing finish?
Generally, yes, but preparation is key. Clean the existing finish thoroughly. Then, lightly sand it to rough it up.
If the old finish is damaged or peeling, it’s best to remove it completely first. Test on a small area if unsure.
Is polyurethane safe for food surfaces like cutting boards?
Standard polyurethane is NOT food safe. It is not meant for surfaces that come into direct contact with food. For cutting boards and bowls, use a food-safe finish like mineral oil, beeswax, or a specialized cutting board conditioner.
What is the best way to get a smooth finish without brush marks?
The key is thin coats and a good brush. Apply polyurethane in the direction of the grain. Avoid over-brushing.
Maintain a wet edge. Lightly sanding and cleaning between coats also helps smooth out minor imperfections and ensures a better base for the next layer.
Final Thoughts on Polyurethane
Getting a great polyurethane finish on your wood projects is totally achievable. It’s about patience and following a few key steps. Proper preparation, thin coats, and drying time are your best friends.
Don’t get discouraged if your first try isn’t perfect. Every project is a learning experience. With a little practice, you’ll be creating beautiful, lasting finishes in no time.