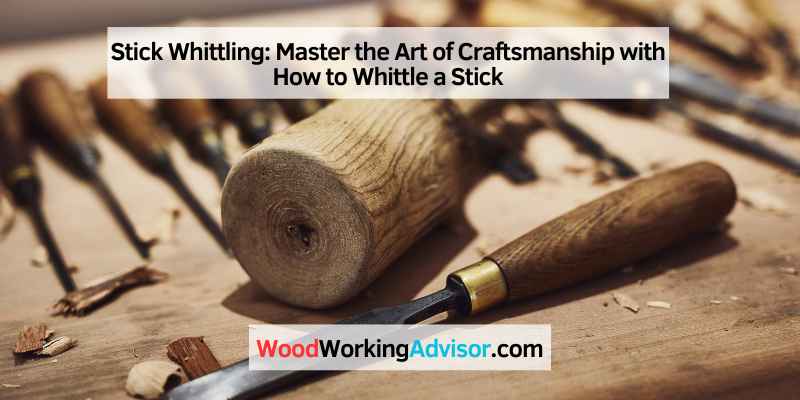
Stick Whittling: Master the Art of Craftsmanship with How to Whittle a Stick
To whittle a stick, start by selecting a suitable stick and using a sharp knife to carefully carve away small shavings in a controlled manner, creating the desired shape and design.
Choosing The Right Wood
When it comes to whittling a stick, choosing the right kind of wood is crucial. The type of wood you select will greatly impact the outcome of your project. In this section, we will discuss the various aspects to consider when choosing the perfect wood for stick whittling.
Softwood
Softwood is a popular choice for stick whittling due to its ease of carving. These types of wood generally have a consistent grain pattern, making them ideal for intricate designs. Some common softwoods used for whittling include pine, cedar, and spruce.
Here are a few key features of softwood:
- Lightweight and easy to work with
- Pronounced grain pattern for added character
- Less durable compared to hardwood
- Commonly available and relatively affordable
Hardwood
If you’re looking for a more durable and long-lasting finished product, hardwood is the way to go. Hardwood is known for its strength and resilience, making it suitable for creating sturdy walking sticks or decorative items. Popular hardwood options for stick whittling include oak, maple, and walnut.
Consider the following characteristics of hardwood:
- Dense and strong, providing excellent durability
- Tends to have a finer grain pattern compared to softwood
- Requires more effort and patience to carve due to its density
- Offers a premium finish with a natural richness
Green Wood Vs Dry Wood
When selecting wood for stick whittling, you’ll need to decide whether to use green wood or dry wood. Green wood refers to freshly cut wood that still contains moisture, while dry wood has been seasoned and dried out. Both options have their advantages and it ultimately depends on your preference and project requirements.
Here’s a quick look at green wood and dry wood:
| Green Wood | Dry Wood |
|---|---|
| Typically easier to carve due to its softer nature | Harder, requiring more effort but provides a smooth finish |
| May experience more shrinking and cracking as it dries | Less prone to shrinkage and cracking |
| Ideal for projects that require immediate carving | Preferred for intricate designs or when precision is crucial |
Now that you have a better understanding of the different wood options available, you can confidently choose the right wood for your stick whittling projects. Selecting the appropriate wood will not only make your carving process easier but will also ensure a beautiful and long-lasting finished product.
Necessary Tools And Safety Precautions
Stick whittling is a wonderful and fulfilling craft that allows you to create beautiful and intricate designs out of a simple stick. However, it is important to have the right tools and take the necessary safety precautions before embarking on your whittling journey. In this section, we will explore the basic tools required for stick whittling as well as the essential safety gear you should have in order to enjoy this craft safely.
Basic Tools For Stick Whittling
When it comes to stick whittling, the tools you choose play a crucial role in the quality of your work. Here are the essential tools you should have:
- Pocket Knife: A sharp pocket knife with a fixed or folding blade is the primary tool for stick whittling. Look for a knife with a comfortable handle and a blade that holds its edge.
- Whittling Knife: A specialized whittling knife with a short, thin blade and a comfortable grip is perfect for creating intricate details and fine carving work.
- Woodcarving Chisel: Chisels come in various shapes and sizes, and they are useful for removing larger chunks of wood or shaping specific areas of your design.
- Sandpaper: Sandpaper in different grits is essential for smoothing out rough edges and bringing a polished finish to your whittled stick.
Safety Gear
Ensuring your safety while whittling is of utmost importance. Here are the essential safety gear you should have:
- Protective Gloves: Wearing protective gloves helps prevent accidental cuts and provides a better grip on the tools.
- Eye Protection: Safety goggles or glasses will safeguard your eyes from flying wood chips or accidental injury.
- Dust Mask: A dust mask helps protect your respiratory system from inhaling wood particles and dust while you’re working.
- First Aid Kit: It’s always wise to have a first aid kit nearby in case of any accidents or minor injuries.
By using the basic tools and wearing the appropriate safety gear, you can enjoy stick whittling with confidence, knowing that you are prepared and protected. Now that you have the necessary tools and safety precautions in place, it’s time to dive into the wonderful world of stick whittling!

Step-by-step Guide To Whittling A Stick
Whittling a stick can be a rewarding and calming hobby that allows you to unleash your creativity while connecting with nature. Whether you’re a beginner or have some experience in woodworking, this step-by-step guide will take you through the process of whittling a stick, from preparing the stick to adding the finishing touches. So grab your tools and let’s get started!
Preparing The Stick
To begin your whittling adventure, you’ll need to choose a suitable stick. Look for a straight, sturdy stick that fits comfortably in your hand. Remove any bark or loose pieces from the stick, ensuring a clean surface for carving. If needed, use sandpaper to smooth out any rough areas. It’s essential to work on a stable surface and ensure your stick is securely fixed in place.
Marking Your Design
Before diving into carving, it’s helpful to mark your design on the stick. This will serve as a guide and help you visualize your finished piece. Using a pencil or marker, sketch the outline or pattern you want to carve. Keep in mind the natural shape of the stick and let it inspire your design. The marking process is also an opportunity to experiment and adjust your design as needed.
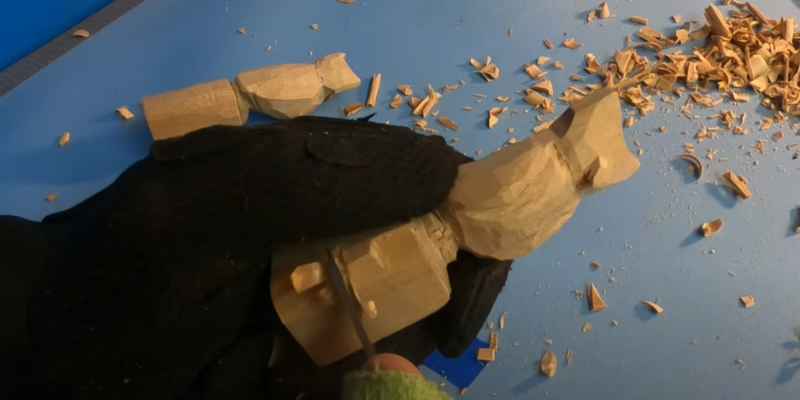
Whittling Techniques
When it comes to whittling, there are various techniques you can employ. One of the most basic techniques is the push stroke. Grasp your knife firmly with a relaxed grip and use your thumb as a pivot, pushing the blade away from you along the wood grain. Another technique is the pull stroke, where you pull the knife gently towards you, using controlled and smooth movements. Experiment with different techniques to find what works best for you and the specific design you’re carving.
Finishing Touches
Once you’ve shaped your design and are satisfied with the overall look, it’s time for the finishing touches. Use sandpaper or a whittler’s knife to refine the smoothness of the carved surface. Pay attention to details and ensure there are no sharp edges that could cause accidents. If desired, you can also apply a protective finish or coat of varnish to enhance the durability and appearance of your whittled stick.
Advanced Stick Whittling Techniques
Discover the secrets of advanced stick whittling techniques in this comprehensive guide. Learn how to skillfully carve a stick with step-by-step instructions and take your whittling skills to the next level.
Stick whittling is a fascinating craft that allows you to transform a simple piece of wood into a work of art. Once you have mastered the basic techniques, you may be ready to take your skills to the next level with some advanced stick whittling techniques. In this section, we will explore three popular techniques that can add depth and intricacy to your whittled creations: relief carving, chip carving, and texturing and burnishing. These techniques require a steady hand, patience, and attention to detail, but the results are well worth the effort. Let’s dive in and discover how you can elevate your stick whittling to new heights!
Relief Carving
Relief carving is a technique that involves carving away wood to create a three-dimensional design that stands out from the surface of the stick. This technique allows you to add depth and dimension to your whittled creations and bring them to life. To get started with relief carving, follow these steps:
- Choose a design: Find inspiration for your relief carving design, whether it’s a nature motif, a geometric pattern, or something entirely unique.
- Transfer the design: Use a pencil or transfer paper to trace the design onto the stick. This will serve as your guide as you carve away the excess wood.
- Carve away the background: Using a carving knife or chisel, carefully carve away the wood around the design. Take your time and work slowly to avoid any mistakes.
- Refine the details: Once you have carved away the background, use smaller carving tools to add finer details and texture to your relief carving.
- Finish your carving: Sand the surface of your relief carving to smooth out any rough edges. Apply a coat of wood polish or varnish to protect and enhance the natural beauty of the wood.
Chip Carving
Chip carving is a technique that involves removing small chips of wood to create intricate patterns and designs on the surface of the stick. It is a technique that requires precision and control, but the results can be stunning. To try your hand at chip carving, follow these steps:
- Choose a design: Select a design that is well-suited for chip carving, such as geometric shapes, floral patterns, or traditional symbols.
- Mark the design: Use a pencil or transfer paper to mark the design onto the stick. This will serve as your guide as you carve.
- Make V-shaped cuts: With a sharp chip carving knife, make V-shaped cuts along the lines of your design. Take care to cut away small chips of wood, rather than digging into the surface.
- Carve away excess wood: Once you have made the initial cuts, use the knife to carefully carve away the excess wood, creating depth and texture in your design.
- Refine the details: Use smaller carving tools to add finer details and smooth out any rough edges or imperfections.
- Finish your carving: Give your chip carving a final sanding to ensure a smooth surface. Apply a wood finish or oil to protect and enhance the natural beauty of the wood.
Texturing And Burnishing
Texturing and burnishing are techniques that add visual interest and tactile appeal to your stick whittling projects. Texturing involves creating patterns or textures on the surface of the stick, while burnishing involves smoothing and polishing the wood to enhance its natural beauty. Here’s how you can incorporate texturing and burnishing into your whittling:
- Choose your texturing tools: There are various tools you can use for texturing, such as a wire brush, sandpaper, or a woodburning tool.
- Create your textures: Experiment with different techniques to create unique textures on the surface of your stick. For example, you can use a wire brush to create a rough texture or a woodburning tool to add intricate designs.
- Burnish the wood: Once you have finished texturing, use a smooth, rounded object like a bone folder or the back of a spoon to burnish the surface of the wood. Apply gentle pressure and smooth out any rough areas.
- Finish your project: Give your whittled stick a final sanding to smooth out any rough edges. Apply a wood finish or polish to protect the wood and bring out its natural beauty.
These advanced stick whittling techniques open up a world of possibilities for creative expression. As you experiment with relief carving, chip carving, and texturing and burnishing, you will develop your own unique style and create pieces that truly showcase your skills. So, grab your carving tools and let your imagination soar as you explore the endless potential of advanced stick whittling techniques!
Projects For Stick Whittlers
Stick whittling is a captivating hobby that allows you to transform ordinary sticks into wonderful creations. Whether you’re new to whittling or have some experience under your belt, there are a variety of exciting projects you can try your hand at. In this section, we’ll explore some popular projects for stick whittlers, including basic animal figures, walking sticks, functional utensils, and decorative items. Let’s dive in and discover the endless possibilities that stick whittling offers!
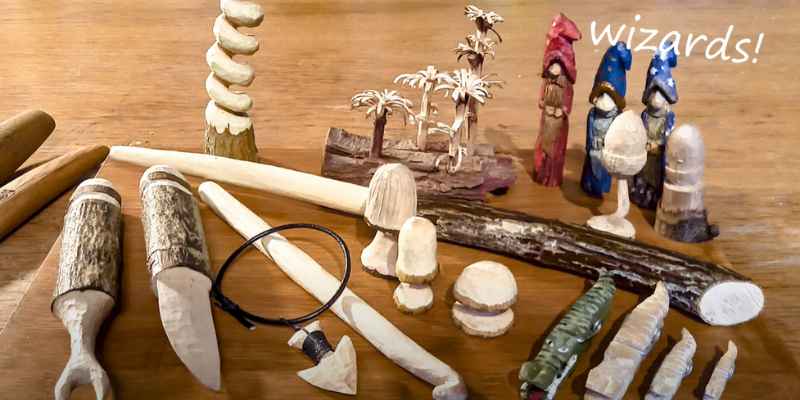
Basic Animal Figures
If you’re eager to unleash your creativity and bring animals to life, whittling basic animal figures is a great place to start. With just a few simple tools, you can carve adorable birds, forest creatures, and even domestic pets. Begin by selecting a suitable stick and visualizing your desired animal figure. Carefully carve away excess wood, shaping your creation with precise cuts. Don’t forget to add intricate details like eyes, ears, and tails to lend your figure a lifelike appearance. Whether you prefer a majestic eagle or a whimsical rabbit, the possibilities are endless.
Walking Sticks
Whittling walking sticks not only serves as a creative outlet but also results in a practical and functional item. Select a sturdy stick with the desired length and let your imagination guide you. Remove the bark and begin shaping the stick, smoothing out rough edges and creating a comfortable grip. Personalize your walking stick with intricate designs, patterns, or even a hand-carved handle. The finished product will not only support you during adventurous hikes but also showcase your artistic flair.
Functional Utensils
Why settle for ordinary utensils when you can carve your own unique and practical tools? Whittle functional utensils such as spoons, forks, and sporks. Start by selecting a stick with the appropriate thickness and length. Carefully sculpt the utensil’s head, handle, and teeth using your favorite whittling techniques. Smooth out any rough edges and ensure your creation feels comfortable and functional in your hand. Imagine the satisfaction of using a handcrafted spoon you’ve meticulously carved while enjoying an outdoor meal.
Decorative Items
Enhance your surroundings with beautiful and intricate decorative items made through stick whittling. With patience and skill, you can create stunning items like candle holders, picture frames, or even small sculptures. Begin by selecting a stick with unique and appealing features. Transform it by carving intricate patterns, abstract shapes, or nature-inspired designs. The end result will be an exquisite piece of art that adds charm and a touch of individuality to your living space.
Regardless of the project you choose, stick whittling offers a fulfilling and artistic outlet where your imagination can run wild. From creating adorable animal figures to fashioning functional utensils and decorative items, there’s no limit to what you can achieve with a stick and a trusty whittling knife. So grab your tools, find the perfect stick, and let your creativity take flight – happy whittling!
Troubleshooting Common Issues
Stick whittling can be a relaxing and enjoyable pastime, but it’s not without its challenges. Luckily, there are solutions to some common issues you may encounter along the way. In this section, we’ll explore how to deal with knots, dull tools, and splitting wood, ensuring that you can continue whittling without frustration. So let’s dive in and troubleshoot these common problems!
Dealing With Knots
Knots in the wood can make the whittling process more difficult. They can cause your knife to catch or make it challenging to create smooth, clean cuts. However, there are a few strategies you can use to deal with knots:
- Adjust your technique: When you encounter a knot, try changing your whittling technique. Experiment with different angles or approach the knot from a different direction to work around it.
- Use a smaller knife: Sometimes, using a smaller knife can give you better control when navigating around knots. Opt for a knife with a narrower blade that will enable you to work more precisely.
- Fill the knot: If the knot is causing significant problems, consider filling it with epoxy or wood filler. Sand it down once the filler has dried to achieve a smooth surface for further carving.
Dull Tools
Using dull tools can make the whittling process frustrating and less effective. Here’s how you can address this issue:
- Sharpen your tools: Regularly sharpening your whittling tools is essential for maintaining their cutting edge. Invest in a high-quality sharpening stone or use a specialized sharpening tool to restore your tools’ sharpness.
- Strop your knife: In addition to sharpening, a final touch-up with a leather strop can refine the edge of your knife. This process helps remove any remaining burrs and ensures a smooth cutting experience.
- Replace blades: If your knife blades become irreversibly dull or damaged, it may be time to replace them. Having spare blades on hand can help ensure you can continue your whittling with minimal interruptions.
Splitting Wood
Sometimes, the wood you are whittling may split or crack. This can be disheartening, but there are ways to mitigate this issue:
- Choose the right wood: Selecting the appropriate wood for whittling can make a difference. Opt for woods that are less prone to splitting, such as basswood or cedar.
- Avoid excessive force: Applying too much pressure when carving can increase the likelihood of wood splitting. Take your time and let the knife do the work, using gentle and controlled movements.
- Prevent drying: Keeping your wood properly hydrated can minimize the chances of splitting. Store your whittling projects in a cool and moist environment when you’re not actively working on them.
By addressing these common issues, you’ll be able to tackle most challenges that arise during stick whittling. Remember to adjust your technique, keep your tools sharp, and choose the right wood to ensure a successful and enjoyable whittling experience!
Tips For Perfecting Your Stick Whittling Skills
Enhance your stick whittling skills with these helpful tips. Learn how to carve a stick effectively and create impressive designs. Perfect your technique and unleash your creativity!
Practice And Patience
To become a master at stick whittling, practice and patience are key. Carving a stick requires skill and precision, both of which can only be developed through consistent practice. Find a quiet and safe space where you can dedicate time to this craft. Start with simple projects, gradually progressing to more complex ones as you gain confidence. Be patient with yourself, as whittling is a skill that takes time to perfect.
Choosing The Right Project
When it comes to stick whittling, choosing the right project is essential. Consider the size and type of stick you are working with, as well as your skill level. If you are a beginner, start with a small and straight stick. As you become more proficient, you can move on to larger or irregularly shaped sticks. Select a project that suits your interests and fits within your abilities. This will help keep you engaged and motivated throughout the whittling process.
Experimenting With Techniques And Designs
Whittling a stick offers numerous opportunities for experimentation. Explore different techniques and designs to enhance your skills and creativity. You can try out various carving techniques such as chip carving, relief carving, or even embellishments like woodburning. Experiment with different patterns, textures, and shapes to create unique and personalized designs. Let your imagination run wild as you discover new ways to express yourself through stick whittling.
Remember, stick whittling is an art form that requires both practice and patience. By choosing the right project and experimenting with various techniques and designs, you can perfect your stick whittling skills. So grab your tools, find a quiet corner, and let your creativity guide your hands as you embark on your stick whittling journey.
Conclusion
Stick whittling is a traditional craft that allows you to create beautiful and functional objects out of sticks. By following the steps outlined in this blog post, you can learn to whittle a stick with ease and precision. Remember to choose the right tools, practice proper safety measures, and let your creativity shine through.
Whether you’re a beginner or an experienced woodworker, whittling a stick can be a rewarding and fulfilling experience. So grab your knife and start whittling today!