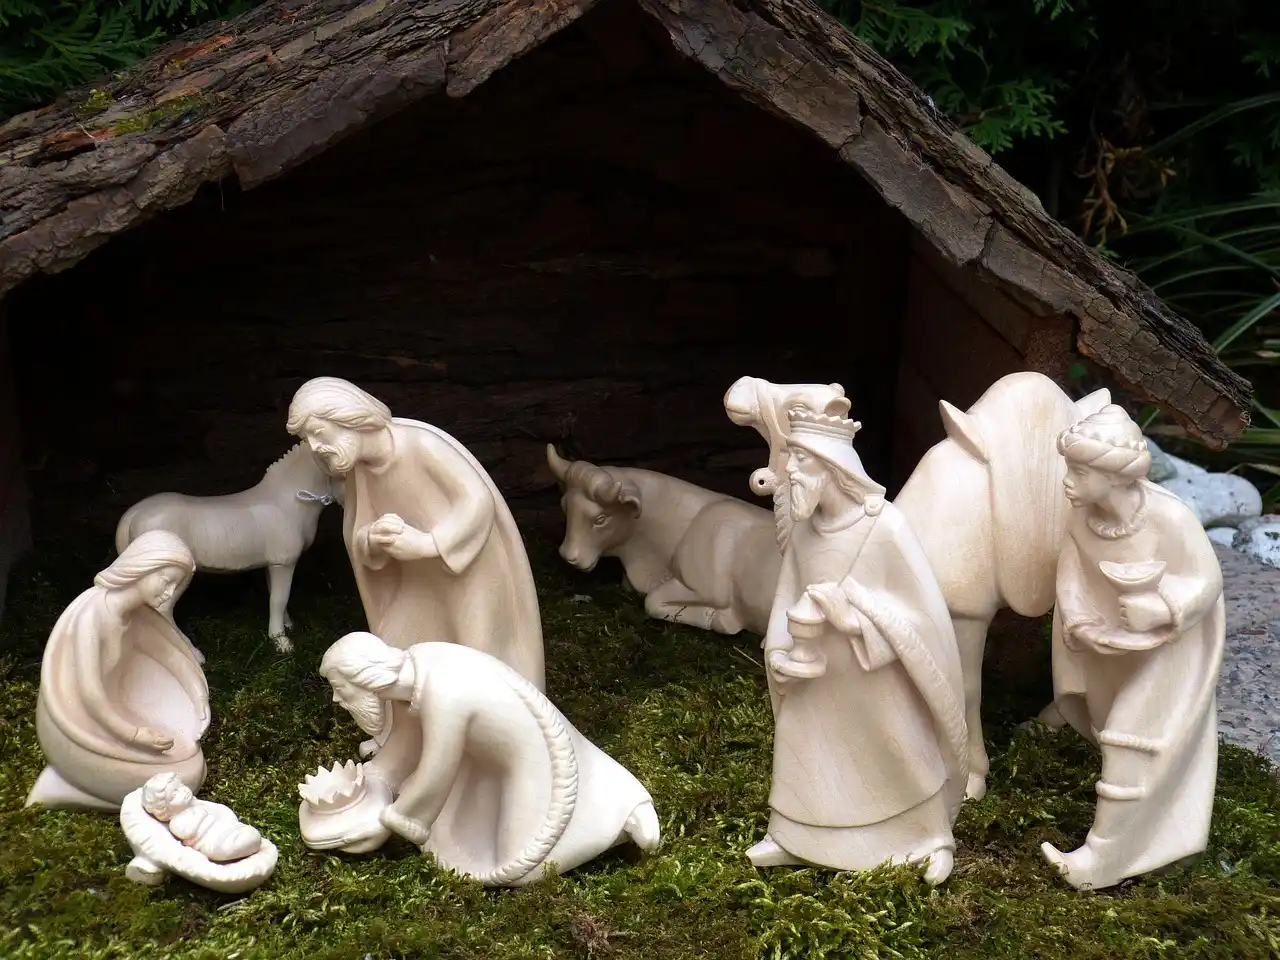
Wooden Nativity Scene DIY: Plans and Build
For a wooden nativity scene DIY, use 1/2-inch plywood for indoor display, 3/4-inch exterior plywood or solid wood for porch use, and a simple painted or sealed finish; choose a silhouette set for beginners and a layered or carved set if you want more detail. This guide shows you how to lay out a full-size pattern, cut the parts, assemble the scene, and finish it from start to finish based on where the display will sit and how much weather it must handle. Bad sizing or finish choice leads to warped parts, weak joints, and a display that fails fast outdoors or around kids.
What this project can look like


You can build a nativity as a flat silhouette, a stable with separate figures, chunky block people, a shadow box, or a yard display. The format matters more than the scene itself because it determines wood thickness, tool choice, storage, and whether the set can handle kids or weather.
A classic silhouette set can be cut from ½-inch plywood and is listed as a beginner build taking 3–4 hours if the shapes are simple and your tools are already set up. A rustic barnwood stable can be built in 2–3 hours with straightforward cuts and assembly. The chunky 2×4 block nativity takes 1–2 hours when you keep the figures basic and avoid extra detailing.
What you’ll need
- Tools: jigsaw or scroll saw, handsaw, clamps, drill/driver, measuring tape, square, pencil, sandpaper, and a sanding block.
- Materials: 1/2-inch plywood for silhouettes, 3/4-inch exterior plywood for outdoor panels, basswood for carving, pine for simple figures, oak for stronger parts, wood glue, screws, dowels, primer, paint, stain, and clear finish.
- Safety gear: safety goggles, ear protection, dust mask, and closed-toe shoes.
- Layout items: paper or cardboard for a full-size sketch, ruler, and labels for parts.
What wood should you use?

For a flat indoor scene, plywood is the easiest choice. For cutout figures, 1/2-inch plywood stays stable enough for a scroll saw or jigsaw and still handles basic freestanding shapes. For carved figures, basswood is a popular carving wood because it is soft and fine-grained. Pine is also easy to shape and light enough for tabletop builds. Oak is stronger and longer-lasting, but it is harder to shape and better for experienced builders.
Plywood for flat cuts
Use plywood when you want silhouettes, puzzle-piece cuts, or stable walls. The ½-inch option works well for indoor silhouettes, while 3/4-inch exterior plywood belongs on outdoor yard displays. A scroll saw is best for detailed curves in thin plywood figures. A jigsaw is the simpler, beginner-friendly option for basic cuts.
Basswood, pine, and oak for figures
Basswood suits hand-carved people and animals because it cuts cleanly and has a fine grain. Pine works for blocky, simple figures and light weight matters. Oak fits parts that need impact resistance or a more durable feel, but it takes more effort to cut, carve, and sand.
When exterior plywood is the better choice
Choose exterior plywood if the set will live outdoors or on a covered porch. It needs primer and paint on every face and edge. If the display stands in the yard, add stakes on the backs of figures so wind does not tip them.
How do you size the scene?
Measure the display area first, then scale the figures to it. A mantel scene usually works best when the stable stays low and wide enough to sit securely in the available space, while a tabletop set can stand taller if the base is deep enough to resist tipping. Shadow boxes need enough depth for figures and a light source. Yard displays need large forms that remain visible from the curb.
Mantel and tabletop targets
For a mantel, keep the stable shallow and the tallest figure within the space under the shelf lip. A common tabletop target is a base wide enough for Mary, Joseph, and baby Jesus without crowding. Leave room for animals or wise men only if the base still looks balanced. Wide feet or a deeper base help prevent tipping.
Shadow box and yard targets
A shadow box nativity is designed to hang flat on the wall, so size the frame around the figures and the LED tea light or spotlight. For an outdoor life-size yard nativity, the build uses ¾-inch exterior plywood and 4-foot-tall shepherds, with stakes on the backs of figures. Use outdoor-rated lights and extension cords if the display is powered.
Build the nativity scene
- Sketch the scene and mark every part. Draw the stable, figures, and base full size before cutting. Make a full-size paper or cardboard template first, then trace it onto the wood and number the parts so you can match them during dry assembly.
- Cut the major shapes with the right saw. Use a scroll saw for tight curves and a jigsaw for simpler cuts. Keep the blade moving at a steady pace to reduce burn marks and splintering.
- Sand all edges and test the fit. Break sharp corners, smooth end grain, and check that figures stand without leaning. This matters more on small pieces that can snap at the ankles or wrists.
- Dry-assemble the stable or base. Check spacing before glue goes on. If parts overlap, trim now instead of forcing the joints later.
- Glue and fasten weak points. Use wood glue for most joints. Add about 1/4-inch dowels where a joint needs extra alignment, and use #6 x 1-inch screws for simple stable framing when the thickness allows it.
- Finish according to location. Use paint, stain, or clear sealer on indoor pieces. Use primer plus exterior paint on yard pieces, and seal every edge and cutout before assembly if possible.
A complete parts-count plan
| Build style | Core parts count | Typical wood thickness | Tools | Best use case |
|---|---|---|---|---|
| Silhouette | 5 to 9 pieces | 1/2-inch plywood | Scroll saw or jigsaw | Fast indoor decor with flat storage |
| Stable-only | 6 to 12 pieces | 1/2-inch plywood or reclaimed boards | Jigsaw, drill, clamps | Frames separate figurines and stores flat with dowels |
| Block figures | 3 to 7 figures plus base | 2x stock or hardwood blocks | Saw, sander, drill | Kid-friendly display and simple painting |
| Shadow box | 1 frame, 3 to 8 figures, backer | 1/2-inch plywood or thin hardwood | Jigsaw, clamps, glue | Wall-hung scene with LED tea light or spotlight |
| Outdoor yard display | 6 to 15 large pieces | 3/4-inch exterior plywood | Jigsaw, drill, primer brushes | Weather exposure and curb visibility |
Can you make it safe for kids or outdoors?
Yes, if you choose the right format and finish. For kids, use chunky block figures or rounded wooden figures with smooth edges and non-toxic, child-safe acrylic craft paint, then cover the paint with a non-toxic, child-safe clear sealer. For outdoors, use exterior plywood, primer, paint, and back stakes. Add outdoor-rated lighting and extension cords if the display includes illumination.
Kid-safe choices
Keep small parts off a toddler-height display. Round corners, sand the bottom edges, and avoid loose accessories that can snap off. Non-toxic, child-safe acrylic craft paint works well on block figures and pairs with a non-toxic, child-safe clear sealer after the paint dries. Suppose a 10-inch tall block Joseph sits on a low shelf; rounding the base corners and sealing the paint helps prevent chips and splinters during handling.
Outdoor-safe choices
Use 3/4-inch exterior plywood, not interior panel stock, for yard pieces. Prime all surfaces, then apply exterior paint over the primer. Add stakes on the backs of figures and anchor them into soil or weighted supports. Picture a 4-foot shepherd on a windy front lawn: without stakes, the panel can twist and split at the base.
Common mistakes
Warped plywood, parts cut too thin, and skipped sealing cause most failures. A thin arm or hand can snap if the design is too delicate for the wood thickness. Burn marks usually mean the blade is dull or the feed rate is too slow. Paint bleed on end grain happens when you skip primer or sealer.
Storage matters too. Flat-pack stables and labeled figures last longer because they are less likely to chip in a box. If you plan seasonal reuse, build with removable dowels or screw-fastened panels instead of glued-only joints.
Say your shelf only allows an 18-inch-wide display. In that case, a shadow box or silhouette is a better fit than a deep stable, because the narrower format still reads clearly and stores flat after the season ends.
If that didn’t work, try this next
If a figure wobbles after assembly, add a 1/4-inch dowel pin or widen the base by 1/2 inch before finishing. If the wood splits near a thin curve, stop and simplify the shape rather than forcing a tighter cut. If outdoor paint peels, sand lightly, re-prime, and apply a second coat of exterior paint.
Frequently asked questions
What wood is best for a wooden nativity scene?
Use plywood for silhouettes and flat-cut sets, basswood for carved figures, pine for easy beginner builds, and oak for stronger but harder-to-shape pieces. For outdoor displays, exterior plywood is the better choice because it handles primer and paint more reliably than interior sheet goods.
Should I use plywood, pine, or basswood for a nativity set?
Use plywood if you want clean cutouts and flat storage. Choose pine for simple, lightweight blocks or rustic stable parts. Choose basswood when the goal is carving fine figure details, since it is soft and fine-grained. The best pick depends on saw type, skill level, and storage space.
How do you size a wooden nativity scene for a mantel?
Measure the available mantel width first, then leave room for the base, figures, and any lights. A shallow stable or silhouette usually fits better than a deep box. Keep the tallest piece low enough to clear the shelf lip and avoid crowding the display edge.
Can I make an outdoor wooden nativity scene?
Yes. Use 3/4-inch exterior plywood, prime every face and edge, and finish with exterior paint. Add stakes to the backs of figures, and use outdoor-rated lights and extension cords if you include illumination. Outdoor pieces need more sealing and stronger anchoring than indoor sets.
How do I make a nativity scene safe for kids?
Choose blocky shapes, sand every edge smooth, and avoid tiny detachable parts. Non-toxic, child-safe acrylic craft paint works well on the figures, followed by a non-toxic, child-safe clear sealer once dry. Keep the set low, stable, and free of sharp corners or fragile projections that can break under handling.
Sponsored / affiliate links. As an Amazon Associate I earn from qualifying purchases. I may earn additional commission from eligible campaigns.