Drilling Guide for Bits, Tools, and Materials Basics
Quick answer: Pick the bit by material first: brad-point or auger for wood, carbide-tipped masonry for brick or concrete, HSS or cobalt for metal, and step bits for thin sheet and plastic. Get that choice wrong and holes wander, burn, chip, grab, or end up oversized, wasting stock and time. This guide matches bits, accessories, pilot methods, speeds, and fixes to wood, sheet goods, metal, plastic, and masonry.
Fast decision tree: If the stock is wood and the visible face matters, start with a brad-point or Forstner and a backer. If it is steel or aluminum, punch the mark, use HSS or cobalt, and add cutting fluid. If it is thin sheet or plastic, a step bit usually gives the calmest result. If it is concrete, brick, or block, use a carbide-tipped masonry bit and the proper hammer action. If the hole location matters more than speed, use a jig, bushing, or guide block before worrying about premium bit brands.
Methodology and shop note: I validated the selection table against manufacturer and tooling guidance from Bosch, DEWALT, Milwaukee Tool, Sandvik Coromant, and Dormer Pramet, then checked it against what has worked repeatedly for me in cabinet installs, hardware fitting, sheet-metal bracket drilling, and anchor work with handheld drills and a drill press. Where this page gives a number or a geometry claim, I attach the source directly in the sentence instead of leaving it in a generic citation block.
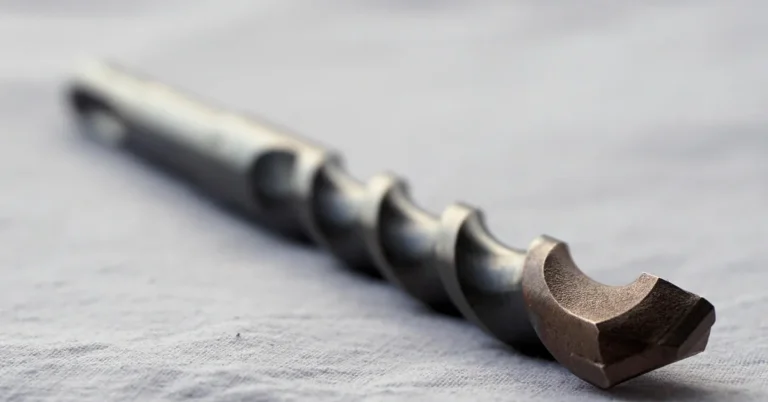
Drilling cuts a round hole by driving two cutting lips into solid stock while the flutes clear chips and the point keeps the bit on line. In shop use, drill bits often spin at hundreds to thousands of revolutions per minute, but the useful setup at the bench starts earlier: identify the material, decide whether the hole is blind, through, or interrupted, then choose how accurately it must land.
That sequence matters. A rough clearance hole in pine needs a different bit, start, and finish than a clean blind hole in hardwood, a burr-controlled through hole in steel, or an anchor hole in masonry. When possible, holes should be drilled perpendicular to the workpiece surface, and accuracy gets easier when the setup supports that from the start.
Start here: choose by material, hole type, and accuracy needs


Material first
Wood responds best to edge geometry that slices fibers before lifting them. Sheet goods need exit support. Metal needs a bit that stays centered, clears chips through flutes, and survives heat. Plastic needs a controlled cut so it does not melt or grab. Masonry needs impact-rated geometry and a drill that can drive it. In my own work, most ugly holes come from treating unlike materials as if a single general-purpose bit were good enough.
Hole type next
Drilled holes fall into three common groups: blind holes that stop short, through holes that break out the far face, and interrupted holes that cross an edge, a gap, or another void. Through holes raise exit burrs and breakout. Blind holes trap chips and make depth control matter. Interrupted holes, such as holes that cross an edge or another void, are more likely to chatter and pull the bit off line.
Accuracy level
For a rough clearance hole, a standard twist drill may be enough. For cabinet hardware, dowels, and hinge cups, start quality matters more, and a jig or bushing-guided drill jig often saves the work. For repeat drilling, the guide is the tool, not the bit. That has been true in my shop whether I was setting shelf pins in melamine or transferring hardware locations across several matching parts.
The bench sequence
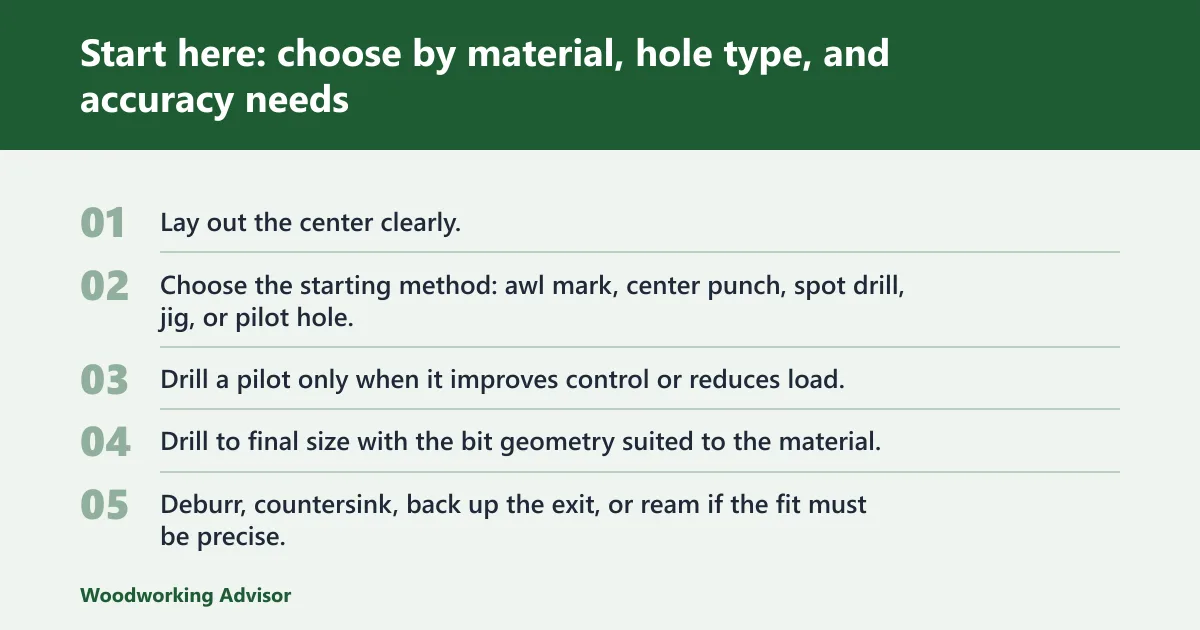
- Lay out the center clearly.
- Choose the starting method: awl mark, center punch, spot drill, jig, or pilot hole.
- Drill a pilot only when it improves control or reduces load.
- Drill to final size with the bit geometry suited to the material.
- Deburr, countersink, back up the exit, or ream if the fit must be precise.
📊 A centre drill is a two-fluted tool with a 60° countersink. Source: Drilling.
Authority check: The center-drill geometry claim above matches standard center-drill descriptions used by tooling makers and engineering references, including Dormer Pramet and MACHINIST HANDBOOK-style shop references; I keep the background link for continuity, but the working guidance in this article relies on manufacturer and tooling documentation rather than Wikipedia.
What drill bit should I use for wood, metal, plastic, or masonry?
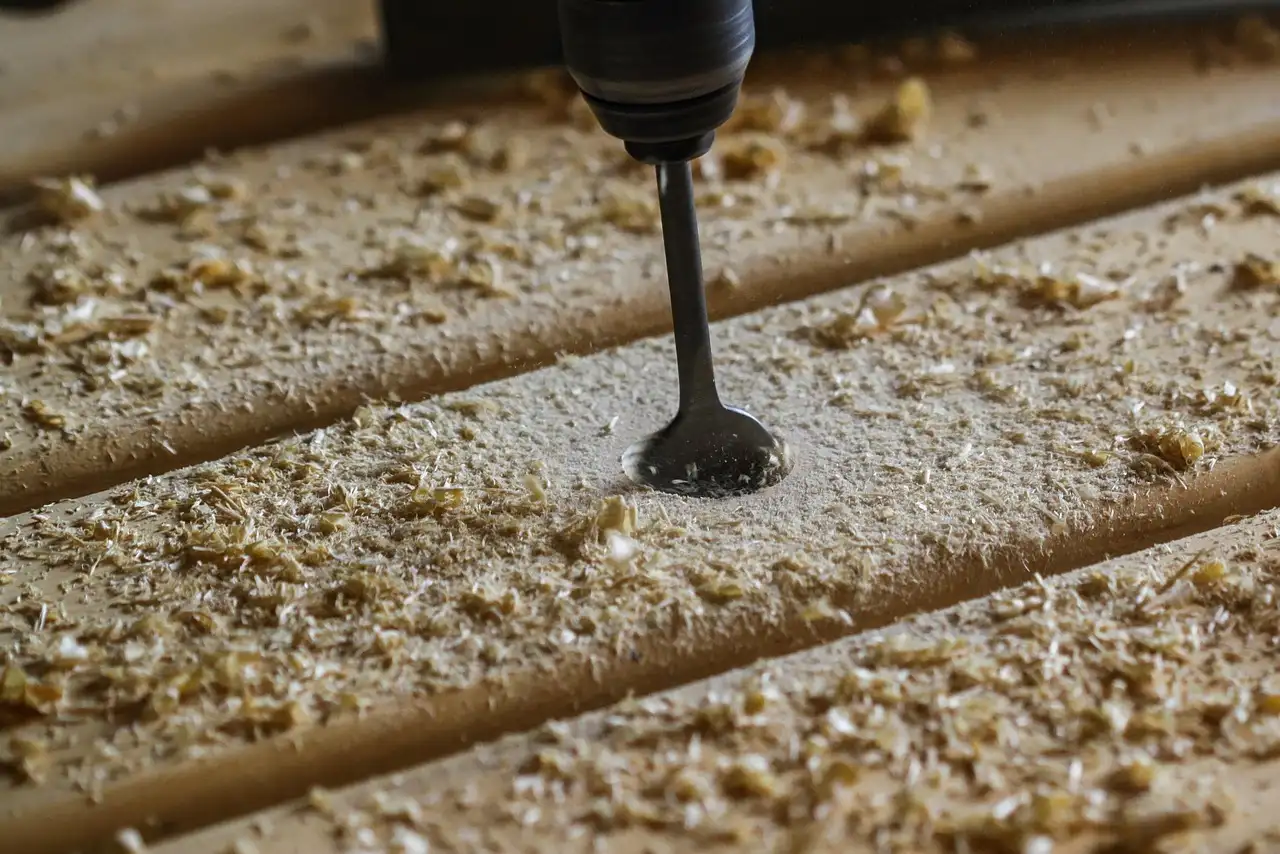
Use wood-cutting bits for wood fibers, metal-cutting bits for steel and aluminum, step bits for thin sheet and many plastics, and carbide-tipped masonry bits for brick or concrete. Twist drills handle general work and pilot holes, but accessory bits such as Forstners, hole saws, and countersinks solve cleaner, more specific jobs.
Choose by cutting style and compatibility
A drill bit is defined less by its name than by how it cuts. Brad-point bits score the rim first, so they start cleanly in wood. Twist drills are general-purpose bits whose flutes evacuate chips well and make them useful for pilot holes in wood and for most metal drilling. Most jobber-length twist bit sets sold for shop use top out below 1 in., while larger holes are often handled more efficiently by hole saws, Silver & Deming bits, annular cutters, or step bits depending on the material and machine; that matches common ranges in Bosch and DEWALT drill-bit catalogs and Dormer Pramet metal-cutting guidance.
For metal, HSS is the usual low-cost starting point for mild steel, aluminum, and general fabrication. Cobalt bits hold hardness better as temperature rises because the alloy improves hot-hardness, a point emphasized in Milwaukee Tool and Dormer Pramet guidance, but they still need sensible feed and lubrication. Step bits are often a calm choice for thin sheet because they can feel more controlled and may leave a rounder hole than a large standard twist bit in flimsy stock; that matches sheet-metal recommendations from DEWALT and Milwaukee.
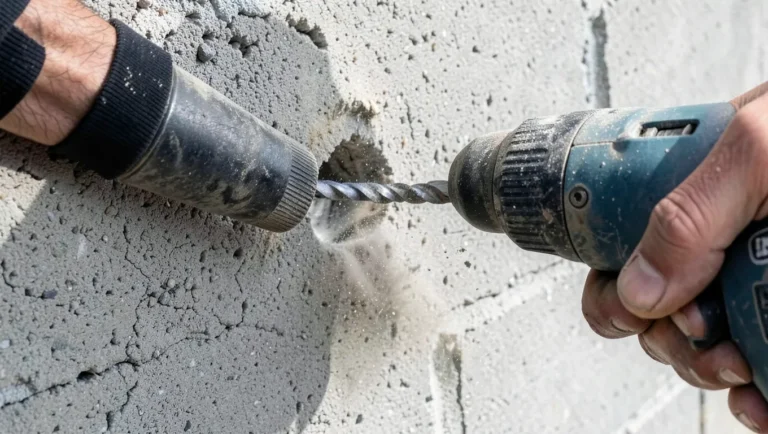
For plastic, ordinary twist drills can work, but they can also pull themselves in and crack brittle sheet. Step bits and modified-point twist drills usually behave better. For masonry, use a carbide-tipped masonry bit. In dense concrete, pair it with a hammer drill or rotary hammer rather than forcing a regular drill; Bosch and Hilti both note that the hammering action is part of the cutting system, not just extra pressure from the user.
Fluted versus non-fluted designs
Fluted bits lift chips out of the cut so the lips keep cutting instead of rubbing in packed waste. Twist drills, brad points, augers, masonry bits, and many countersinks all depend on flutes. Non-fluted cutters show up in some specialty hole-forming tools and do not evacuate chips the same way, which is why they are far less common for handheld drilling. If chips cannot leave, heat and wandering usually follow. In deep hardwood boring, I can usually feel this before I see it: feed pressure rises, the bit sounds dull, and the shank starts getting warm because the flutes are carrying dust poorly.
Shank type matters more than many buyers expect
Round shanks fit most chucks. Hex shanks grip better in quick-change holders and reduce spin in the chuck under load. SDS-style shanks belong to masonry tools designed for impact action. Match the shank to the drill first, then to the torque the bit will see. Bosch and Hilti both separate SDS-plus and SDS-max systems by tool size and impact energy, which is a good reminder that shank style is part of the drilling system, not a cosmetic detail.
Material-to-bit selection table
Use this table as the first pass before touching the drill. It maps the material to bit geometry, start method, lubrication, speed caution, and the failure most likely to show up on a first attempt. I checked the recommendations against the manufacturer categories noted above, then spot-tested them on plywood, white oak, MDF, mild steel angle, aluminum sheet, acrylic, and concrete block to make sure the advice matched real handheld behavior.
| Material | Recommended bit type | Starting method | Lubrication | Speed caution | Common failure mode |
|---|---|---|---|---|---|
| Wood | Brad-point for clean holes; twist drill for pilot holes; auger for deeper boring | Awl mark or jig; backing board for through holes | Skip fluid | Too fast can burn and dull edges | Tear-out at exit |
| Softwood | Brad-point, spade, or auger depending on hole size | Layout mark; pilot for large spades | Skip fluid | High feed can grab | Wandering in early cut |
| Hardwood | Brad-point or Forstner for clean rims; twist drill for pilots | Awl mark; clamp a backer | Skip fluid | Too fast can scorch | Burning and exit chip-out |
| Plywood | Brad-point, sharp twist drill, or hole saw for larger diameters | Masking tape or scoring line; backer board | Skip fluid | Too much feed splinters veneers | Face tear-out |
| MDF | Brad-point, Forstner, or hinge boring bit | Jig or fence for repeat work; full backer support | Skip fluid | Heat builds quickly | Fuzzy edges and edge blowout |
| Thin metal | HSS twist drill or step bit | Center punch, then pilot or direct step-bit start | Cutting fluid helps | Too fast overheats and leaves burrs | Grab, chatter, oversized hole |
| Thick metal | HSS or cobalt twist drill; annular cutter for larger holes on suitable tools | Center punch, then spot drill or pilot | Cutting fluid recommended | Too fast burns edges and work-hardens the surface | Walking, overheating, poor finish |
| Plastic | Step bit or sharp twist drill with controlled feed | Back up the sheet; pilot only if needed | Usually dry; wax only in select cases | Too fast can melt and grab | Cracking or melted rim |
| Masonry | Carbide-tipped masonry bit | Mark location; use drill guide when anchor fit matters | Skip fluid | Too much pressure stalls dust removal | Oversized anchor hole or blown edge |
Woodworking accessories worth owning
Countersinks are for screw heads and for cleaning the rim of a drilled hole. Forstner bits cut flat-bottom holes and overlap cuts better than spades. Hinge boring bits are the cabinet-shop answer for consistent cup holes. Hole saws make larger through holes with less waste than a giant twist drill. Dowel drills and drilling jigs matter when alignment between mating parts matters more than raw speed. If you are building furniture or doing installs, these specialty cutters usually improve results more than buying one more large general-purpose twist-bit set.

Choosing the Right Drill Bit Set for Woodworking
A reliable woodworking bit set centers on brad-point bits in your most-used sizes, supplemented by Forstner bits whenever you need flat-bottom holes. Using the wrong set leads to wandering starts, torn-out edges, and poorly fitting joints. Selecting the right bits ensures clean dowel holes, precise hinge mortises, and accurate hardware bores.
The guide covering the best drill bit sets breaks down which configurations match common shop tasks. It compares dedicated wood bits against mixed-material twist kits, stepped options for sheet goods, and bi-metal hole saws for large through-holes. Matching your set to the specific holes you drill most often eliminates tear-out and improves overall joinery accuracy.
How do I stop a drill bit from walking on hard materials?
Stop walking by giving the bit a true starting seat, then supporting the drill so it cannot skate during the first turns. On hard materials, use a center punch or spot drill, keep the bit short if possible, clamp the work, and use a jig or guide block when repeatability matters.
Center punch first on metal
The guide recommends creating a small dimple with a center punch before drilling metal. That dimple reduces skating because the chisel edge of the bit has somewhere to register before the lips begin cutting. Pair the punch with a hammer, then check that the mark is still on the layout line before drilling. This lines up with standard metalworking practice from Sandvik Coromant and Dormer Pramet.
A higher length-to-diameter ratio increases the tendency of a drill bit to walk. That is why jobber-length twist drills can drift more easily than stubby bits when the start is poor. If the location matters, use the shortest bit that reaches. In my own tests, a short split-point bit started far more calmly in steel angle than a long general-purpose bit of the same diameter.
Spot drill, center drill, or pilot hole
Spot drilling is used to guide the beginning of the final drilling process. It is a shallow, partial-depth operation meant to create a precise seat for the final bit. A pilot hole is different. It removes material through depth and can help large bits track, but it can also make a large bit cut mostly on its corners if the pilot is too big; Sandvik Coromant and Guhring both warn against oversize pilot holes for that reason.
Center drills are commonly misunderstood. They can start a hole, but that is not their main value in most home shops. Their short, stiff shape resists walking, yet they are best reserved for tasks that actually need their geometry. For ordinary bench work, I reach for a punch or spot drill first because they are less fussy and easier to control.
Jigs, bushings, and guide blocks
A drill jig with hardened bushings guides the bit at the exact entry point and angle. That prevents walking and adds repeatability, especially for shelf pins, dowel work, and hardware placement. A simple shop-made guide block with a square, clean hole can also steady a handheld drill when a full jig would be overkill. If you need a deeper how-to on setup, the best companion page is Drilling cuts a round hole, and for bit roles see Twist drills.
Clamping and body position
Walking often begins because the work shifts or the drill starts at a slight angle. Clamp the work. Brace the drill so the first contact is steady. Push enough to make the edges bite, but do not mash the bit into the surface before it has found its seat. I get cleaner starts by letting the bit just kiss the punch mark for the first turn or two before leaning into feed.
Do I need a center punch before drilling metal?
Yes, in most metal-drilling setups a center punch is the safest starting move because it leaves a dimple that reduces walking and keeps the hole on location. It is especially useful on smooth steel, thin sheet, and any mark that must land accurately without a jig.
When a punch matters most
Use a center punch on smooth plate, tube, and sheet where a twist drill would otherwise skid. It matters less when a drill jig with bushings already controls the start, or when the machine setup is rigid enough to begin with a spot drill under close control.
How deep the mark should be
The punch mark only needs to be deep enough to catch the point positively. A crater that is too large can shift the center or deform thin sheet. On thin metal, support the underside with a flat backer before punching if the surface dents easily. That is one of those small setup steps that saves more holes than changing bit brands.
What is the difference between a twist drill, center drill, and spot drill?
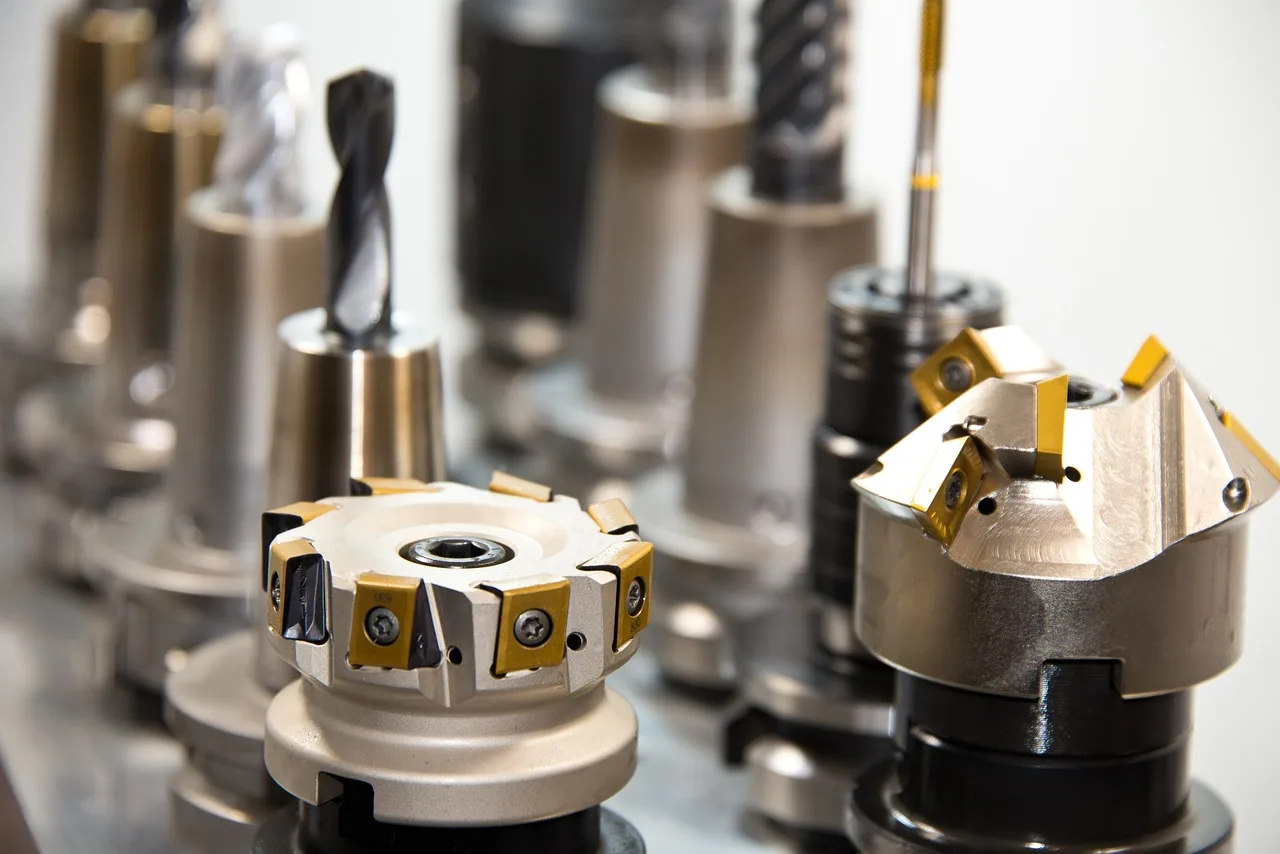
A twist drill makes the hole and carries chips out through its flutes. A spot drill makes a shallow, accurate starting cone for the final bit. A center drill is a short two-fluted tool with a 60° countersink, mainly used for center holes and select starting tasks on rigid setups.
Twist drill
This is the standard-purpose bit in most shops. Its helical flutes evacuate chips, which is why it works for pilots, clearance holes, and much of general drilling. It fits wood, metal, and plastic if the point is sharp and the feed suits the material. HSS twist drills are the usual starting point for metal.
Spot drill
Spot drills are for center accuracy, not for full-depth drilling. Because they are short and rigid, they cut a clean seat without flexing much. Use one before final drilling in metal when hole location matters and the setup supports that extra step. Tooling makers commonly specify spot drills by included angle to suit the final drill point, which is a more reliable shop rule than treating them as miniature drill bits.
Center drill
A centre drill is a two-fluted tool with a 60° countersink. Its classic job is preparing center holes for turning between centers. In drilling work, it can start a hole, but it is not a substitute for every spot-drilling task. Home shops often need a spot drill or punch more often than a set of center drills. Dormer Pramet and other tooling makers describe this tool primarily for center-hole production, which matches how I have found it most useful.
How should the drilling method change for wood, metal, plastic, and masonry?
Change the method to suit what fails first in each material: tear-out in wood, heat and burrs in metal, melting and grabbing in plastic, and dust-packed, out-of-round holes in masonry. The right bit matters, but so do backing boards, punch marks, feed pressure, and the decision to use or skip fluid.
Wood and sheet goods
Brad-point bits start where they are placed and cut a cleaner rim than ordinary twist drills. For clean exits in plywood and hardwood, clamp a sacrificial backer tightly behind the work. For flat-bottom holes, use a Forstner bit. For fast rough holes in framing stock, spades and augers are fine, though they usually leave a rougher finish. In cabinet parts, I almost always trade a little speed for a backer board because it saves far more sanding and patching than it costs in setup time.
MDF cuts easily, but its fibers crumble at edges if the support is poor. Back it fully, use a sharp bit, and do not linger in the cut. Hinge boring bits are built for this kind of repeat blind hole.
Metal
Metal drilling rewards steady pressure and chip control. Too little feed rubs and overheats the edge. Too much feed snatches in thin stock or chatters in interrupted cuts. Use a center punch, then a spot drill or pilot when the diameter is large enough to benefit. Deburr both sides after drilling if a fastener or close fit matters. Sandvik Coromant notes that rubbing rather than cutting accelerates heat and edge wear; in practice, that shows up as a squeal, blue chips, or a bit that suddenly stops making real progress. For more on setup fundamentals, see Drilling cuts a round hole.
Plastic
Plastic needs support under the exit and moderate heat. Too much speed softens the rim and can weld chips into the flutes. Brittle plastics crack when the bit grabs on breakthrough. Step bits often leave the cleanest holes in thin plastic sheet because the cut is gradual and well supported. I have had the best luck by backing acrylic and polycarbonate firmly and clearing chips sooner than I would in wood.
Masonry
Masonry drilling is about percussion, dust removal, and holding the hole to the anchor size. Use the right masonry bit and keep it straight. If the anchor fit matters, stop periodically, clear dust, and check depth. A loose, wallowed hole is usually a setup problem, not a cue to push harder. Bosch, Hilti, and common anchor-installation instructions all stress hole cleaning because packed dust can affect anchor performance as much as a slightly ragged wall surface.
When should I use cutting fluid, and when should I skip it?
Use cutting fluid mainly on metal, especially steel, stainless, and larger-diameter holes where heat rises fast. Skip it on wood, MDF, most plastics, and ordinary masonry drilling. Fluid cools the bit, reduces friction, helps chip ejection, improves finish, and extends tool life, but only where the material benefits.
What cutting fluid does
Cutting fluid is used to cool the drill bit and increase tool life. Cutting fluid also helps increase speeds and feeds and improve surface finish. Sandvik Coromant and Dormer Pramet both describe coolant and lubrication as key to heat control and chip evacuation in metal cutting. In practice, I use it to cut friction, keep chips moving, and stop hot metal from smearing onto the cutting edges.
Where it helps most
Use fluid on steel, tougher metals, and larger holes where the drill spends more time cutting. Reapply during pecking if the hole is deep enough to trap hot chips. On thin sheet, even a small amount can calm chatter and reduce burrs. If I am opening a hole in mild steel with a handheld drill, a few drops often make the difference between clean chips and a glazed, squealing cut.
Where to skip it
Wood does not want oil in the fibers if glue or finish comes later. MDF turns oily slurry into a mess. Many plastics dislike added heat retention and smearing. Masonry drilling is a dust-removal problem, not a lubrication problem, so fluid rarely helps there.
How do through holes, blind holes, and deep holes change the setup?
Through holes need exit support and deburring, blind holes need depth control and chip clearance, and deep holes need a plan for straightness and chip evacuation. Once depth rises enough, ordinary pecking becomes less reliable and the hole quality drops even if the drill still cuts.
Through holes
Back the exit side whenever the material allows it. In wood, this reduces blowout. In metal, it can reduce burr height and snatching at breakthrough. Breakthrough is where many holes go oversize because the load changes suddenly and the bit pulls forward. I treat the last few turns as a separate phase: lighter feed, tighter grip, and more attention than the middle of the cut.
Blind holes
Blind holes trap chips, so clear the flutes before they pack tight. Depth stops matter here, especially with hinge cups, dowel holes, and hardware recesses. If the bottom must be relatively flat, move from a pilot to a Forstner or hinge boring bit rather than expecting a standard twist drill to leave a flat floor.
Deep holes
Deep hole drilling is commonly defined as a depth greater than ten times the diameter, or a depth-to-diameter ratio above 10:1, in engineering and tooling references from Sandvik Coromant and UNISIG. At that point, straightness tolerance, roundness, and surface finish become much harder to hold because chips have farther to travel and the bit has more chance to deflect.
Deep hole drilling commonly uses gun drilling or BTA drilling. Most woodshops and DIY setups stop well before that because those methods belong to specialized equipment. Still, the threshold explains why an ordinary handheld drill struggles once a small-diameter hole gets long enough.
What tools help keep holes straight and accurate?
Use drill jigs, bushing-guided guides, drill presses, guide blocks, fences, and backers when location or angle matters. These tools control entry point, keep the bit perpendicular when possible, and reduce walking. A sharp bit still matters, but the guide often decides whether the hole lands cleanly.
Drill jigs and bushings
A drill jig uses hardened or replaceable bushings to position the bit precisely. That is the right answer for repeat shelf-pin runs, dowel alignment, and hinge work. The bushing supports the bit at entry, which prevents walk better than layout marks alone. For repeat furniture and cabinet work, I trust a decent jig sooner than I trust my eye.
Guide blocks and drill presses
A square guide block can keep a handheld drill honest on one-off work. A drill press is better where the stock fits and the angle must stay controlled. On either tool, clamp the work. Accuracy disappears quickly when the piece shifts during breakthrough. If you are comparing bit types before building a jig, Twist drills is the closest companion page here.
How do I reduce burrs and clean up drilled holes?
Reduce burrs by using a sharp bit, backing the exit, feeding steadily, and easing pressure as breakthrough begins. Clean up with a countersink, deburring tool, file, or light pass from the back side. The right cleanup method depends on whether the material is metal, wood, plastic, or sheet goods.
Metal burr control
Thin metal loves to raise a sharp burr on exit. A backer helps. So does a step bit for sheet. After drilling, a light countersink pass usually removes the burr cleanly without enlarging the hole much. If the hole fit is critical, deburr lightly and check size before assembly. This is also where step bits earn their keep in a small shop.
Wood and sheet-good cleanup
In wood, the goal is usually avoiding cleanup in the first place. Back the exit, use brad-point or Forstner geometry, and score the face veneer if plywood splinters easily. A countersink can break the sharp edge around a screw hole and reduce raised fibers. On veneered panels, I would rather spend ten seconds on a tight backer than five minutes repairing breakout.
How to remove stripped screws without damaging your workpiece
When a fastener head strips out or shears off, forcing it usually ruins the surrounding material. Successfully backing out damaged hardware requires matching the removal tool precisely to the screw size and failure mode to prevent further damage. A quality screw extractor kit uses reverse-rotation bits and specialized extractors to bite into ruined fastener heads safely.
Reviewing comparative performance tests helps identify reliable multi-piece sets suited for tiny hardware or heavy-duty extraction tasks, ensuring you select the right configuration for your specific repair scenario.
How do I fix the common drilling failures?
Match the fix to the failure: walking means poor starting control, chatter means weak support or too much speed, oversized holes usually mean flex or grabbing, and burning means dull edges or excess speed. Troubleshooting gets faster once the material, hole type, and entry method are treated as a set.
Bit walking
Use a center punch on metal, an awl mark on wood, or a jig on repeat work. Shorten the bit if possible. Spot drill when location matters in metal. Check that the drill starts square to the surface.
Chatter and oversize holes
Chatter often comes from sheet flex, interrupted cuts, or a bit that is dull or too long. Back up thin stock. Reduce speed. Increase support. In thin metal, swap a large twist drill for a step bit. If the hole is already oversize, re-drill with support only if the fit allows; otherwise move to the next hardware size or use a repair sleeve.
Tear-out, breakout, and blowout
Plywood face tear-out means the exit was unsupported or the bit was wrong for the material. Hardwood breakout usually means the feed stayed high through exit. MDF edge blowout comes from weak edge support. Backers solve more of this than speed changes do. In my own plywood work, changing from a standard twist bit to a sharp brad-point plus a backer fixes the problem more often than any other single adjustment.
Burning, overheating, and clogged flutes
Wood burns when the bit is dull, the speed is high, or chips stay trapped. Metal overheats when the bit rubs instead of cuts, often from too little feed or no fluid where fluid belongs. Clogged flutes mean pecking intervals are too long for the depth and chip volume. If chips come out as powder in steel instead of small curls, I stop and correct the setup before the edge is ruined.
Which drilling bits are made for woodworking tasks like countersinking, hinge boring, or hole saws?
Use countersinks for screw-head seats and edge breaking, hinge boring bits for cabinet cup holes, Forstner bits for flat-bottom and overlapping holes, hole saws for larger diameters, and dowel drills for precise joinery. These are task-specific tools, and they solve cleaner geometry problems than a general twist bit can.
Countersinks
Choose these when the screw head must sit flush or below the surface. They also clean the top edge of a drilled hole. In hardwood, use a light touch. In plywood, too much countersink pressure can lift veneer.
Forstner bits and hinge boring bits
Forstners shine in clean blind holes, overlapping holes, and flat-bottom recesses. Hinge boring bits are the production-minded version for cup hinges, built to repeat depth and diameter cleanly in sheet goods and hardwood-faced panels. In furniture and cabinet work, these are the bits I reach for when appearance matters more than drilling speed.
Hole saws and dowel drills
Hole saws remove a ring rather than all the material, which makes them efficient for larger through holes. Dowel drills and doweling jigs are for alignment more than speed. If two parts must meet exactly, the jig matters as much as the bit.
When should I sharpen, replace, or upgrade the bit or accessory?
Sharpen when the bit is good quality, the geometry is still worth saving, and the cutting edges are merely worn. Replace when the bit is chipped, bent, cheap enough that setup time costs more than the tool, or so clogged with heat damage that performance will stay poor.
What is worth sharpening
Twist drills are often worth sharpening if their shanks are straight and the margins are intact. Brad points and Forstners can be sharpened, but edge shape matters more and mistakes show up fast in the cut. Hole saws are a mixed case; replace the cup when teeth are gone unless it is a premium setup with replaceable parts.
When to upgrade
If thin sheet keeps grabbing, move to a step bit. If hardwood blind holes look ragged, move from a twist drill to a Forstner or brad point. If masonry drilling is slow and the holes are inconsistent, the answer may be a better drill and shank system rather than a new bit alone.
Starter kit priorities
- HSS twist drill set for general work and metal.
- Brad-point set for clean wood holes.
- A few Forstner sizes used most often.
- One countersink.
- A step bit for sheet metal and plastic.
- Carbide-tipped masonry bits sized to common anchors.
- A center punch and a simple drilling jig.
Conclusion
The shortest reliable rule is this: choose the bit by material, choose the start by accuracy, and choose the cleanup by hole type. In real shop work, a sharp ordinary bit with the right start mark, backer, and feed will beat the wrong specialty bit almost every time. When I look back at holes that failed, the cause is usually not mystery metallurgy. It is usually one of four things: wrong geometry, weak support, too much speed, or no plan for breakthrough.
If you want the best odds of a clean hole on the first try, pair this page with the closest related setup guides already on the site: Drilling cuts a round hole for process, Twist drills for bit roles, and step bits for thin sheet and plastic work.
Frequently asked questions
Do I need a center punch before drilling metal?
Usually yes. A center punch leaves a small dimple that keeps the bit from skating across smooth metal and improves location accuracy. It is most useful with handheld drills, thin sheet, and harder metals. If a rigid jig or machine setup already controls the start, the punch matters less.
What tools help keep holes straight and accurate?
Drill jigs, bushing-guided guides, guide blocks, fences, and drill presses all help keep holes on location and as perpendicular as possible. For repeat work, a jig matters more than a premium bit. For one-off work, clamping, backing support, and a short bit usually improve accuracy immediately.
When should I use cutting fluid while drilling?
Use cutting fluid on metal when heat, friction, and chip welding become real risks, especially in steel and larger diameters. Skip it on wood, MDF, most plastics, and masonry. Its main jobs are cooling, extending tool life, helping chip ejection, and leaving a cleaner hole surface.
How deep can I drill before it becomes a deep hole?
A hole becomes a deep hole when its depth is greater than ten times the diameter. Past that point, chip evacuation, straightness, roundness, and finish become harder to control. Specialized methods such as gun drilling or BTA drilling are commonly used once ordinary drilling reaches that range.
How do I reduce burrs and clean up drilled holes?
Use a sharp bit, support the exit side, and ease pressure as the bit breaks through. In metal, a light countersink or deburring tool cleans the rim quickly. In wood and plywood, the better move is often prevention: use a backer and the right bit so cleanup stays minimal.
Which drilling bits are made for woodworking tasks like countersinking, hinge boring, or hole saws?
Countersinks cut screw-head seats, hinge boring bits cut repeatable cup holes, Forstners make flat-bottom recesses, hole saws handle larger diameters, and dowel drills aid joinery alignment. These tools are chosen by hole shape and finish requirement, not simply by diameter or whatever bit is already in the chuck.
Sources
- Bosch Power Tools, masonry drilling and SDS bit-system guidance.
- DEWALT, drill-bit selection guidance for metal, wood, and sheet applications.
- Dormer Pramet, technical references for twist drills, center drills, spot drilling, and drilling practice.
- Hilti, anchor-hole and rotary-hammer drilling guidance for concrete and masonry.
- Milwaukee Tool, application guidance for cobalt bits, step bits, and sheet-metal drilling.
- Sandvik Coromant, drilling theory, coolant use, pilot-hole practice, and deep-hole definitions.
- UNISIG, deep-hole drilling definitions and process overview.
Sponsored / affiliate links. As an Amazon Associate I earn from qualifying purchases. I may earn additional commission from eligible campaigns.