How to Repair Scratches on Hardwood Floors (Fix by Scratch Depth)
To repair scratches on hardwood floors, first work out how deep each one goes, because a scratch in the finish and a scratch in the wood need different fixes. The wrong product can cloud a polyurethane coat, and sanding the wrong way can cut through an engineered floor’s thin top layer. Below you get a 3-step depth test, the right repair for each depth, and which products are safe on your floor’s finish. For flooring basics, see our wood flooring guide.
How to Fix Scratches by Scratch Type
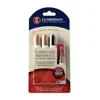 |
Best Touch-Up Kit Pick Guardsman Furniture Repair Kit (3 Markers + 3 Wax Sticks), $7.70 It covers the first two repairs in the depth test below: markers for scratches that have gone through the finish, and wax filler sticks for the deeper ones you can feel with a fingernail.
|
As an Amazon Associate we earn from qualifying purchases.
A hardwood floor has two layers that matter for repairs: the clear finish on top and the wood underneath. Every fix on this page falls into one of three jobs: hide or buff a mark in the finish, color and re-seal a scratch that reached the wood, or fill a groove that removed wood. The table below matches each depth to its job.
| Scratch depth | What it looks like | Fingernail test | Best fix |
|---|---|---|---|
| Finish only (surface scratch or scuff) | Pale or hazy line, most visible in raking light; wood color looks unchanged | Glides over it | Clean, then buff, polish, or a matching marker |
| Through the finish into the wood | Lighter or darker line than the surrounding wood; may turn darker when wet | Catches slightly | Color-matched stain marker, then seal with matching finish |
| Gouge (wood is missing) | Visible groove or dent with a rough edge | Catches hard | Fill with wax stick or stainable filler, level, color, seal |
| Widespread scratching | Hundreds of fine lines across a traffic area | Mostly glides | Screen and recoat, or sand and refinish the floor |
The 3-Step Depth Test: How Deep Is the Scratch?
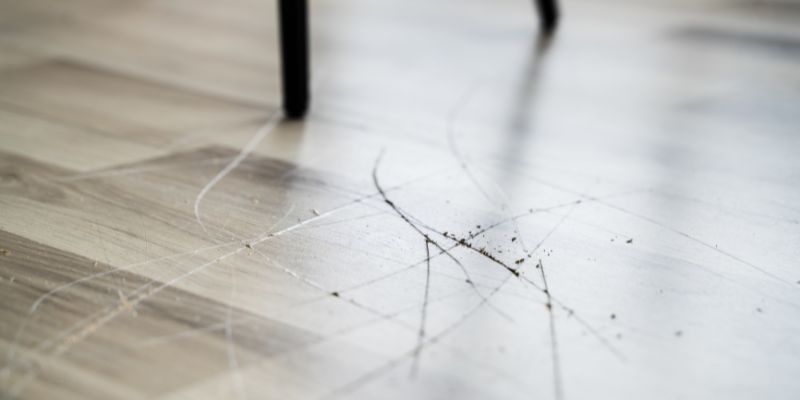
Most guides tell you to match the repair to the scratch but never say how to tell which layer you are looking at. These three checks take about two minutes and decide everything that follows.
- Look at it in raking light. Crouch down and look along the floor toward a window, or hold a phone flashlight low and flat. A pale, hazy line that disappears when you look straight down is usually a finish scratch.
- Run a fingernail across it. Drag your nail across the scratch, not along it. If the nail glides, the damage is in the finish. If it catches, the wood is involved.
- Check the color. Wipe the spot clean and dry first. A scratch that shows bare, lighter wood has cut through the finish. A scratch that is the same color as the floor with a cloudy edge has not.
If you are still unsure, put a single drop of water on the scratch and blot it up after a minute. On a sealed floor the drop beads up. If the wood under the scratch darkens, the finish is broken there, so treat it as a wood-level scratch and re-seal it after coloring. Use only a drop and dry the spot, because standing water is what damages hardwood.
How to Repair Surface Scratches in the Finish
These are the easiest scratches to fix, and they are also the most common. Clean the area first with a cleaner made for hardwood and a soft cloth, because grit trapped under a repair shows up as a rough patch. If you need a cleaner, see our guide to a homemade hardwood floor cleaner by finish type. Let the spot dry fully, then pick one of these:
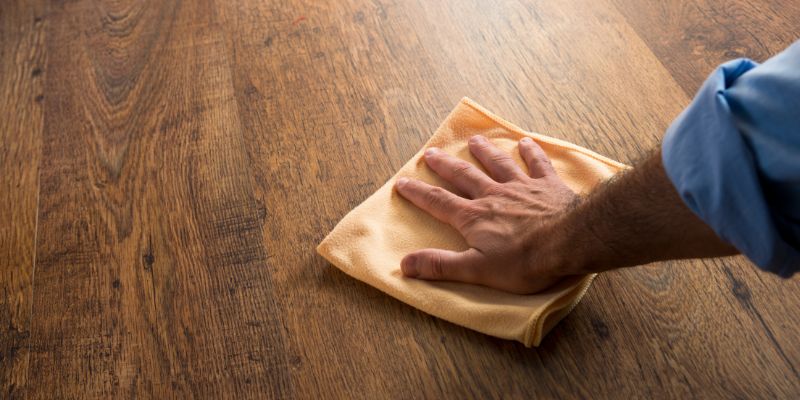
- Buff it. A dry microfiber cloth rubbed along the grain evens out light scuffs that are really just residue on the finish.
- Use a matching stain marker. Draw along the scratch, wipe off the excess right away, and blend with a dry cloth. Minwax, for example, sells touch-up markers in shades such as Golden Oak, Provincial, Early American, and Ebony, so you can match most mid-range floor colors. Our guide to the wood finish stain marker covers color matching in detail.
- Use a wax filler stick on a waxed floor. Rub it across the scratch and buff it. On a floor sealed with polyurethane, wax can leave a dull patch, so test a hidden spot first.
- Try the walnut trick only as a quick cosmetic cover. Rubbing a fresh walnut kernel along a light scratch leaves natural oils that darken it. It hides the mark for a while but does not repair anything.
For more ways to cover marks without refinishing, see our roundups on how to hide scratches in wood floors and how to cover scratches in wood floors. If you prefer to skip sanding on bigger marks, our no-sanding scratch removal guide lists four options.
How to Fix Scratches That Reach the Wood
When the fingernail catches, the clear finish no longer protects that strip of wood, and moisture can get in. The repair has three parts: color, fill if needed, and seal.
- Clean and dry the scratch. Remove dust with a soft brush, then wipe with a barely damp cloth and let it dry.
- Smooth the edges if they are raised. Use 220-grit sandpaper wrapped around a block and sand lightly along the grain. Stop as soon as the raised edge is flat.
- Color the bare wood. Apply a stain marker or a tiny amount of matching stain with a fine artist brush. Build the color in thin layers, because it is easy to add and hard to remove.
- Fill a groove if one remains. Press a wax filler stick or a stainable wood filler into it, then scrape level with a plastic putty knife or an old card.
- Seal the repair. Brush on a thin coat of the same type of finish as your floor (see the finish table below) and follow the recoat time on the can. Skipping this step leaves the repair exposed to moisture and traffic.
Deep Gouges and Dents
A gouge removes wood, so color alone will not hide it. Fill slightly proud of the surface, let it harden according to the product label, then level it with fine sandpaper and color it to match. Wax sticks are quick, but they are a cosmetic fill and sit softer than the wood. A hardening filler lasts longer on high-traffic spots. A dent where the fibers are crushed but not cut is a different problem; see how to remove dents from hardwood floors.
Repair Method by Finish Type
The product that works on one floor can damage another, so check which finish you have before touching the scratch. Water-based polyurethane tends to look clear and plastic-like, oil-based polyurethane has a warmer amber tint, a wax finish feels slightly soft and can be marked with a fingernail, and oiled or hardwax floors look flat and matte with no visible film.
| Finish type | Safe repair methods | Avoid |
|---|---|---|
| Oil-based polyurethane | Stain markers, wax fill sticks, wood filler with matching stain | Water-based refresher coats, which may not bond well |
| Water-based polyurethane | Color-matched touch-up products made for water-based finishes | Oil-based products that can yellow or haze the clear coat |
| Wax finish | Wax fill sticks, the walnut trick, re-waxing the whole panel to blend | Vinegar-based mixes and film-forming refresher coats, which will not bond to wax |
| Oiled (hardwax oil) | Spot-sand and re-oil the affected boards | Film-forming products such as polyurethane, which will not bond evenly over oil |
Before you recoat a repaired spot with a film finish, it also helps to know how a full coat is applied and how long it needs to cure; our guide to varnishing wood floors covers drying times and safety.
Scratches on Engineered Hardwood: Know Your Wear Layer
Engineered hardwood has a real-wood top layer glued over plywood or fiberboard, and that top layer is thin. According to retailer and flooring guides, each sanding removes roughly 1 mm of wood, and the National Wood Flooring Association’s stated threshold is that a wear layer thinner than 3/32 inch (about 2.5 mm) should not be sanded. That is why this page keeps recommending markers, wax, and spot fills for engineered floors instead of aggressive sanding.
| Wear layer thickness | Typical sandings | What that means for scratches |
|---|---|---|
| Under 2.5 mm (3/32 in) | None, per the NWFA threshold | Use markers, wax, and filler only; call a pro for deep damage |
| 2 mm | About 1 to 2 times | One careful spot repair or a light screen and recoat |
| 3 mm | About 2 to 3 times | Spot-sanding a deep scratch is possible; avoid sanding the whole floor often |
| 4 mm or more | About 3 to 4 times | Behaves more like solid hardwood for repairs |
Check the wear layer on the box, the manufacturer’s spec sheet, or by looking at a board edge at a threshold or vent opening. If you cannot find it, treat the floor as unsandable.
When to Screen and Recoat, Sand, or Call a Professional
If scratches cover a whole traffic area, spot repairs will look patchy. Screening and recoating buffs the old finish with an abrasive screen and adds a fresh coat, which fixes scratches that live only in the finish without removing wood. Scratches that reach the wood across a large area need sanding and refinishing, which is hard to do evenly without a drum or orbital floor sander. Call a pro for widespread damage on engineered floors, for deep gouges near board edges, or when you cannot match the color after a test spot.
How to Prevent Hardwood Floor Scratches
- Felt pads under furniture legs. Replace them when they flatten or collect grit.
- Rugs in hallways and entries. Use a breathable rug pad, because some rubber backings can discolor a finish.
- Shoes off at the door. Grit tracked in on soles is what leaves fine scratch lines.
- Trim pet nails. Long claws cut into the finish, especially on high-gloss floors.
- Sweep or dry-mop often. Loose grit scratches the finish under foot traffic.
If a loose board is the real problem underfoot, our guide on fixing squeaky hardwood floors covers that separately.
Frequently Asked Questions
How Can I Fix Scratches on Hardwood Floors Without Sanding?
For light scratches in the finish, use a stain marker that matches the floor, a wax filler stick, or a walnut rubbed along the scratch. Clean the spot first and buff it with a soft cloth afterward. On a waxed floor, skip vinegar-based home mixes, which can wear down the wax with repeated use. None of these methods remove wood, so they do not need sanding.
What’s the Best Product for Deep Scratches?
For deep scratches and gouges, use a wax filler stick for a quick cosmetic fill or a stainable wood filler for a harder repair. Press it in slightly proud, level it, color it to match, and seal it with the same type of finish as your floor. Test the color on a hidden spot before you start.
Can I Fix Scratches on Engineered Hardwood?
Yes, but avoid sanding unless the wear layer is thick enough. The National Wood Flooring Association says a wear layer thinner than 3/32 inch (about 2.5 mm) should not be sanded. Use markers, wax sticks, or spot fills instead, and call a professional for deep or widespread damage.
How Do I Match Stain Colors to My Floor?
Test the marker or stain on a hidden spot, such as inside a closet or under a rug, and let it dry before judging the color. Build color in thin layers. If you are between two shades, go with the lighter one and add a second pass, because it is easier to darken than to lighten.
Are Home Remedies Like Walnuts Effective?
A walnut rubbed on a very light surface scratch can darken it temporarily because of the nut’s natural oils. It does not repair the finish or the wood and is not effective on deep scratches or gouges. Use a marker or filler for anything your fingernail catches on.
How Can I Prevent Scratches on My Hardwood Floor?
Put felt pads under furniture legs, use rugs in high-traffic areas, trim pet nails, and take shoes off at the door. Sweep or dry-mop regularly, because loose grit under foot traffic leaves fine scratches in the finish.
When Should I Call a Professional?
Call a professional for widespread scratches across a traffic area, deep gouges on engineered floors, or any floor where the wear layer is under about 2.5 mm. They can screen and recoat or sand the whole floor evenly, which is hard to do by hand.
Sponsored / affiliate links. As an Amazon Associate I earn from qualifying purchases. I may earn additional commission from eligible campaigns.