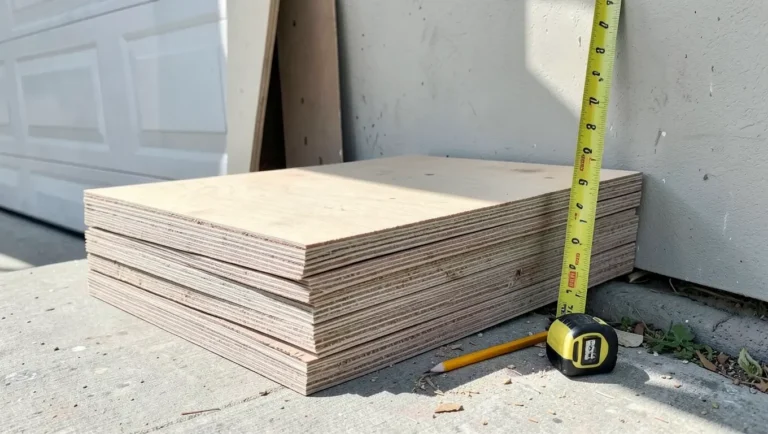
How to Seal Plywood Edges: 5 Methods That Actually Work
To seal plywood edges, brush 3 thin coats of polyurethane into the end grain for indoor pieces, or use penetrating epoxy, an exterior waterproofer, or iron-on edge banding for anything outside or damp. Bare plywood edges soak up water much faster than the faces, so unsealed edges are where swelling and delamination start. Below: the right sealer for each situation, the exact coat-and-dry steps, shed floors, shower and wet-area edges, and how to rescue a damaged edge. If you are waterproofing a whole piece rather than just the edges, start with our guide on how to waterproof wood.
What You Need to Seal Plywood Edges
 |
Best Indoor Edge Sealer Pick MOLLOR Water-Based Polyurethane Acrylic Sealer, 16 oz
|
As an Amazon Associate we earn from qualifying purchases.
Gather these before you start – running out of sealant mid-coat leaves an uneven line where the old and new sealant meet. If you have not chosen your plywood grade yet, deciding between CDX plywood and OSB first will also tell you how much edge sealing the panel actually needs.
- 120-grit and 220-grit sandpaper
- Wood filler or exterior-grade wood glue (for gaps and voids)
- A 1-2 inch natural or foam brush
- Your chosen sealant: polyurethane, epoxy penetrating sealer, exterior waterproofer, or iron-on edge banding
- Tack cloth or a lint-free rag
- Gloves and eye protection
How to Seal Plywood Edges: Step-by-Step
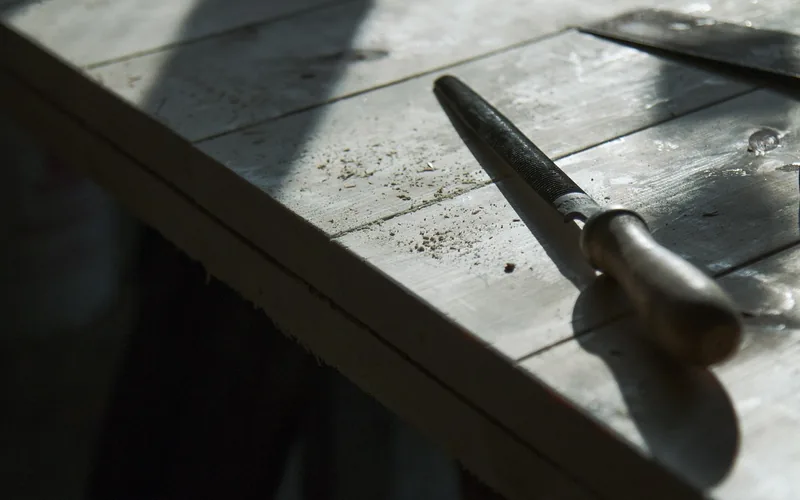
- Sand the edge: Work through 120-grit then 220-grit sandpaper, sanding along the direction of each ply, until the edge feels smooth and free of splinters.
- Fill voids and gaps: Press wood filler (or a thick wood-glue-and-sawdust paste) into any visible voids between plies, let it cure fully, then sand it flush.
- Wipe the edge clean: Remove all sanding dust with a tack cloth – leftover dust stops the sealant from bonding to the wood.
- Apply the first coat: Brush a thin coat of sealant into the end grain, working it in rather than just laying it on top. Let it dry per the label (roughly 2-4 hours for polyurethane, up to 24 hours for epoxy).
- Scuff-sand between coats: Once dry, lightly sand with 220-320 grit to knock down any raised grain.
- Apply two more coats: Three thin coats total gives the end grain enough of a moisture barrier – this matters most on exterior projects and shed floors.
Best Sealants for Plywood Edges Compared
There is no single “best” sealer – the right one depends on where the plywood lives and how much moisture it will see.
| Sealant | Best For | Coats | Full Cure |
|---|---|---|---|
| Water-based polyurethane | Indoor furniture, cabinets, shelving | 3 | 24-48 hrs |
| Penetrating epoxy resin | Marine use, decking, high-moisture areas | 2, then a UV topcoat | 24-72 hrs |
| Exterior wood waterproofer | Shed floors, fences, outdoor structures | 2-3 | 24 hrs |
| Iron-on edge banding | Visible furniture edges that need a finished look | N/A (adhesive-backed) | Immediate |
| Diluted wood glue (sizing) | Budget sealing before paint, indoor-only | 1-2 | 1 hr |
Sealing Plywood Edges for Exterior Use and Shed Floors
Exterior plywood edges face two problems interior edges don’t: constant weather cycling and, on a shed floor, direct or near-ground contact. Start with exterior-rated CDX or pressure-treated plywood rather than trying to seal your way around interior-grade material – sealant slows moisture, it doesn’t stop it from an inferior panel.
For a shed floor specifically: raise the plywood off the ground on pressure-treated sleepers or joists so water can drain and air can circulate underneath, then seal all four edges with an exterior waterproofer before the panel goes down – not after. If you are also finishing an exterior deck surface nearby, the same logic applies to a deck wood sealant: reapply before the old coat fully wears through, not after water has already gotten in. Recoat exposed edges every 12-24 months, since UV and standing water break down sealant faster outdoors than indoors.
Special Cases: Phenolic Plywood, Shellac, and Weak Edges
How Do You Seal Phenolic Plywood Edges?
Phenolic (film-faced) plywood already has a waterproof resin film on its faces, but the factory film does not cover the cut edges – those raw edges absorb water just like any other plywood. Seal cut edges of phenolic plywood with a penetrating epoxy sealer or a marine-grade polyurethane; ordinary interior sealants won’t bond as well to the resin-heavy plies.
Can You Use Shellac and Wood Filler to Seal Plywood Edges?
Yes. Dewaxed shellac is a fast-drying sealer that bonds well to both bare plywood and wood filler, which makes it a solid combination for indoor edges: fill voids with wood filler, sand flush, then brush on 2 coats of shellac. Shellac is not a good match for exterior or high-moisture use – it softens with prolonged water contact, so save it for furniture and cabinetry edges that stay dry.
How Do You Strengthen a Weak or Splitting Plywood Edge?
A penetrating epoxy sealer soaks into loose or delaminating plies and hardens them from the inside, which is the most reliable fix for a soft or crumbling edge. For a ply that has already separated, work exterior-rated wood glue into the gap – or a bit of joint compound for a purely cosmetic void – clamp it closed until cured, then sand and seal as normal. Edge banding adds a further layer of physical reinforcement on edges that see regular bumps and contact.
Sealing Plywood Edges in Showers and Other Wet Areas
Searchers often ask how to seal plywood edges for a shower or bathroom wet area, and the honest answer is that edge sealer alone is not enough there. Sealing the cut edges slows water getting into the plies, but it does not make plywood a waterproof wall or floor. In a tiled shower, the waterproofing has to come from a membrane system (a sheet or liquid-applied membrane under the tile), and the substrate is normally cement board or foam board rather than plywood. Plywood that must stay in a bathroom, such as a vanity cabinet or a subfloor outside the wet zone, still benefits from sealed edges, especially at cut-outs for pipes and around the toilet flange where water collects.
For those damp-but-not-submerged spots, use penetrating epoxy or an exterior-rated waterproofer rather than interior polyurethane, seal every cut edge and drilled hole before installation, and keep the finished edge from sitting in standing water. For general coating choices on the faces of the panel, see how to waterproof wood.
Common Mistakes That Ruin a Sealed Edge
- Skipping the sanding step: Sealant applied over rough, splintered edges never bonds evenly and peels within weeks.
- One thick coat instead of three thin ones: A heavy coat skins over on the surface while staying wet underneath, trapping bubbles and soft spots.
- Using an interior sealant outdoors: Standard indoor polyurethane breaks down fast under UV and standing water – use an exterior-rated product for anything outside.
- Sealing over dust: Skipping the tack-cloth wipe-down leaves a layer of dust between the wood and the sealant, so it never actually adheres to the plywood itself.
📊 Exposed end grain absorbs and releases moisture up to 100 times faster than face grain – Source: Wagner Meters, Wood Moisture Info
Building a box or chest from plywood? See our how to make a plywood box guide for the cut list, then seal the exposed edges as shown above.
Frequently Asked Questions
How do I seal plywood edges effectively?
Sand the edge smooth, fill any voids with wood filler, wipe away dust, then brush on 3 thin coats of sealant – polyurethane indoors, epoxy or an exterior waterproofer outdoors – sanding lightly between coats. Working the sealant into the end grain rather than just coating the surface is what actually stops moisture.
Can I use paint to seal plywood edges?
Yes, but paint alone is a weaker barrier than a dedicated sealant because it sits mostly on the surface instead of penetrating the end grain. If you are painting anyway, smooth the surface first, prime the edge with a diluted wood glue sizing coat, let it dry, then paint – the glue fills the porous end grain so the paint does not sink in unevenly. See our guide on painting plywood walls for face-grain prep, which differs from edge prep.
How many coats of sealant should I apply?
Three thin coats, sanding lightly between each one, gives plywood end grain enough of a moisture barrier for most indoor and outdoor projects. One thick coat is not a substitute – it skins over on top while staying wet underneath and traps bubbles.
Can you use shellac and wood filler to seal plywood edges?
Yes, for indoor use. Fill voids with wood filler, sand it flush once cured, then brush on 2 coats of dewaxed shellac, which bonds well to both bare plywood and cured filler. Skip shellac outdoors or anywhere it will see standing water – it softens with prolonged moisture exposure.
How do you seal plywood edges for exterior or shed-floor use?
Start with exterior-rated CDX or pressure-treated plywood, seal all four edges with an exterior waterproofer before installing the panel, and keep shed floors raised off the ground on sleepers so water drains instead of pooling against the edge. Recoat exposed edges every 12-24 months outdoors.
Conclusion
Sealing plywood edges comes down to matching the sealant to where the panel lives: polyurethane for indoor furniture, penetrating epoxy or an exterior waterproofer for anything outside or ground-adjacent, and edge banding when appearance matters most. Sand first, fill any voids, and apply the sealant in three thin coats rather than one thick one – that combination is what actually keeps moisture out of the end grain long term.
Once the edges are sealed, the face needs its own finish: see how to finish plywood faces for sanding limits on thin veneer, conditioner, and topcoat choices.
Sponsored / affiliate links. As an Amazon Associate I earn from qualifying purchases. I may earn additional commission from eligible campaigns.