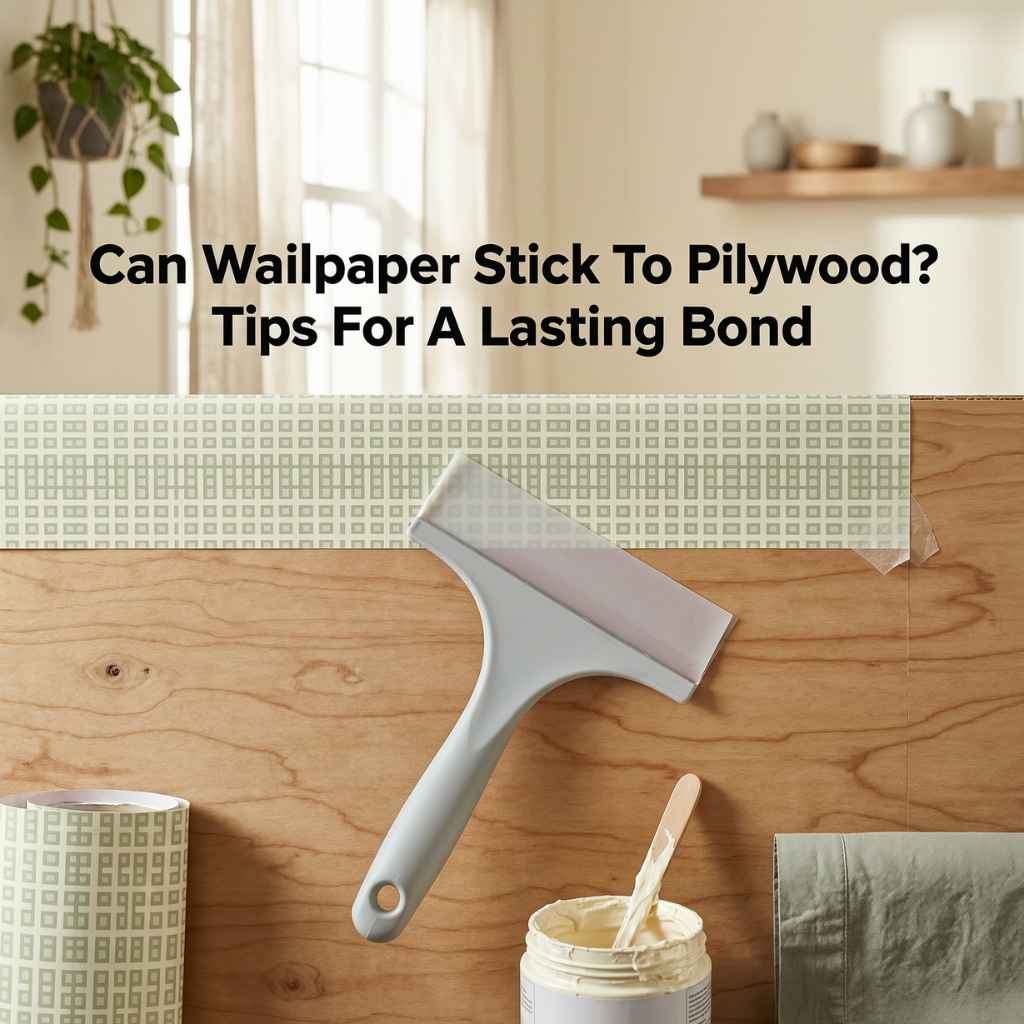
Can Wallpaper Stick To Plywood? Tips For A Lasting Bond
It’s a common question when you’re looking to add some style to a room. You’ve got this great piece of plywood, maybe a finished wall in a workshop or an unfinished project, and you’re dreaming of wallpaper. But can it actually stick?
Will it hold? It can feel like a big gamble. You’ve probably seen gorgeous rooms with smooth, perfectly applied wallpaper, and you wonder if your plywood project can achieve that same look.
It’s totally understandable to feel a bit unsure. Plywood is different from drywall, after all.
The short answer is yes, wallpaper can stick to plywood. However, success depends heavily on proper surface preparation, the type of plywood, and the right adhesive. Without these steps, your wallpaper might peel or bubble over time.
Understanding Wallpaper and Plywood
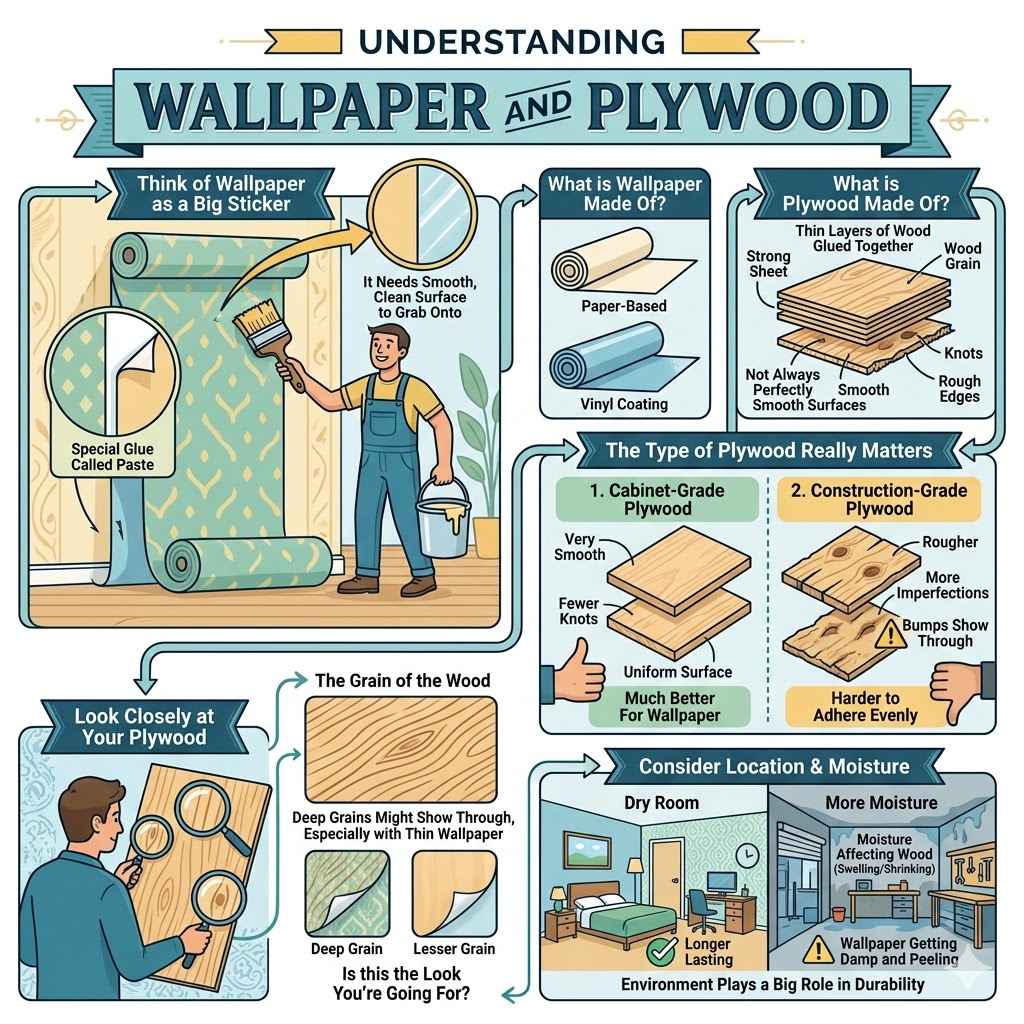
Wallpaper is designed to stick to smooth, clean surfaces. Think of it like a big sticker. It needs something to grab onto.
Most wallpapers are paper-based or have a vinyl coating. They come in rolls and can be applied with a special glue called paste. Plywood, on the other hand, is made of thin layers of wood glued together.
These layers create a strong sheet, but the surface isn’t always perfectly smooth. It can have wood grain, knots, and sometimes even rough edges. This makes it a bit trickier for wallpaper than a flat drywall surface.
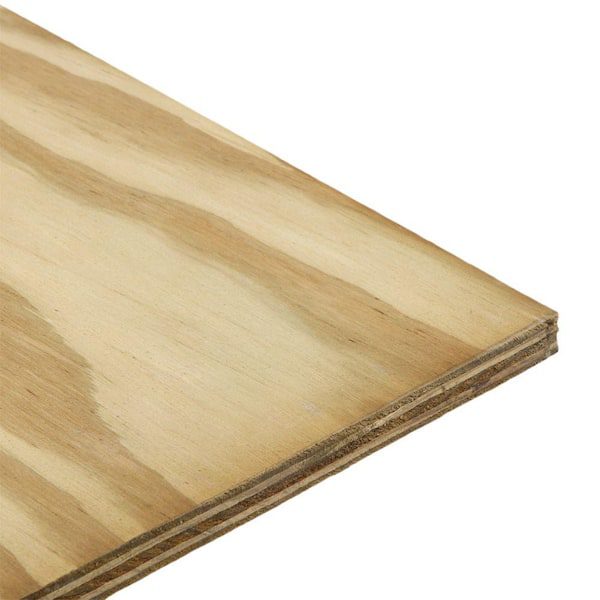
The type of plywood really matters. Cabinet-grade plywood is usually very smooth. It has fewer knots and a more uniform surface.
This is much better for wallpaper. Construction-grade plywood might be rougher. It often has more imperfections.
Applying wallpaper to rougher wood can lead to bumps showing through. It can also make the paper harder to adhere evenly. So, the first step is always to look closely at your plywood.
What does its surface feel and look like?
The grain of the wood is another factor. You might see lines running across the plywood. These are the wood grain.
If they are very deep, the wallpaper might not lay perfectly flat over them. You might see the grain pattern showing through the wallpaper, especially if the wallpaper is thin. This can look interesting, or it might not be the look you’re going for.
It’s good to consider this before you start.
Also, think about where this plywood is located. Is it in a dry room like a bedroom or office? Or is it in a place with more moisture, like a garage or a basement workshop?
Moisture can affect both the wood and the wallpaper. Wood can swell or shrink with changes in humidity. Wallpaper can get damp and peel if there’s too much moisture.
So, the environment plays a big role in how well your wallpaper will last.
My Own Plywood Wallpaper Adventure
I remember a time I decided to redecorate my garage workshop. I had these bare plywood walls that looked so unfinished. I found this amazing botanical-print wallpaper.
I thought, “This will make my workshop feel so much more inspiring!” I was so excited. I bought the wallpaper and the paste. I figured, “How hard can it be?
It’s just a wall.” I skipped some of the preparation steps because I was in a hurry to see the finished result. I just cleaned the walls a bit and started pasting. That’s when things started to go wrong.
Right away, I noticed some spots weren’t sticking. The wallpaper wasn’t lying flat over the wood grain. It looked a bit bumpy.
Then, a few days later, I saw a corner starting to peel near the floor. It was where I had rushed the paste application. The moisture from the paste made the plywood swell just a little, and the paper lifted.
I felt a wave of frustration. My dream workshop was starting to look like a mess. It taught me a big lesson about not skipping those crucial prep steps.
I had to peel off some of the paper. I learned that you really need to treat plywood like you’re painting it. You need a smooth, sealed surface first.
That experience was frustrating, but it made me an expert on getting wallpaper to stick to tricky surfaces like plywood. It’s all about treating the wood properly before the paper ever touches it.
After I fixed it, the walls looked so much better. The key was the extra steps I took. It wasn’t just about the wallpaper itself.
It was about preparing the base. This is true for many DIY projects. The foundation matters a lot.
I learned that patience in the preparation phase saves a lot of headaches later. And it makes the final result truly beautiful.
Preparing Your Plywood Surface
Getting wallpaper to stick to plywood means making the plywood surface ready. This is the most important part. Think of it like getting ready for a big event.
You want everything to be perfect. First, you need to clean the plywood. Any dust, dirt, or grease will stop the paste from sticking well.
Use a soft cloth and a mild cleaner. Wipe down the entire surface. Make sure it’s completely dry before you move on.
Next, you need to fix any imperfections. Are there any knots? Small holes?
Cracks? You can fill these with a wood filler or putty. Let the filler dry completely.
Then, sand it smooth. You want the surface to be as flat as possible. Sanding is key.
It removes any rough spots and makes the surface even. Use fine-grit sandpaper. You don’t want to scratch the wood too much.
After sanding, wipe away all the dust again. A tack cloth is great for this. It picks up tiny particles of dust that a regular cloth might miss.
This is a really crucial step for a smooth finish. Any dust left behind can cause bumps under the wallpaper.
Now comes a really important step: sealing the plywood. Plywood is porous. This means it can soak up liquids.
If you apply paste directly, the plywood will absorb a lot of the moisture. This can cause the wood to swell. It can also weaken the glue bond.
To stop this, you need to seal the wood. A good primer or a sealant is perfect for this. You can use a water-based primer.
It’s easy to use and dries clear.
Apply at least one good coat of primer. Make sure to cover the entire surface. Pay attention to the edges.
If you are using a very thin wallpaper, or if the wood grain is very prominent, you might need two coats of primer. Let each coat dry completely. Follow the instructions on the primer can.
This sealed surface will help the wallpaper paste stick evenly. It also stops the wood from absorbing too much moisture from the paste.
Some people even suggest using a wallpaper lining paper. This is a special paper that goes directly on the wall first. Then you put your decorative wallpaper on top of the lining paper.
It creates a super smooth, uniform surface. It’s especially helpful for tricky walls like plywood or walls with a lot of texture. This is an extra step, but it can make a big difference in the final look and how long the wallpaper lasts.
Ensure your primer is fully dry before you start hanging wallpaper. This can take several hours, or even overnight. Rushing this step can undo all your hard work.
Patience here really pays off. The goal is a surface that is smooth, clean, and non-absorbent. It’s the foundation for a beautiful and lasting wallpaper job.
Quick Prep Checklist
- Clean: Wipe down plywood with a mild cleaner. Let dry.
- Repair: Fill holes and cracks with wood filler. Let dry.
- Sand: Smooth filler and any rough spots with fine sandpaper.
- Dust Off: Use a tack cloth to remove all sanding dust.
- Seal: Apply 1-2 coats of water-based primer or sealant. Let dry completely.
- Optional: Hang a layer of wallpaper lining paper for extra smoothness.
Choosing the Right Wallpaper and Adhesive
Not all wallpapers are created equal when it comes to sticking to plywood. Thicker, vinyl-backed wallpapers tend to be more forgiving. They have a bit more body.
They can often hide minor surface imperfections better. They are also more durable. This makes them a good choice for areas like workshops or playrooms where they might see more wear and tear.
Paper-backed wallpapers are thinner. They can be beautiful, but they might show more of the wood grain or any slight bumps on the surface. If you choose a delicate paper, your surface preparation needs to be absolutely perfect.
You’ll need that super smooth finish. For plywood, vinyl or heavy-duty papers are often a safer bet.
The adhesive, or paste, is just as important as the wallpaper. Most modern wallpapers come with instructions on the type of paste to use. Some are “peel and stick” or “pre-pasted,” meaning you just need to add water.
Others require a separate paste. If you’re using a separate paste, make sure it’s suitable for the type of wallpaper you’ve chosen. Look for a heavy-duty wallpaper paste if you’re concerned about the bond.
Some people have had success using a standard white craft glue (like Elmer’s Glue-All) mixed with water as an adhesive for certain types of wallpaper on wood. You usually mix it about 50/50 with water to create a liquid that can be brushed on. This can create a strong bond.
However, it’s important to test this on a small, inconspicuous area first. Make sure it works well with your wallpaper and doesn’t stain or damage it.
Always read the wallpaper manufacturer’s instructions. They know their product best. They will tell you what type of paste is recommended.
They will also give you guidance on how to apply it. Using the wrong paste can lead to problems later. It might not stick, or it might damage the wallpaper itself.
So, double-check that you have the right supplies before you begin.
When applying paste, ensure you get an even coat on both the wallpaper and the wall (if it’s a paste-the-wall product). Don’t leave dry spots. Also, don’t use too much paste.
Excess paste can ooze out the seams and make a mess. It can also weaken the paper if it’s too wet. The goal is a consistent, thin layer that will grab the wallpaper and hold it securely to the primed plywood.
Wallpaper & Adhesive Tips
- Paper Type: Vinyl or heavier papers work best on plywood.
- Pre-pasted/Peel-and-Stick: Convenient but ensure surface is perfect.
- Separate Paste: Choose a heavy-duty paste if recommended.
- DIY Paste: Test diluted white glue (e.g., Elmer’s) on a scrap piece first.
- Manufacturer Guide: Always follow specific wallpaper instructions.
- Even Coat: Apply paste evenly without too much or too little.
Application Techniques for Plywood
Once your plywood is prepped and you have your materials, it’s time to hang the wallpaper. Start in a corner or a prominent spot. Measure and cut your first strip.
Make sure you have a little extra at the top and bottom to trim. This gives you some wiggle room. If your wallpaper has a pattern, make sure you align it correctly with the next strip.
When applying the wallpaper, work from the center outwards. Use a smoothing tool, like a wallpaper brush or a plastic smoother. Gently push out any air bubbles.
Work towards the edges. This helps the wallpaper conform to the surface. For plywood, pay extra attention to smoothing.
You want to press the paper down firmly, especially over any slight texture from the grain. This ensures good contact with the primer.
Don’t rush the process. Take your time with each strip. If you see a small bubble forming, try to gently smooth it out towards the edge.
If a bubble is stubborn, you might need to lift the wallpaper back slightly, smooth the area underneath, and then reapply the paper. This is where the quality of your primer and paste comes in. A good bond will make this easier.
When you get to the edges and corners, you’ll need to trim the excess wallpaper. Use a sharp utility knife or a razor blade for clean cuts. You can use a straight edge or a ruler to guide your knife.
This gives you a crisp, professional finish. Be careful when cutting to avoid damaging the wall underneath or the adjacent wallpaper strip.
For seams, where two strips of wallpaper meet, make sure they are perfectly aligned. Some pastes allow you to “book” the wallpaper, meaning you fold it onto itself for a few minutes before applying. This helps it stretch and adhere better.
Follow the paste instructions for this step. Ensure the seams are pressed down firmly with your smoothing tool.
If you encounter a knot in the plywood that seems to be pushing through, or if the grain is very pronounced, you might need to apply extra pressure in that spot. Sometimes, a small dab of paste right on the knot, allowed to get slightly tacky, can help it adhere better. Just be careful not to overdo it and create a visible bump.
After the wallpaper is up, let it dry completely. This usually takes at least 24 hours. During this drying time, avoid excessive humidity or drafts.
You want the paste to cure properly. This is when the bond hardens and becomes strong. Once dry, you can inspect your work.
Any small gaps at the seams can often be filled with a tiny bit of touch-up paint that matches your wallpaper, or a specific wallpaper seam adhesive if needed.
Application Steps Recap
- Measure & Cut: Account for pattern repeat and excess.
- Apply with Care: Work from the center outward.
- Smooth Firmly: Use tools to push out air and ensure contact.
- Address Texture: Pay attention to wood grain and knots.
- Trim Carefully: Use a sharp blade for clean edges.
- Align Seams: Ensure strips meet perfectly.
- Dry Fully: Allow 24+ hours for paste to cure.
Real-World Contexts for Plywood Wallpaper
Why would someone want to put wallpaper on plywood? It’s not as common as drywall, but there are many practical and creative uses. Workshops are a big one.
Imagine a tool-laden garage. Plywood walls are durable. Adding wallpaper can make it feel less like a dusty storage space and more like a functional, pleasant area.
It can brighten up a utilitarian space.
Kids’ playrooms are another area. Plywood can be used for custom built-ins, like bookshelves or playhouses within a room. Wallpapering these elements can add a fun, decorative touch.
It makes the play area feel more magical. It’s also a way to cover up less attractive plywood surfaces in a kid-friendly way.
You might see plywood used for accent walls in basements or rec rooms. It’s often a more affordable material than wood paneling. Wallpaper can transform a basic plywood wall into a stylish feature.
It adds texture and color to the room. This is especially useful if you’re on a budget but want a designer look.
Some people use plywood for temporary walls or dividers. Think about rental spaces or studio apartments where you might want to create different zones. Wallpaper can make these temporary structures look more permanent and attractive.
It can help them blend in with the rest of the room’s decor.
Another area is in sheds or outbuildings. If you’re using a shed as a craft space or a small studio, finishing the interior with wallpaper can make it much more inviting. It’s a way to add personality to a structure that might otherwise just be plain wood.
The key in these contexts is understanding the environment. A workshop might see more dust and grease. A playroom might see more bumps and scuffs.
This is where choosing a durable, washable wallpaper is important. Also, consider the level of moisture. Basements and sheds can be more humid.
Ensure your preparation and wallpaper choice can handle it.
The design of the plywood itself can influence the choice of wallpaper. Very rustic plywood might pair well with a bold, textured wallpaper. Smoother, finer plywood might suit more delicate or subtle patterns.
It’s about finding a balance between the natural character of the wood and the style you want to achieve with the wallpaper.
When is it Normal, and When Should You Worry?
It’s completely normal for wallpaper to stick well to properly prepared plywood. If you followed all the steps – cleaning, filling, sanding, priming, and using the right paste – you should have a strong, smooth bond. The wallpaper should lie flat.
The seams should be tight. The surface should feel smooth to the touch.
You might worry if you see peeling corners or edges, especially shortly after application. This is a sign that the paste didn’t adhere well. It could be due to insufficient priming, dust on the surface, or using the wrong type of adhesive.
Cold spots or drafts during drying can also cause issues.
Bubbles are another concern. Small, trapped air bubbles that can’t be smoothed out are not ideal. They can grow over time.
They can also be a place where moisture can get trapped, leading to mold or mildew in the long run. If you have many persistent bubbles, it might mean the surface wasn’t smooth enough, or the paste wasn’t applied evenly.
If the wood grain is showing through too much, and it’s not the look you intended, that’s something to note. This usually means the primer coat wasn’t sufficient, or the wallpaper is too thin for the texture of the wood. You might need to add another layer of primer or even a lining paper.
You should also worry if you notice any signs of moisture damage. This includes mold or mildew growth under the wallpaper, or if the plywood itself starts to warp or swell significantly. This indicates a problem with moisture in the room, or a failure in the sealing process.
It’s important to address the root cause of the moisture.
If the wallpaper is easy to peel off after only a short time, it’s a clear sign that the bond failed. This isn’t normal and means you’ll need to re-do the prep and application. Sometimes, the issue is with the wallpaper itself if it’s a very cheap or old product, but usually, it’s a surface preparation or application problem.
A simple check you can do after the wallpaper is fully dry is to gently press along the edges and seams. They should feel secure. Run your hand over the surface.
It should feel mostly smooth, with only the intended texture of the wallpaper. If you can easily lift an edge, or if there are loose areas, it’s time to investigate.
Normal vs. Concerning Signs
- Normal: Flat wallpaper, tight seams, smooth feel, no peeling.
- Concerning: Peeling edges/corners, persistent bubbles, wood grain showing excessively, mold/mildew, swelling wood.
Quick Fixes and Tips
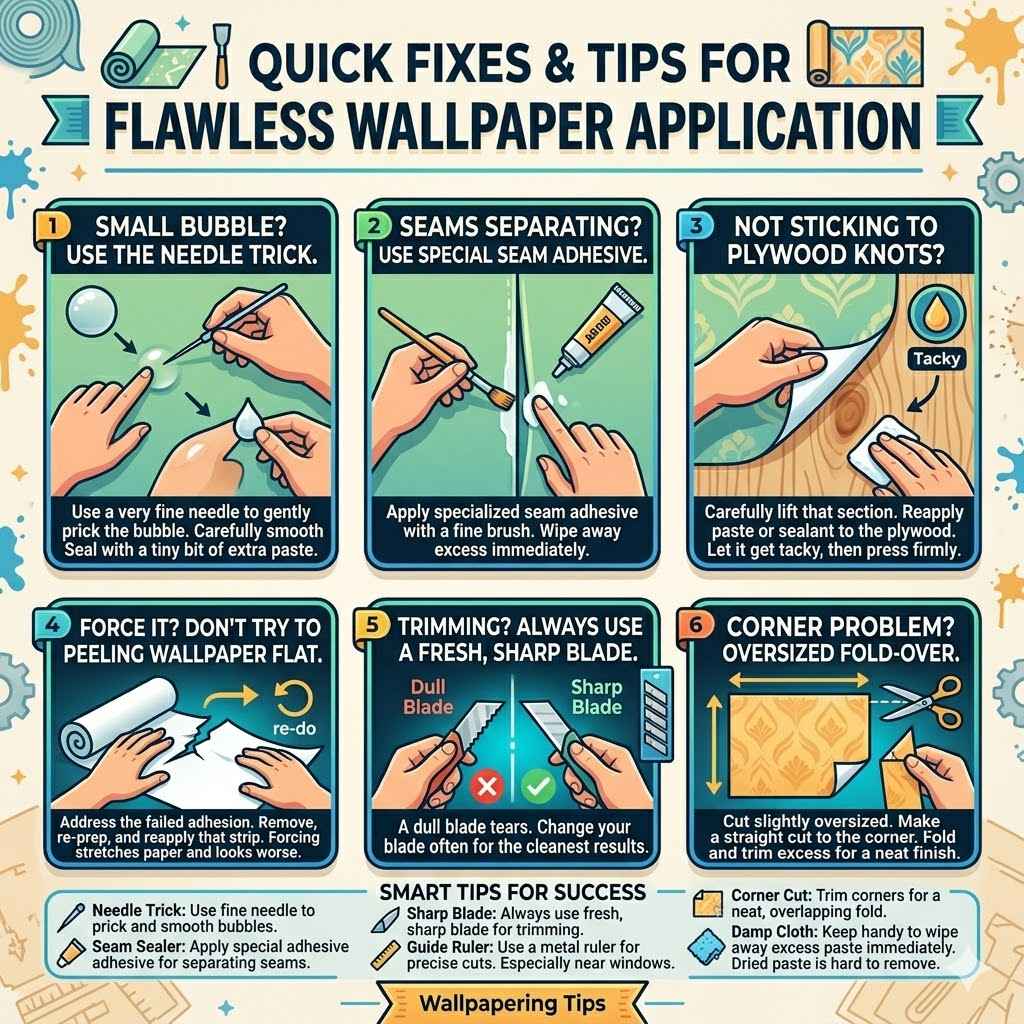
If you have small bubbles that are bothering you, sometimes you can use a very fine needle to gently prick the bubble. Then, use a small tool or your finger to carefully smooth the air out. You can then apply a tiny bit of extra paste or a clear adhesive to the small hole to help it seal.
For seams that are slightly separating, a specialized wallpaper seam adhesive can be carefully applied with a fine brush. Wipe away any excess immediately. Sometimes, a small amount of touch-up paint that matches your wallpaper can disguise a minor seam issue.
If you find that the wallpaper isn’t sticking well to a specific knot or area, you might need to carefully lift that section. Apply a little more paste or sealant to the plywood underneath. Let it get slightly tacky, then firmly press the wallpaper back into place.
Use your smoothing tool to ensure good contact.
Don’t try to force peeling wallpaper flat without addressing the cause. If it’s lifting, it means the adhesion has failed in that spot. You’ll likely need to remove that strip, re-prep the area if necessary, and reapply.
Trying to force it can stretch the wallpaper and make it look worse.
When trimming, always use a sharp blade. A dull blade will tear the paper instead of cutting it. Change your blade often for the cleanest results.
A metal ruler or a straight edge helps guide your knife for perfect lines, especially around windows and doors.
For corners, a neat trick is to cut a slightly oversized piece. Then, make a single, straight cut from the edge of the wallpaper directly into the corner. This allows the wallpaper to fold over the corner smoothly.
You can then trim any excess very precisely.
Remember to always have a damp cloth handy. You’ll need it to wipe away any excess paste that oozes from the seams or edges. Clean paste residue immediately.
Dried paste can be very difficult to remove and can leave a mark on the wallpaper.
Smart Tips for Success
- Needle Trick: Use a fine needle to prick and smooth small bubbles.
- Seam Sealer: Apply special adhesive for separating seams.
- Sharp Blade: Always use a fresh, sharp blade for trimming.
- Guide Ruler: Use a metal ruler for precise cuts.
- Corner Cut: Trim corners for a neat, overlapping fold.
- Damp Cloth: Keep one handy to wipe away excess paste instantly.
Frequently Asked Questions
Can I wallpaper over unprimed plywood?
It is strongly advised against wallpapering directly over unprimed plywood. Plywood is porous and will absorb moisture from the wallpaper paste. This can cause the wood to swell, weakening the adhesive bond and leading to peeling, bubbling, or warping over time.
Priming creates a barrier that stops this absorption and provides a smoother surface for the wallpaper to adhere to.
What is the best type of wallpaper for plywood?
Vinyl-backed or thicker, more durable wallpapers are generally best for plywood. These types of wallpapers have more body, can better hide minor surface imperfections, and are often more resistant to moisture and wear. Thin paper-backed wallpapers might show the wood grain or texture of the plywood more prominently, requiring extremely thorough surface preparation.
How many coats of primer do I need for plywood before wallpapering?
At least one coat of a good quality water-based primer is usually sufficient for most types of plywood. However, if you are using a very thin wallpaper, or if the plywood has a very prominent grain or texture, two coats of primer might be necessary. Always let each coat dry completely according to the manufacturer’s instructions before applying the next or hanging wallpaper.
Will the wood grain show through wallpaper applied to plywood?
Yes, the wood grain can sometimes show through wallpaper applied to plywood, especially if the grain is deep or the wallpaper is thin. Proper surface preparation, including thorough sanding and applying at least one, and sometimes two, coats of primer, can minimize this. Using a wallpaper lining paper before your decorative wallpaper also helps create a completely smooth surface that hides underlying textures.
Is it okay if my plywood wall has knots?
Knots in plywood can be a challenge for wallpaper. You should fill any loose or open knots with wood filler and sand them smooth. If the knot itself creates a raised bump, it might still show through the wallpaper.
Applying extra primer over the filled knot can help. In some cases, if the knot is very prominent, it might be best to use a thicker wallpaper or a lining paper to mask it completely.
Can I use peel-and-stick wallpaper on plywood?
Yes, peel-and-stick wallpaper can be used on plywood, but the surface preparation is still critical. The plywood must be perfectly smooth, clean, and dry. You will likely need to seal the plywood first with a primer designed for smooth surfaces, even though it’s not traditional paste.
Check the peel-and-stick wallpaper manufacturer’s recommendations for surface compatibility, as some adhesives may not bond well to certain finishes.
Conclusion
So, can wallpaper stick to plywood? The answer is a resounding yes, with the right approach. It takes more care than hanging wallpaper on drywall.
But by understanding the wood, preparing the surface diligently, choosing the right materials, and applying them carefully, you can achieve a beautiful, lasting result. Don’t be discouraged by the extra steps. They are the bridge from a potentially frustrating project to a successful one.