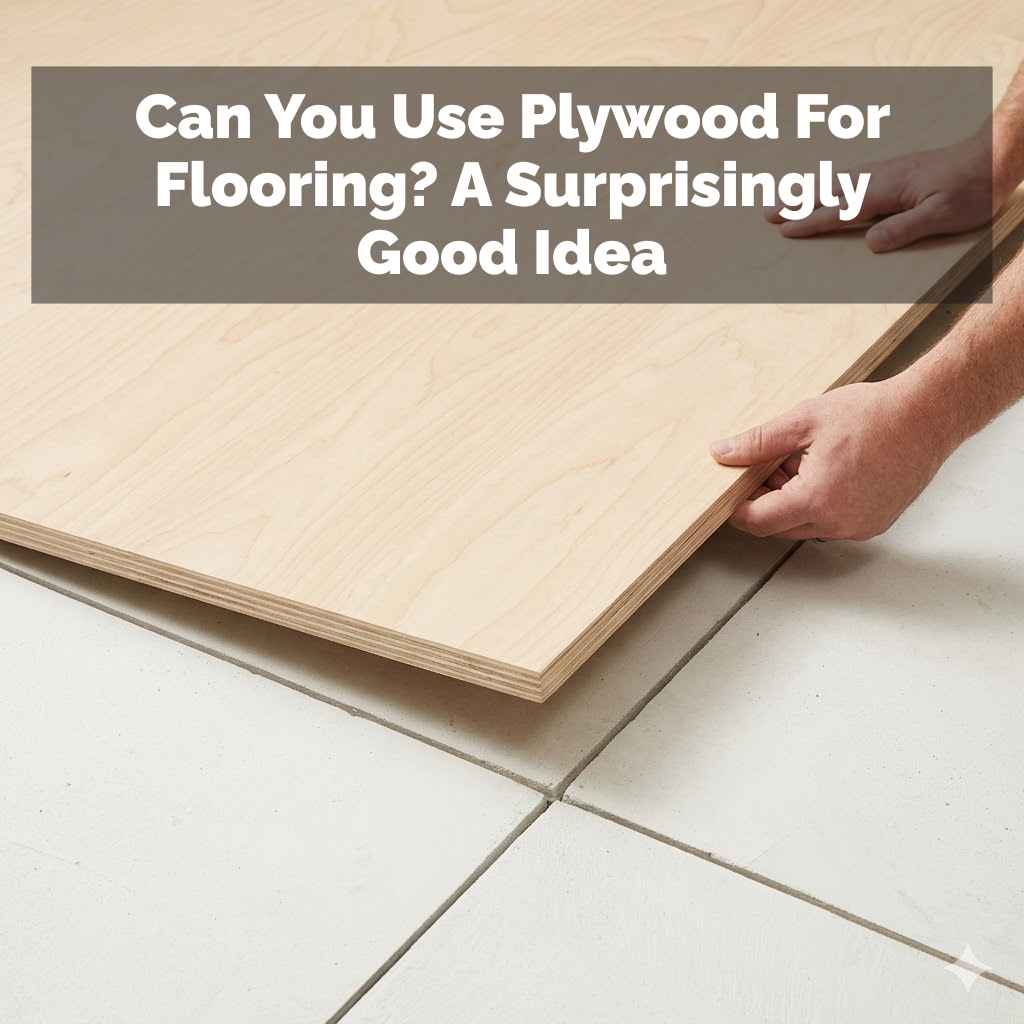
Can You Use Plywood For Flooring? A Surprisingly Good Idea
Yes, you can use plywood for flooring, especially as an underlayment or a finished surface in certain areas. It offers a durable, affordable, and customizable option when prepared and finished correctly. It’s often seen in workshops, garages, or as a base for other flooring types, but can also be a stylish choice for living spaces.
What is Plywood and Why Consider It for Floors?
Plywood is made from thin layers of wood veneer. These layers are glued together. The grain of each layer runs in a different direction.
This makes plywood very strong. It is also stable. It doesn’t warp or shrink much.
Building homes often uses plywood. It’s used for walls and roofs.
So, why would anyone think about using it for floors? Well, think about its strengths. It’s tough.
It can handle a lot of foot traffic. It’s also much cheaper than many other flooring materials. This makes it a great option for people on a tight budget.
Or maybe you like a very simple, modern look. Plywood can give you that.
It’s not just for hidden spaces anymore. Many people are finding ways to make plywood floors look really good. They sand them smooth.
They stain them different colors. They even seal them with protective finishes. This turns a basic building material into something stylish.
It shows how creative you can be with home projects.
My Plywood Floor Adventure: A Garage Transformation
I remember when my friend, Sarah, decided to tackle her garage. It was a disaster zone. Dust everywhere, old paint spills, and that general “messy garage” smell.
She wanted a floor that was easy to clean and wouldn’t break the bank. We were looking at garage floor paint, but it seemed like a lot of work for something that might chip easily. That’s when she remembered seeing plywood used in a workshop once.
She had this crazy idea: “What if we just put down plywood?”
I’ll admit, I was skeptical. Plywood for flooring? Wouldn’t it splinter?
Would it look like a construction site? But Sarah was determined. We went to the lumber yard.
We picked out the thickest, smoothest plywood we could find. It was a bit of an investment, but still far less than tile or proper garage flooring kits. The real magic happened when we started installing it.
We cut the sheets to fit. We screwed them down tight. Then came the finishing.
We sanded it until it was as smooth as glass. We put down a few coats of a tough, clear sealant. The transformation was incredible.
The garage floor was now clean, bright, and surprisingly chic. It felt solid underfoot. And cleaning up oil drips or spilled paint became a breeze.
It wasn’t just a garage floor anymore; it was a project we were proud of.
Types of Plywood and What They Mean for Flooring
Not all plywood is created equal. When you’re thinking about using it for your floors, the type you choose matters a lot. You want something that is strong and doesn’t have too many knots or gaps.
The most common types you’ll see are:
- CDX Plywood: This is a very common type. The ‘C’ and ‘D’ mean there might be some knots and imperfections on the surface. ‘X’ means it’s rated for exterior use, so it’s made with waterproof glue. It’s strong and affordable. But the surface isn’t always smooth enough for a finished floor without a lot of work. It’s great for subflooring though.
- AC or BC Plywood: These are higher grades. ‘A’ means the surface is smooth and sanded. ‘B’ means it’s pretty good but might have a few small defects. ‘C’ is lower quality. For a floor you want to see, AC or BC plywood is a better choice. You’ll have less sanding to do.
- Hardwood Plywood: This type has a veneer of a nicer hardwood on the surface. Think oak, birch, or maple. It looks more like solid wood flooring. It’s more expensive than CDX. But it gives a good finish without needing a lot of extra treatment on the surface itself.
When picking plywood, look for the grade. Panels graded ‘A-A’ or ‘A-B’ are usually the smoothest. Also, check the thickness.
For flooring, at least 3/4 inch thick is recommended. This gives it the strength it needs. It will feel solid under your feet.
It won’t flex too much.
Plywood Grades Explained Simply
Face Grade (First Letter): This is the “pretty” side. ‘A’ is smooth and ready to paint or stain. ‘B’ has some plugs or small defects.
Back Grade (Second Letter): This side doesn’t need to look as nice. ‘C’ can have knots. ‘D’ has many knots.
Exposure (X): ‘X’ means the glue is waterproof. Good for damp areas.
For Flooring: Aim for at least a ‘B’ on the face grade if you want a smooth look. CDX is best for subfloors or very rustic looks.
The Pros and Cons: Is Plywood Flooring Right for You?
Like any building choice, using plywood for flooring has its good and bad points. It’s important to weigh them before you decide.
The Good Stuff (Pros)
- Cost-Effective: Plywood is often much cheaper than hardwood, laminate, or tile. This makes it a budget-friendly choice.
- Durability: When you use good quality plywood and seal it well, it’s very strong. It can stand up to a lot of wear and tear.
- Versatility: You can paint it, stain it, or leave it natural. This lets you create many different looks for your home.
- Easy Installation: For those who are handy, installing plywood can be pretty straightforward. It comes in large sheets, so you cover a lot of area quickly.
- Good Base: It makes an excellent subfloor for other finished flooring. It gives a solid, level surface.
The Not-So-Good Stuff (Cons)
- Surface Imperfections: Lower grades of plywood have knots, voids, and rough patches. These need filling and sanding.
- Moisture Sensitivity: While some plywood is water-resistant, it’s not waterproof. Spills can cause damage or swelling if not cleaned up fast.
- Noise: Plywood floors can sometimes sound hollow or creaky. Adding a good underlayment can help with this.
- Comfort: It’s a hard surface. It won’t have the same warmth or give as carpet or cork.
- Requires Finishing: You absolutely must seal plywood floors. Without protection, they will get dirty easily and can be damaged.
Myth vs. Reality: Plywood Flooring
Myth: Plywood flooring always looks cheap and unfinished.
Reality: With proper sanding, staining, and sealing, plywood can achieve a modern, stylish look. Many people achieve a polished concrete or industrial vibe.
Myth: Plywood floors are impossible to keep clean.
Reality: A good quality sealant makes plywood floors very easy to wipe down. They are often easier to clean than some types of wood flooring.
Myth: Plywood floors are not durable.
Reality: High-quality plywood, installed correctly and sealed, is very durable. It can withstand heavy foot traffic for years.
Where Plywood Flooring Shines
While you might not see plywood floors in every fancy home, they are a smart choice for specific areas or styles. Think about where a durable, low-cost, and customizable floor would be a great fit.
Workshops and Garages
This is where plywood really shines. It can handle tools dropping, car tires, paint spills, and general mess. It’s easy to sweep and mop.
And if a section gets damaged, it’s relatively easy to replace.
Basements
Basements can sometimes be damp. Using plywood as a subfloor or even a finished floor (with good waterproofing and sealing) can be a good option. It’s more forgiving than hardwood in potentially moist environments.
Always check for water issues first, though.
Playrooms and Kids’ Rooms
Kids are tough on floors. Plywood can take a beating. It’s easy to clean up spills from snacks or art projects.
You can paint it fun colors or stain it a natural tone. It’s also a safer bet than tile if a toy happens to drop.
Budget-Friendly Renovations
If you’re on a tight budget but need new flooring, plywood can be your best friend. It allows you to save money on the material itself. This money can then be used for better quality finishes or to hire help if you need it.
Industrial or Rustic Decor
For homes aiming for an industrial, modern, or rustic look, unfinished or simply sealed plywood can be a feature. It has a raw, honest appeal that fits these styles perfectly. Think open-plan lofts or country-chic cottages.
Quick Scan: Plywood Floor Suitability
| Area | Best Use Case | Considerations |
| Garage | Excellent | High durability, easy to clean. Seal well. |
| Workshop | Excellent | Tough, cost-effective. Handles spills and tools. |
| Basement | Good | Use water-resistant plywood. Seal thoroughly. Monitor for moisture. |
| Living Room | Possible | Requires high-grade plywood and meticulous finishing for looks and comfort. |
| Kitchen | Possible | Needs excellent sealing against spills. High traffic area. |
Installation: Making Plywood Work as Flooring
Installing plywood as flooring takes a little care. It’s not just about slapping down some sheets. You need to prepare the subfloor and the plywood itself.
Then, you need to finish it right.
Step 1: Prepare Your Subfloor
If you are putting plywood directly over joists, you need to use thick plywood (3/4 inch is best). Make sure the joists are strong and spaced correctly. If you already have an old floor, you might be able to put plywood over it.
But the old floor must be flat and secure. Remove any old carpet or soft underlayment. You want a firm, level surface.
Step 2: Choose and Prepare Your Plywood
As we talked about, pick a good grade. AC or BC plywood is often best for a finished look. Hardwood plywood is even better if your budget allows.
Before you install, inspect each sheet. Fill any small holes or gaps with wood filler. Let it dry completely.
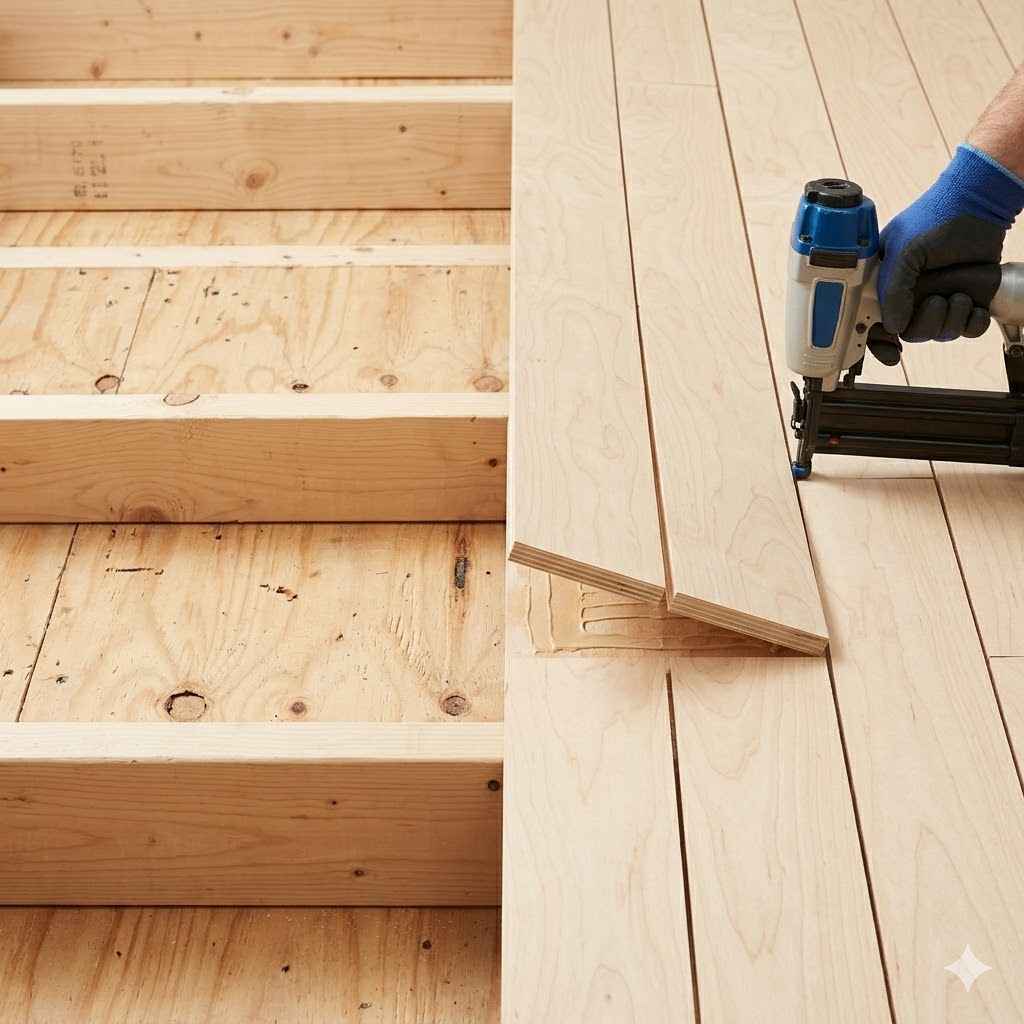
Step 3: Cut and Lay the Plywood
Measure your room carefully. Plan how you will lay the sheets. You want to avoid very small pieces.
Stagger the seams, just like with any other flooring. Use wood screws to attach the plywood to the subfloor. Space the screws about 6-8 inches apart along the edges and 10-12 inches in the field.
This makes sure the floor is solid and won’t move.
Step 4: Sanding is Key
This is a super important step. Use a floor sander or a belt sander for large areas. Start with a coarse grit sandpaper (like 60 or 80 grit) to get rid of any unevenness.
Then move to a finer grit (like 120 or 150 grit) for a smooth finish. Sand all the edges and seams so they are perfectly flush. Vacuum up all the dust thoroughly.
You can even wipe it down with a tack cloth.
Step 5: Filling and Sealing
After sanding, you might see small gaps or screw holes you missed. Fill these again with wood filler. Let it dry and then lightly sand again.
Now, it’s time to seal. You have choices here:
- Polyurethane Varnish: This is a classic. It comes in water-based or oil-based formulas. Water-based dries clear and fast. Oil-based gives a warmer tone but takes longer to dry and can yellow over time. Apply at least two to three coats.
- Epoxy Resin: This is super tough. It’s a great choice for garages or workshops. It provides a very durable, waterproof surface. You mix two parts together, and it cures hard. It can be a bit trickier to apply evenly.
- Paint: You can paint plywood floors. Use a good quality primer. Then use a durable floor paint. You can create solid colors or even patterns. Seal over the paint with a clear coat for extra protection.
Let each coat of finish dry completely according to the product directions. Lightly sand between coats with very fine sandpaper (220 grit) for a smoother finish. Clean off all dust after each sanding.
Installation Checklist
Gather Materials: Plywood sheets, wood screws, wood filler, sandpaper (various grits), floor sander (optional), primer (if painting), paint or sealant (polyurethane, epoxy), rollers, brushes.
Prepare Subfloor: Ensure it’s clean, dry, and level. Secure any loose boards.
Cut & Lay Plywood: Measure carefully. Stagger seams. Screw down securely.
Fill & Sand: Fill holes. Sand smooth in stages. Vacuum dust.
Apply Finish: Apply multiple coats of your chosen paint or sealant. Sand lightly between coats if needed. Allow full cure time.
Adding Style: Painting and Staining Plywood Floors
The real beauty of plywood flooring is its potential for customization. It’s like a blank canvas. You can make it fit your exact style.
Staining Plywood
Staining can bring out the wood grain and give your floor a rich look. If you use a higher grade plywood like AC or BC, the grain will be more visible and attractive.
Process:
- Make sure the plywood is perfectly smooth after sanding.
- Apply your chosen wood stain. Use a foam applicator or a lint-free cloth. Work in the direction of the wood grain.
- Wipe off any excess stain after the time recommended on the can.
- Let the stain dry completely.
- Apply your protective topcoat (polyurethane is common).
You can experiment with different stain colors. Dark walnut, rich espresso, or even a light natural tone can transform the look.
Painting Plywood Floors
Painting offers endless possibilities. You can go for a solid color, create a checkerboard pattern, or even stencil designs onto the floor.
Process:
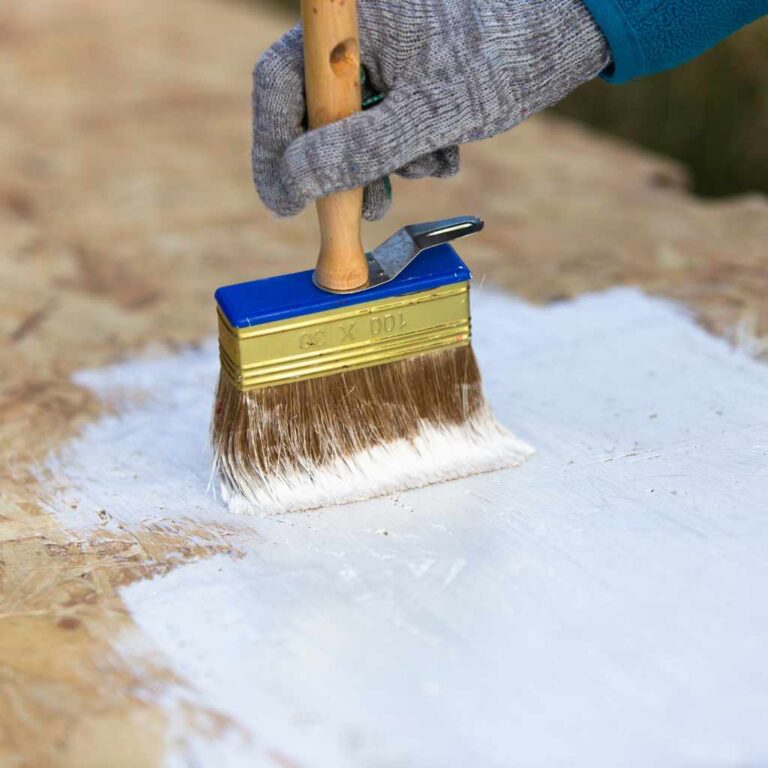
- Prime the plywood. A good primer helps the paint stick better and provides a uniform base.
- Apply your floor paint. Use multiple thin coats rather than one thick one.
- If you’re doing a pattern, use painter’s tape to create clean lines.
- Let the paint cure fully.
- Seal over the paint with a durable clear coat for extra protection.
Consider high-gloss, satin, or matte finishes depending on the look you want. A matte finish can hide imperfections better, while a gloss finish makes the floor look very polished.
Design Ideas for Plywood Floors
Simple & Modern: Sand smooth and apply a clear matte or satin polyurethane. This highlights the natural wood texture.
Chic Industrial: Stain dark, then use a high-gloss or satin finish. It mimics polished concrete or dark stained wood.
Farmhouse Style: Paint a light color (white, cream, light gray) and distress it slightly for a worn look. Seal with a matte finish.
Bold Statement: Use vibrant paint colors or create custom stencils for a unique, artistic floor.
Maintenance: Keeping Your Plywood Floor Looking Great
Once your plywood floor is installed and finished, you want it to last. Proper maintenance is key.
Regular Cleaning
Sweep or vacuum your floors regularly. This removes dirt and grit that can scratch the finish over time. For spills, wipe them up immediately with a damp cloth.
For a more thorough clean, use a cleaner specifically designed for your finish. Most polyurethane finishes can be cleaned with a damp mop and a mild floor cleaner. Avoid using too much water, as it can still seep into any tiny gaps.
Protecting the Finish
Use floor mats at entrances to catch dirt and moisture. Place felt pads under furniture legs. This prevents scratches and dents.
Avoid dragging heavy items across the floor.
When to Re-Coat or Repair
Over time, the protective finish might wear down, especially in high-traffic areas. You might start to see dull spots or faint scratches. If this happens, you can lightly sand the floor again and apply another coat of your sealant or varnish.
If you notice any damaged areas, like dents or gouges, you can repair them. For small issues, use wood filler. For larger problems, you might need to replace a section of plywood.
This is where using screws instead of glue makes repairs easier.
Plywood Floor Care Tips
Daily: Sweep or dust mop to remove loose debris.
Weekly: Damp mop with a gentle floor cleaner if needed.
Monthly: Check for any small scratches or dull spots. Touch up if necessary.
Annually: Consider a light screening and re-coating of the protective finish for high-traffic areas.
Protect: Use rugs at doors and felt pads on furniture.
When to Call a Professional
While installing plywood flooring can be a DIY project, there are times when you might want to bring in the pros. If you’re unsure about subfloor preparation, especially if you suspect moisture issues in a basement, a professional can assess the situation. They have the tools and experience to ensure a truly level and stable base.
Also, if you want a very complex design or a super-high-end finish, a professional flooring installer can achieve results that might be difficult for a beginner.
For most standard installations, especially in garages or workshops, a handy DIYer can achieve great results. The key is careful planning, patient execution, and thorough finishing. Don’t rush the sanding and sealing steps.
These are what make the difference between a floor that looks like scrap wood and one that looks like a stylish design choice.

Frequently Asked Questions About Plywood Flooring
Can I use standard CDX plywood for my living room floor?
While CDX plywood is strong, its surface has knots and voids that aren’t ideal for a finished living room floor. It requires a lot of filling and sanding to look presentable. For living areas, it’s better to use AC, BC, or hardwood plywood for a smoother, more attractive finish.
How do I prevent my plywood floor from squeaking?
Squeaks often happen when the plywood isn’t fully secured to the subfloor, or the subfloor itself is moving. Make sure to use plenty of screws spaced closely together, especially along the edges of the plywood sheets and where they meet the joists. Adding a sound-dampening underlayment before installing the plywood can also help.
Is plywood flooring waterproof?
No, plywood is not waterproof. While some types use water-resistant glues, the wood itself can absorb moisture and swell. You must seal plywood floors thoroughly with a waterproof or water-resistant finish, like epoxy or multiple coats of polyurethane, to protect them from spills and moisture.
How many coats of polyurethane should I use on plywood flooring?
For good protection, especially in areas with foot traffic, it’s recommended to apply at least three coats of polyurethane. For very high-traffic areas like a workshop or garage, four or even five coats might be beneficial. Always allow each coat to dry completely and sand lightly between coats for the best adhesion and smoothest finish.
Can I put carpet over plywood flooring?
Yes, plywood makes an excellent subfloor for carpet. It provides a firm, stable base for carpet installation. If you are installing plywood specifically to be a subfloor for carpet, you might not need to sand it as smoothly as you would for a visible floor, but ensuring it’s flat and secure is still crucial.
What is the best way to clean a painted plywood floor?
Clean painted plywood floors gently. Sweep or vacuum regularly. For spills, wipe them up quickly.
Use a damp mop with a mild floor cleaner. Avoid abrasive cleaners or too much water, as this can damage the paint or finish. Always test any cleaner in an inconspicuous area first.
Final Thoughts on Plywood as Flooring
So, can you use plywood for flooring? Absolutely. It’s a material with great potential.
It offers a budget-friendly way to get durable and customizable floors. Whether you’re looking for a simple, modern look in a garage, a rustic feel in a cabin, or a unique statement in your living space, plywood can deliver. It just needs a little smart planning and careful finishing.
Don’t be afraid to get creative. Your next floor might just be hiding in plain sight.