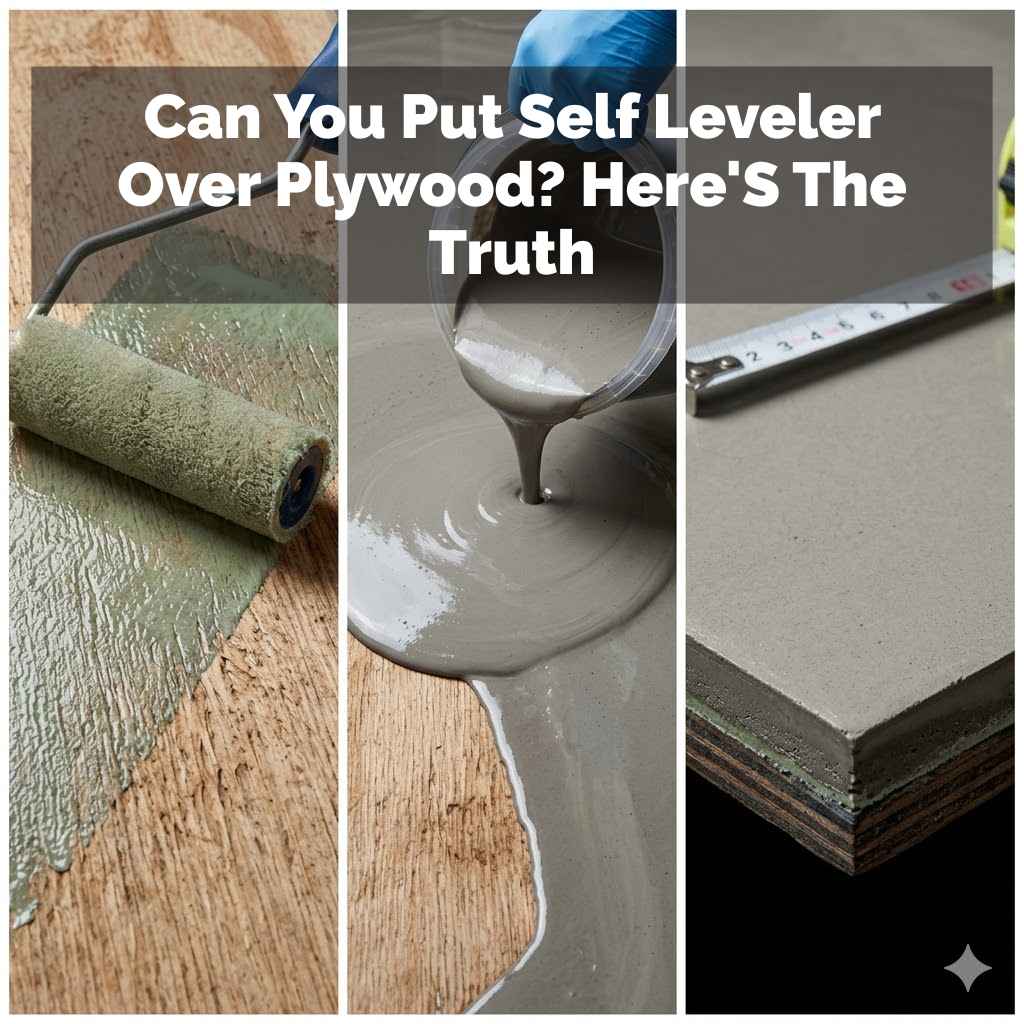
Can You Put Self Leveler Over Plywood? Here’S The Truth
It’s a question many homeowners and DIYers ask when facing uneven floors: “Can I just pour self-leveling compound over my plywood subfloor?” You’ve probably seen those glossy ads or watched videos showing a smooth, perfect floor appearing like magic. But the reality can be a bit more complex. If you’re looking at a floor that feels more like a roller coaster than a stable surface, you might be hoping for a simple fix.
Let’s break down what you need to know before you mix that first bag.
Putting self-leveling compound directly over plywood is sometimes possible, but it depends heavily on the plywood’s condition, type, and how you prepare it. Proper priming and reinforcement are often crucial steps to ensure a lasting, crack-free floor. It’s not always a simple pour-and-go solution.
Understanding Self-Leveling Compound and Plywood
Self-leveling compound, also called self-leveling underlayment (SLU), is a special mix of cement, polymers, and other additives. When you add water, it becomes a liquid that flows and spreads across a floor. Its main job is to create a flat, smooth surface.
This new surface is perfect for laying down final flooring like tile, vinyl, or wood. Think of it as a really smooth concrete blanket for your floor.
Plywood is a common material for subfloors. It’s made of thin layers of wood glued together. It’s strong and usually provides a good base.
However, plywood can have issues. It might warp over time. Moisture can cause it to swell or shrink.
Joints between plywood sheets can sometimes create dips or bumps. These uneven spots are what self-leveling compound aims to fix.
The big question is whether these two materials play well together. Plywood is a wood product, and self-leveling compound is cement-based. Cement and wood can react in different ways.
Wood expands and contracts with changes in moisture and temperature. Cement-based products don’t move as much. This difference in movement can cause problems if not handled right.
In many cases, you can use self-leveling compound over plywood. But it’s not as simple as just pouring it on and walking away. There are specific steps you need to take.
These steps help make sure the new layer sticks well. They also prevent cracks from forming later. If you skip these steps, you might end up with a bigger problem than you started with.
My Own Plywood Floor Adventure
I remember this one time, a friend called me up, sounding really stressed. He had just bought an old house. The living room floor had this weird dip right in the middle.
It felt like walking downhill indoors! He wanted to put down some nice laminate flooring. He saw a video online about self-leveling compound and was convinced it was the easy answer.
So, he went to the store, bought a few bags of the stuff, and a big bucket. He mixed it up, poured it into the dip, and watched it spread. He was so happy!
He thought he was done. But a few weeks later, he called me again. The dip was still there, and now there were tiny cracks appearing in the self-leveling layer.
He had used it over bare plywood, with no primer or any special prep. That’s when he realized it wasn’t as simple as he thought. It was a classic case of wanting the quick fix without understanding the right way to do it.
This experience taught me a lot. It showed me that even with great products, you need to know the process. Floors are the foundation of a room.
You want them to be solid and last. So, when you’re thinking about self-leveling over plywood, it’s important to get the details right. It’s about building a stable base that will support your finished floor for years to come.
When Plywood Meets Self-Leveler: Key Factors
Plywood Type: Not all plywood is created equal. Exterior-grade plywood is generally more stable than interior-grade. The thickness also matters.
Plywood Condition: Is it damaged? Water-stained? Cupped or warped?
These issues must be addressed before any leveling compound is applied.
Existing Floor Coverings: If there’s old flooring like vinyl or carpet, it needs to be removed completely down to the bare plywood.
Subfloor Movement: Plywood subfloors can flex. This movement needs to be accounted for to prevent cracks.
The Core Problem: Plywood’s Nature
So, why can’t you just pour self-leveler over plywood without a second thought? The main reason is how wood behaves. Plywood is made of wood plies.
These plies are glued together in alternating directions. This makes it strong. But wood naturally absorbs and releases moisture.
When it gets moist, it swells. When it dries out, it shrinks.
This expansion and contraction is a slow, constant movement. A cement-based self-leveling compound is rigid. It hardens and stays put.
If the plywood moves underneath it, the rigid compound can crack. Think of trying to bend a piece of hard plastic. Eventually, it will snap.
The same principle applies here.
Also, plywood can sometimes have a smooth, sealed surface. Or it might have oils and resins in it. These can prevent the self-leveling compound from bonding properly.
The compound might just peel off later. You need a surface that the compound can grip onto firmly.
Another issue is that plywood subfloors are often made of multiple sheets. Where these sheets meet, there can be small gaps or ridges. These are called seams.
If these seams aren’t properly taped or filled, they can become weak spots. The self-leveling compound can crack right over these seams.
The weight of the self-leveling compound itself can also be a factor. While it flows to level, it adds weight to the subfloor. In older homes, subfloors might not be as robust as modern ones.
This added weight, combined with plywood movement, can lead to structural concerns if not managed.
Understanding Subfloor Movement
Expansion: When humidity is high, wood absorbs moisture and gets slightly bigger.
Contraction: When the air is dry, wood releases moisture and shrinks a little.
Temperature Effects: While less direct, temperature changes can influence humidity levels, indirectly affecting wood.
Why It Matters for Self-Leveler: This constant, albeit small, movement creates stress. Without proper preparation, the rigid leveling compound will crack under this stress.
Prep Work: The Unsung Hero
This is where most DIYers might cut corners, but it’s the most critical part. Proper preparation ensures the self-leveling compound bonds well and lasts. It’s like building a strong foundation for a house.
You wouldn’t build a house on shaky ground, right? Your floor needs the same care.
First, you need to clean the plywood thoroughly. Get rid of any dust, dirt, grease, or old adhesive. A stiff broom and a vacuum cleaner are your friends here.
If there are any old glues or coatings, you might need a scraper or even a floor grinder to remove them. The surface needs to be perfectly clean.
Next, you need to deal with any imperfections in the plywood itself. Small dents or gouges can be filled with a wood filler or a patching compound. If you have larger areas of damage, like delaminated plywood (where the layers are coming apart), you might need to cut out that section and
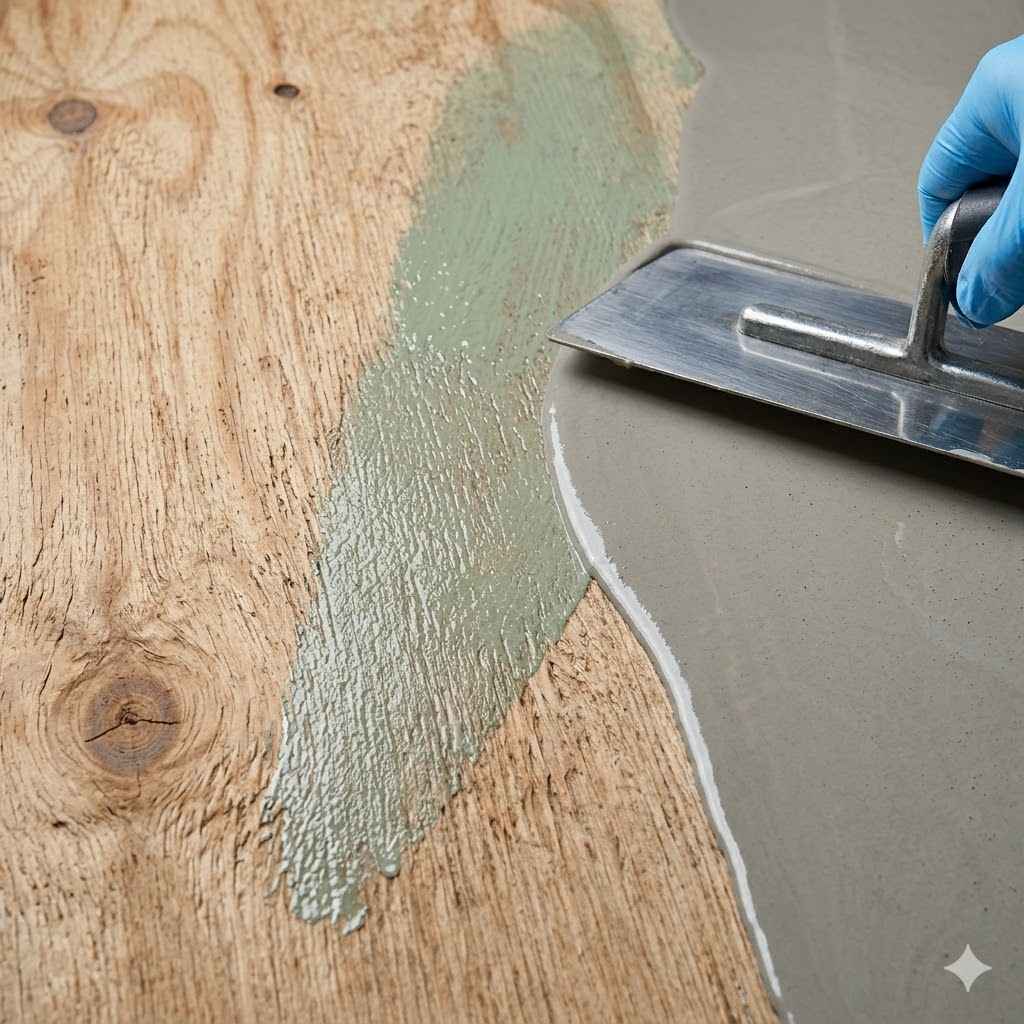
Now, for the most important step: priming. You absolutely need a special primer designed for self-leveling compounds. These primers do a few things.
They seal the porous surface of the plywood, preventing it from soaking up too much water from the leveling mix too quickly. This allows the compound to cure properly. They also create a strong bond between the plywood and the leveling compound.
Many primers are acrylic-based. They create a slightly tacky surface that the self-leveler can grip onto.
You need to apply the primer according to the manufacturer’s instructions. This usually involves one or two coats. Let it dry completely between coats and before applying the self-leveler.
Don’t skip this step. Using the wrong primer, or no primer at all, is a surefire way to have the leveling compound fail.
Primer is Not Optional
Sealing Porosity: Prevents plywood from sucking water out of the wet compound too fast.
Creating Adhesion: Provides a sticky surface for the compound to grab onto.
Moisture Barrier: Some primers offer a slight barrier against residual moisture.
Consistency: Ensures the compound cures evenly across the entire surface.
Reinforcement: Adding Strength Where It Counts
Even with a good primer, there’s another layer of protection you should consider. This is reinforcement. It adds strength to the self-leveling layer, especially over plywood seams.
Many professionals recommend using a reinforcing mesh or mat.
This mesh is typically a fiberglass material. You embed it into the wet primer before pouring the self-leveling compound. It acts like rebar in concrete.
It helps to distribute any stress across a wider area. This significantly reduces the chance of cracks forming, especially over the seams between plywood sheets.
The process usually involves applying a coat of primer, then laying the fiberglass mesh into the wet primer. You smooth it down carefully, making sure there are no wrinkles or bubbles. Then, you apply a second coat of primer over the mesh, ensuring it’s fully saturated and the mesh is well-adhered.
Once this second coat is dry, you’re ready for the self-leveling compound.
Some self-leveling compounds are formulated with special fibers already mixed in. These can offer some degree of internal reinforcement. However, for plywood subfloors, an additional fiberglass mesh is often the safest bet.
It’s an extra step, but it provides serious peace of mind.
I’ve seen jobs where people skipped the mesh over seams. A year later, faint lines appeared in the finished floor, right where the plywood seams were. That’s the self-leveler showing its stress.
Reinforcement is the key to avoiding that.
Reinforcing Mesh: A Smart Addition
What it is: Usually a fiberglass or synthetic fabric mat.
How it helps: Distributes stress, prevents cracks, especially over seams.
When to use: Highly recommended for plywood subfloors, especially over seams.
Application: Embedded into a wet primer coat.
When Plywood is Just Not Enough
There are times when even the best prep work might not be enough for self-leveling compound over plywood. If your plywood subfloor is in really bad shape, it might be beyond repair. This is when you have to consider replacing it.
What constitutes “bad shape”? Look for these signs:
- Extensive water damage: Soft spots, dark stains, and delamination are serious.
- Significant warping or cupping: If the plywood sheets look like potato chips, they are not a stable base.
- Rot or mold: This indicates structural issues and moisture problems that need to be fixed.
- Loose or squeaky subfloor: While some squeaks can be fixed, widespread looseness means the subfloor isn’t stable.
- Subfloor is too thin: For certain types of finished flooring, especially tile, the subfloor might need to be thicker than what you currently have. Self-leveling compound adds thickness, but it doesn’t add structural strength.
In these situations, the best course of action is to remove the damaged plywood. Then, install new plywood of the correct thickness. You should also address any underlying moisture issues in your home’s structure.
Once you have a solid, stable new plywood subfloor, you can then proceed with confidence using self-leveling compound. Or, in some cases, a new, stable plywood subfloor might be all you need for your final flooring.
I once worked on a house where the bathroom subfloor was soft and mushy. Turns out, there had been a long-term leak from the shower. The plywood was ruined.
We had to rip it all out and start fresh. Pouring self-leveler over that would have been a disaster waiting to happen. Always assess the subfloor’s integrity first.
Signs Your Plywood Needs Replacing
Soft or spongy spots: Indicates rot or severe water damage.
Visible buckling or severe cupping: Plywood is no longer flat.
Mold or mildew: Suggests persistent moisture problems.
Delamination: Layers of plywood are separating.
Extremely thin or undersized: Not suitable for the weight of the finished floor.
The Right Way to Apply (Briefly)
While this article focuses on the “can you” question and preparation, a brief overview of application helps. Once your plywood subfloor is prepped, primed, and possibly reinforced, you’re ready for the self-leveling compound.
Mixing is crucial. Follow the manufacturer’s instructions exactly. Too much water makes it weak.
Too little water makes it hard to flow. You typically mix it in a large bucket with a drill and mixing paddle. Work quickly, as it starts to set fast.
Pour the mixed compound onto the floor. Use a gauge rake to help spread it evenly to the desired thickness. Work in sections if you have a large area.
A smoother or squeegee can help move it into place and remove air bubbles. Wear spiked shoes so you can walk on the wet compound without leaving marks.
Allow it to cure completely. This can take 24 hours or more, depending on the product and conditions. Don’t rush this step.
Once it’s cured, you’ll have a hard, smooth surface ready for your final flooring. Always check the product’s instructions for specific curing times before installing new flooring.
I learned that pouring it too thick in one go can cause issues. It’s better to do multiple thinner layers if you need significant height. Each layer needs to cure properly before the next one is added.
This ensures maximum strength and avoids cracking.
Application Quick Tips
Read Instructions: Always follow the specific product’s directions.
Work Fast: Self-leveler has a short working time.
Use Tools: Gauge rake, smoother, and spiked shoes are helpful.
Proper Mixing: Crucial for strength and flow.
Allow Full Cure: Do not install flooring too early.
What This Means For Your Floor Project
So, can you put self-leveler over plywood? The answer is a qualified yes, but with important conditions.
It’s not a magic wand to fix all floor problems instantly. The plywood subfloor must be in good condition. It needs to be clean, structurally sound, and properly prepared.
This preparation involves thorough cleaning and, most importantly, the use of a specific primer.
For added security and long-term durability, reinforcing the plywood seams with a fiberglass mesh is highly recommended. This step is often the difference between a floor that lasts and one that develops cracks prematurely.
If your plywood subfloor is damaged, warped, or rotten, pouring self-leveling compound over it won’t fix the underlying structural issues. In such cases, replacing the plywood is the necessary first step.
Understanding these steps is key. It ensures you’re not just covering up a problem, but actually creating a stable, smooth, and durable base for your beautiful new floor. This careful approach saves you headaches and money in the long run.
When It’s Normal to Use Self-Leveler Over Plywood
- Your plywood subfloor is in good structural condition (no rot, significant warping, or damage).
- The plywood is clean and free of old adhesives, paint, or sealers that would prevent bonding.
- You are willing to use the correct, manufacturer-recommended primer.
- You plan to use a reinforcing mesh, especially over plywood seams.
- You need to smooth out minor imperfections, small dips, or trowel marks from the original plywood installation.
When to Worry or Consider Alternatives
- The plywood is soft, spongy, or shows signs of water damage or rot.
- The plywood is severely cupped, warped, or uneven, indicating underlying structural issues or movement.
- There are large gaps between plywood sheets that cannot be properly taped and filled.
- You’re hesitant to use primer or reinforcement, or you don’t have the time for proper prep.
- The existing plywood is very old or thin and may not support the additional weight of the self-leveler plus the final flooring.
- You have significant high spots rather than low spots; self-leveler is best for filling low areas.
Quick Fixes & Tips for Success
Use the Right Primer: Always use a primer specifically designed for self-leveling compounds and compatible with plywood. Read the self-leveler manufacturer’s guide.
Don’t Skimp on Prep: Cleanliness is paramount. Any debris will compromise the bond.
Reinforce Seams: Use fiberglass mesh tape or a fiberglass reinforcing mat over all plywood seams and edges. This is crucial for plywood.
Work in Sections: For larger areas, plan your pour. Mix enough material to cover a manageable section before it starts to set.
Check for Movement: Before you start, walk on the subfloor. If it feels flexible or bouncy, address that structural stability first.
Follow Instructions: Every product is different. Read and follow the specific instructions for your chosen self-leveling compound and primer.
Ventilation: Ensure good ventilation during and after application, as some primers and compounds can have strong odors. Use appropriate personal protective equipment (PPE).

Frequently Asked Questions
Do I need to seal plywood before using self-leveling compound?
Yes, you absolutely need to prime it. A specialized primer creates a strong bond and prevents the plywood from absorbing too much water from the mix. This is a critical step for success.
Can I use self-leveler over painted plywood?
Generally, no. Paint, varnish, or other sealers can prevent the self-leveling compound from bonding properly. You’ll likely need to remove the paint down to bare plywood or ensure the paint is specifically approved for use under self-leveling compounds, which is rare.
What thickness of plywood is best for self-leveling compound?
The thickness of the plywood is more about the subfloor’s structural integrity than its compatibility with self-leveler. Typically, 3/4-inch plywood is a good standard. The self-leveler itself will be poured to a desired thickness (usually 1/4 to 1 inch) to level the surface.
How do I fix squeaky plywood before leveling?
Squeaks often come from the plywood rubbing against the floor joists or from movement between plywood sheets. You can try driving screws through the plywood into the joists, or use a subfloor adhesive. Addressing squeaks is important for a stable base before leveling.
Can I pour self-leveler over old vinyl flooring glued to plywood?
No, you must remove the old vinyl flooring and its adhesive completely down to the bare plywood. Any residue will prevent the self-leveler from adhering correctly and could lead to failure.
Will self-leveling compound make my floor stronger?
Self-leveling compound creates a smooth and hard surface, but it does not add significant structural strength to the subfloor itself. Its primary purpose is to level and smooth. For structural issues, you need to address the subfloor directly.
Final Thoughts
The journey to a smooth floor often involves more than just pouring a magical mixture. When it comes to using self-leveling compound over plywood, the secret to success lies in thorough preparation and understanding. It’s about creating a stable, well-bonded surface that can handle the demands of your home.
With the right steps, your plywood subfloor can indeed become a great foundation for a beautifully leveled surface.