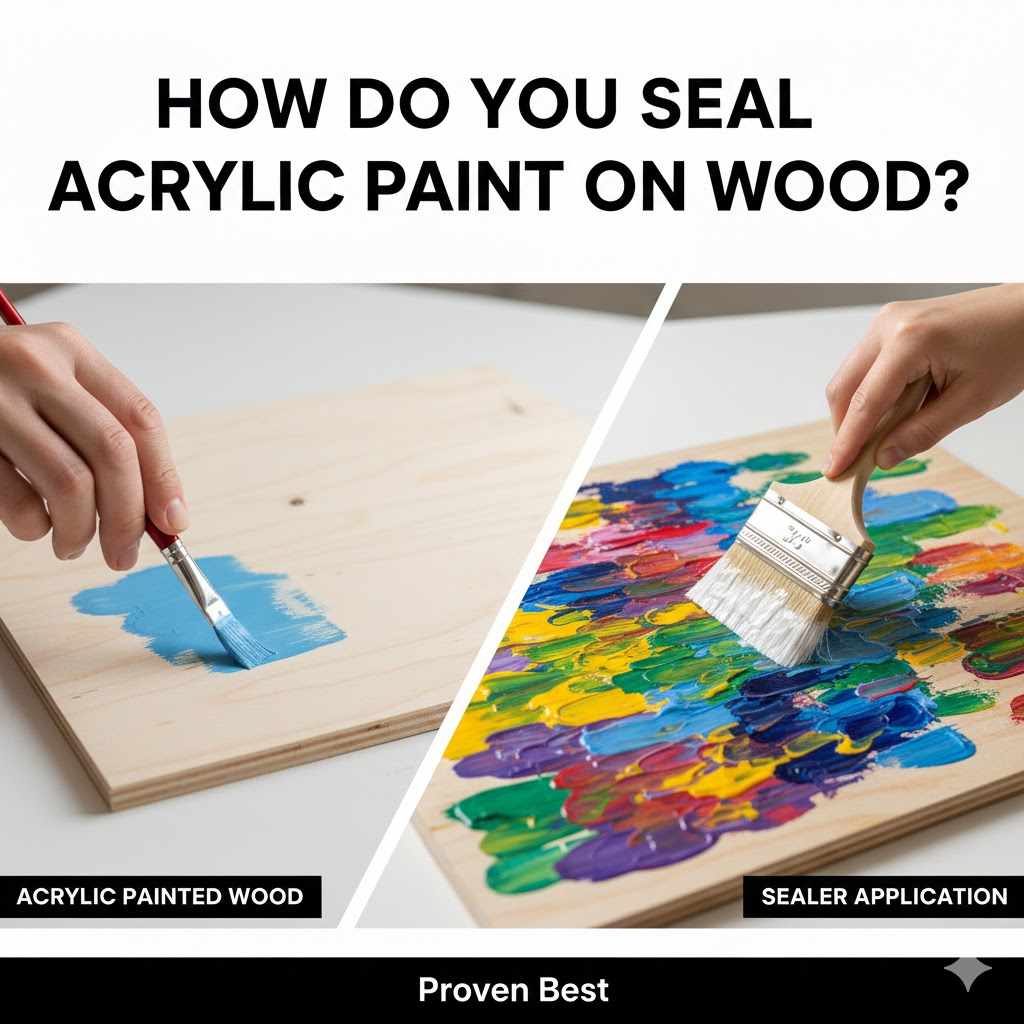
How Do You Seal Acrylic Paint on Wood: Proven Best
The best way to seal acrylic paint on wood is by applying 2–3 thin, even coats of a clear, durable topcoat, such as polyurethane or acrylic varnish, allowing full dry time between coats for maximum protection and longevity.
Welcome to the workshop! Have you just finished a beautiful painting on wood—maybe a decorative sign, a painted shelf, or some fun wooden coasters? That’s fantastic! Now comes the critical, often slightly confusing part: sealing the paint. Acrylic paint is versatile, but it needs a good protective layer, especially on wood surfaces that see regular use.
It’s frustrating when your hard work smudges or fades after just a little handling. Don’t worry! Sealing your acrylic art correctly is straightforward. We’re going to walk through the simple steps together so you can achieve a professional, durable, and beautiful finish that lasts for years.
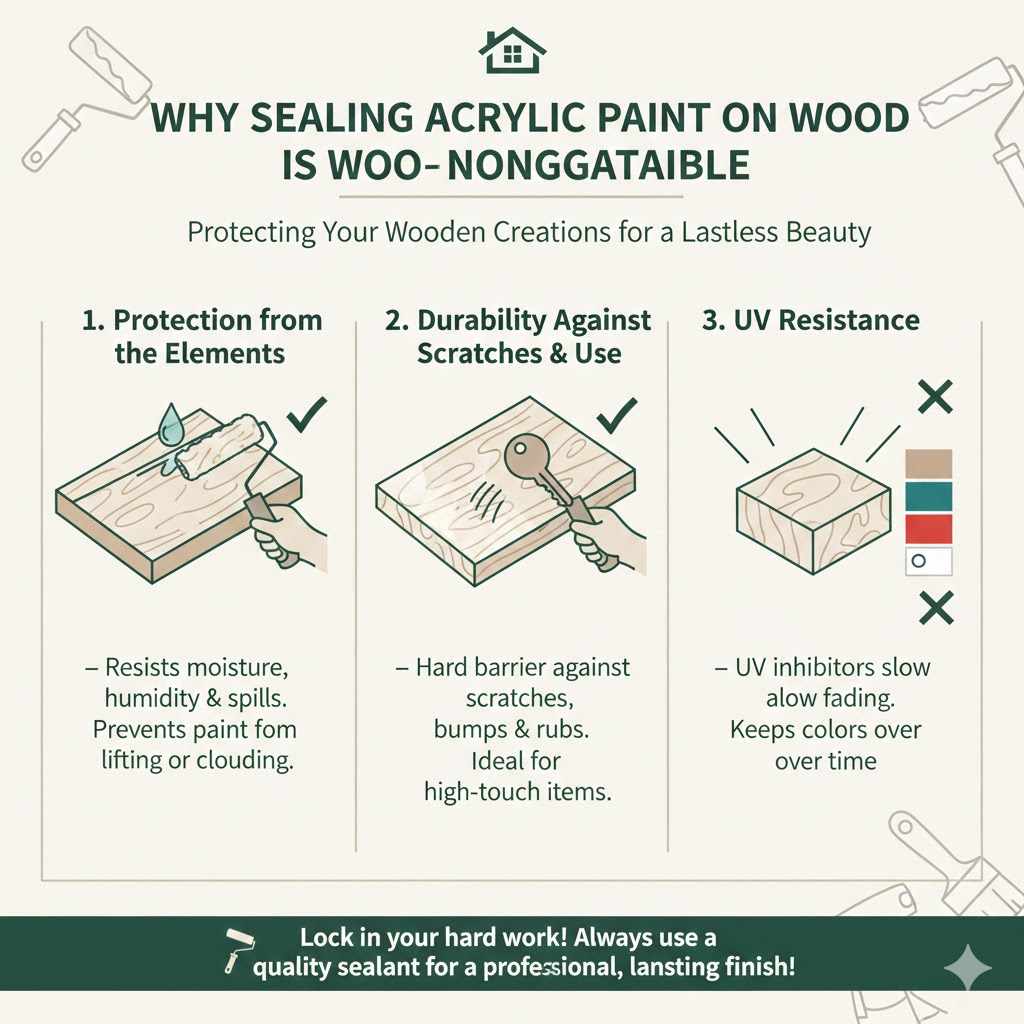
Why Sealing Acrylic Paint on Wood is Non-Negotiable
Acrylic paint is water-based. Even after it dries to the touch, it remains slightly susceptible to water, abrasion, and UV fading over time. When you paint wood, you are creating a surface that needs defense. Sealing isn’t just about making it shiny; it’s about locking in your effort.
Protection from the Elements
Think of your sealant as armor. Without it, moisture from humidity or accidental spills can penetrate the paint layer. This can cause the paint to soften, lift, or become cloudy, especially in a kitchen or bathroom setting.
Durability Against Scratches and Use
If your painted item is going to be touched, moved, or used—like a picture frame or a tray—the paint needs abrasion resistance. A quality sealant provides a hard, protective barrier against everyday bumps and rubs.
UV Resistance
Sunlight can degrade pigments over time, causing colors to look dull or faded. Many modern sealants contain UV inhibitors that slow down this fading process, keeping your vibrant blues and reds looking fresh.
Gathering Your Essential Supplies (The Starter Kit)
Before we start brushing or spraying, let’s make sure you have everything handy. Preparing your workspace and materials ensures a smoother, cleaner application process. This keeps things efficient and enjoyable!
Materials You Will Need
- Acrylic Painted Wood Surface (Must be fully cured—wait 24-48 hours after painting).
- Your Chosen Sealer (See types below for recommendations).
- High-Quality Brushes or Foam Applicators (Lint-free is best for liquid sealers).
- Clean, Lint-Free Cloths or Tack Cloth.
- Fine-Grit Sandpaper (220-grit or higher, optional but recommended for a perfect finish).
- Protective Gloves and Drop Cloth.
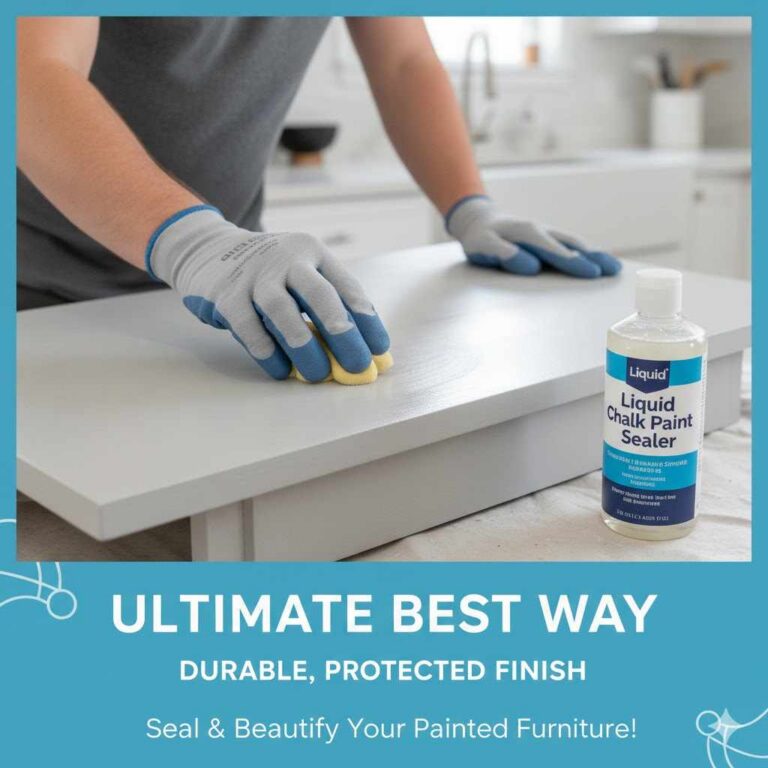
Choosing the Right Sealer: A Comparison for Beginners
This is where most beginners get stuck. What product actually works best for sealing acrylic on wood? The answer depends on the look you want (matte, satin, or gloss) and where the piece will live.
Here are the top three performers, often recommended by professional craftspeople and home DIYers:
| Sealer Type | Best For | Pros | Considerations |
|---|---|---|---|
| Water-Based Polyurethane (Clear Finish) | Indoor furniture, signs needing high durability. | Extremely durable, low odor, quick dry time. | Can sometimes slightly yellow light colors over long periods. |
| Acrylic Spray Sealer (Varnish) | Decorative items, artwork where brush strokes must be avoided. | Easiest for beginners, flawless finish, excellent UV protection. | Requires good ventilation; risk of drips if applied too close. |
| Wax Finish (Paste Wax/Furniture Wax) | Rustic items, natural matte finishes, items not exposed to high water. | Gives a soft, natural sheen; easy to buff and repair. | Offers the least water resistance; requires reapplication over time. |
For most first-timers sealing painted wood indoors, I recommend a good quality water-based polyurethane or an acrylic spray varnish, as they provide the best balance of protection and ease of use without the strong fumes associated with oil-based alternatives.
The Prep Work: Setting Up for Success
Proper surface preparation is 80% of a good paint job, and sealing is no exception! If your surface isn’t ready, your sealant won’t adhere well, leading to bubbles, peeling, or a hazy finish. Be patient here; rushed prep means redoing the whole project later.
Step 1: Ensure the Paint is Fully Cured
Acrylic paint needs time to fully cross-link and harden. Even if it feels dry to the touch, it’s usually not fully cured. Curing is the process where solvents or water fully evaporate.
- Wait Time: Always wait a minimum of 24 hours after applying the final coat of acrylic paint before sealing. For thick coats or highly humid environments, wait 48 hours.
Step 2: Clean the Surface Thoroughly
Dust, skin oils, and small paint chips are the enemy of smooth sealing. They will get trapped under the sealant, creating bumps.
- Gently wipe the entire painted surface with a tack cloth. A tack cloth is slightly sticky and grabs dust particles without leaving residue.
- If the piece is brand new wood that you painted, ensure you sanded away any mill glaze before painting (though the paint itself should be dust-free now).
- If sealing an older piece, wipe with a slightly damp cloth (water only) and allow it to dry completely—15 minutes should suffice—before moving on.
Step 3 (Optional but Recommended): Light Sanding (The Professional Secret)
If you applied a few layers of paint and they feel slightly bumpy, or if you just want an incredibly smooth base for your topcoat, a very light sanding helps the sealant bite into the surface.
- Use 320 or 400-grit sandpaper—very fine grit. You are not trying to remove the paint; you are just breaking the surface tension of the paint layer.
- Sand very lightly in the direction of the grain, just enough to remove high spots.
- Wipe clean with a tack cloth immediately after sanding.
Applying the Sealer: The Proven Best Method
We’re going to focus on applying a liquid sealer (polyurethane or varnish) with a brush, as this offers the best control for beginners on detailed wooden items. If you use a spray, ensure you follow the can’s instructions regarding distance (usually 8-12 inches).
Technique Focus: The Thin Coat Rule
I cannot stress this enough: Thin coats are infinitely better than one thick coat. Thick coats pool, trap air (creating bubbles), take forever to dry, and are prone to dripping and cracking. Thin coats dry fast, cure hard, and look seamless.
Step 4: First Sealing Coat Application
- Mix, Don’t Shake: If you are using liquid polyurethane, stir the can gently. Never shake it, as this introduces bubbles that will transfer to your wood piece.
- Load the Brush Lightly: Dip your high-quality synthetic brush about one-third of the way into the sealer. Gently tap the brush against the inside edge of the can to remove excess—remember, thin coats!
- Brush in Sections: Start on a less visible area, like the back or bottom edge, to get a feel for the flow. Apply the sealer in long, even strokes, following the direction of the wood grain if visible.
- Do Not Overwork It: Apply smoothly and quickly. Go over the area once or twice maximum. If you keep brushing over the same area, the sealer starts to dry and lift, causing drag marks. Let the material self-level as much as possible.
- Avoid Pooling: Check the edges and corners where liquid sealer loves to gather. Use the edge of your brush to lightly pull excess sealer away from these areas.
Step 5: Drying and Curing Time (The Test of Patience)
Drying time is crucial for good adhesion. If you sand or recoat while the sealer is still slightly tacky, you will ruin the finish.
- Dry to the Touch: Most water-based products will feel dry in 1–4 hours, depending on humidity and thickness.
- Recoat Time: Check the specific instructions on your product can! Generally, recoating can happen after 4 hours, but waiting 6–8 hours is safer for beginners to ensure the first coat is firm.
Step 6: Intercoat Sanding (For a Glass-Smooth Finish)
If you want a truly professional, showroom finish, you need to lightly sand between coats. This knocks down any dust nibs that settled and any tiny ridges left by the brush.
- Once the first coat is fully dry (not just dry to the touch, but hard), use very fine 400-grit sandpaper or a fine sanding sponge.
- Sand the entire surface extremely lightly. You are aiming to dull the sheen, not remove the sealant.
- Wipe away all sanding dust meticulously with a tack cloth.
Step 7: Applying Subsequent Coats
Repeat Step 4 (Application) and Step 5 (Drying). Most wooden projects benefit from three total coats of sealant (the initial coat plus two recoats) for truly long-term protection, especially on high-traffic surfaces.
Step 8: Final Cure
Even after the final coat is dry to the touch, the sealant is not yet fully cured and resistant to scratching. This takes much longer.
- Handle Carefully: You can usually handle the item after 24 hours.
- Full Cure: For maximum hardness, avoid heavy use, scrubbing, or placing hot items on the surface for 3 to 7 days, depending on the specific sealer used. Polyurethane takes longer to reach its final hardness than varnish.
Sealing Acrylic Paint on Wood for Specific Needs
Different environments demand different levels of protection. A small wooden jewelry box needs less defense than a painted cutting board.
For Items Exposed to Moisture (Kitchen/Bath Decor)
When moisture is a concern, you must prioritize sealers with high water-resistant ratings. The preparation is key here: ensure the paint has cured for the full 48 hours before sealing.
- Top Choice: Oil-Based Polyurethane or Marine Varnish. While oil-based products have stronger fumes and require mineral spirits for cleanup, they form a harder, more water-tight shell than water-based formulas. (Ensure your paint layer is compatible—test in a hidden spot first!)
For High-Touch Surfaces (Signs, Furniture, Shelves)
Durability against repeated abrasion is the goal. You need a hard topcoat that won’t immediately scratch if something slides across it.
- Top Choice: Water-Based Polyurethane (Matte, Satin, or Semi-Gloss). Modern water-based formulas are incredibly tough and dry fast, minimizing project downtime. Three coats are non-negotiable here.
For Artwork or Decorative Items (Minimal Handling)
If your piece is going on a wall or needs a specific artistic finish (like an ultra-flat matte look), extreme abrasion resistance is less important than aesthetics.
- Top Choice: Matte Acrylic Spray Sealer or Artistic Varnish. These are easy to spray evenly, offering UV protection without significantly altering the look of your paint underneath.
It’s important to consult material safety data sheets (MSDS) or guides from manufacturers like Minwax or Varathane regarding recoat windows and cure times, as specific formulas vary. Safety first—always work in a well-ventilated area when using any solvent or chemical coating, as noted by environmental protection agencies when discussing volatile organic compounds (VOCs).
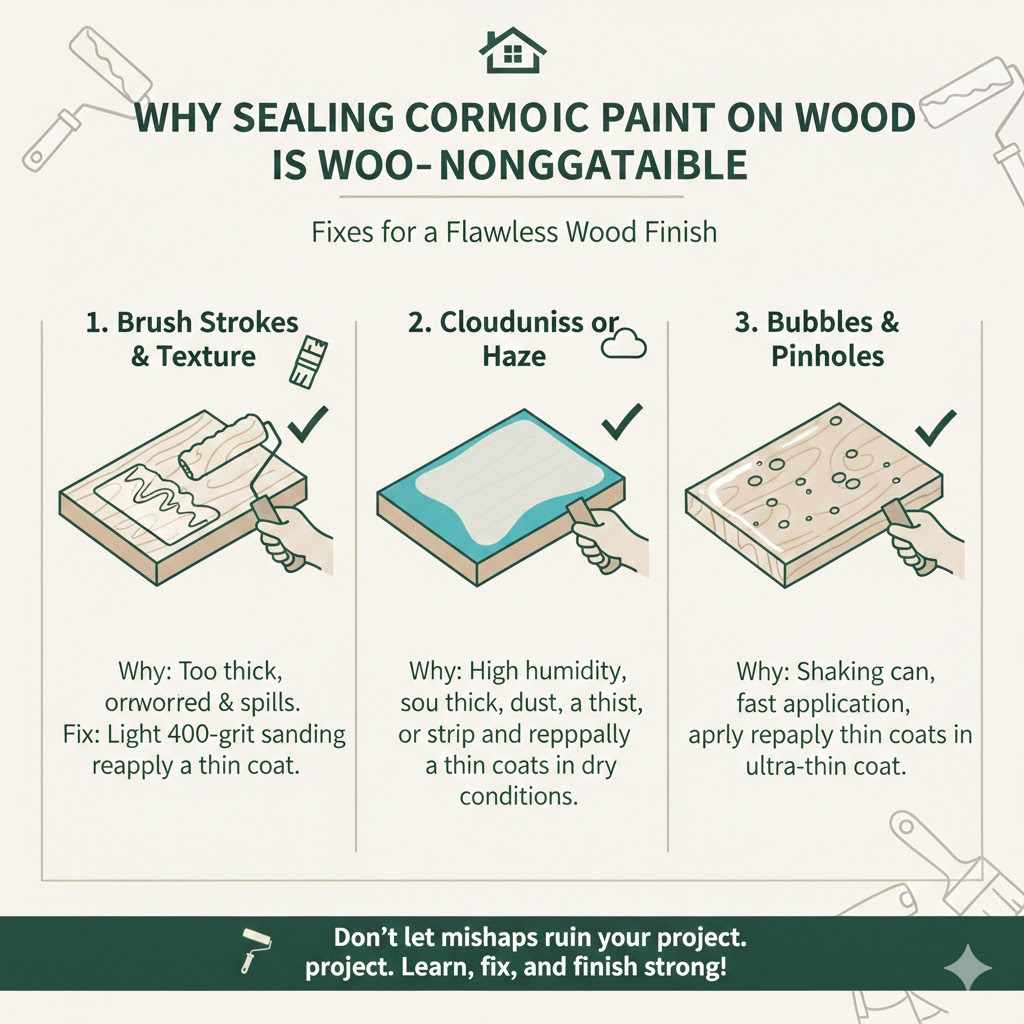
Troubleshooting Common Sealing Problems
Even with the best plan, sometimes things go slightly sideways. Here are fixes for the three most common beginner sealing blunders.
Problem 1: Brush Strokes and Texture
Why it happens: Applying the sealer too thickly, or working the material too long after it starts setting up.
The Fix: If the surface is still wet (within the first few minutes), you can often use a clean, dry brush to gently smooth the area. If it is dry, wait until the entire coat is cured, then use very light sanding (400-grit) followed by another thin coat, paying close attention to applying smoothly in one pass.
Problem 2: Cloudiness or Haze
Why it happens: This is very common with water-based products if they are applied too thickly or if the humidity is too high, trapping moisture. It can also happen if sanding dust wasn’t fully removed before the final coat.
The Fix: If the haze is minor, sometimes rubbing it gently with 0000 (superfine) steel wool can improve clarity. If it is severe, you may need to use a citrus-based stripper (check compatibility with your paint first!) or sand through the finish entirely and reapply 2–3 very thin, fast coats in a drier environment.
Problem 3: Bubbles and Pinholes
Why it happens: Shaking the can instead of stirring, applying too fast, or painting over paint that wasn’t fully cured.
The Fix: This is very difficult to fix mid-coat. For small imperfections in a fully dried coat, you can often use a toothpick or fine sandpaper to gently pop or smooth the bubble. Then, apply a final, ultra-thin, slow-brushed coat over the repaired area.
Frequently Asked Questions (FAQs) for Beginners
Q1: Can I use an oil-based sealer over water-based acrylic paint?
A: Yes, generally you can! Oil-based sealers are very durable. However, you must let the acrylic paint dry and cure for at least 48 hours first. Always test on a scrap piece to ensure no lifting occurs.
Q2: Do I need to sand between every single coat?
A: For beginners aiming for a mirror finish, sanding (intercoat abrasion) after the first coat is essential. For subsequent coats (coats 2 and 3), you only need to sand if you see imperfections like dust or brush marks. If the second coat went on smoothly, you can often skip sanding before the third coat.
Q3: How long should I wait before using the painted wood object?
A: While it will be dry to the touch in a few hours, wait 24 hours before light handling. For items that will see significant wear, like painted coasters or serving trays, wait a full 3–7 days before placing hot mugs or sharp objects on them to allow the sealant to achieve maximum hardness.
Q4: Is Mod Podge a good sealer for acrylic paint on wood?
A: Mod Podge is a popular choice for paper crafts, but for wood that needs serious protection, it’s only a light sealer. It offers very little abrasion or water resistance compared to polyurethane or varnish, making it better suited for display-only items.
Q5: What is the best finish—Matte, Satin, or Gloss?
A: This is purely aesthetic! Matte hides surface imperfections well, Satin (my personal favorite for everyday items) offers a gentle sheen that highlights colors beautifully, and Gloss maximizes color vibrancy and shine but clearly shows every fingerprint or imperfection.
Q6: Can I use wood stain over acrylic paint that has been sealed?
A: No, you cannot use traditional wood stain over sealed acrylic paint. Stain is designed to penetrate raw wood. Once sealed, you must use products designed to sit on the surface, like colored glaze or a tinted varnish, if you wish to alter the color.
Conclusion: Finishing Strong
You now have all the tools and techniques required to properly seal your beautiful acrylic paintings on wood. Remember the core principles: proper curing time, meticulous cleaning, and applying multiple thin coats rather than one thick, tempting coat. Sealing is the final act of craftsmanship that turns a lovely hobby piece into a durable heirloom or a functional piece of home decor.
Grab your chosen varnish, pour a small amount, stir it gently, and take your time with that first thin layer. Enjoy the transformation as that protective armor goes on—you’ve earned a finish that will look fantastic for years to come. Happy crafting, mentor friend!