How to Refinish a Wooden Deck
Refinish a wooden deck by using the least aggressive prep that fits its condition: repair loose boards first, then clean and recoat sound stain, strip failing coatings, or sand only when peeling or rough fibers remain. Skip that match and you can trap moisture, shorten finish life, and end up redoing the deck after one wet season. This guide shows how to inspect, prep, and finish the deck with stain, sealer, or paint for winter durability.
Deck condition decision table


| Condition | Visible signs | Prep steps | Best finish | Avoid | When to hire a pro |
|---|---|---|---|---|---|
| Bare pressure-treated wood | Fresh lumber color, mill glaze, light fuzzing, no old finish | Inspect for fastener flushness, clean, let it dry fully, then scuff-sand raised fibers | Semitransparent stain for color, or a clear/tinted sealer if you want the natural grain visible | Heavy solid coating that can peel later if the deck is still moving moisture | If boards cup badly, twist, or stay damp after normal drying |
| Weathered gray wood | Sun-bleached gray surface, dull fibers, surface grime, possibly mildew spots | Clean with an oxygenated cleaner or bleach-based cleaner as needed, scrub, rinse, then sand rough spots after drying | Tinted waterproofer for faded color, or semitransparent stain for more pigment | Painting over loose fibers without sanding or removing grime | If gray is paired with soft wood, rot, or deep checking |
| Old solid stain | Color is still present, but areas are worn thin, chalky, or patchy | Clean, test adhesion, then scuff-sand or fully sand worn sections before recoating | Solid color finish if you need uniform color and better hiding | Applying a clear sealer over a film that is already failing | If the coating is bubbling, peeling in sheets, or hiding damage |
| Failing peel-prone paint | Flaking edges, lifted sheets, bare spots, lap ridges | Scrape loose paint, strip what will not stay put, sand to sound edges, then clean and dry | Solid color finish or paint, depending on the product system | New topcoat over loose paint | When paint covers large areas, or lead-safe rules may apply |
| Boards with rot or deep checking | Soft spots, punky edges, wide splits, checks that catch a fingernail | Replace damaged boards, reset protruding fasteners, then clean and finish surrounding wood | Depends on the remaining sound wood after repair | Any coating over active rot | When rot reaches joists, railing posts, or multiple boards |
How do you inspect a deck before refinishing?
Start with damage, not cleaner. Look for rot, loose boards, cracked ends, warping, raised nails or screws, and checks that are deeper than a surface scratch. If a board flexes, stays soft after probing, or has a lifted edge that catches a shoe, replace or reset it before any coating work.
Picture a deck of about 12 by 16 feet with one board near the grill that dips underfoot and a couple of screw heads standing proud. That board should be fixed first, because finish will not stop movement. If you coat around a loose section, the finish often cracks there first.
Check the fasteners and board edges
Run a hand carefully over each walking path. Protruding fasteners should be driven flush or replaced with corrosion-resistant hardware appropriate for outdoor use. Sharp board edges and splinters need attention too, since finish will not hide them and winter moisture tends to open them wider.
Replace damaged wood before any coating
Rot, heavy warping, and deep checking are repair problems before they are finishing problems. Coating over damaged wood traps moisture and hides failure. Replace boards that are soft, split through, or structurally loose. Then clean the surrounding area so the new finish bonds to sound material.
When should you clean, sand, or strip?
Choose the lightest prep that still holds up. Sound wood with light dirt or mild graying usually needs cleaning and a scuff-sand, while peeling stain or paint needs removal before recoating. Sanding is for raised grain, rough patches, and bare-wood prep after washing, not for every deck.
Choose cleaning only for sound, dirty wood
If the finish is intact but dusty, dull, or lightly mildewed, cleaning is usually enough before recoating. A deck cleaner removes mildew and sun staining better than water alone. That said, a cleaner cannot fix flaking film or soft wood, so inspect first and keep expectations realistic.
Strip when the old coating is failing
Old solid stain and paint that peel or flake need stripping or serious removal, because new finish will follow the failure. Spot-sanding loose edges is not enough when the film is releasing from large areas. Strip down to stable material, then clean and let the wood dry before recoating.
Sand after washing when fibers stand up
After cleaning and drying, use sanding to knock down raised grain, fuzzing, and rough spots. For bare wood prep, a random orbital sander is commonly used on flat boards. Start with a coarser grit for rough lumber, then move finer so you smooth the surface without rounding edges.
What is the best way to clean the deck?

Choose the cleaner based on what you see. Oxygenated cleaner works well for general grime, mildew, and sun staining, while bleach-based cleaners are sometimes used for stubborn organic discoloration. Scrub with a stiff-bristle brush, rinse thoroughly, and let the surface dry before sanding or coating.
Use cleaner, scrub, and rinse
Bob Vila recommends scrubbing with a stiff-bristle brush and TSP solution, and the same basic sequence applies to most cleaners: apply, scrub, and rinse. The rinse matters because residue left in the grain can interfere with stain or sealer and may leave uneven color.
Use pressure washing only when the wood can take it
Pressure washing can etch soft wood or splinter weathered fibers if the pressure is too high. Popular Mechanics recommends staying below 2,000 psi, and Complete Construction says softer lumber should be around 500 to 600 psi, while harder wood should go no higher than about 1300 psi. Use a broad-fan tip and keep the nozzle about a foot from the deck.
Cool conditions help because the water is less likely to flash dry on the surface, which can leave uneven cleaning marks. A higher setting is not better. It usually means more damage and more sanding later.
How do you sand a wooden deck?
Use a random orbital sander for flat boards and a careful hand for edges, corners, and rails. The goal is to smooth raised fibers after washing, not to remove more wood than needed. On bare wood, work through a grit progression that removes roughness without leaving deep scratches.
Use the right grit progression
For bare-wood prep, start coarse enough to flatten fuzz and weathered spots, then step to a medium grit, and finish finer if the board surface needs it. The exact grit depends on the wood and how rough it is, but the sequence matters more than any single number.
Do not round over the deck edges
Keep the sander moving and stay flat on the board face. Rounding the edges makes finish wear faster at the corners and can expose end grain. Around stairs, posts, and tight corners, finish with hand sanding so the surface stays even.
Which finish should you use?
Choose finish by how much wood you want to see and how much coverage you need. Semitransparent stain gives more pigment than toner, so it covers faded wood better while still showing grain. Solid color finish hides wood grain and color completely, like paint, and clear or tinted sealers keep more of the natural look.
Stain versus sealer versus paint
Deck stain is the best fit when you want color plus UV protection. Semitransparent stain is a common middle ground, and solid color stain is useful when the surface needs more hiding. Deck sealer is better when moisture resistance and a natural wood look matter more than hiding flaws.
Some clear waterproofers allow wood to weather to a natural silver-gray over time. Tinted waterproofers can renew the natural wood color on faded decks. Solid variants give more coverage and a more opaque look, but they also hide grain more completely.
When paint makes sense
Paint is a finish choice, not a cleanup fix. Use it only when you are prepared for stronger prep and a more opaque look. A deck with peeling paint needs careful removal before repainting. If you want visible grain, a stain or sealer is the better match.
How should you apply the finish?
Use a roller, brush, or pump sprayer as the product allows, then back-brush or back-roll to work the finish into the wood. Keep a wet leading edge so the next pass overlaps while the film is still open. That reduces lap marks and uneven sheen on wide boards.
Follow the coat count and weather window
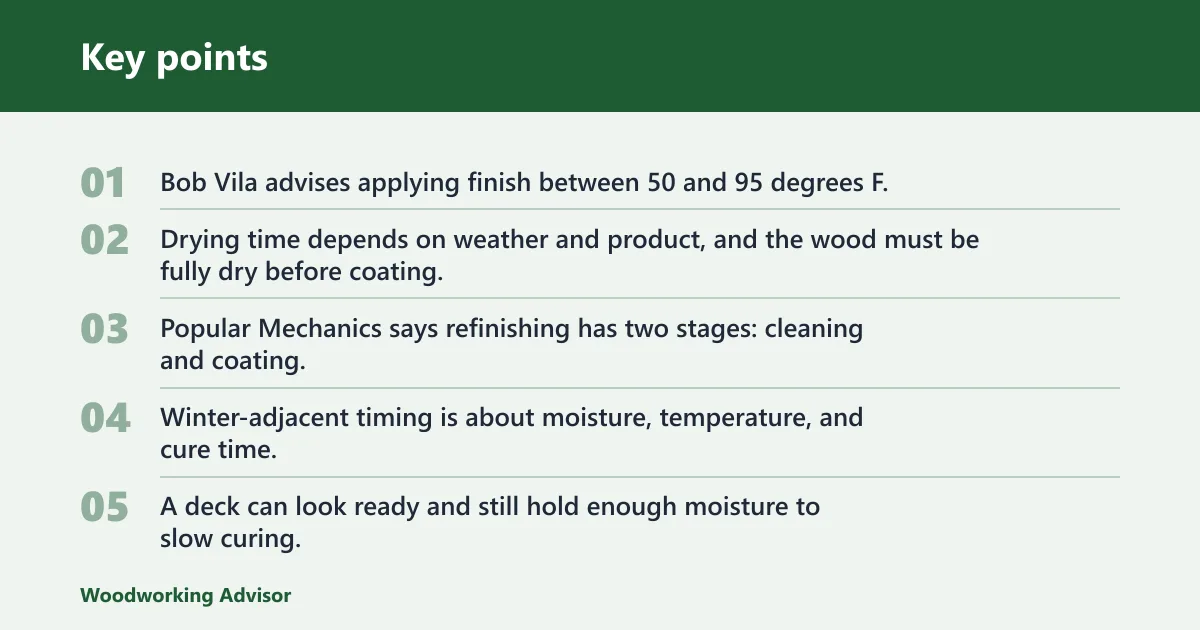
Bob Vila advises applying finish between 50 and 95 degrees F. Drying time depends on weather and product, and the wood must be fully dry before coating. The same source says refinishing has two stages: cleaning and coating, and the labor can take 1.5 to 3 hours per 100 square feet.
Winter-adjacent timing is about moisture, temperature, and cure time, not the calendar date. A deck can look ready and still hold enough moisture to slow curing. If the forecast stays cool and damp, wait. Finish that cannot cure before a cold, wet spell is more likely to fail early.
Use one coat or two coats exactly as directed
Some products are made for one coat, while others need two. Do not guess. Apply the film thickness the label calls for, and let each coat dry for the stated interval before walking on it or putting furniture back. That matters even more on shaded or north-facing decks.
Suppose a deck of about 180 square feet gets a semitransparent stain and the wood still feels cool and slightly damp in the morning shade. In that case, a second coat too soon can trap moisture and create blotches. Waiting for a true dry surface gives the finish a better chance to cure evenly.
How to refinish a wood deck yourself
You can refinish a wood deck yourself if the boards are sound, the damage is limited, and you choose the least aggressive prep that fits the condition. Start with repair, then clean, dry, sand, and coat in that order. A sound deck that only needs cleaning is a good DIY candidate.
Simple DIY sequence
- Inspect for rot, loose boards, deep checking, and lifted fasteners.
- Repair or replace damaged boards first.
- Clean with the right cleaner, then rinse well.
- Let the deck dry fully before sanding or coating.
- Sand rough fibers or strip failing finish if needed.
- Apply stain, sealer, or paint with a wet leading edge.
How to refinish a weathered wood deck
A weathered deck usually needs cleaning first, then a decision about sanding or stripping based on how much finish remains. Gray wood that is still sound may only need a cleaner, a rinse, and light sanding. If the old coating is patchy or peeling, remove the failed areas before recoating.
How to refinish a deck without sanding
You can refinish without sanding only when the surface is already sound and the issue is dirt, mildew, or light color fading. Clean thoroughly, rinse, let it dry, and apply a compatible stain or sealer. If fibers are raised or a film is peeling, sanding or stripping becomes necessary.
How to prep a wood deck for paint
Prep for paint by removing anything loose first. Scrape peeling areas, sand to a stable edge, clean off dust and residue, and let the wood dry fully before priming or painting. Paint holds best when the surface is sound, dry, and free of old finish that can keep releasing.
How to paint a wooden deck
Paint a wooden deck only after the board surface is repaired, cleaned, and dry. Apply the coating with a roller, brush, or sprayer as the product allows, and keep a wet edge so lap marks do not set up. Use a solid-color finish or deck paint system made for foot traffic.
How to restore a wooden deck
Restoration is usually a sequence of diagnosis, repair, cleaning, and recoating. Replace rot, flatten protruding fasteners, remove failing finish, wash away mildew and stain, then choose stain, sealer, or paint based on how much grain you want to keep visible. Good restoration starts with honest damage assessment.
How to repaint a wooden deck
Repaint only after the existing paint has been stabilized. Remove loose film, sand the edges, clean the surface, and let it dry before recoating. If large areas are peeling, full removal is safer than spot repairs because new paint follows the weakest layer underneath.
Frequently asked questions
How much pressure should I use when power washing a deck?
Use the lowest pressure that cleans the surface. A broad-fan tip and a foot of distance reduce etching and splintering.
When should I choose stain instead of paint for a deck?
Choose stain when you want to keep some wood grain visible and add UV protection without a heavy film. Semitransparent stain works well on faded but sound wood. Paint makes more sense when you want opaque coverage and are willing to do the stronger prep that peeling film demands.
What is the best way to sand a wooden deck?
A random orbital sander is the best starting tool for flat deck boards because it removes roughness without leaving obvious swirl marks. Use it after washing and drying, and move through a grit progression that smooths raised fibers while keeping board edges square and intact.
Sponsored / affiliate links. As an Amazon Associate I earn from qualifying purchases. I may earn additional commission from eligible campaigns.
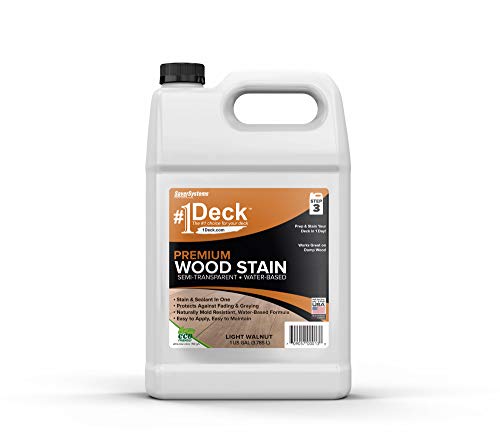
 #1 Deck Premium Advanced Solid Color Outdoor Wood Stain and Sealer in One – Water Based Sealant for Wood Decks, Fences, & Siding - 1 Gal - Made in USA - Simply White
 #1 Deck Premium Advanced Solid Color Outdoor Wood Stain and Sealer in One – Water Based Sealant for Wood Decks, Fences, & Siding - 1 Gal - Made in USA - Gray