Winter Wood Care: Decks, Fences, Doors and Furniture
Use a 3-step winter wood triage: fix water traps and bare wood first, seal only dry surfaces above 50°F, and ignore cosmetic graying until spring. Miss those calls, and freeze-thaw cycles can turn minor checks into rot, sticking doors, loose fasteners, and failed finishes. This guide covers what to inspect, protect, and safely leave alone on decks, fences, exterior doors, and outdoor furniture.
Start by sorting symptoms by cause. Wet leaves in a deck corner, a fence post lifting after a hard freeze, a door rubbing at the latch edge, and mildew under a furniture cover do not need the same fix. Some signs call for quick homeowner action. Others point to movement, hidden decay, or hardware failure that no sealer will cure.
This advice reflects standard exterior-wood maintenance practice used by deck builders, painters, and repair contractors: deal with slip hazards and trapped moisture immediately, confirm whether wood is actually dry before coating, and separate surface wear from structural movement. For baseline safety and materials guidance, see the USDA Forest Products Laboratory’s Wood Handbook, the North American Deck and Railing Association deck safety materials, and manufacturer label instructions for any coating or ice-melt product used.
Winter wood triage: what matters first


The four winter threats
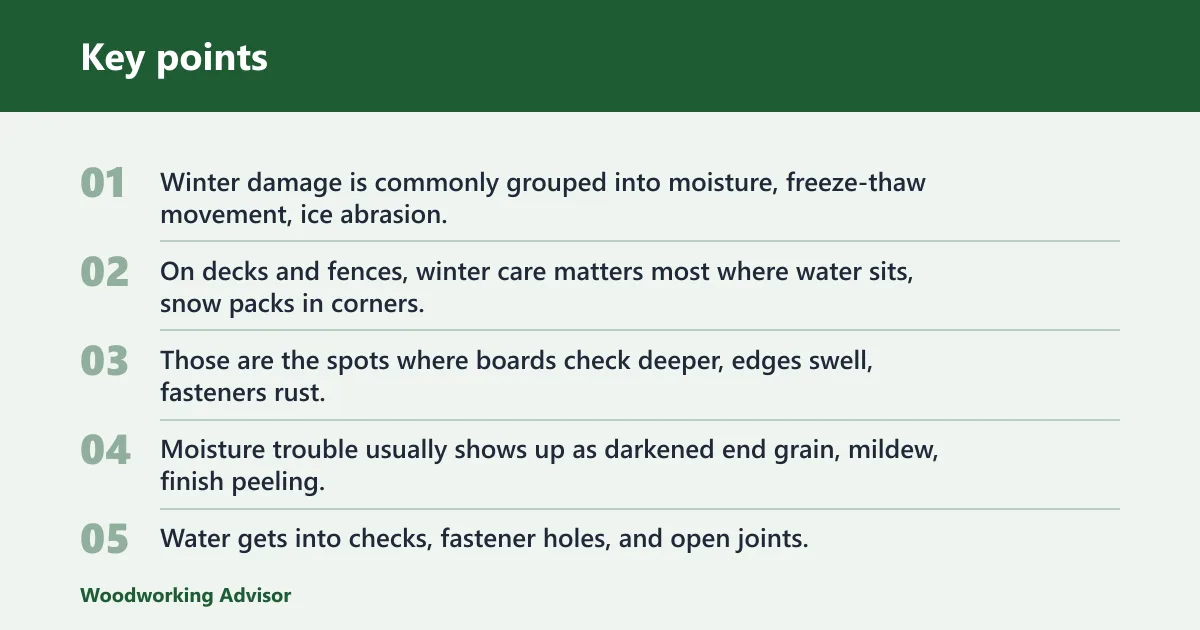
Winter damage is commonly grouped into moisture, freeze-thaw movement, ice abrasion, and hardware corrosion. On decks and fences, winter care matters most where water sits, snow packs in corners, and finish has worn off. Those are the spots where boards check deeper, edges swell, fasteners rust, and rot starts near end grain or the soil line.
Moisture trouble usually shows up as darkened end grain, mildew, finish peeling, swollen door edges, and water sitting in low spots. Freeze-thaw damage builds in steps. Water gets into checks, fastener holes, and open joints, then repeated freezing and drying leave raised grain, wider cracks, loosened joints, and finishes that wear through sooner. That general pattern is consistent with the USDA Forest Products Laboratory’s discussion of wood moisture cycling, checking, and finish breakdown in outdoor exposure.
Ice damage is different. It often starts with scraping, foot traffic over packed snow, or slippery films that hold more water against the surface. Hardware trouble shows up as orange staining around screws, rail brackets loosening, hinges binding, or locksets and gate hardware corroding enough to stop moving cleanly.
Urgent signs versus cosmetic signs
Handle structural or safety signs first. On decks, that means loose railings, spongy boards, fastener pullout, stair movement, and slick walking paths. On fences, it means posts lifting, a new lean, gates that no longer latch because the opening changed, or broad rot near grade. On doors, severe binding, split joints, and failing hinges come before finish touch-up. On furniture, cracked load-bearing joints and rusted hardware matter more than faded color.
Surface graying can usually wait until spring unless bare wood is actively soaking up water. Surface graying, light checking that has not opened the board deeply, small finish scuffs, and stain fading are usually spring jobs unless bare wood is actively soaking up water.
What sealing can solve and what it cannot
Exterior wood sealant works as a moisture barrier, not a structural reset. A good penetrating sealer can slow water uptake, reduce surface checking, and cut finish wear on exposed faces and edges. A surface coating can shed water and add color, but it can also wear through on traffic areas and peel if moisture is trapped underneath. Those limits line up with the USDA Forest Products Laboratory’s guidance that finish performance depends heavily on moisture control, surface prep, and exposure.
Sealing cannot stop frost heave, fully correct a leaning fence, reverse hidden rot, or prevent gouges from sharp tools. Frost heave can shift soil beneath footings. That is a ground-movement problem, not a coating problem.
Pressure-treated wood needs the same distinction. It often takes sealers once it is clean and dry, and the right sealer can slow winter moisture cycling that leads to checking and warping. It will not fix boards that are already split, cupped, or structurally weakened. For pressure-treated lumber, manufacturer and industry guidance commonly stresses allowing the wood to dry to the product label’s requirements before sealing or painting rather than coating immediately after installation.
Wood triage decision table
Winter triage by structure
| Structure | Risk sign | Likely cause | Safe immediate action | When to call a pro |
|---|---|---|---|---|
| Deck | Spongy board, loose railing, packed snow in shaded corners, slick steps, rust around fasteners | Moisture intrusion, freeze-thaw damage, trapped debris, corrosion, worn finish | Clear wet or packed snow with a plastic shovel or soft broom, remove leaf dams, mark slick areas, inspect rail and stair fasteners, use chloride-free CMA for stubborn ice | If boards feel soft underfoot, railings move, fasteners pull out, ledger-adjacent areas stay wet, or framing appears to shift |
| Fence | New lean, misaligned gate, post lifting, cracks at end grain, rot near soil line | Frost heave, winter moisture exposure, ground contact decay, open checks taking in water | Check plumb, clear snow piled against pickets and posts, seal small dry cracks above ground, keep sprinklers and runoff off the fence line | If posts move by hand, leaning worsens quickly, concrete footings crack or heave, or rot is widespread at post bases |
| Door | Sticking at latch or threshold, swollen bottom edge, finish worn on top or bottom, hinge rust, open panel or stile-rail joints | Moisture uptake at vulnerable edges, freeze-thaw joint movement, hardware corrosion, runoff exposure | Dry the area, adjust weather exposure if possible, seal bare edges when conditions allow, tighten loose screws, lubricate appropriate hardware | If the door binds severely, joints split, locksets or hinges loosen in the wood, or swelling returns after drying |
| Furniture | Mildew under cover, standing water on seats, finish flaking, loose joints, rusted hardware | Trapped condensation, covered-snow moisture retention, finish failure, corrosion, movement at joints | Store indoors if possible, or use a waterproof snug cover with venting space and tie-downs, brush snow off, keep pieces off wet ground | If joints loosen on load-bearing chairs or benches, wood softens, cracks widen at fasteners, or moisture stays trapped under covers |
Winter-safe tools and materials
| Tool or material | What it is for |
|---|---|
| Plastic shovel | Snow removal on decks and around furniture with less gouging risk than metal |
| Soft broom | Light, dry snow removal and sweeping debris from board gaps and door thresholds |
| Calcium magnesium acetate (CMA) | Chloride-free ice melt option for wood walking surfaces where traction is needed without defaulting to chloride salts |
| Penetrating exterior wood sealer | Reducing moisture uptake on dry bare or compatible treated wood |
| Surface coating or exterior wood paint | Adding a wear layer and water shedding on suitable doors, trim, fences, or furniture |
| Waterproof fitted furniture cover | Keeping direct rain and snow off furniture while resisting wind shift and abrasion |
Matching lumber species to outdoor exposure levels
Outdoor wood fails fastest when the species doesn’t match its exposure. Ground-contact framing requires pressure-treated lumber, while covered structures perform well with cedar or redwood. Exposed furniture in mild climates benefits from dense hardwoods like teak or white oak. Selecting wood by appearance or availability alone leads to rot, warping, and fastener corrosion.
Choosing the right outdoor project lumber means evaluating moisture, load, and maintenance requirements before cutting. A proper match between species and environment extends service life and reduces seasonal repairs, which is especially critical before winter weather accelerates decay.
Choosing the right wood for outdoor railing
If you’re replacing or building a railing, the wood species you choose affects how long it lasts, how much upkeep it needs, and how well it holds up outdoors. The supporting guide compares pressure-treated pine, cedar, and mahogany so you can match the material to your exposure level and budget, instead of guessing based on appearance alone. It also notes where redwood and other alternatives fit when you want a different balance of durability and cost.
That matters because railings fail fast when the species can’t handle moisture, movement, or fastener stress. For a side-by-side breakdown of the tradeoffs, see the best wood railing guide.
When hemlock works outdoors—and when it doesn’t
Hemlock can be a practical outdoor wood, but only in the right exposure conditions. The supporting article explains the key rule: use it in sheltered, above-grade applications, and avoid relying on it for ground contact or areas that stay wet. That matters because hemlock is much more likely to rot, split, and fail early when moisture exposure is high, which can turn a low-cost material choice into repeated repairs.
If you’re deciding whether it belongs in a deck edge, trim detail, or other exterior project, this hemlock outdoor use guide breaks down where it performs acceptably, when pressure treatment is needed, and how it compares with more durable species.
How do you protect a wood deck in winter?
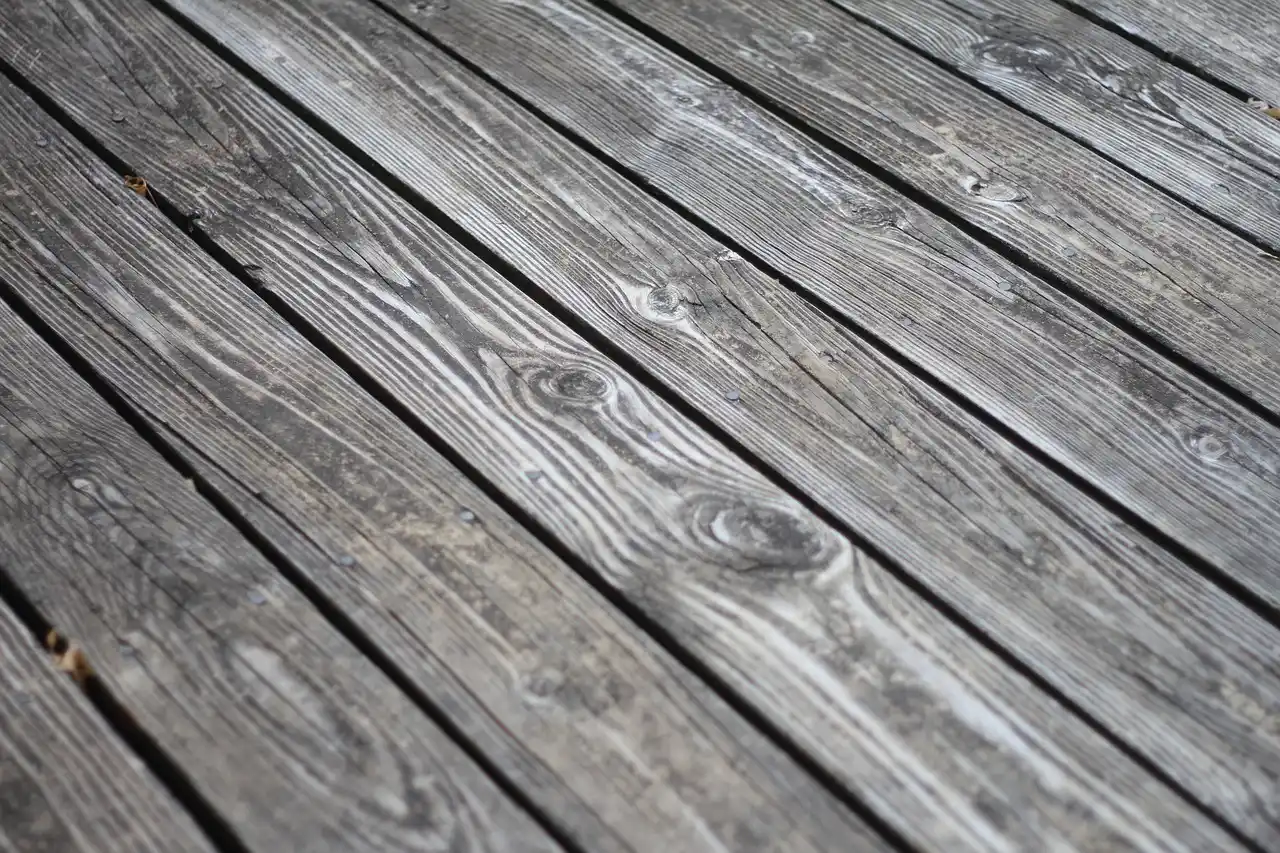
Protect a wood deck by treating it as a walking surface first and a finish project second. Clear trapped debris, inspect boards, railings, stairs, and fasteners, remove wet or packed snow promptly, and use deck-safe ice control. Seal only dry wood in suitable weather, because sealant reduces water uptake but will not fix movement or rot.
Inspect the parts that fail first
Start with stairs, rail posts, board ends, and the area nearest the house. These spots stay wetter, take more traffic, and show movement sooner. Look for lifted fasteners, blackened cracks, rust halos around screws, and any board that feels softer than the ones around it.
Railing stability matters more than stain color. If a rail deflects noticeably or a post connection looks loose, stop there and plan repair before winter use. Slip risk also rises when old coatings wear smooth, algae starts in shaded areas, or leaf mulch sits in board gaps.
Say your deck has a shaded corner under a grill cover and a pile of wet oak leaves packed between boards. That is a moisture trap, not a cosmetic mess. Clearing that pocket does more for winter protection than touching up stain on a dry, open area.
If the deck is due for coating work, use a sibling maintenance guide such as deck sealing to match the right prep and finish type to the boards already on the structure.
Should snow stay or go?
Snow does not always need instant removal. A light, dry layer on a sunny deck with no foot traffic can wait briefly. Clear sooner when snow is wet, packed, drifting against the house, sitting on stairs, or staying in shade where meltwater cannot dry.
After each storm, make a decision based on moisture content and location:
- Brush off dry powder from stairs, paths, and rail caps first.
- Shovel wet snow before it compacts under foot traffic.
- Clear snow from persistent shade and from spots where water ponds after thaw.
- Leave only a thin dry layer on low-risk areas if a melt is expected and nobody needs to walk there.
One deck-care recommendation is to use a plastic shovel instead of metal. Metal shovels can scratch and gouge deck surfaces. That matters because gouges hold water, roughen the path, and speed finish wear. Snow-and-ice safety agencies and multiple deck manufacturers likewise warn against sharp metal edges on finished walking surfaces.
What is the safest way to handle ice on wood?
Avoid aggressive chopping. Scraping ice hard enough to reach bare wood often does more harm than the ice itself. Start with traction, not force. A soft broom can break loose weak frost. For bonded ice, calcium magnesium acetate, or CMA, is commonly used as a chloride-free option when a melt product is needed. CMA is recognized by agencies including the U.S. EPA in deicer discussions as a less corrosive alternative to common chloride salts, though product labels still need to be followed.
CMA is friendlier to decks than many chloride products, but it still needs restraint. Any ice melt can leave residue, reduce traction if overapplied and re-wet, and raise corrosion concerns around nearby metal hardware. Sweep slush away after thaw so water does not sit around fasteners and board ends.
Will chloride-based ice melt damage a deck? It can. Chloride-heavy products can leave surface residue, speed corrosion around screws and connectors, and wear finishes faster where people grind slush into the boards. They also trade one hazard for another if they leave a slick brine film on a smooth coating. The practical point is not that every use causes visible deck damage, but that repeated use increases corrosion and cleanup concerns compared with non-chloride approaches.
Sealant limits on decks
Deck sealers help most on clean, dry wood before the weather turns. Use them to slow moisture absorption and reduce checking. Do not expect them to stop slippery algae, ice gouges, or movement in framing connections.
If a product needs mild weather, respect that limit. Firmtread Anti Slip Coat is sold with temperature and drying guidance from its manufacturer, so cold-weather application should follow that label rather than a generic winter rule. That timing matters in fall and early winter because short days, dew, and low temperatures can interrupt film formation long before the surface looks dry.
Treating a Slippery Wood Deck
A slippery winter deck usually needs a source-first fix: clear ice, remove algae or mildew, wash off leaf stains, and check whether the finish has worn away so water no longer beads. The supporting guide on slippery deck treatment explains how to identify which of those causes is making the surface slick, then choose the right treatment without damaging the wood.
That matters because the wrong approach can make traction worse or strip away protection you still need. The article also covers safer cleaning methods, when pressure washing is risky, and which ice-melt choices are better for wood surfaces, so you can reduce slip risk now and lower the chance of the deck getting slick again after the next thaw.
Snow Removal Decisions for Decks
Heavy, wet snow and ice can overload a deck’s framing, hide trip hazards, and scratch wood or composite surfaces if you use the wrong tool. The guide snow removal guide walks you through a decision matrix that tells you when to act and when a light layer can stay, lists the essential tools, and shows step‑by‑step techniques for shoveling and de‑icing without harming the deck. It also flags common mistakes and answers frequent questions, helping you protect your outdoor space and avoid costly repairs.
Effective Snow Management for Your Deck
Winter snow can damage deck surfaces and create hazardous slip conditions, so proactive snow control is essential. This guide explains how to seal and maintain wood, composite, or PVC decks before the first snowfall, then safely remove snow using a plastic shovel and a pulling motion rather than scraping. It also offers a decision table to help you choose between letting snow melt naturally or removing it, and highlights common mistakes that can scar your deck. By following these steps you’ll reduce freeze‑thaw stress, preserve the deck’s finish, and keep the area safe for foot traffic. Learn the full process in our article on how to keep snow off.
What to expect from an unstained deck over winter
An unstained deck can usually make it through a single winter, but bare wood is more vulnerable to repeated wetting, snow cover, and freeze-thaw cycles. The supporting article explains the difference between normal weathering and real winter damage, so you know when a few surface checks are cosmetic and when boards may be soft, split, or starting to rot.
It also shows what to inspect after the snow melts, including warping, cupping, and fastener problems, and why catching those issues early can prevent a small repair from turning into board replacement. If you want a practical spring checklist, see unstained deck winter damage.
Keeping the Space Under a Deck Dry
Moisture pooling or seeping beneath a deck can lead to rot, stained surfaces, and unusable storage space. The right fix depends on the water source and whether the deck is newly built or already in place—approaches range from waterproof membranes and gutter channels to retrofit drip-and-trough systems and simple ventilation.
Under-deck drainage systems are covered in detail, including how to diagnose what is making the space wet, how to choose between above-joist and below-joist designs, what to inspect before installation, cost expectations, and practical steps for getting the job done.
Can You Build a Deck in Winter?
Yes—building a deck in winter can work, but only when the site is reachable, the ground can be excavated to the required depth, and the materials can be installed within safe temperature ranges. The supporting article explains the key go/no-go checks that determine whether winter construction is practical, including frost depth, inspection timing, footing concerns, and cold-weather limits for concrete and fasteners. Use it to avoid costly fixes from heaving footings, delayed curing, or damaged lumber.
If you’re weighing whether to start now or wait, this winter deck guide gives you a clear decision framework so you can match the project to the weather instead of guessing.
Choosing the right deck coating for winter weather
If your deck is still sound but needs a stronger barrier against rain, snow, and freeze-thaw cycles, the supporting guide breaks down the best protection options by condition and goal. It compares stain-and-sealer products, moisture-shedding sealers, prep products for worn finishes, and even traction-focused choices for slippery winter decks so you can match the coating to the deck you actually have. The article also explains why a sealed, intact surface can usually be protected in one step, while failing finish or heavy wear needs prep first. For a practical product-by-product starting point, see the best deck protection guide.
What a winter cabin upkeep checklist should cover
A solid winter checklist focuses on the problems that escalate fastest: new water intrusion, sticking doors or windows, roof and chimney issues, heating performance, and any signs of ice or thaw-freeze damage. The supporting article breaks down how often to inspect, what to look for after storms, and how to adjust the routine for occupied, vacant, or remotely managed cabins. It also helps you prioritize repairs so a small leak or draft does not become rot, swelling, or heat loss. For a practical checklist you can follow through the season, see winter log cabin upkeep.
Cabin winterization choices and the risks of skipping them
Winterizing a cabin comes down to picking the right approach for its plumbing, heat, and occupancy: full shutdown, heat-and-monitor, or a buyer-ready inspection setup. The supporting guide explains how to choose the best path, then walks through the practical steps that protect the structure before hard freeze conditions arrive.
That matters because unprotected pipes, fixtures, wells, and appliances can fail fast once temperatures drop, leading to burst lines, mold, and expensive repair work. For a clear step-by-step breakdown of what to drain, protect, or check before leaving a property unattended, see cabin winterization guide.
Log cabin exterior upkeep
If you’re responsible for a log cabin, exterior maintenance is mostly about catching small moisture problems before they become structural repairs. The supporting guide explains a practical schedule: inspect the exterior twice a year, clean away buildup, check for water entry at checks, joints, and end grain, and address any openings quickly so moisture does not spread into rot or insect damage. It also helps you tell the difference between routine upkeep and a repair that needs more attention.
For a clear checklist on what to inspect, when to re-stain, and how to judge whether damage is cosmetic or serious, see log cabin exterior maintenance.
Why hardwood gaps appear in winter
Winter gaps in hardwood floors are often a normal response to dry indoor air, not immediate damage. The supporting guide explains how to tell when boards are simply shrinking as humidity drops—often around 35% relative humidity or lower—and when the pattern suggests a deeper issue such as subfloor movement, installation problems, or moisture imbalance. That distinction matters because the wrong fix can waste time and money while the real cause keeps spreading.
It also covers practical ways to check room humidity, compare seasonal movement, and decide whether to wait, monitor, or investigate further. If you’re seeing open seams this season, hardwood floor shrinking is the best starting point for figuring out whether the gaps are harmless or a warning sign.
When a Humidifier on the Floor Is Safe for Wood
A humidifier placed on a wood floor is usually safe when it stays level, doesn’t leak, and keeps room humidity in a moderate range. The supporting guide explains the difference between harmless moisture and the kinds of problems that can lead to cupping, swelling, staining, or damage to nearby furniture.
That matters because the real risk is often not the humidifier itself but puddling, condensation, or over-humidifying a room. If you need a practical way to judge placement and spot warning signs early, the article on humidifier floor placement breaks down what to watch for and when to move or adjust the unit.
Can a Humidifier Harm Wood Furniture?
Yes—if it leaks, blows mist directly onto furniture, or pushes indoor humidity too high, a humidifier can damage wood. The supporting article explains the difference between normal humidity control and accidental wetting, so you can spot the real risks before you see swelling, cupped panels, lifted veneer, or finish stains. It also lays out practical humidity targets and placement rules that help keep wood stable.
If you’re trying to protect a room full of wood pieces, the humidifier and wood furniture guide is useful because it turns a vague concern into a simple checklist: keep humidity in a safe range, avoid direct spray, and watch for warning signs before damage spreads.
Treat an Aging Deck Based on the Real Damage
An old deck usually needs one of four responses: a deep clean, a brightener, a penetrating stain, or targeted repairs. The right choice depends on what the boards are actually doing—gray oxidation, dirt buildup, water soak-in, surface checking, or soft spots from rot. The supporting guide breaks down those conditions and explains which treatment fits each one, so you avoid wasting time on the wrong product and reduce the chance that trapped moisture keeps damaging the wood. It also compares common options for cleaning, brightening, sealing, and coloring weathered decking. old wood deck treatment
When a New Deck Is Ready for Its First Finish
A new deck should be coated only after the wood has dried enough to absorb stain or sealer; treating it too soon can trap moisture and shorten the finish’s life. The supporting guide explains how to judge readiness, including what to look for in pressure-treated lumber, cedar, and redwood, so you can avoid peeling, blotching, and mildew. It also walks through the practical choice between sealing and staining, plus the prep steps that help the first coat bond properly.
If you’re planning the first treatment on a fresh build, the new deck treatment article gives a clear timing and product checklist that helps the coating last longer and perform better in wet or sunny weather.
Diagnosing loud deck popping in freezing temperatures
Loud pops from a deck during cold snaps usually come from normal thermal contraction, but repeated cracking, widening gaps, or sudden board movement often point to loose fasteners, trapped ice, or structural shifting. Telling the difference matters because ignoring the wrong cause can turn a minor seasonal fix into warped boards, torn connections, or water damage.
Quick surface checks let you separate harmless winter noise from problems that need attention before spring. A winter deck popping guide breaks down how wood and composite materials behave differently in the cold, whether frost heave plays a role, and which signs require immediate triage versus routine monitoring.
How do you keep a wooden fence from warping or rotting in winter?
Keep a wooden fence sound in winter by watching the posts first, then the boards and rails. Clear persistent snow buildup, keep moisture off end grain and ground-contact areas, seal small dry cracks when weather allows, and treat sudden leaning or lifting as a footing problem, not a finish problem.
Posts and alignment come before surface care
Fence damage often starts below the rail line. Frost heave can shift soil beneath footings, lifting or tilting posts and changing the gate opening. If a gate suddenly drags or no longer latches, check the post line before assuming the hardware slipped.
Look down the fence from one end. A gradual old lean is less urgent than a new kink over one or two panels. Posts that rise after freezes, twist enough to pull rails, or loosen in the ground call for repair.
Suppose a 6-foot privacy fence stood straight in October, then one latch-side post rises after a freeze and the gate misses by half an inch. Sealing the boards will not correct that. The urgent item is the shifted footing or soil movement at the post.
Where winter moisture gets
Winter moisture exposure is worst at end grain, post bases, fastener holes, and horizontal surfaces that hold water. Picked-over finish on top edges and cracked board ends deserve attention before broad flat faces that still shed water well.
Small, dry surface cracks can be worth sealing to slow water entry. Deep splits, broad softness near grade, and repeated wetness at post bases point toward replacement, not crack filler. Rot prevention mostly comes down to stopping water from sitting in the same place, not coating every inch with a thick film.
Mold and mildew can also appear where snow sits against a fence in shade. Clean affected areas when conditions allow, then improve drainage and airflow. If mildew returns under a dense vine screen or against piled leaves, fix the moisture source first.
Paints and stains that fit fence work
Exterior paints and stains do different jobs. Penetrating formulas soak in and usually wear by fading. Surface coatings build a visible layer and may peel when moisture pushes from below. Some stain lines are sold in transparent, semi-transparent, and semi-solid formulas, which helps when deciding how much grain to show and how much weathering to hide.
For painted fences and furniture, Cuprinol Garden Shades Matt Wood Paint is marketed by its manufacturer for fences and garden furniture, and Cuprinol publishes its own durability claims for that line. Treat those as manufacturer claims tied to proper prep and exposure, not as guaranteed service life in every yard. They do not change the rule that a moving post needs structural repair.
Wooden railing upkeep that prevents winter damage
If a railing is already showing moisture damage, the priority is to stop the problem before talking about finish. The supporting guide explains how to inspect wooden railings for water intrusion, loose fasteners, split sections, and early rot, then decide whether a repair or a full refinish makes sense. That matters because winter stress can turn a small defect into a weak, slippery, or unsafe handrail.
It also covers practical cleaning and seasonal steps, including how to winter-proof indoor and outdoor railings before cold weather makes the damage worse. For a closer walkthrough, see wooden railing maintenance tips.
When Winter Fence Installation Makes Sense
Winter fence installation can work, but only when the site conditions are right. The supporting guide explains the practical checks that matter most: whether the ground is still workable, whether post holes can reach below the frost line, and whether concrete can cure without being compromised by cold. That matters because forcing the job into frozen, waterlogged, or unstable soil can lead to heaving, crooked posts, drainage problems, and avoidable repair costs.
It also breaks down when to schedule the project, when to wait for better weather, and which fence types are more suitable for cold-weather work. For a clear breakdown of the decision points, see winter fence installation.
Routine fence maintenance that prevents winter damage
Keeping a wooden fence in good shape starts with a simple seasonal routine: wash off dirt and mildew, look for loose boards or soft spots, and seal vulnerable areas before cold weather sets in. These steps matter because moisture, sun, and freeze-thaw cycles can turn small flaws into warped panels, split posts, and expensive replacements.
The wooden fence maintenance guide walks through the full order of care, from cleaning and inspection to sealing, staining, and repairing weak sections before winter. Use it to build a basic maintenance schedule that protects the fence structure, slows rot, and helps you catch problems early.
Reinforce a Fence Post Before Small Damage Turns into a Bigger Repair
If a fence post is only starting to lean, has shifted in soft soil, or shows rot near the base, the right fix can stop the problem from spreading through the rest of the fence. This guide explains how to choose the repair that matches the failure, whether that means bracing a post, resetting it after frost movement, splicing usable wood above ground, or replacing it when the damage is too advanced. The practical value is simple: the wrong repair can leave the post moving, loosen fasteners, and make the fence fail again in the next storm.
For the repair options and decision points, see fence post repair.
Restore Worn Wood Railings Before Finish Failure Spreads
Worn railings need more than a quick coat: the right fix starts with judging whether the old finish can be cleaned and sanded, or whether failing layers need stripping first. Refinishing wood railings walks through that decision, then covers surface prep, spot repairs, and choosing paint, stain, or sealer based on what the wood condition allows.
That matters because railings get constant hand contact and weather exposure, so weak prep leads to peeling, blotchy color, and short-lived adhesion. This section helps readers match the repair method to the railing’s condition so the new finish lasts longer and looks even.
Fix a Sticking Door Before It Causes Bigger Wear
A sticking door is usually a sign of a specific mechanical issue, not a reason to start sanding right away. The supporting guide on door sticking fixes shows how to identify the rub point, check hinges and strike plate alignment, and decide when weatherstripping or minor adjustments will solve the problem. That matters because the wrong repair can create extra gap, remove too much material, or hide an underlying seasonal movement issue.
Use it when a door drags at the top, bottom, or after painting, since each pattern points to a different fix. The article helps you choose the least invasive repair first, which saves time and preserves the door’s fit.
When seasonal humidity is the real reason a door sticks
If a wooden door only drags when the air turns damp, the fix is usually about moisture movement, not major carpentry. The supporting guide explains how to tell humidity swelling from hinge, strike, or frame problems by looking at where the rub happens, how much the gap changes, and whether the issue repeats in the same season.
That matters because the wrong fix can waste time and make the problem worse. The article on wooden door humidity shows the least invasive repair path first, so you can reduce rubbing, protect the finish, and avoid turning a small seasonal bind into hardware or frame damage.
Choosing fence designs that survive high winds
Fences in exposed yards fail when solid panels catch too much wind load, racking posts and tearing gates during the first major storm. Designs that allow 20% to 50% airflow—such as spaced pickets, shadowbox boards, aluminum, or chain link—dramatically reduce that pressure and extend the life of the installation.
Proper panel style alone is not enough; post depth, footing size, and gate reinforcement determine whether a fence holds up over time. A detailed breakdown of wind-resistant fence options compares materials by exposure level and explains the structural details that prevent costly blowouts before winter storms arrive.
What should you do for exterior wood doors before freezing weather?
Check an exterior wood door for swelling, sticking, exposed bare edges, and hardware corrosion before the first hard freeze. Doors fail differently from decks and fences: the weak points are top and bottom edges, panel and stile-rail joints, thresholds, and hinge screws that loosen as wood cycles between damp and dry.
Inspect the edges and joints
The top and bottom edges often lose finish first because they are less visible and easy to miss during past painting. Once those edges take on moisture, the door can swell and bind at the latch edge or drag at the threshold. Panel movement may also open small lines at joints.
Check for rubbing marks, bare wood, and seasonal changes in reveal gaps. Mild sticking after rain can be a maintenance problem. Severe binding that needs force, scrapes through finish, or returns after a dry spell points to swelling, movement, or hardware shift that needs more than touch-up.
Protect hardware and runoff paths
Hinges, locksets, strike plates, thresholds, and exposed screws collect moisture and salts from shoes. Clean off grime, tighten loose screws, and address rust early. Hardware corrosion can mimic wood movement because a stiff hinge changes the door swing and latch alignment.
Manage runoff too. If a storm door, porch roof drip, or clogged sweep keeps water on the bottom edge, coating the face alone will not do much. Exterior wood paint can suit doors and windows, but it needs intact edges and enough dry time before wet weather.
Ronseal Weatherproof Exterior Wood Paint is sold with its own weather-resistance and durability claims on the manufacturer’s product page. Use those as product-specific label claims, not a blanket promise for every door. Cold, damp conditions still make timing and prep matter.
Winterize Exterior Doors Before Cold Weather Hits
This guide explains how to winterize a door by identifying the real problem first: drafts, moisture entry, or seasonal wood movement. That matters because each issue needs a different fix, from replacing worn weatherstripping to adjusting sweeps, thresholds, or hardware. The article also covers how to inspect the door before the first freeze, so you can catch gaps and sticking parts early instead of waiting for energy loss or water damage to show up.
It’s especially useful for homeowners who want a practical winter prep plan for entry doors, patio doors, and other exterior openings. Winter door maintenance helps reduce drafts, protect finishes, and keep doors operating smoothly through cold snaps.
Can outdoor furniture stay outside in winter?
Outdoor furniture can stay outside in winter only when the wood species, finish condition, and exposure make water shedding realistic. Storage is safer for many pieces. If furniture stays outside, use waterproof snug covers that resist wind, allow drainage below, and do not trap condensation against the wood.
Store versus cover
Storage beats covering when the piece has open joints, worn finish, soft end grain, or hardware already showing rust. It also wins for folding chairs and smaller tables that can be moved easily. Covering is a workable second choice for larger benches, heavy dining sets, and pieces on porches or patios with decent drainage.
Do not wrap furniture so tightly that moisture cannot escape. Covers should be waterproof, fit snugly, and resist wind, but the base still needs airflow and drainage. Loose covers flap, abrade the finish, and pump damp air across the same corners for months.
Picture a teak bench on a covered porch with a fitted waterproof cover tied at the legs and blocks keeping the feet off wet pavers. That setup can work. Change one variable, such as letting the cover drape to the ground and trap puddles, and mildew risk rises fast.
Mold, mildew, and snow load
Mold and mildew thrive where snow sits under covers or where condensation stays trapped after thaws. Brush snow off covers so weight does not hold the fabric against the wood. Periodically check underneath during milder spells, especially on shaded porches and north-facing patios.
If mildew appears, clean the wood when temperatures allow, dry it thoroughly, and correct the cause. That may mean storing the piece, tightening the cover, lifting it slightly off the surface, or moving the furniture so meltwater does not pool underneath.
How to choose the right winter storage for patio furniture
If you need to keep patio pieces in good shape through freezing weather, the main job is matching the storage method to your space and the furniture itself. The patio furniture winter storage guide breaks down when to move items indoors, when covered storage is enough, and when weatherproof pieces can stay outside with proper protection.
That matters because the wrong setup can trap moisture, cause mold, warp wood, rust hardware, or crack resin. This section helps you sort through the practical choices fast so you can protect chairs, tables, and cushions without overbuying storage or leaving valuable furniture exposed.
How to store outdoor cushions for winter
Winter cushion storage works best when you keep moisture out and match the storage method to the cushion material. The supporting guide explains when breathable bins, a dry shed, or sealed plastic make sense, and why fully dry cushions need different treatment than foam or polyester fills. That matters because trapped moisture is the fastest way to end up with mold, mildew, and ruined fabric by spring.
It also covers prep basics like cleaning and drying cushions first, choosing an indoor location that stays off damp floors, and avoiding common mistakes that shorten cushion life. For the full breakdown, see outdoor cushion storage.
Protecting acacia furniture through winter
Acacia patio furniture lasts longer when you treat winter as a moisture and movement problem, not just a storage issue. The supporting guide explains when acacia should be moved under cover or indoors, and what to do if it must stay outside: clean off dirt, let it dry fully, use a breathable cover, and avoid oiling a sound finish right before cold weather. That matters because trapped moisture, mildew, finish failure, and rusted hardware can turn a simple spring refresh into a costly repair. For a practical breakdown of cleaning, covering, storing, and cushion care, see acacia wood winter care.
Storing furniture safely without climate control
If you only have a standard storage unit, the key is to store the right furniture the right way. This article explains which pieces can usually handle a non-climate-controlled unit—like solid wood, metal, and plastic—and which ones are better off in climate control, such as upholstered, leather, veneer, and particleboard furniture.
It also covers the prep steps that matter most, including cleaning, drying, wrapping, and keeping items off the floor and away from concrete. That matters because moisture swings can lead to rust, mold, swollen joints, veneer failure, and glue line damage. See the full furniture storage guide for the material-by-material breakdown and warning signs.
Is Cedar a Good Outdoor Choice?
Cedar is a solid outdoor wood because its natural oils help it shed moisture and resist decay better than many softwoods, but it is not maintenance-free. The supporting article explains how cedar handles rain, sun, insects, and soil contact, and why species differences matter when you choose boards for fences, decking, furniture, or trim.
It also covers where cedar performs well, where it falls short, and whether a finish or treatment is worth adding. If you are deciding between appearance and durability, this cedar weather resistance guide helps you match the wood to the exposure level instead of assuming all cedar behaves the same outdoors.
Decide what can stay outside and what should be stored
If you are unsure whether a table, chair, or bench can handle winter, this guide breaks the decision down by material, drainage, and cover fit. It explains why some pieces can stay outside with the right protection while others are likely to crack, rust, mildew, or warp if left exposed.
That makes the article useful any time you need a quick winter plan for patio pieces: it helps you sort winter-safe items from those that should be moved indoors, and it shows when a tight cover is enough versus when storage is the safer choice. See the full winter furniture guide for the checklist.
How to check whether a pergola can handle snow
If you’re deciding whether a pergola is winter-ready, start with its snow load rating and compare it to your area’s expected ground snow load. A pergola that looks sturdy can still be under-designed for heavier snowfall, which is why this matters before the first storm hits. The supporting guide to snow load on pergolas explains what ratings to look for, how to interpret them, and which design details are most likely to fail under weight.
That information helps you avoid sagging beams, split posts, and collapse risks, especially if your pergola is decorative rather than engineered for winter exposure. It also shows how snow accumulation changes the load, so you can judge whether your current structure needs reinforcement, better drainage, or a safer seasonal plan.
How Much Wind a Pergola Can Handle
A pergola’s wind limit is not a single fixed number; it depends on anchoring, roof style, size, and how exposed the structure is to open weather. The supporting article explains why a well-anchored fixed pergola may handle stronger gusts than a lightweight or fabric-topped model, and why weak footings can turn a moderate storm into a costly repair.
That matters because the same pergola can perform very differently on a sheltered patio versus an open, wind-prone yard. For a practical breakdown of the factors that change real-world performance, see pergola wind resistance.
Choosing a pergola enclosure for winter
If you want to keep using a pergola through colder months, the enclosure choice has to match your climate and the frame’s limits. The supporting article breaks down when clear vinyl panels, polycarbonate, roll-down sides, or curtains make sense, and why the wrong option can add snow load, catch wind, or wear out fast.
It also compares attachment methods, budget tradeoffs, and weather exposure so you can pick a setup that protects the space without overloading it. See the full pergola enclosure guide for a practical way to choose materials and decide whether a partial side enclosure or a more rigid winter setup is the better fit.
Stabilize a Wobbly Gazebo Before Weather Makes It Worse
If a gazebo shifts, sways, or lifts at the corners, the fix is usually to anchor the posts, tighten any loose connectors, and add diagonal bracing where the frame still racks. The supporting guide explains how to diagnose instability on concrete, decks, pavers, or soil, so you can choose the least invasive repair that actually holds instead of guessing at the roof or trim.
That matters because a little wobble can turn into torn anchors, bent framing, and wind or snow damage. For a step-by-step breakdown of the common causes and the right remedy for each surface, see this gazebo stabilization guide.
Which sealants and materials are safe to use before winter?
Use winter prep products according to the problem they solve. Penetrating sealers help slow moisture uptake in dry wood. Surface coatings help when intact film protection and color are the goal. Safe snow and ice tools matter just as much, because a good finish can still be ruined by gouging, trapped slush, or poor timing.
Penetrating sealers versus surface coatings
Penetrating sealers suit decks, many fences, and some furniture because they move with the wood and usually fail by wearing away rather than peeling. Surface coatings, including paint and film-forming deck products, fit doors, trim, some fences, and selected furniture where appearance and water shedding matter more than abrasion resistance.
On bare wood, check whether the product is meant to soak in or build a film. On previously coated wood, stay within the manufacturer system unless the old layer is removed. Applying a penetrating product over a tight intact film usually does little. Applying a film over damp wood often ends in early peeling.
Bare, treated, and previously finished wood
Pressure-treated wood needs a compatibility check before sealing. Many modern treatments accept sealants well once the surface is clean and dry. After cleaning, let the wood dry fully before coating. The benefit is slower moisture cycling and less checking. The limit is the same as elsewhere: sealing will not stop structural movement or hidden rot. That approach is consistent with pressure-treated wood guidance from major preservative and lumber sources, which typically require dry wood and label-compatible finishes rather than immediate coating.
For painted options, product claims can help plan timing. Ronseal Weatherproof Exterior Wood Paint and Cuprinol Garden Shades Matt Wood Paint both publish durability and use-case claims through their manufacturers. Use those figures as manufacturer claims tied to specific products, not as a shortcut around prep.
Dry-time and cure-time decisions
Most manufacturers list minimum temperature, dry-surface, and rain-free windows on the label. Follow those over any generic seasonal advice. The key winter mistake is coating late in the day or just before a damp cold snap, when the finish skins over but does not cure well.
A common first-timer mistake is sealing a deck on a 52°F afternoon after washing it that morning. The air qualifies, but the boards may still hold moisture in the grain and around fasteners. Wait for dry wood, not just a workable thermometer reading.
What winter damage means you need a pro?
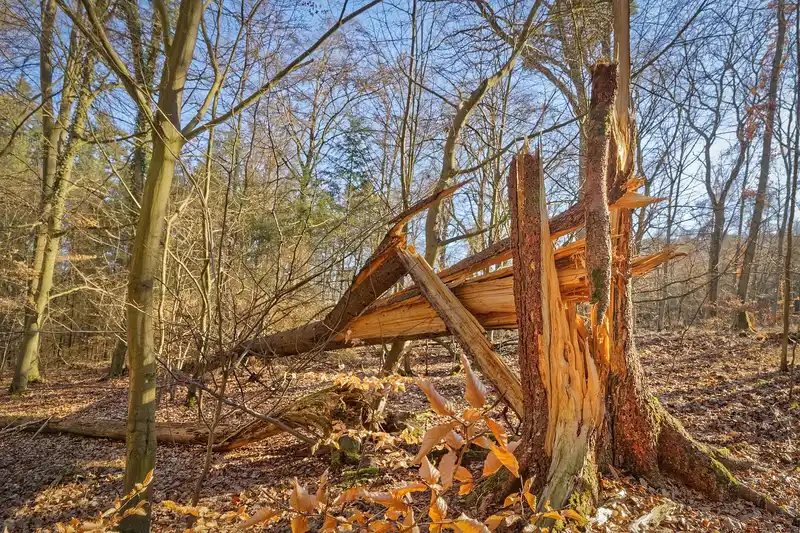
Call a pro when winter signs point to structural movement, hidden decay, or hardware failure that routine cleaning and sealing cannot address. The clearest triggers are loose deck railings, soft deck boards, fence posts lifting or leaning fast, severe door binding, split joints, and broad rot around fasteners or ground contact.
Deck and fence repair thresholds
On a deck, a railing that moves under hand pressure, a stair tread that flexes unusually, or a soft board near a joist line is beyond routine care. Fastener pullout and movement where the deck meets the house also belong in the repair category. NADRA deck safety materials are especially useful here because they prioritize railing, stairs, connection points, and walking-surface hazards over cosmetic finish issues.
On a fence, call for help if posts rotate in the ground, concrete footings crack or rise, rails detach, or rot extends through multiple boards and post bases. Sealing over those symptoms only delays the real work.
Door and furniture thresholds
Doors need repair when swelling is severe enough to scrape through finish repeatedly, hinges loosen in enlarged screw holes, panel joints split, or locksets no longer hold securely. Furniture needs repair when seat or leg joints loosen, hidden moisture softens the wood, or corrosion at bolts and brackets compromises load-bearing parts.
Frequently asked questions
Should I remove snow from my deck after each snowfall?
Not always. A light, dry layer on a low-use deck can wait briefly, especially in sun. Remove snow sooner when it is wet, packed, shaded, on stairs, against the house, or likely to be walked on, because compaction and slow drying raise slip risk and moisture exposure.
What is the safest way to clear ice off wood?
Use the least aggressive method that restores traction. Start with a soft broom for loose frost and a plastic shovel for snow. For bonded ice, use calcium magnesium acetate sparingly rather than chopping with a sharp tool. Hard scraping can gouge wood, wear finishes, and create places for water to sit. If you use any melt product, check the label, keep it off nearby metal when possible, and sweep off residue after the thaw.
What kind of sealant should I use before winter on exterior wood?
Choose a penetrating sealer for many decks, fences, and some furniture when the goal is slowing water uptake with less peeling risk. Choose a surface coating for suitable doors, trim, or painted pieces when you need a film layer and color. Apply only to clean, dry wood in label-approved conditions.
Will chloride-based ice melt damage my deck?
It can. Chloride-based melts may leave residue, speed corrosion around screws and connectors, and wear finishes faster where slush is ground into the surface. They can also reduce traction if they create a slick brine film. A chloride-free option such as CMA is usually the safer starting point for wood, though even that should be used lightly and cleaned up after thaw.
How do freeze-thaw cycles damage wood outdoors?
They work in repeats, not one big event. Wood takes on moisture through checks, joints, end grain, and worn finish. As conditions swing, that water drives swelling, raised grain, wider checking, joint movement, and finish failure. Over time, the cycle deepens cracks and exposes more wood to the next round, which is why small neglected openings often look much worse by late winter or early spring.
Can I leave outdoor furniture outside in winter?
Yes, but only when the piece is sound, the finish still sheds water, and the setup lets moisture escape. Storage is better for smaller or weaker pieces. If furniture stays outside, use a waterproof snug cover with wind control, keep it off wet ground, and check for trapped condensation. If mildew or loose joints show up midseason, move the piece indoors or under better shelter rather than just tightening the cover and hoping the problem stops.
Sponsored / affiliate links. As an Amazon Associate I earn from qualifying purchases. I may earn additional commission from eligible campaigns.