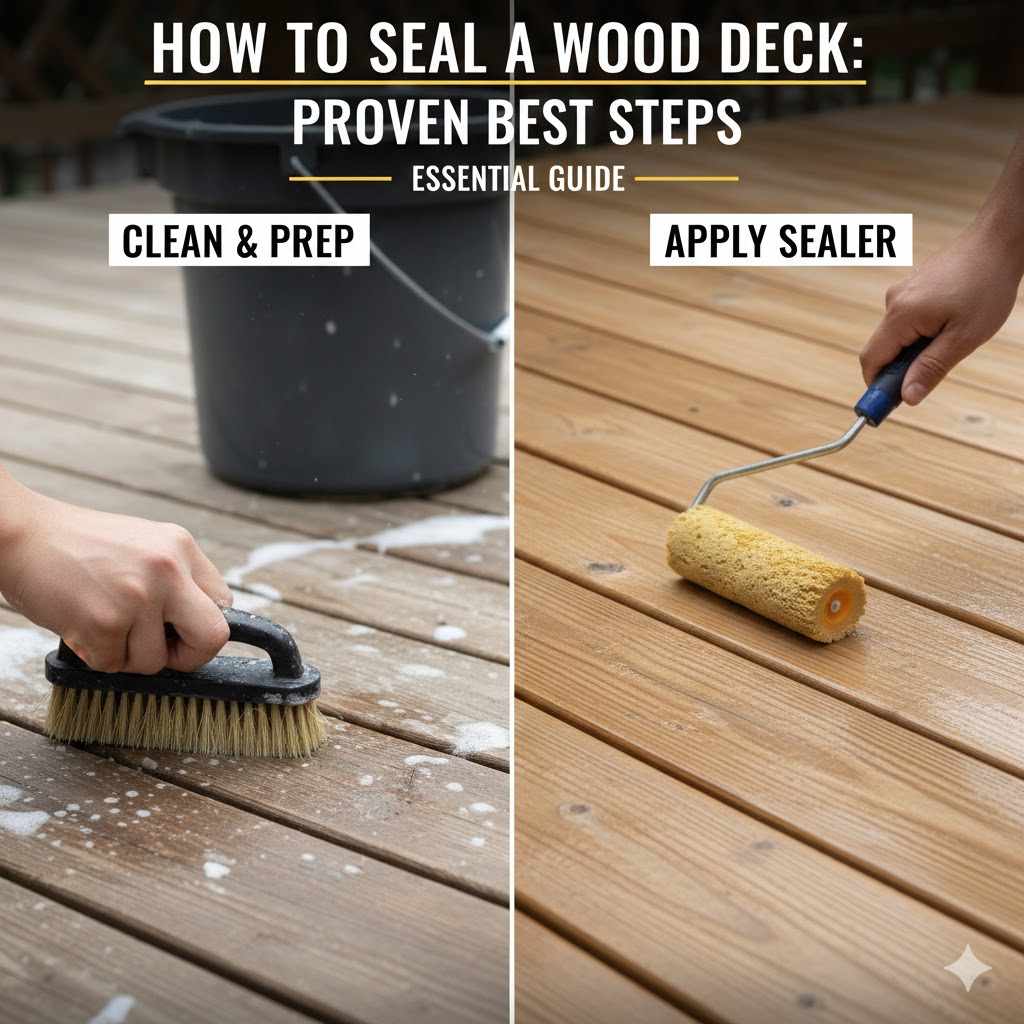
How To Seal A Wood Deck: Proven Best Steps
To seal a wood deck correctly, thoroughly clean and prep the wood, choose the right sealer based on your wood type, apply thin, even coats following the manufacturer’s instructions, and allow adequate drying time for lasting protection against weather and UV damage.
Hello there! I’m Md Meraj, and I know that protecting your deck from sun, rain, and foot traffic can feel like a big chore. Seeing that beautiful wood start to gray or crack is frustrating, right? Many homeowners worry that sealing a deck is complicated or requires special skills.
I’m here to tell you it’s completely doable! With the right plan, even first-time DIYers can achieve a fantastic, long-lasting seal. This guide breaks down exactly how to seal a wood deck using proven steps, turning that worry into pride in your beautiful outdoor space.
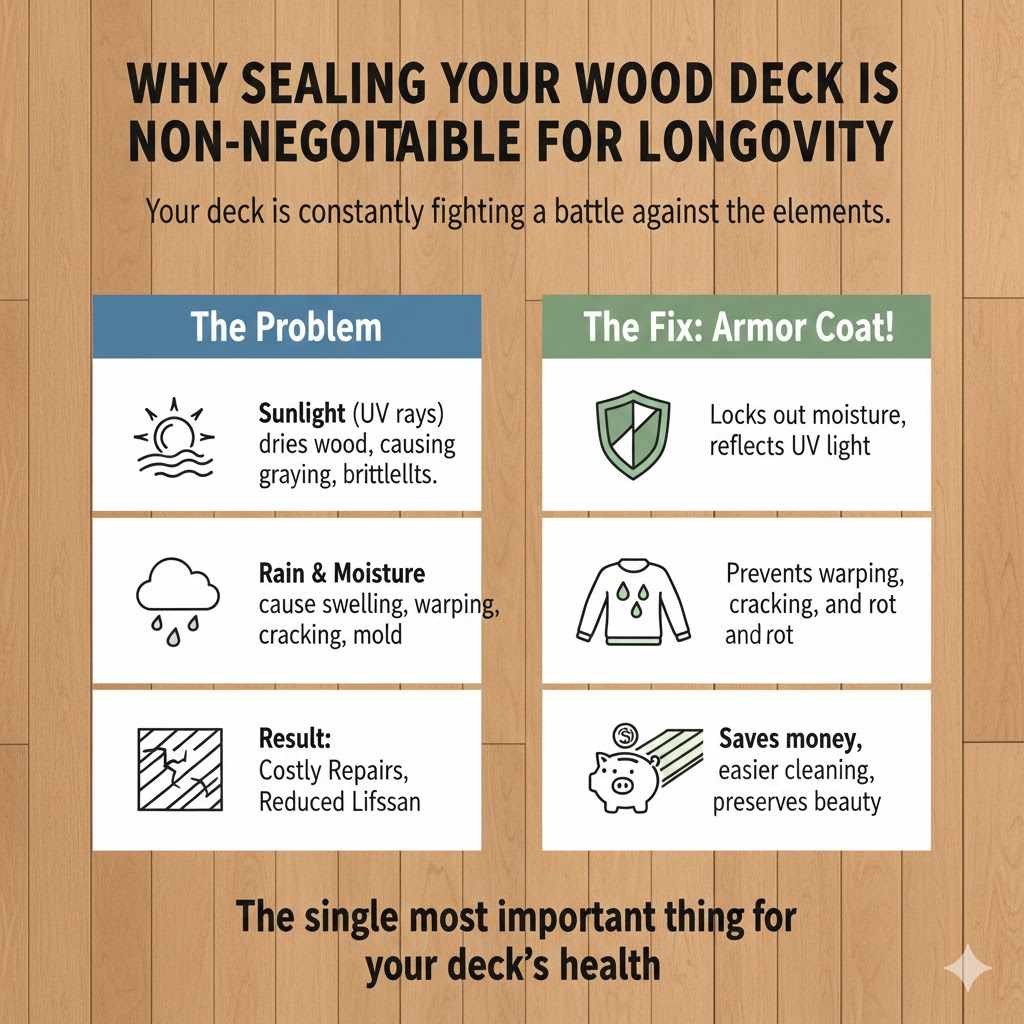
Why Sealing Your Wood Deck Is Non-Negotiable for Longevity
Your deck is constantly fighting a battle against the elements. Sunlight (UV rays) dries out the wood fibers, causing them to become brittle and gray. Rain and moisture soak into the wood, leading to swelling, warping, cracking, and inviting mold and mildew growth. Sealing your deck acts like an armor coat, locking out moisture and reflecting harmful UV light.
Think of it as the difference between an unprotected sweater left outside versus one treated with water repellent. Sealing preserves the natural beauty and structural integrity of your wood for years to come. A good seal makes cleaning easier, resists stains, and ultimately saves you money on costly repairs down the line. This process is the single most important thing you can do for your deck’s health.
Choosing Your Weapon: Understanding Deck Sealers and Stains
Before we grab a brush, we need the right material. Not all deck finishes are created equal. They generally fall into three categories, and choosing correctly impacts the look and how often you’ll need to reseal.
Oil-Based vs. Water-Based Sealers
This is often the first major decision you face:
- Oil-Based (Alkyd): These penetrate deep into the wood, offering excellent penetration and usually a richer color. They are great for older or very dry wood. The downside? They take longer to dry, clean up requires solvents (like mineral spirits), and they often require more surface preparation to adhere properly.
- Water-Based (Acrylic/Latex): These sit more on top of the wood while still allowing the wood to breathe. They are famous for being easier to apply, drying very quickly, and offering excellent UV resistance. Cleanup is a simple soap and water job. For beginners, water-based formulas are often the most forgiving choice.
Transparency Levels: Clear, Toner, or Solid?
Sealants and stains provide different levels of protection and aesthetic change:
| Type | Protection Level | Look | Frequency to Reapply |
|---|---|---|---|
| Clear Sealers | Good Moisture Resistance, Low UV Block | Shows natural wood grain completely. | Annually (or bi-annually if sun exposure is high). |
| Toner/Semi-Transparent Stains | Better Moisture, Good UV Block | Enhances wood grain, adds slight color/tint. | Every 2–3 years. |
| Solid Color Stains | Best Moisture & UV Protection | Hides most grain, looks like painted wood. | Every 4–5 years. |
Mentor Tip: If your deck wood is in great shape and you love the look, go for a quality semi-transparent stain. It balances rich color with durable protection. If the wood is already somewhat weathered, a solid stain offers the best immediate cosmetic refresh and defense.
When to Seal: Timing Matters
The success of your sealing job largely depends on the weather. You must look ahead at the forecast!
- Check the temperature requirements—most products need temperatures between 50°F and 90°F (10°C and 32°C).
- Avoid high heat and direct midday sun when applying, as this causes the sealer to dry too fast, leading to streaks and poor penetration.
- Crucially, ensure no rain is forecasted for at least 24–48 hours after application, depending on the product directions. For detailed guidelines on wood product suitability, resources like the U.S. Forest Service’s general building guidelines can offer context on material expansion due to weather.
Step 1: Thorough Deck Preparation—The Foundation of Success
If you want the sealer to last, you cannot skip the prep work. Think of preparation as making sure the wood has a clean, dry surface ready to drink up the sealer. If you apply sealer over dirt, mildew, or old peeling finish, the new coat will fail quickly.
Tool Checklist for Prep Work
Gather these items before you start cleaning:
- Stiff-bristle scrub brush (not wire!)
- Deck cleaner/brightener (Oxygenated bleach cleaners are often safer than harsh chlorine bleach).
- Deck stripping agent (if removing old stain).
- Pressure washer (optional, used carefully) or garden hose with a high-pressure nozzle.
- Rags, tape, and plastic sheeting for covering nearby plants and siding.
Cleaning the Deck Surface
This process is often the most labor-intensive part of the job.
- Clear the Deck: Remove every piece of furniture, railing planter, grill, and rug. You need 100% access to all deck boards.
- Sweep Thoroughly: Use a push broom to remove all loose debris, leaves, and dirt.
- Test for Old Sealant: Lightly sprinkle a few drops of water across the surface. If the water beads up, you likely have an old sealant layer that needs to be stripped first. If the water soaks in quickly, you can proceed straight to cleaning.
- Stripping (If Necessary): If stripping is required, apply the deck stripper according to its instructions. This often involves letting it soak and then scrubbing vigorously before rinsing thoroughly.
- Deep Clean: Mix your deck cleaner according to the instructions. Apply it evenly across the entire surface, working in small sections. Let it sit for the recommended dwell time (usually 10–15 minutes), but do not let it dry on the wood. Scrub stubborn areas with your stiff brush.
- Rinsing: Rinse the entire deck extremely well. If you are using a pressure washer, keep the pressure low (under 1500 PSI) and keep the nozzle moving. Too much pressure can etch or splinter the wood fibers—we want clean, not damaged, wood! Rinse until all soap residue is gone.
Sanding and Brightening: Creating a Perfect Canvas
Even after cleaning, the wood might look fuzzy or gray. Sanding smooths out raised grain (from the water exposure) and opens the wood pores so the new sealer can properly adhere.
- Brightening (Recommended): After cleaning, applying a deck brightener (usually an oxalic acid product) neutralizes the cleaner and brings back the natural color of the wood, ensuring a beautiful final stain tone. Follow the product directions exactly.
- Light Sanding: Use a pole sander or orbital sander with 60-to-80-grit sandpaper. Lightly sand across the grain where necessary to smooth out rough spots, but avoid heavy sanding that changes the board profile. You are aiming for smoothness, not total refinishing.
- Final Cleanup: Use a leaf blower or vacuum to suck up every bit of sanding dust. Any remaining dust will mix with your sealer and create a rough finish. The wood must be perfectly dry and dust-free before the next step.
Step 2: Testing and Preparing Your Sealer
This stage ensures you get the color right and the product is mixed well.
Conducting the Water Test (If Skipping Prep Test Above)
If you skipped the beading test earlier or just want to confirm your deck is ready for absorption, you perform the test again after cleaning and sanding. Sprinkle water on the wood. If it soaks in within a few minutes, you are ready to seal. If it still beads up, the surface may still have residue or the wood is not dry enough.
Sampling the Color
Sealant color looks dramatically different on a dry sample board than it does in the can or on wet wood. Always test first!
- Find an inconspicuous area—perhaps a bottom corner board or a piece of scrap wood leftover from construction.
- Apply a thin coat of your chosen sealer exactly as you plan to apply it to the whole deck.
- Allow it to dry completely (check the can, usually 12–24 hours). This gives you the truest indication of the final color and tone. If you like it, you are good to go!
Mixing the Sealer
Even if you shake the can, sealants often separate upon standing, leaving pigment settled at the bottom. This separation must be corrected!
- Stir the sealer vigorously for several minutes.
- If using a large bucket or commercial quantities, use a paint mixing attachment on a drill to ensure thorough blending. Keep stirring periodically while you work.
Step 3: The Art of Application
Applying the sealer requires patience and good technique. Rushing here leads to uneven absorption, blotchiness, and premature failure.
Essential Application Tools
You don’t need every specialized tool, but these make the job significantly smoother:
- Natural bristle brush (for oil-based) or high-quality synthetic brush (for water-based).
- Deck pad applicator or lamb’s wool pad attached to a long handle. This is key for covering wide boards quickly and evenly.
- Large pump sprayer (for quick, thin initial coats only).
- Quality trim brush (2–3 inches) for railings, spindles, and tight corners.
The Application Technique: Thin and Even Coats
This is the most important mantra: One thin coat is always better than two thick coats. Thick coats bubble, peel, and trap moisture underneath.
- Work in Sections: Do not try to cover the entire deck at once. Work in 2- or 3-board strips from one end of the deck to the other. This is called “working wet-to-wet.”
- The Pumping Method (Best for Large Areas): Use your pump sprayer to apply a light mist evenly across your working section (e.g., two boards wide). Immediately follow this with your pad applicator or brush, spreading the material out evenly along the grain.
- Back-Brushing or Back-Rolling: Whether you spray or use the pad, the final action should always be a pass with a quality brush following the wood grain. This forces the product into the pores and smooths out any applicator lines.
- Edges and Ends: Use your trim brush to saturate the end-grains (the sides of the boards you see when you look down the length). End-grain absorbs sealant much faster and needs extra attention to prevent moisture entry.
- Railing and Vertical Surfaces: Apply these surfaces last, usually requiring more care with a brush. Work top-to-bottom.
Managing Puddles and Over-Application
If you see shiny puddles or areas where the sealer isn’t soaking in after 5–10 minutes, you have applied too much. Immediately take a clean, dry brush or a rag wrapped around a sanding block and gently wipe up the excess material, working it into a drier section of the wood.
Leaving puddles is a guaranteed way to get a sticky, peeling finish when cured. Be proactive and redistribute any pooling material immediately.
The Second Coat (If Required)
Most manufacturers recommend only one coat for maximum penetration, especially with semi-transparent stains. However, if your wood is extremely dry or you opted for a lighter toner, a second coat might be recommended.
Crucial Rule: You must wait until the first coat is fully dry before applying the second. This usually means 12–24 hours. If you apply the second coat too soon, it sits on top of the wet first coat, leading to curing issues and peeling.
Step 4: Curing and Cleanup
The project isn’t truly done until the sealer has fully cured (hardened). This is different from being “dry to the touch.”
Drying vs. Curing Times
Check your product’s label for specific times, but here is a general guideline:
- Dry to Touch: Usually 2–4 hours. This means you can gently walk on it with socks.
- Foot Traffic: Typically 12–24 hours.
- Full Cure (Heavy Use): This can take anywhere from 48 hours to 7 days. Avoid placing heavy furniture, rolling rugs, or setting up heavy planters on the deck until this time has passed. Placing items on a semi-cured surface can cause the sealer to stick to the object, peeling right off the wood when the object is moved.
Cleaning Up Tools Safely
Proper cleanup protects your tools and the environment:
- Water-Based Cleanup: Rinse brushes, rollers, and pads thoroughly with warm, soapy water until the water runs clear.
- Oil-Based Cleanup: Use mineral spirits or paint thinner in a dedicated container. Work the brushes in the solvent until clean. Allow the solvent-soaked rags to dry completely outdoors, laid flat, before disposing of them, as they pose a spontaneous combustion risk.
Expert Maintenance Tips for Maximizing Sealer Life
A beautiful seal lasts longest with proper care. Think of this as the follow-up maintenance that validates all your hard work in the preparation phase.
Routine Cleaning Schedule
Regular, gentle cleaning prevents dirt and mildew spores from getting a foothold that can break down the sealer over time.
- Sweep regularly to remove leaves and grit (which acts like sandpaper underfoot).
- Perform a mild deck wash (using a very mild soap solution or wood-safe cleaner) once in the spring and once in the fall. Never use harsh degreasers or chlorine bleach on a sealed deck, as this will break down the sealant prematurely.
Identifying When Reapplication is Needed
The “water test” is your best annual diagnostic tool.
When spring rolls around, sprinkle water in several spots across your deck surface. If the water beads up nicely, the sealer is still performing well! If the water soaks in rapidly (as if it hit raw wood), it’s time to clean and re-seal that area, or perhaps the whole deck depending on how widespread the absorption is.
Understanding Fading vs. Failure
Remember, most semi-transparent sealers fail due to UV damage (fading) long before they fail due to water penetration. Even if the water beads up perfectly, if the wood color looks bleached out or significantly lighter, it means the UV inhibitors are gone, and the wood fibers are breaking down, indicating it is time to re-apply for cosmetic protection.
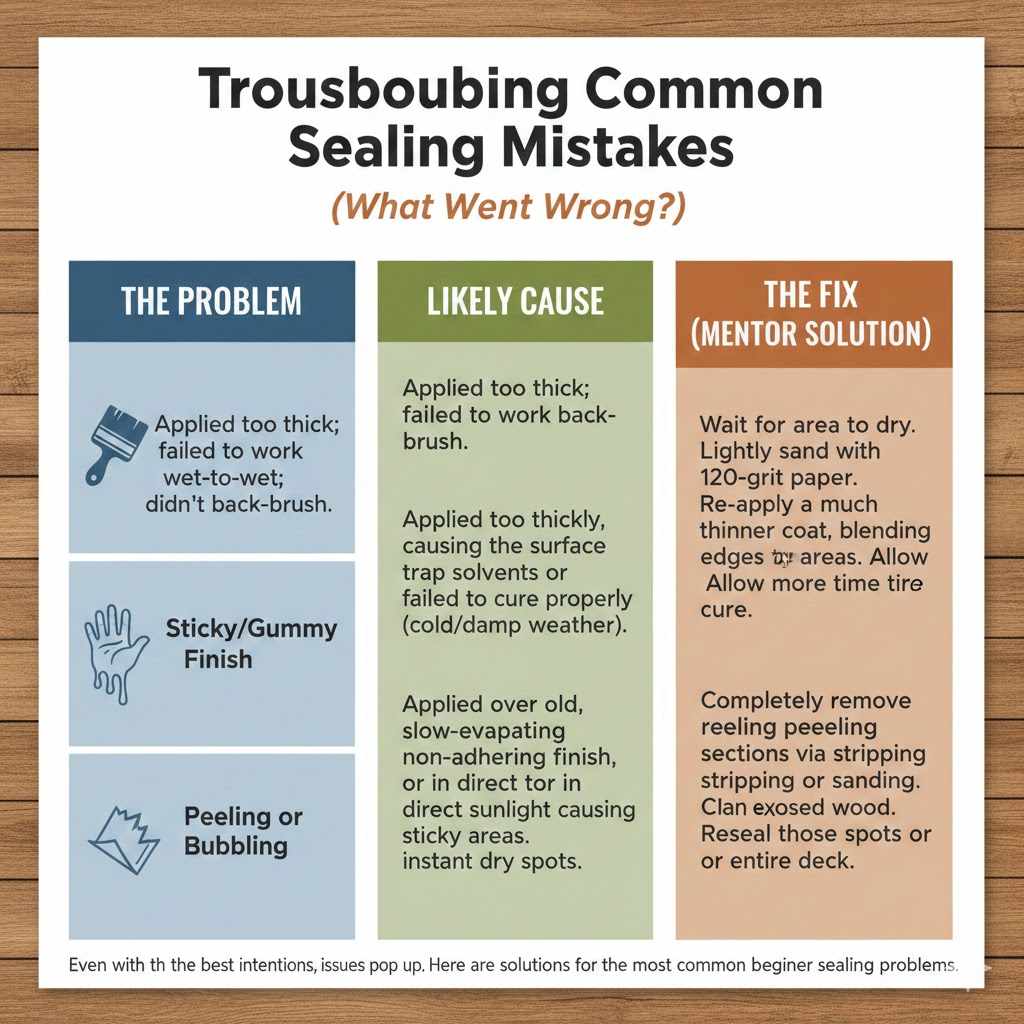
Troubleshooting Common Sealing Mistakes (What Went Wrong?)
Even with the best intentions, issues pop up. Here are solutions for the most common beginner sealing problems:
| The Problem | Likely Cause | The Fix (Mentor Solution) |
|---|---|---|
| Streaky/Uneven Color | Applied too thick; failed to work wet-to-wet; didn’t back-brush. | Wait for the entire area to dry completely. Lightly sand the entire deck with 120-grit paper and re-apply a much thinner coat, ensuring you blend edges immediately. |
| Sticky/Gummy Finish | Applied too thickly, causing the surface to trap solvents or the sealer failed to cure properly (often due to cold/damp weather). | This is harder to fix. Use a high-quality, slow-evaporating mineral spirit wash (or the product specified by the manufacturer) to wipe down the sticky areas aggressively to remove the excess. Then allow more time to cure. |
| Peeling or Bubbling | Applied over old, non-adhering finish, or applied in direct hot sunlight causing instant dry spots. | Peeling sections must be completely removed via stripping or sanding. Clean the newly exposed wood well and reseal only those spots or the whole deck if necessary. |
Frequently Asked Questions (FAQ) for Deck Sealing Beginners
Q1: How often do I actually need to seal my deck?
A: It varies by product and exposure. Generally, clear sealers need yearly touch-ups, while high-quality semi-transparent stains last 2 to 3 years. Always use the water test to check protection yearly.
Q2: Can I seal a pressure-treated (PT) deck right after it’s built?
A: No. Most new PT wood needs time to dry out thoroughly, often 6 to 12 months. If you seal too early, the trapped moisture will cause the sealer to fail or cause the wood to warp excessively.
Q3: Should I use a stripper if I’m using a solid stain?
A: Yes, if there is any previous coating. Solid stains are paint-like and need a clean, chemically neutral, slightly porous surface to bond properly. Skipping the stripper leads to early peeling.
Q4: Is it better to brush or spray on the sealer?
A: A combination is often best. Spraying allows for quick, even coverage, but you must always back-brush immediately after spraying to push the product into the grain and remove drips.
Q5: Can I seal the deck if the wood feels slightly damp?
A: Absolutely not. Even water-based sealers require the wood substrate to be dry for proper adhesion and curing. Wait until you have at least two full sunny days with no rain before attempting application.
Q6: What should I use to clean my deck without hurting the plants around it?
A: Use an oxygenated bleach cleaner (sodium percarbonate). This is far less harsh than chlorine bleach and breaks down into water and oxygen, making it much safer for surrounding vegetation once thoroughly rinsed. Be sure to soak any nearby plants with plain water before starting and rinse them again after cleaning the deck.
Q7: Does sealing prevent wood rot?
A: Sealers significantly reduce the likelihood of rot by keeping water out, but they do not make the wood invincible. Rot prevention also relies on good deck design that allows for airflow and drainage underneath and between the boards.
Conclusion: Confidence in Your Crafted Deck
Sealing your wood deck isn’t magic; it’s thorough preparation followed by careful application. We’ve walked through testing your wood, selecting the right armor, getting the surface perfectly clean, and applying that sealer evenly. Remember, the effort you put into cleaning and sanding today will pay dividends in the durability and appearance of your deck for seasons to come.
Don’t let the scale of the project intimidate you. Work section by section, take your time with the preparation, and prioritize thin, even coats over thick, fast ones. By following these proven steps, you are not just protecting a surface; you are investing in years of enjoyment on a beautifully maintained, resilient outdoor living space. Grab those safety glasses, fire up that brush, and get ready to enjoy a deck that looks fantastic and stands strong against the weather!