4X8 Plywood Wall Paneling: Ideas, Types & Installation Tips
Plywood wall panels, especially in the common 4×8 sheet size, offer a versatile and often budget-friendly way to enhance interior walls. They come in many styles and can be installed with basic tools, making them accessible for DIY projects aiming for a quick aesthetic upgrade.
Understanding 4×8 Plywood Wall Paneling
When we talk about 4×8 plywood wall panels, we mean large sheets of plywood. These sheets are typically four feet wide and eight feet long. That’s a pretty big area to cover on a wall.
Plywood itself is made by layering thin wood veneers. These layers are glued together. They are placed in a way that makes the plywood strong.
This construction also helps stop it from splitting or cracking easily. Think of it like building with many thin pieces of wood, stacked and stuck tight. This makes them much tougher than a single piece of solid wood the same size.
The appeal of 4×8 plywood wall panels is their size and how they can cover a lot of space fast. For someone looking to update a room, this is a huge plus. Instead of putting up many small pieces of wood, you are working with large, manageable sheets.
This can save you a lot of time. It also means fewer seams to worry about. This gives your walls a cleaner, more unified look.
Plywood panels are not new. They have been used for a long time in building and decorating. But today, they are made in many new ways.
You can find them with different finishes and textures. Some look like real wood planks. Others have cool geometric patterns.
Some are meant to be painted. Others are designed to show off the wood grain. This variety means you can likely find a 4×8 plywood wall paneling style to fit almost any design idea you have for your home.
My First Time Trying Plywood Wall Panels
I remember looking at my bland living room wall for months. It was just painted drywall. It felt so… flat.
I wanted something with more character. I had seen pictures of rooms with wood-paneled walls, and they looked so cozy and rich. But the thought of buying individual wood planks and carefully measuring and cutting each one felt overwhelming.
My weekend DIY projects usually involved a bit of frustration and a lot more time than I planned. So, I put off doing anything about it.
Then, a friend mentioned 4×8 plywood wall panels. They said it was a much simpler way to get that wood look. I was skeptical.
Could a big sheet of plywood really look good and not cheap? I went to a local lumber yard. Seeing the different types of panels laid out was a revelation.
There were sheets with a beautiful oak veneer. Others had a subtle texture that looked modern. I picked out a maple-veneer panel.
It had a nice, light color. It felt solid when I touched it.
Getting them home and up on the wall was still a bit of work. You definitely need help to carry those big sheets. But the actual installation was surprisingly straightforward.
I measured, marked, and cut the panels. I used a circular saw. The cuts were pretty clean.
Then, I attached them to the wall studs. The big size meant I covered a huge section of the wall very quickly. When I finished, I just stood back and stared.
It looked amazing. The wall had depth and warmth. It completely changed the feel of the room.
I was so relieved and proud. That experience taught me that sometimes, the simpler solution is the best one.
Quick Look: Types of 4×8 Plywood Wall Panels
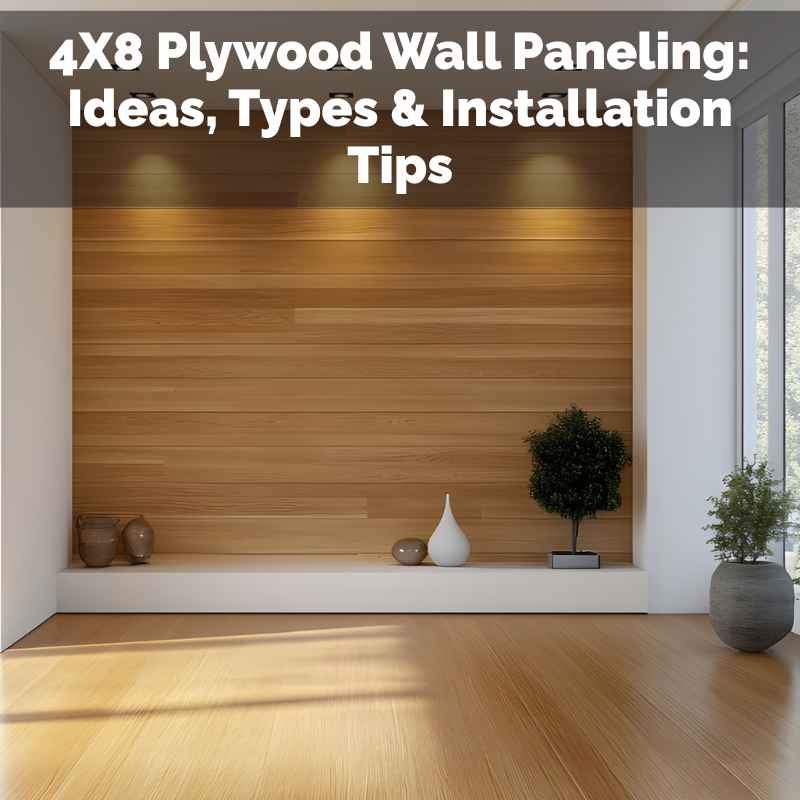
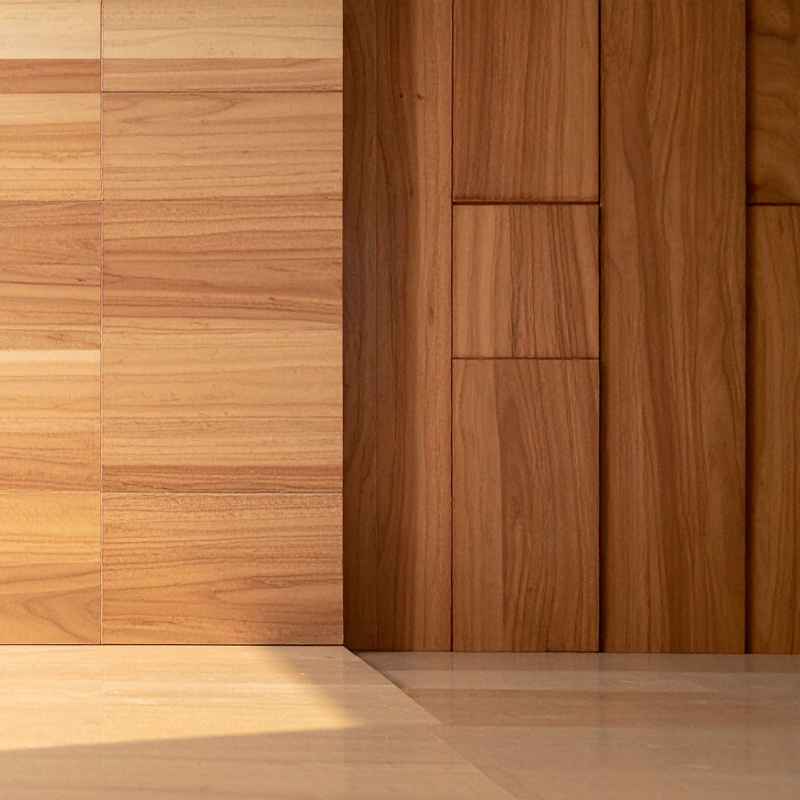
Wood Veneer Panels: These use a thin layer of real wood on top. They look like solid wood but cost less. Oak, maple, cherry, and walnut are common.
MDF Panels with Laminate/Veneer: Medium Density Fiberboard (MDF) is smooth and stable. A printed pattern or thin wood layer is added.
Grooved or Shiplap Style Panels: These have pre-cut grooves. They mimic the look of individual wood planks put together.
Textured Panels: Some panels have raised patterns. This adds visual interest and depth.
Paint-Ready Panels: These have a smooth surface. They are made for you to paint any color you like.
Different Types of 4×8 Plywood Wall Panels
Choosing the right 4×8 plywood wall paneling is key. There isn’t just one kind. Each type has its own look, feel, and use.
Understanding these differences will help you pick the best fit for your home. It also helps you know what to expect when you buy and install them.
One of the most popular types is wood veneer paneling. This is what I used in my living room. These panels have a real wood layer on the front.
This layer is called a veneer. It can be made from many different woods, like oak, birch, or even cherry. The veneer gives the panel the beautiful look of solid wood.
But the core of the panel is made from layers of wood glued together. This makes it stronger and usually cheaper than solid wood planks. The grain patterns can be very striking.
They add a natural beauty to any wall.
Another option is MDF (Medium Density Fiberboard) panels. MDF is made from wood fibers pressed together with resin. It’s very smooth and stable.
It doesn’t warp easily. For wall panels, MDF is often covered with a decorative laminate or a thin wood veneer. These can mimic the look of many types of wood.
They can also have printed patterns or solid colors. MDF panels can be a great choice if you want a very uniform look or if you plan to paint the wall. They don’t have the natural variations you see in real wood grain.
You’ll also find panels designed to look like individual wood planks. These are often called shiplap or grooved panels. They come with the lines already cut into the sheets.
This makes them look like many narrow boards have been installed. It gives a rustic or farmhouse feel. Installing these can be faster than putting up separate planks.
The grooves hide any small gaps. This gives a clean, finished look. These are very popular for accent walls or entire rooms.
Some 4×8 plywood wall panels have textures. These textures can be subtle or very noticeable. They might have a raised pattern.
Or they could feel like rough wood. These textured panels add a lot of visual interest. They can make a plain wall feel much more dynamic.
They are good for modern or industrial styles. They can also help hide minor wall imperfections if the texture is deep enough.
Finally, there are paint-ready panels. These are usually made from MDF or smooth plywood. They have a uniform, smooth surface.
They are designed specifically to be painted. You can paint them any color you like. This gives you the most freedom to match your room’s decor.
They can create a clean, modern look. Or they can be painted a bold color for a statement wall. You can even add molding or trim over them after painting to create a custom look.
Installation Basics: What You’ll Need
- Measuring Tape: For accurate measurements.
- Level: To ensure panels are straight.
- Circular Saw or Table Saw: For cutting panels to size.
- Stud Finder: To locate wall studs for secure mounting.
- Screws or Nails: To attach panels to studs.
- Construction Adhesive: For extra hold.
- Caulk: To fill small gaps.
- Safety Glasses: Always protect your eyes.
- Utility Knife: For scoring or trimming.
- Paint or Stain: If you’re finishing the panels.
Real-World Context: Where to Use 4×8 Plywood Wall Panels
The beauty of 4×8 plywood wall panels is their adaptability. They aren’t just for one kind of room or one style. You can use them in many places in your home.
Think about the function of the room and the look you want. This will guide your choice of panel type and finish.
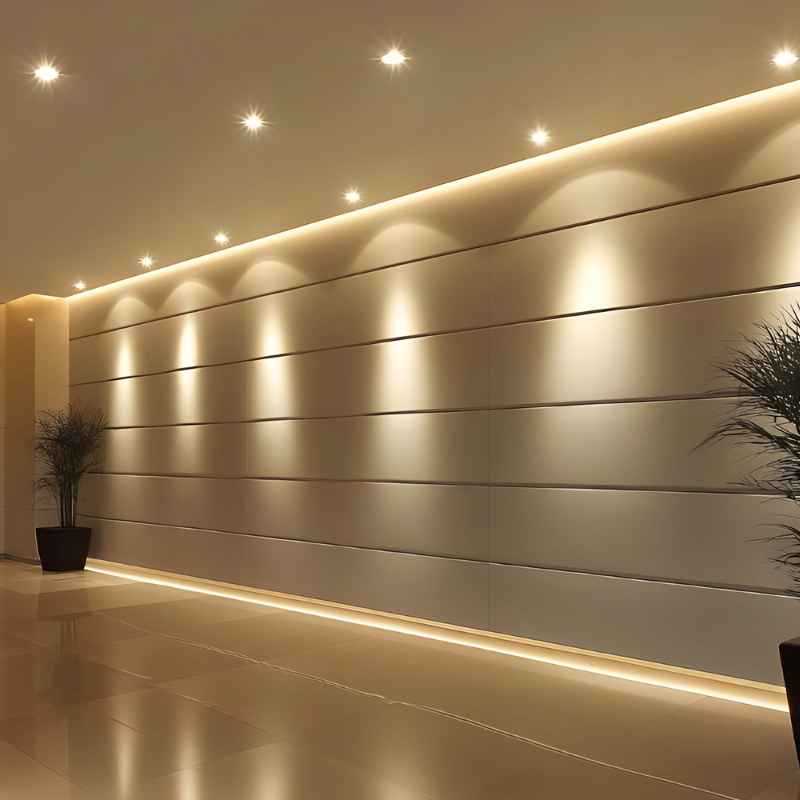
In a living room or family room, these panels can create a cozy focal point. An accent wall behind a TV or a fireplace looks stunning. You can use a warm wood veneer for a traditional feel.
Or a grooved panel for a modern farmhouse vibe. If you want a clean, minimalist look, a paint-ready panel painted a neutral color works well. The large panels mean fewer seams.
This gives a smooth, finished backdrop. It can make the room feel bigger and more put-together.
Bedrooms are another great place for these panels. Imagine a master bedroom with a feature wall behind the bed. A dark wood veneer can add a touch of luxury and drama.
A lighter wood or a subtle texture can create a calm, serene atmosphere. This is especially true if you are going for a Scandinavian or modern minimalist style. The panels can add warmth that soft furnishings might not provide alone.
They can also help with sound dampening slightly.
What about basements or home offices? These areas often need a boost in warmth and style. Basements can sometimes feel dark or unfinished.
Plywood panels can bring life and color to these spaces. In a home office, a well-chosen paneling can make the space feel more professional and inspiring. A light-colored grooved panel can make a basement feel brighter and more inviting.
For an office, a subtle wood grain or a painted finish might feel more focused.
Garages or workshops can also benefit. While they might not need the fancy veneers, durable, paintable plywood panels can protect drywall. They offer a clean surface that is easy to wipe down.
They can make a utility space feel more organized. Think about a workshop where tools are hung on pegboards. Panels provide a solid backing for those boards.
They are tougher than plain drywall in these busy areas.
Consider hallways or entryways. These are often overlooked spaces. A hallway with a textured or wood-grain 4×8 plywood wall paneling can welcome guests.
It adds instant character. It sets the tone for the rest of your home. A narrow hallway can feel much more interesting with this added dimension.
It’s a practical way to add style without taking up floor space.
When thinking about where to use them, consider the moisture levels. Most plywood panels are best suited for dry interior areas. They are not typically recommended for bathrooms or kitchens where steam and water are common.
Unless you use a specific type designed for those areas, or seal them very well, moisture can cause problems like warping or delamination over time. Always check the manufacturer’s recommendations.
Style Spotlight: Modern Farmhouse
Look: Clean lines, shiplap or grooved panels, often painted white or a light natural wood tone.
Why it works: Mimics the look of reclaimed barn wood without the cost. The vertical lines of shiplap add a sense of height and airiness.
Tips: Combine with other farmhouse elements like rustic furniture, metal accents, and simple decor.
Installation Tips for a Professional Finish
Getting a professional look with 4×8 plywood wall panels isn’t as hard as you might think. It mostly comes down to careful planning and execution. A few simple tips can make a big difference.
They help you avoid common mistakes and get a result you’ll be proud of.
First, measure twice, cut once. This old saying is crucial here. Before you even touch a saw, measure the wall space you want to cover.
Measure the panels themselves. Plan how you will lay out the sheets. You want to minimize waste.
You also want the seams to fall in logical places. Often, you can align seams with existing wall corners or doorways. This makes them less noticeable.
Use a pencil to mark your cut lines clearly.
Next, find the studs. For a secure installation, you must attach the panels to the wall studs. Use a stud finder to locate them.
Mark their positions on the wall. You can also use a thin drill bit to test for studs. The panels are heavy.
They need to be screwed or nailed into the solid wood framing of the wall. Attaching them only to drywall is not strong enough. This is a critical step for safety and durability.
When cutting, take your time. Use a sharp blade on your saw. A dull blade can cause splintering, especially on veneer surfaces.
A fine-tooth blade is usually best for plywood. If you are cutting a large panel, support it well while cutting. This prevents it from sagging and breaking.
Some people like to score the cut line first with a utility knife. This can help create a cleaner edge. Always wear safety glasses.
Wood dust can be harmful.
Consider how you will attach the panels. Screws offer the strongest hold. You can use drywall screws or specific construction screws.
If you want to hide the screws, you can use a countersink bit. This drills a small hole for the screw head. Then you can fill the hole with wood putty.
If you are using veneer panels, be careful not to over-tighten screws. This can crush the veneer. Nails are another option, especially finishing nails.
You will need a nail gun for a clean job. Then you can fill the nail holes with putty.
Construction adhesive is your friend. Apply a bead of construction adhesive to the back of the panels before you press them against the wall. This adds an extra layer of security.
It helps prevent rattling or bowing over time. It also adds strength to the overall installation. Make sure the adhesive is suitable for your panel type and wall surface.
Follow the product instructions for application.
Don’t forget the edges and seams. Once the panels are up, you might have small gaps. You can fill these with paintable caulk or wood putty.
Choose the product based on the panel material and your finish. For grooved or shiplap panels, the grooves themselves hide many imperfections. If you are painting, a light sanding between coats will give a smooth finish.
If you are staining, test your stain on a scrap piece first. Wood types can absorb stain differently.
Plan for outlets and switches. You will need to cut holes for these. Measure their exact location.
Transfer these measurements to the panel before you hang it. Use a jigsaw or a RotoZip tool for clean cuts. Make sure the edges of the holes are smooth.
You can often use a router bit to bevel the edges slightly for a cleaner look.
Finally, consider the overall finish. If your panels are paint-ready, plan your paint colors. If they are wood veneer, you might want to seal them.
A clear protective coat will protect the wood. It can also enhance the natural color and grain. Always test finishes on scrap pieces first.
This ensures you like the final look before applying it to your walls.
Myth vs. Reality: Plywood Paneling
Myth: Plywood paneling always looks cheap and dated. Reality: Modern panels come in high-quality veneers and stylish designs that look sophisticated.
Myth: Installation is too difficult for a beginner. Reality: With proper planning and basic tools, DIYers can achieve great results.
Myth: Plywood panels are not durable. Reality: When installed correctly and finished, they are very durable and long-lasting.
Myth: You can’t use plywood panels in main living areas. Reality: They are perfect for accent walls or entire rooms, adding warmth and style.
What This Means for You: When It’s Normal and When to Worry
Understanding when 4×8 plywood wall panels are a good fit is important. Like any building material, there are times they shine and times they might not be the best choice. Knowing the difference helps you make smart decisions for your home.
It’s normal and often a great idea to use these panels when you want to add warmth, texture, or a specific style to a room. If you’re looking for an affordable way to update an accent wall, they are perfect. They are also great for covering up damaged drywall.
Or for creating a feature wall in a bedroom, living room, or dining room. Using them for a rustic, modern, or farmhouse look is very common. They are also suitable for areas like home offices or finished basements.
When it’s not ideal is in areas with high moisture. Bathrooms, steam showers, laundry rooms with high humidity, or kitchens right next to the sink are usually not good places for standard plywood panels. Moisture can cause the veneers to peel, the glue to weaken, or the wood to swell and warp.
If you absolutely need paneling in a high-moisture area, look for specialized moisture-resistant panels. You must also ensure they are properly sealed. But generally, stick to dry areas.
You should also consider the type of finish. If you are looking for a perfectly smooth, seamless wall that you can paint in any high-traffic area, very thin veneer panels might not be the best choice. They can be scratched or dented more easily than some other wall coverings.
However, thicker, more durable veneers or well-finished MDF panels can stand up well to normal use.
Pay attention to the quality of the panel itself. Cheap, thin plywood might splinter easily during installation. It might also have visible flaws in the veneer.
Always inspect the sheets before you buy them. Look for a consistent grain pattern and a smooth surface. The quality of the manufacturing matters a lot.
If you notice any swelling, warping, or separation of the layers after installation, this could indicate a problem. It might be due to high humidity. Or it could be a defect in the panel itself.
In such cases, it’s best to investigate the cause. You might need to address moisture issues in the room. Or, if it’s a product defect, contact the manufacturer.
For most typical home applications, however, when installed correctly, they are very durable.
Consider your personal style. If you want a very sleek, ultra-modern, minimalist look with no texture at all, sometimes the natural grain of wood veneer can be too much. In those cases, a smooth, paint-ready MDF panel might be a better fit.
Or a panel with a very subtle, uniform texture.
Ultimately, 4×8 plywood wall panels are a versatile and valuable material for home improvement. They offer a way to add significant visual impact. They do this without the extreme cost or labor of solid wood.
Just choose the right type for your space and install it with care. You’ll likely be very happy with the results.
Quick Checks Before Buying
- Measure your space: Know the exact square footage.
- Choose your style: Wood grain, grooved, paintable?
- Check for damage: Inspect sheets for warping or veneer flaws.
- Consider your tools: Do you have the right saw for cutting?
- Factor in finish: Will you paint, stain, or seal?
- Ventilation: Ensure the area is dry and well-ventilated.
Quick Fixes & Tips for Enhancing Your Walls
Even with the best planning, small details can elevate your 4×8 plywood wall paneling project. These simple tips focus on making the installation smoother and the final look more polished. They are about adding those finishing touches that make a big difference.
Start with a Clean Wall: Before you begin, make sure the wall surface is clean, dry, and free of dust or debris. If you’re covering existing wallpaper, remove it completely. This ensures the adhesive and fasteners have a solid surface to grip.
Use a straight edge for Cuts: When cutting panels, especially long cuts, use a straight edge or a clamping guide with your saw. This helps ensure a perfectly straight line. It prevents the saw from wandering.
This is crucial for tight seams.
Pre-Drill Pilot Holes: For screws, especially near the edges of the panels, pre-drilling small pilot holes can prevent the wood from splitting. This is particularly important for veneers and thinner plywood.
Fill Seams and Holes: Use a high-quality paintable caulk for any small gaps between panels or along trim. For screw or nail holes, use wood putty that matches your panel finish or is designed for painting. Sand smooth after drying.
Consider Trim: Adding trim around the edges of the paneled area can give it a more finished and custom look. Baseboards, crown molding, or even simple wood strips can frame the panels beautifully.
Test Finishes: If you plan to paint or stain, always test your chosen product on a scrap piece of the paneling. Different wood types and veneers react differently to stains and paints. This lets you see the final color and saturation.
Work with a Helper: Those 4×8 sheets are heavy and awkward. Having an extra pair of hands makes carrying, positioning, and installing the panels much easier and safer. It also helps when you need to hold the panel in place while you mark or attach it.
Plan Outlet Cut-outs Carefully: Double-check measurements for electrical outlets and switches. Use a template if possible. A jigsaw is usually the best tool for making these cuts cleanly.
Allow for Expansion: In some environments, wood can expand or contract slightly with changes in humidity and temperature. Leave a small gap (about 1/8 inch) around the perimeter where the panels meet the ceiling or adjacent walls. This gap can be hidden by trim.
Frequently Asked Questions
What is the best type of plywood for walls?
The best type depends on your goals. For a natural wood look, wood veneer panels are excellent. For a smooth, paintable surface, MDF panels or specific paint-ready plywood are ideal.
Grooved or shiplap panels are great for a planked look.
Can I install 4×8 plywood wall panels myself?
Yes, many DIYers successfully install 4×8 plywood wall panels. It requires basic tools like a saw, level, and stud finder. Having a helper is highly recommended due to the size and weight of the sheets.
How do I cut plywood wall panels?
Use a circular saw or table saw with a fine-tooth blade for clean cuts. Measure carefully and use a straight edge for guidance. Always wear safety glasses.
Support the panel adequately during cutting to prevent breakage.
How do I attach plywood panels to the wall?
Attach panels to wall studs using screws or nails. Construction adhesive on the back of the panel provides extra support. Ensure you locate studs with a stud finder and mark their positions.
Can I paint over plywood wall panels?
Yes, many 4×8 plywood wall panels are designed to be painted. If you have wood veneer, you can paint it after priming. Paint-ready panels have a smooth surface ideal for painting any color.
Are plywood wall panels good for soundproofing?
Plywood panels can offer some minor sound dampening due to their density. However, they are not a primary soundproofing solution. For significant soundproofing, you would need additional insulation and specialized materials.
Conclusion
Updating your walls doesn’t have to be a massive undertaking. 4×8 plywood wall panels offer a fantastic blend of style, versatility, and affordability. Whether you want a cozy wood look or a sleek painted finish, there’s a panel for you.
With careful selection and installation, you can transform your space beautifully.