How Do I Seal Painted Wood? Proven Essential Guide
To seal painted wood effectively, you must clean the surface thoroughly, ensure the paint is fully cured (often 24–72 hours), and then apply thin, even coats of a clear topcoat like polyurethane or lacquer using a high-quality synthetic brush or foam roller. Proper sealing protects your hard work from scuffs and moisture, ensuring a lasting, beautiful finish.
Welcome to the workshop! I’m Md Meraj, and I know that feeling when you finish painting a project—maybe a lovely bedside table or a freshly painted front door. The color looks perfect, right? But then, worry sets in: “Will it scratch? Will that little splash of coffee stain it?” It’s a common snag for every DIYer. You’ve done the hard part, and now you need to lock in that great look.
The good news is that sealing painted wood is surprisingly straightforward once you know the right steps. We aren’t doing complex chemistry; we are just adding a tough, clear shield. This guide cuts out the jargon and gives you simple, proven methods to make your painted wood project durable and beautiful for years to come. Let’s grab our gear and protect that gorgeous paint job!
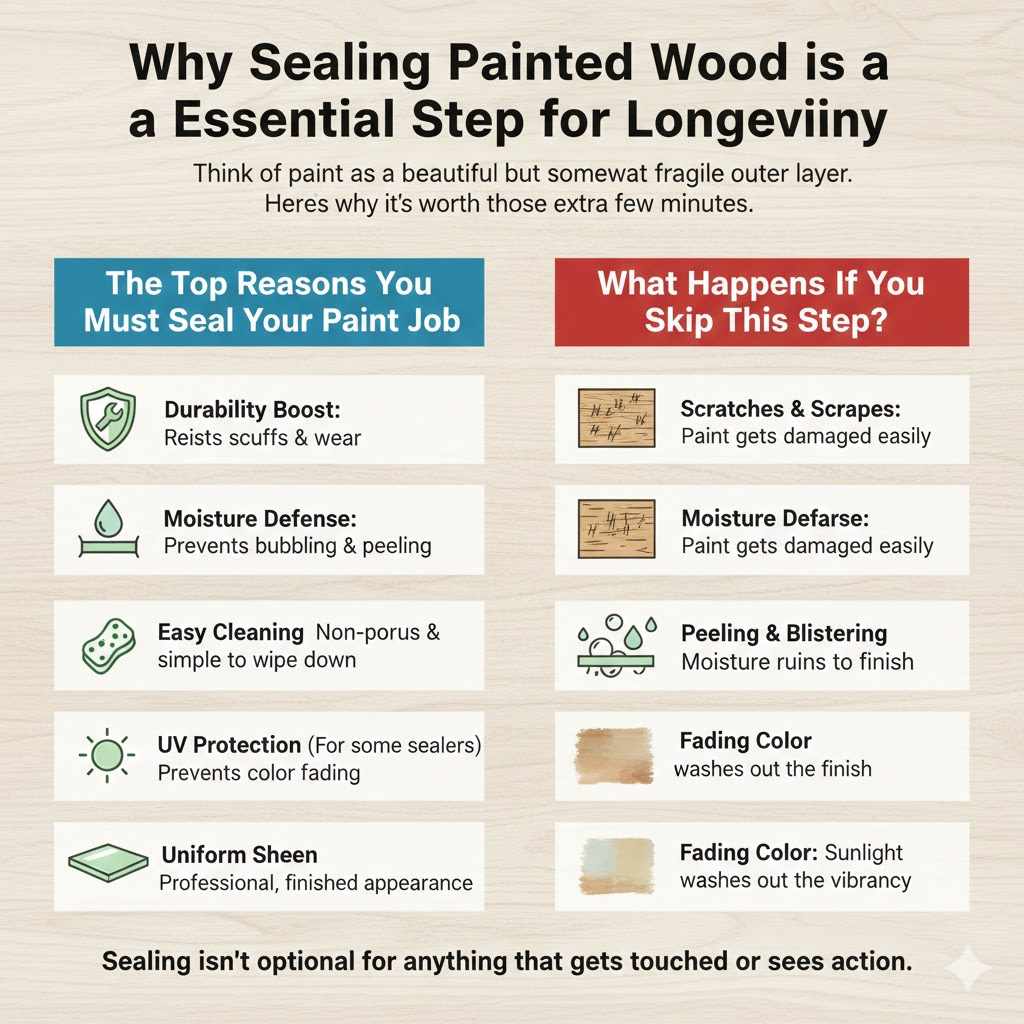
Why Sealing Painted Wood is an Essential Step for Longevity
Think of paint as a beautiful but somewhat fragile outer layer. It offers color, but it doesn’t offer much protection against daily life—and let’s face it, daily life involves spills, fingerprints, and accidental bumps. Sealing painted wood transforms that colorful layer into something truly tough.
The Top Reasons You Must Seal Your Paint Job
If you skip this step, you risk immediate disappointment. Sealing isn’t optional for anything that gets touched or sees action. Here’s why it’s worth those extra few minutes:
- Durability Boost: Sealers create a hard shell that resists scuffs, scrapes, and general wear and tear far better than standard paint layers alone.
- Moisture Defense: Wood naturally absorbs moisture. A good sealer blocks water penetration, preventing paint from bubbling, blistering, or peeling due to humidity or spills.
- Easy Cleaning: Sealed surfaces are non-porous. Wiping down dust or cleaning up a small mess becomes incredibly simple—no scrubbing needed that might wear down the color.
- UV Protection (For some sealers): If your project lives near a sunny window, certain sealers contain UV inhibitors that prevent your lovely paint color from fading over time.
- Uniform Sheen: Sealers help even out the final look, making sure all parts of the paint job reflect light consistently, giving it a professional, finished appearance.
Preparation: The Non-Negotiable First Steps
This is where most beginners make small mistakes that lead to big peeling problems later. Proper preparation ensures your sealer actually sticks well to the paint underneath. Follow these steps carefully; your future self will thank you!
Step 1: Knowing When Your Paint is Truly Dry (Curing vs. Drying)
This is critical. Wet paint seals terribly. Paint dries to the touch quickly, but it needs time to cure—meaning all the solvents have evaporated and the paint has reached maximum hardness. Different paints need different curing times.
- Latex/Acrylic Paints: Usually dry to the touch within 1–4 hours, but you must wait at least 24 hours before sealing, sometimes 48 hours, especially in humid conditions.
- Oil-Based Paints: These take longer. Wait a minimum of 48–72 hours.
- Tip from the Workshop: Check the paint can instructions! Manufacturers always list the recoat/sealing time specific to their formula.
If you seal paint that is still slightly soft, the solvent in your topcoat can re-wet the paint underneath, leading to wrinkles, stickiness, or outright failure.
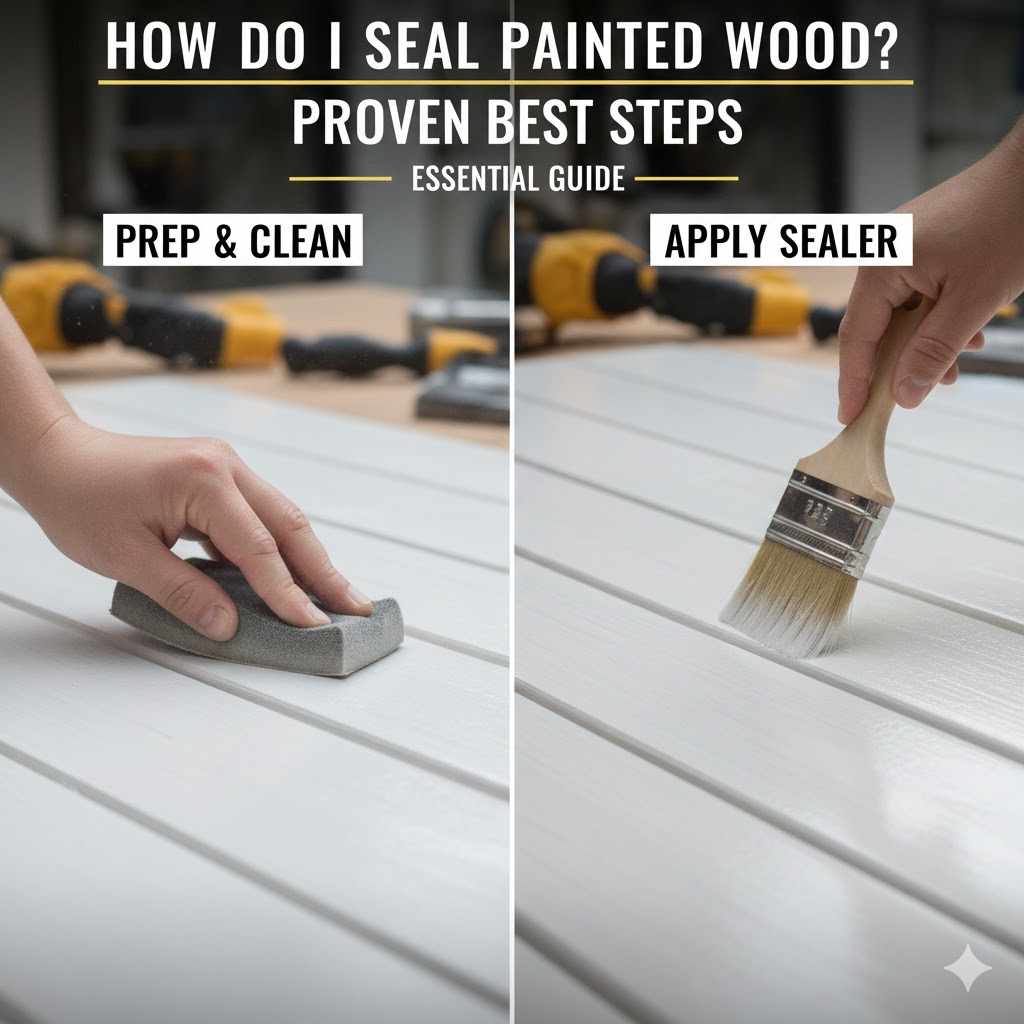
Step 2: Gentle Cleaning and De-Gritting
Even if the surface looks clean, it likely has microscopic dust, hand oils, or cooking grease (if it’s a kitchen item). The sealer needs a perfectly clean canvas.
- Dust Removal: Use a very soft, dry cloth or a tack cloth (available at any hardware store) to wipe every surface gently. A tack cloth is slightly sticky and traps fine particles other rags miss.
- Degreasing (If necessary): If the painted item is frequently handled (like a chair rail or door knob), wipe it down with a rag lightly dampened with mineral spirits or a very mild detergent solution. Do not soak the wood.
- Rinse and Dry: If you use soap, wipe down again with clean water. Allow the piece to dry completely—check corners and crevices. Moisture trapped under the sealer is a disaster waiting to happen.
Step 3: Addressing Imperfections (Light Sanding Debate)
This step requires a gentle hand when dealing with already painted surfaces.
- Do NOT Sand Heavily: You are not trying to remove paint; you are creating a light “tooth” for the sealer to grip onto. Heavy sanding will expose bare wood or uneven patches.
- The Right Abrasive: Use very fine sandpaper, typically 220 grit or higher. If the paint is soft, use fine (1500+ grit) sanding sponges.
- Technique: Sand very lightly in the direction of the wood grain, just enough to take the sheen off the top coat. Immediately vacuum all dust, followed by a final wipe with a tack cloth.
Choosing Your Sealer: Finding the Right Shield
The “best” sealer depends entirely on where the wood lives and how much abuse it takes. A cabinet in a powder room needs less protection than a kitchen table! Here is a breakdown of the most common, beginner-friendly sealers for painted wood.
Sealer Types Comparison Table
| Sealer Type | Best For | Pros | Cons |
|---|---|---|---|
| Water-Based Polyurethane | General furniture, décor, low-moisture areas. | Cleans up with water, low odor, dries fast, doesn’t yellow over time. | Slightly less durable than oil-based; can sometimes raise the grain slightly. |
| Oil-Based Polyurethane | High-traffic tabletops, bathroom vanities, exterior projects. | Extremely durable, high resistance to scratches and heat. | Strong odor (needs ventilation), yellows slightly over time, long drying time, requires mineral spirits for cleanup. |
| Lacquer (Spray Only) | Fine furniture, quick projects, smooth finish goals. | Dries extremely fast, produces a beautiful, thin, hard shell. | Can be tricky to apply without runs; fumes are strong; needs proper safety gear. |
| Clear Wax | Chalk paint projects, aged/patina look, low-use items. | Very easy to apply (buffing), gives a soft, low-sheen look. | Offers minimal scratch or water protection; needs re-waxing periodically. |
Understanding Sheen Levels
The sheen refers to how shiny the final coat is. This is a personal preference but also affects how much dirt shows. A higher sheen is easier to clean but highlights every tiny imperfection.
- Matte/Flat: Very little shine. Hides scratches well but is slightly less durable and harder to wipe clean than glossier options.
- Satin: A popular middle ground. Offers a soft glow while providing good protection and decent cleanability.
- Semi-Gloss/Gloss: Very shiny. Extremely durable and easiest to clean (great for kids’ furniture), but it will show every bump and brush stroke underneath.
Meraj’s Tip: For most indoor, general-use painted furniture, Satin or Semi-Gloss water-based polyurethane offers the best balance of ease of use, durability, and appearance for beginners.
The Application Process: Applying Your Sealer Like a Pro
You’ve prepped your wood and chosen your potion. Now for the main event! Applying a clear topcoat requires patience and a light hand. Remember, you are aiming for smooth, even coverage without drips.
Essential Tools You Will Need
Using the right tools prevents streaks and trapped hairs, which can ruin an otherwise perfect finish.
- Your chosen sealer (polyurethane, etc.)
- High-quality synthetic brush (if using liquid from a can) or foam pad applicator.
- Tack cloths or a lint-free microfiber towel.
- Good lighting so you can see wet edges.
- A stirring stick—NEVER shake the can! (Shaking creates air bubbles that pop onto your wood.)
- Safety gear: Gloves and adequate ventilation (open windows or use a fan). Proper ventilation is key for safety, especially with solvent-based products. The CDC provides good general guidelines for working with volatile chemicals safely.
Step-by-Step Guide to Applying Liquid Sealer (Polyurethane)
If you bought brush-on polyurethane, follow these steps precisely for the smoothest result.
- Stir Gently: Open the can. Slowly and gently stir the sealer for about 60 seconds, making sure to scrape the bottom corners to incorporate any settled material. Do not stir vigorously or create foam.
- Cut in the Edges: Dip your brush about one-third of the way into the sealer. Use the brush to apply a thin layer around the edges, corners, and any recessed details first. Work in small sections.
- Apply Thin Coats: For the main, flat areas, apply the sealer using long, smooth, consistent strokes in the direction of the wood grain. Think of spreading butter thinly on toast. Less is definitely more here. Overloading the brush causes runs and bubbles.
- The “Tip-Off” Stroke: After laying down a section, use the very tip of the brush (almost dry) to gently “tip off” the surface with very light, sweeping passes. This helps smooth out brush marks before the finish sets.
- Avoid Over-Brushing: Once you’ve passed over an area once or twice, STOP. Continuously brushing the sealer once it starts to set up will drag the setting material and create ugly streaks or drags.
- Allow Adequate Cure Time: Check the can, but typically you need 4–8 hours before recoating with the second coat. Ensure the room temperature is stable and moderate for the best results.
- Sand Lightly Between Coats: Once the first coat is completely hard (it will look dull), lightly scuff the entire surface with 320 or 400-grit sandpaper or a fine abrasive pad. This is crucial—it knocks down dust nibs and prepares the surface for the next layer. Clean thoroughly with a tack cloth.
- Apply Second (and Third) Coat: Repeat steps 2 through 6. Most furniture requires two coats minimum; three coats offer excellent durability, especially on horizontal surfaces like tabletops.
When to Use Spray Sealers
Spray sealers (like aerosol lacquers or polyurethane sprays) are fantastic for beginners who worry about brush marks, as they dry almost instantly and self-level beautifully.
- Preparation is Key: Since spray lacquer cures so fast, any dust in the air will land on the sticky surface and create craters. Work in the cleanest area possible (like a garage with good airflow) and ensure the piece is pristine.
- Distance Matters: Hold the can 10–12 inches away from the surface. Moving too close causes drips; moving too far causes an orange-peel texture.
- Move Continuously: Spray in long, smooth, overlapping strokes, sweeping from one end to the other without stopping your hand movement until the stroke is complete.
- Thin Layers Rule: Spray on three or four very light coats rather than one thick coat. Light coats dry quickly, preventing runs.
Special Considerations for High-Use & High-Moisture Areas
If you sealed kitchen cabinets, bathroom vanities, or exterior trim, you need a tougher approach. These areas face constant temperature changes, cleaning chemicals, and humidity.
Protecting Painted Kitchen Cabinets
Kitchen cabinets are hit with grease, steam, and constant wiping. They benefit most from the toughest protection.
For cabinets, I strongly recommend FDA-compliant sealers if the paint might see heavy use near food preparation, though standard oil-based polyurethanes are excellent for durability on painted cabinet faces.
- Use an oil-based polyurethane or a 2-part epoxy conversion varnish (if you want to step up your durability game, though this requires more complex mixing).
- Aim for three or even four thin coats, allowing maximum cure time between each—especially if you used chalk paint, which requires extra sealing against scrubbing.
Sealing Painted Exterior Wood
Exterior wood (like porch railings or trim) needs a sealer that handles UV rays and temperature expansion/contraction.
Do not use standard indoor polyurethane outdoors; it will crack and peel quickly. Look specifically for sealers labeled “Exterior Grade” or spar varnish. Spar varnish is designed to remain flexible as the wood moves in changing weather.
Choosing the Right Sealer Based on Substrate (The Wood Itself)
The wood beneath the paint matters. Porous woods (like pine or MDF) soak up the first layer of paint and sealer unevenly.
| Substrate Type | First Sealer Pass Strategy |
|---|---|
| Smooth, Factory-Sealed Wood | Can proceed directly to a standard first coat after light scuffing. |
| Raw Pine or Soft Woods | Apply a sanding sealer first, or use a very thin, diluted first coat of your chosen poly to avoid the wood soaking up too much, which can affect the color layer. |
| MDF (Engineered Wood) | Use a high-quality primer before painting, and seal edges well, as MDF swells significantly when it absorbs moisture. |
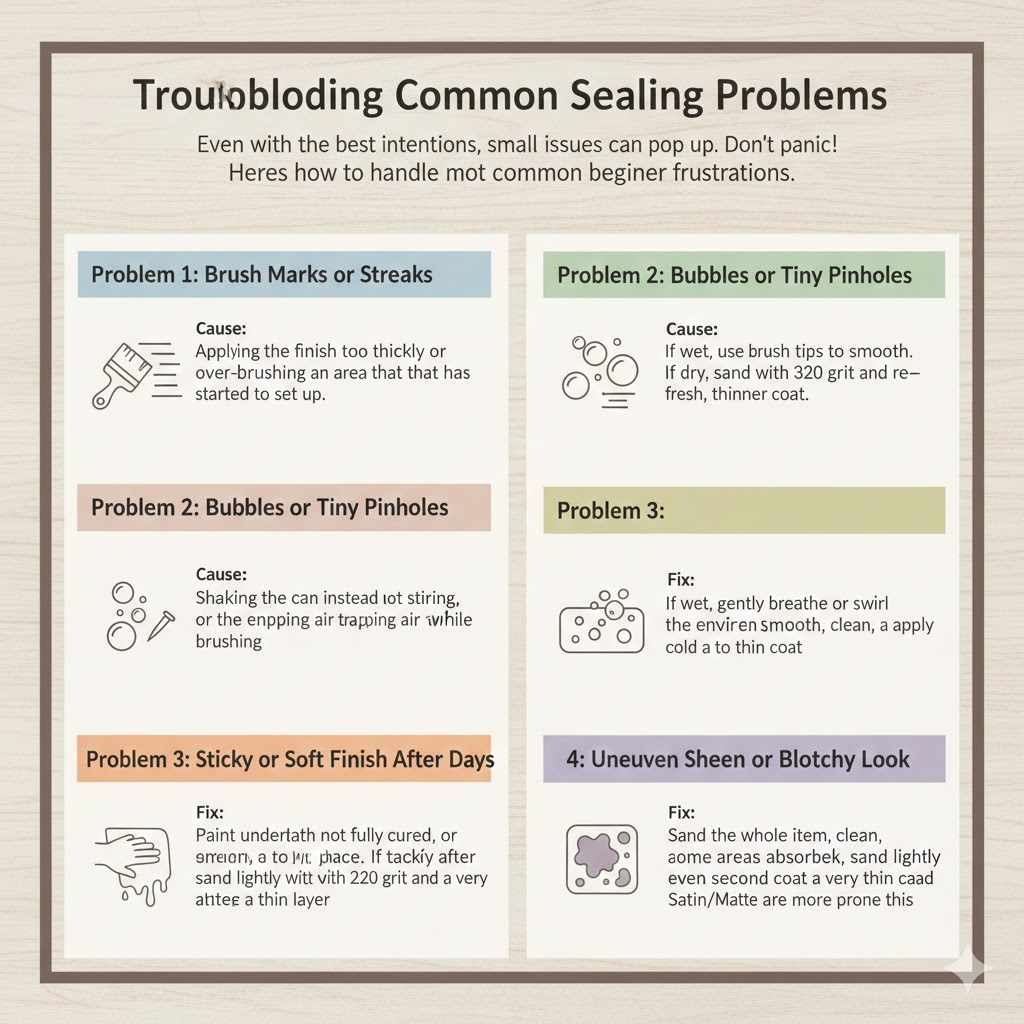
Troubleshooting Common Sealing Problems
Even with the best intentions, small issues can pop up. Don’t panic! Here’s how to handle the most common beginner frustrations.
Problem 1: Brush Marks or Streaks
Cause: Usually applying the finish too thickly or over-brushing an area that has started to set up.
Fix: If the coat is still wet, use your brush tips very lightly (“tipping off”) to smooth the area immediately. If the coat is already cured and dry, you must lightly sand the whole surface with 320 grit, wipe clean, and apply a fresh, thinner coat. This often means fixing one area requires smoothing the whole board.
Problem 2: Bubbles or Tiny Pinholes
Cause: This is often caused by shaking the can instead of stirring, introducing air that rises through the sealer, or trapping air while brushing.
Fix: If the coat is wet, gently breathing on the area or gently swirling a clean, dry brush over the bubbles can sometimes pop them before they cure. If they are cured, lightly sand them smooth, clean, and apply another thin coat. For future cans, always stir gently!
Problem 3: Sticky or Soft Finish After Days
Cause: The paint underneath was not fully cured before sealing, or the environment is too cold or humid. Sealers need moderate conditions to cure correctly.
Fix: Move the piece to a warmer, drier environment if possible. Do not touch it. If the stickiness is severe, you may have to wait longer. If it remains tacky after a week, very lightly sand the entire sticky surface with 220 grit, wipe clean, and apply a very thin layer of fresh sealer.
Problem 4: Uneven Sheen or Blotchy Look
Cause: You applied coats inconsistently, or some areas absorbed the sealer more than others.
Fix: The only reliable fix is to ensure full coverage. Lightly sand the whole item, clean it, and apply a full, even second coat. Satin and Matte finishes are more prone to looking blotchy if not perfectly even than high-gloss finishes.
FAQ: Sealing Painted Wood for Beginners
Q1: Can I seal chalk paint? If so, how many coats do I need?
A: Yes, you absolutely must seal chalk paint as it is extremely porous and wears easily. Chalk paint typically requires two to three coats of a durable sealer (like polyurethane or wax blend) to achieve reasonable protection, especially on tables.
Q2: Do I have to sand the paint before I apply the sealer?
A: Generally, yes, but very lightly! You need to sand with high-grit sandpaper (220 grit or higher) just enough to “de-gloss” the surface. This removes the slickness and gives the sealer something rough to grab onto, ensuring it adheres properly without dulling your original color.
Q3: How long does it take for a sealed piece of wood to be fully usable (like a table)?
A: While most projects are dry enough for light handling after 24 hours, polyurethane needs time to reach its maximum hardness. For heavy-use items like tabletops, wait 3–7 days before putting heavy items or liquids on them to allow for the full cure.
Q4: Is spray polyurethane or brush-on polyurethane better for beginners?
A: Spray polyurethane is often easier for beginners because it levels out beautifully, hiding small application errors like slight brush marks. However, brush-on often offers a slightly thicker, more robust layer when applied properly over multiple coats.
Q5: My project is painted white. Will the sealer change the color?
A: It depends on the sealer. Water-based polyurethanes generally dry very clear and will maintain the crisp white color. Oil-based polyurethanes will add a noticeable amber or yellowish tint to the white finish over time.
Q6: Can I use clear nail polish as a sealer for small craft items?
A: For tiny crafts that will not see much use, clear nail polish can act as a quick sealer. However, it chips and yellows very quickly compared to proper wood sealants like polyurethane, so I do not recommend it for functional furniture or high-touch items.
Final Thoughts on Craftsmanship and Protection
You have successfully moved past the painting stage and stepped into the realm of finishing. This final step of sealing is what truly separates a good DIY project from one that looks professionally built to last. It might feel fussy waiting for coats to dry or wiping off dust for the tenth time, but trust me—that patience pays dividends every time you look at your newly protected piece.
Remember the core principles we covered: Patience during the cure time of the paint, ultra-clean preparation, and applying the sealer in thin, controlled coats. Whether you chose the durable toughness of oil-based poly for your kitchen island or the low-odor ease of water-based satin for a shelf, you’ve invested in protecting your color and adding longevity to your wood.
Go ahead and put that freshly sealed piece to use! Enjoy the fact that it looks fantastic and, thanks to that clear shield you applied, it’s built tough enough for real life. Happy crafting!