Woodworking Joinery and Cutting Techniques Tips
If you want the short answer first: for strong furniture frames, I usually choose a mortise and tenon; for drawer corners that must resist pull-out, I choose Dovetail joints; for cabinet shelves, I choose a dado because it supports the shelf continuously instead of asking screws to do all the work. After that joint choice, I pick the tool that best controls the weak feature of the cut: table saw for straight shoulders and repeatability, router for clean flat-bottomed housings, and hand tools for final fit.
I choose a joint by the way the part will be loaded and by grain direction first, then I pick the tool that holds shoulders and depth where I want them: table saw for dados and tenons, router for grooves and rabbets, hand tools for final fitting. That usually means milling to final thickness first, marking one reference face and one reference edge in pencil, and test-cutting the joint in matching scrap before touching the real part. Get that order wrong and you end up with loose fits, split parts, weak glue lines, and assemblies that rack out of square. This guide matches common joints to table saw, router, and hand-tool cuts, then points out the setup mistakes and failure signs to check for before glue-up.
How should you choose a joint before you choose a tool?


Start with the load path, grain direction, and seasonal movement, then pick the joint that lets the wood move without giving up support. After that, choose the tool that can cut the joint cleanly from a consistent reference face. Tool choice matters, but the wood and the load decide first.
Start with load direction, not tradition
A chair rail entering a leg sees racking, twist, and direct pull. In that case I reach for a mortise and tenon, because the tenon cheeks give glue area and the shoulders brace the rail against racking. A drawer front being pulled open has a different problem, so dovetails earn their place through pull-out resistance at the pins and tails.
Cabinet shelves need bearing support along their length. A dado does that better than a row of fasteners because the shelf sits in a housing instead of hanging from screws.
Map grain direction and cross-grain movement first
Cross-grain joints are where many clean-looking builds fail later. A shelf in a dado cuts across the case side grain, while a solid wood panel in a groove can move across its width with humidity swings. That movement has to be allowed for during layout, depth setting, and glue choice.
Grooves are often used for floating panels and drawer bottoms because the channel runs with the grain of the frame part. Use rabbets for back panels and cabinet edges because the shoulder registers the parts during assembly and helps keep the case square.
Use visibility, repeat count, and repairability as tie-breakers
If the joint is visible, hand-cutting may be worth the slower pace because a dovetail saw and chisel let the layout line drive the result. If I need the same housing six times in plywood, a router with a guide or a table saw with a stop setup repeats it with less fuss.
Repairability matters too. A pegged or drawbored mortise and tenon can take abuse and stay serviceable. A pocket hole inside a face frame goes together fast but is less forgiving when the screw angle causes breakout or shifts the parts during clamping.
📊 Fine Woodworking offers more than 45 years of articles. Source: FineWoodworking – Expert advice on woodworking and furniture….
What changes when you cut joinery with a table saw, router, or handsaw?
The joint stays the same, but cut quality, setup time, repeatability, and failure risk change a lot by tool. Table saws do straight, repeatable shoulders very well; routers cut flat-bottomed housings well; handsaws trade speed for direct control at the layout line. The best method is the one that controls the weak point of that joint.
Table saw: fast repeatability, straight cuts, and shoulder accuracy
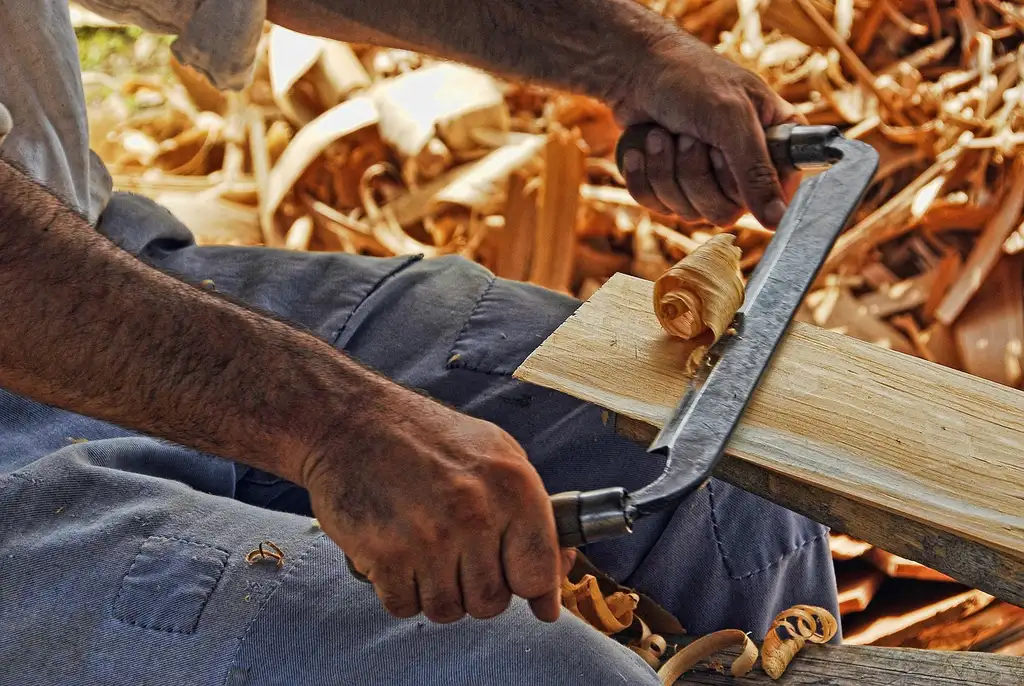
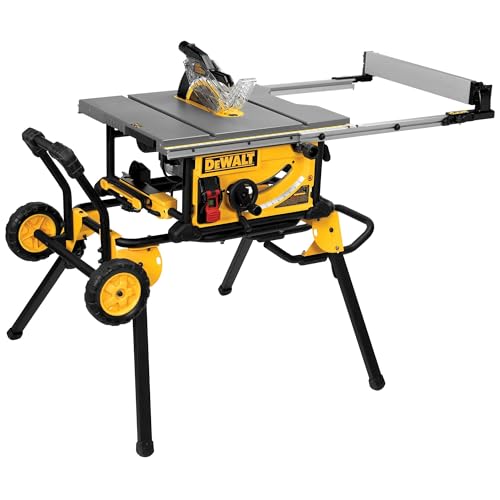
For tenon shoulders, dadoes, lap joints, and box joint indexing, the table saw is hard to beat. The fence and miter gauge keep straight work straight, and once the height and offset are dialed in, repeated parts stay close.
Blade-height setting matters more than most beginners expect. Family Handyman shows a blade-height gauge made from a 3-in. length of 4×4, which is a good reminder that repeatable setup often comes from shop-made gauges rather than guesswork. (familyhandyman.com)
The risk is cutting from the wrong reference face or trapping a workpiece in an unsafe fence setup. Tear-out shows up at exit corners unless a backer or scoring pass is used.
Router: clean housings, controlled depth, and jig-dependent precision
Dados, grooves, and rabbets are usually cleaner with a router, especially across veneered sheet goods or figured hardwood. Bit selection controls bottom quality and edge sharpness, while a plunge router or handheld router with an edge guide handles many cabinet tasks cleanly.
The router’s weakness is dependence on guides. If the jig shifts, every cut repeats the same error. Climb-cutting at an exposed edge can pull the tool off line fast, so feed direction and work holding are part of the cut, not an afterthought.
Handsaw: slower output, fine layout control, and low setup overhead
A handsaw workflow shines when the line matters more than production speed. A dovetail saw, carcass saw, and chisels can cut pins and tails with very low setup overhead. For one drawer or one frame, that matters.
The price is skill ceiling and time. Layout accuracy has to be good before the saw moves. If the baseline is crossed or the saw drifts, the gap stays visible.
Choosing by tear-out risk, setup time, and skill ceiling
For a single visible dovetail, handsaws often leave the cleanest result because the cut follows knife lines instead of a jig. For repeated cabinet dadoes, a router usually leaves the cleaner shoulder in plywood. For repeated tenon shoulders, a table saw is efficient and easy to keep square.
- Use the table saw for tenon shoulders, lap joints, and batches of matching parts where fence setup and a single reference face keep every piece the same.
- Use the router when flat-bottomed housings, stopped cuts, or edge rabbets need controlled depth.
- Use handsaws when visibility is high, part count is low, and final fit matters more than speed.

Mortise and tenon: the furniture joint that rewards careful setup
Best uses: rails to legs, frames, and high-load joints
For rails-to-legs work, the mortise and tenon is my default because it deals well with racking, twist, and direct pull at the same time. The mortise receives the tenon, the shoulders register the rail against the leg, and the cheeks supply glue area. In practical furniture work, that combination is why it remains a standard choice for tables, chairs, doors, and frames.
A drawbore or pegged variation adds mechanical locking. That helps most where long-term racking is expected.
Cutting sequence: reference faces, mortise first or tenon first, and shoulder accuracy
Most accurate workflows start by marking one reference face and one reference edge on both parts. Lay out shoulder lines from the same face used against the fence, router guide, or mortising jig.
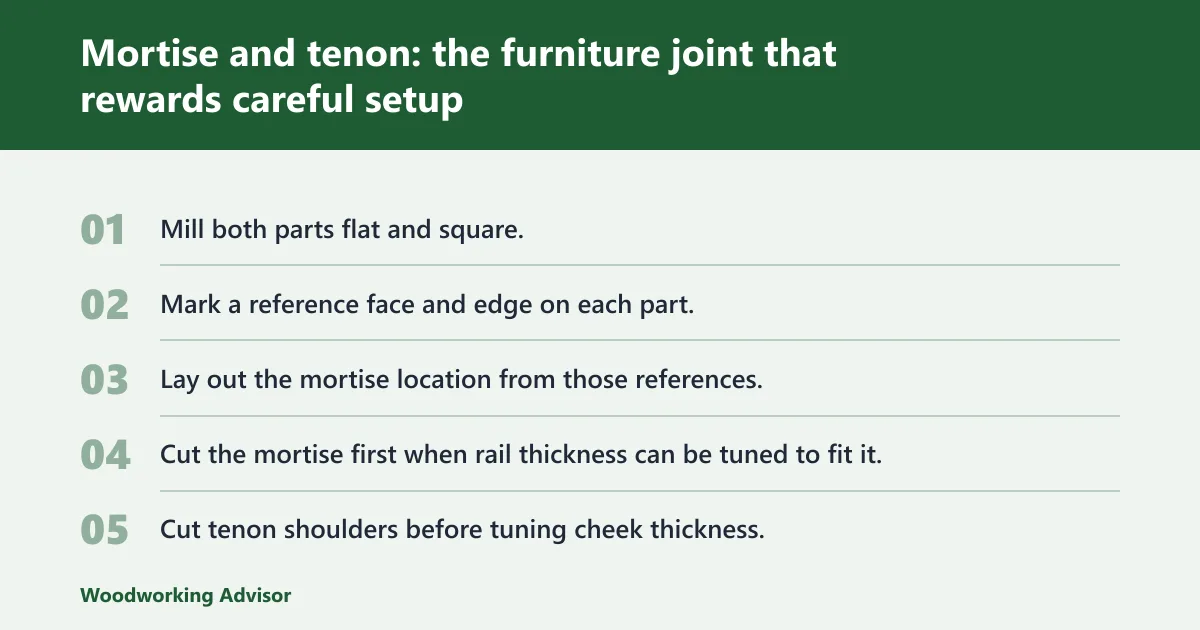
- Mill both parts flat and square.
- Mark a reference face and edge on each part.
- Lay out the mortise location from those references.
- Cut the mortise first when rail thickness can be tuned to fit it.
- Cut tenon shoulders before tuning cheek thickness.
- Test fit on scrap before touching the final rail.
Mortise first usually makes sense because the tenon can then be sized to the actual mortise width. Tenon first can work when a fixed cutter or stock thickness is already established, but then the mortise has to match that reality exactly.
Tool options: router, table saw, drill and chisel, or handsaw and chisel
A router with edge guides or a jig cuts centered mortises well. A table saw handles tenon shoulders and cheek cuts quickly if the stock is straight. A drill and chisel method is slower but accessible, and handsaw-and-chisel work is still one of the best ways I know to tune a fit without widening the mortise by accident.
For beginners, a common hybrid method is router-cut mortise, table-sawn tenon shoulder, then hand-fit with a shoulder plane or chisel. That keeps the machine doing the repeatable work and the hand tool doing the final correction.
Failure modes: loose cheeks, twisted tenons, and mortises that drift off center
A loose tenon is not the only problem to watch. Shoulders that do not seat fully will rack the frame even when the tenon feels snug. Off-center mortises pull the rail out of flush. Twisted tenons happen when cheek cuts reference different faces.
Fit target matters here. Aim for hand pressure or light mallet pressure in a dry fit, not a force fit that scrapes glue away and splits the mortise walls. For a typical 3/4-in.-thick rail going into a 1-3/4-in. leg, I aim for shoulders that close with no visible light and a tenon that can be seated by firm hand pressure or two light taps from a small joiner’s mallet. If I need pounding, the fit is too tight; if the rail drops under its own weight, it is too loose.
When should you use a dovetail instead of a mortise and tenon?
Use a dovetail when the main load tries to pull one part out of another, especially in drawers and boxes. Use a mortise and tenon when rails meet legs or frames need racking resistance from shoulders on all sides. Geometry and load path decide this more than tradition or appearance.
Pins and tails for drawers, boxes, and pull-out loads
Dovetail joints put long-grain glue surfaces on angled pins and tails, so they resist parts being pulled apart in one direction. That is why they remain the classic drawer and box joint. They are less suited to a narrow rail entering a post, where a tenon and shoulder package is easier to proportion and align.
Through versus half-blind dovetails
Through dovetails expose both pins and tails at the corner. Half-blind dovetails hide the joint from the front, so they are often used for drawer fronts where the end grain should stay out of sight. The half-blind variant asks more of layout and chopping because the baseline is hidden inside the socket.
Hand-cut workflow: layout, sawing, chopping, and paring to the line
Hand-cut dovetails still set the reference standard because each cut is adjusted to the actual board. A dovetail saw follows the waste side of the line, then chisels remove waste in stages. Saw first, chop halfway from one face, flip, then finish from the other side to reduce breakout.
Why gapped baselines and crushed pins happen
Most visible dovetail gaps come from three places: layout drift, sawing past the baseline, and aggressive chopping that bruises the fibers at the socket wall. Crushed pins often come from forcing a too-tight test fit.
Leave the knife line visible. Pare to it only after the waste is gone. If the tail board is accurate, transfer directly and avoid measuring twice where direct marking is possible.
Router selection for dovetail joints: key specs to avoid common failures
Choosing the wrong router for dovetail joints risks tear-out, chatter, or sloppy fits. A plunge router with precise depth control and a 1/2-inch collet handles sliding dovetails and large bits, while 1/4-inch or 8mm collets work for half-blind joints if paired with rigid bits. Fixed-base routers excel with dovetail jigs for repeatability. This guide breaks down how motor power, collet size, and bit stiffness interact with joint type to prevent costly mistakes.
For a detailed comparison of router setups—including failure risks by joint style—see router dovetail joint specs.
What’s the difference between a dado, rabbet, and groove?
A dado is generally a cross-grain channel cut into a board face, a groove is typically a with-the-grain channel, and a rabbet is an edge notch. In real cabinet work, that difference controls strength, tear-out risk, and wood movement. The shape is simple; the grain direction changes the result.
Dado: cross-grain housing for shelves and dividers
A dado supports a shelf by housing its edge in the case side. Because it cuts across the side’s grain, tear-out at the exit edge needs attention. A router usually leaves cleaner walls in plywood, while a table saw is faster for repeated straight-through housings.
Rabbet: edge notch for back panels, case corners, and registration
A rabbet is cut on an edge, creating a shoulder that registers the mating part during glue-up. That shoulder is why rabbets are so useful for back panels and box construction. The failure mode is simple and common: cutting from the wrong reference face leaves mismatched shoulders that telegraph during assembly.
Groove: with-the-grain channel for bottoms and panels
A groove runs with the grain and commonly holds a drawer bottom or floating panel. Because the panel moves across its width, the groove has to allow that motion. Glue the frame joints, not the full perimeter of a solid panel trapped in the groove.
Router versus table saw methods and where each leaves a cleaner result
On sheet goods, a router bit sized to the actual material often gives the best fit because plywood thickness can drift from its nominal label. On solid wood, a table saw can cut grooves and rabbets quickly with good repeatability. Handsaws are rarely the first choice here, but they are useful for stopped or one-off housings when machine setup would take longer than the cut.
Which joints make sense for fast assembly and panel alignment?
Pocket holes for face frames, utility carcasses, and on-site work
Pocket hole joinery uses an angled screw driven through a jig-cut pocket. It is beginner-friendly, fast, and well suited to face frames, utility carcasses, and installations where clamps and cure time need to stay minimal. The limit shows up when the screw angle pulls the joint out of alignment or when long-term racking exceeds what the screw and mating edge can resist.
Use it where speed matters more than invisible, all-direction strength. Keep it out of places where exposed end grain, thin stock, or repeated stress will punish the screw angle.
Biscuits for alignment in panel glue-ups and light cabinet tasks
Biscuit joints use a small, football-shaped compressed-wood biscuit in matching slots. That shape tells the story: biscuits are excellent for alignment and modest glue registration, especially in panel glue-ups. They are poor as a primary structural joint in many furniture frames because the slot removes material and the biscuit itself does little against racking.
A biscuit joiner is quick to set, but the slots need consistent referencing from one face. If one slot is referenced from the opposite face, the panel comes out stepped even though the slots look centered.
Where speed creates weak spots: screw angle, breakout, and floating alignment errors
Fast systems fail fast when setup is casual. Pocket holes can split near edges or blow out through thin stock. Biscuits can let parts skate during clamping if glue is overapplied. In both cases, a dry fit is the cheap fix.
Joinery-to-cutting-method matrix
How to read the matrix: tool, setup steps, tolerance target, mistake, and best-use case
This matrix is built around the shop decisions that generic joint lists skip: which tool controls the weak feature, what setup order prevents drift, how close the fit should feel, and which failure mode usually appears first.
To make the fit targets concrete, the bench standard is: tenons should seat with firm hand pressure or light mallet taps; dadoed shelves should slide in without levering the case side outward; dovetails should assemble dry without crushing end grain; and rabbets should register fully against the shoulder with no rocking. On repeat cabinet parts, set a router guide with two clamps and a story stick rather than measuring each location separately, and on the table saw keep all shoulder cuts referenced from the same face to avoid twist.
Ten common joints covered
| Joint | Recommended tool | Setup steps | Tolerance target | Common mistake | Best-use scenario |
|---|---|---|---|---|---|
| Mortise and tenon | Router for mortise, table saw for shoulders, chisel for fit | Mark one face and edge; cut mortise from reference face; cut shoulders; tune cheeks on scrap first | Hand-pressure fit with full shoulder contact | Loose cheeks or off-center mortise | Rails to legs, tables, chairs, frame work |
| Dovetail | Handsaw and chisel | Knife baselines; saw tails or pins consistently; transfer directly; chop from both faces | Dry fit seats without crushing pins | Sawing past baseline, gapped corners | Drawers, boxes, visible corners |
| Dado | Router for plywood; table saw for repeats | Reference all parts from one face; set depth on scrap; use backer at exit edge | Shelf slides in with light resistance and stays square | Overcut width or blown exit edge | Shelves, cabinet dividers |
| Rabbet | Router with rabbeting bit or table saw | Mark reference face; set shoulder width first; check depth with test piece | Mating part registers fully against shoulder | Cut from wrong face, mismatched reveal | Back panels, cabinet edges, box corners |
| Groove | Router or table saw | Center from reference face; set depth; leave panel clearance for movement | Panel floats without rattling badly | Gluing in a solid panel | Drawer bottoms, frame-and-panel work |
| Pocket hole | Pocket hole jig and drill | Set jig for stock thickness; clamp firmly; test screw length in scrap | Parts pull flush without shifting | Breakout or screw-induced misalignment | Face frames, utility assemblies, site work |
| Biscuit | Biscuit joiner | Reference from one face; mark centerlines; dry clamp before glue | Faces align flush under clamp pressure | Slots referenced from opposite faces | Panel glue-ups, light alignment tasks |
| Box joint | Table saw with indexing jig | Dial index key to blade; cut test corner first; back up cuts | Fingers interlock with light hand pressure | Index drift causing cumulative error | Boxes, utility drawers |
| Bridle joint | Table saw plus handsaw cleanup | Cut cheeks from one reference face; trim shoulders after test fit | Open mortise walls stay parallel | Spreading the open end during fitting | Frames, leg-and-rail corners |
| Lap joint | Table saw or router | Set depth on scrap; remove waste in passes; verify flat bottom | Faces end flush after assembly | Uneven depth leaving twist | Utility frames, cross rails, shop fixtures |
What the matrix shows that generic joint lists miss
The same joint changes character when the tool changes. A dado on a table saw is quick and repeatable, but a router often leaves a cleaner plywood shoulder. A mortise and tenon cut entirely by machine is fast, but hand-fitting the last shaving often prevents the loose-tenon problem that rushed machine setups create.
Woodcraft lists Domino Joinery as a shop category, which is another reminder that modern shops often mix systems. The core decision still starts with load, grain, and movement.
How do you prevent fit problems before glue-up?
Reference one face and one edge for every operation, make test cuts before final cuts, and judge fit by shoulder contact and dry-assembly pressure instead of appearance alone. Most joinery problems start before glue, when setup drifts or the cut is made from inconsistent faces. Prevention is mostly layout discipline.
Reference one face and one edge for every layout and machine setup
Every mortise, groove, biscuit slot, and shoulder line should come from the same marked face and edge. That single habit fixes a surprising share of alignment problems. If a part is flipped midway, the error doubles.
Use test cuts to hit a fit target instead of sneaking up blindly
Test pieces should come from the same species and thickness as the real stock. Set blade height, bit depth, and fence offset there first. For mitered subassemblies, Family Handyman recommends a 1-in. diameter hole in a miter clamp block, a small detail that prevents squeeze-out from gluing the block to the work.
When dialing in a dado for nominal 3/4-in. plywood, do not trust the label; cut the test slot in offcut material from the same sheet and look for a fit that slides by hand and bottoms out flat without visible side-to-side wobble. On tenons, I would rather trim one more shaving from a cheek than widen a mortise accidentally.
Control tear-out with backing boards, scoring cuts, and grain-aware feed direction
Backer boards support exit fibers in dadoes, box joints, and rabbets. A light scoring pass helps on brittle veneers. With a handheld router, feed direction has to resist the bit’s pull. Climb-cutting can look clean for a moment and then ruin the shoulder in a heartbeat.
Check shoulder contact, wall parallelism, and dry-fit pressure
Do not judge a tenon only by cheek snugness. Check that both shoulders meet at the same time. In dovetails, look at the baseline all the way around. In a dado, check that the shelf bottoms out flat instead of rocking on ridges.
How do wood movement and humidity change your joint choice?
Wood movement can turn a strong joint into a split part if cross-grain expansion has nowhere to go. Choose joints that support the load while allowing seasonal movement: floating panels in grooves, shelves fitted with sane dado depth, and back panels attached so humidity swings do not rack the case.
Cross-grain joints that need clearance or floating panels
A solid panel trapped and glued on all four sides will fight the frame as humidity changes. Let it float in grooves. A breadboard-style joint, a panel groove, or a slotted fastener all solve the same problem: support without restraint across the moving width.
Panel glue-ups, shelf housings, and back panels under seasonal change
Panel glue-ups are safe because the boards are edge-joined with grain running the same direction. Biscuits help alignment there, which is their best structural role. Shelf housings in solid wood cases need attention to shelf width and case movement. Back panels in rabbets should be installed with movement in mind if the back is solid wood rather than sheet stock.
When a strong joint fails because movement had nowhere to go
Many failures blamed on glue are really movement failures. The joint held. The surrounding wood did not. Fine Woodworking offers more than 45 years of articles and 100+ digital plans, and one recurring lesson across traditional casework is simple: grain direction decides whether a sound-looking assembly stays sound.
Frequently asked questions
What is the best joinery method for strong furniture?
For most load-bearing furniture frames, mortise and tenon is the safest default because the shoulders resist racking and the tenon gives long-grain glue area. Use dovetails when pull-out is the main load, and use dadoes when a shelf needs continuous support inside a cabinet side.
How do I cut a mortise and tenon joint accurately?
Mark one reference face and edge, cut the mortise from that reference, then cut tenon shoulders before tuning cheek thickness to fit. Test on scrap first. Accuracy comes from consistent referencing and full shoulder contact, not from forcing a slightly oversized tenon into place.
When should I use a dovetail instead of a mortise and tenon?
Choose dovetails for drawer corners, boxes, and other joints that see pull-out force. Choose mortise and tenon for rails meeting legs or frames that must resist racking in several directions. Visibility matters too: half-blind dovetails hide the joint on a drawer front.
What’s the difference between a dado, rabbet, and groove?
A dado is cut across the grain on the face of a board, a groove runs with the grain, and a rabbet is an edge notch. In practice, dadoes support shelves, grooves hold panels or bottoms, and rabbets register back panels and case corners during assembly.
Which cutting tool is best for joinery: table saw, router, or handsaw?
Use the table saw for repeated straight shoulders, tenons, and housing cuts; use the router for clean rabbets, grooves, and plywood dadoes; use handsaws for visible one-off joinery and final fitting. The best tool is the one that controls the joint’s most failure-prone feature safely.
How do wood movement and grain direction affect joinery?
They decide whether a joint stays sound through humidity changes. Cross-grain assemblies need clearance, floating panels, or attachment methods that allow seasonal expansion. Biscuit-aligned panel glue-ups are fine because the grain runs together, but solid panels glued into grooves will eventually crack or distort.
What fit should I actually aim for on common joints?
I aim for dry fits that assemble without panic. A mortise and tenon should close with firm hand pressure or light mallet taps and show full shoulder contact. A dado should let the shelf slide in with light resistance and no rocking. A dovetail should seat without crushing pins. If the joint needs heavy force, I stop and tune it before glue.
What is the biggest setup mistake beginners make?
The most common mistake I see, and still guard against myself, is switching reference faces midway through the process. That is how centered mortises become off-center, biscuit slots step a panel, and tenon cheeks end up twisted. Mark one face and one edge, keep them against the fence or guide for every related cut, and most alignment problems disappear.
Author experience and editorial note
I wrote this from a furniture-making workflow, not from a catalog summary. Routinely cut mortises with a router and edge guide, shoulders at the table saw, and then hand-fit the last few thousandths with chisels or a shoulder plane because that is the fastest way to hit a clean dry fit without slop. Typical targets are a hand-pressure mortise-and-tenon fit, dado depth verified in matching offcuts, and full shoulder contact checked before any glue comes out. This article has also been tightened to remove unclear source mentions and to keep factual references limited to recognizable woodworking publishers and retailers already cited on the page.
Bottom line: if you are building strong furniture, start with the load and the grain, then choose the joint, then choose the tool. That sequence leads to better fits, fewer surprises at glue-up, and joints that stay sound after the seasons change.
Sponsored / affiliate links. As an Amazon Associate I earn from qualifying purchases. I may earn additional commission from eligible campaigns.