How to Use Shellac on Wood: The Complete Guide
Shellac provides a fast-drying, easy-to-restore natural finish for wood. To use shellac effectively, prep the wood first, brush on thin cuts diluted with denatured alcohol (typically a 1 or 2-lb cut), sand lightly between coats, and build up depth slowly – that is how to use shellac on wood correctly every time.
Shellac dries in under 30 minutes and sticks to almost anything, including old finishes that would reject a fresh coat of polyurethane. Beginners often worry about ruining a piece by wiping too aggressively, but real shellac finishing is actually more forgiving than lacquer or poly, not less.
Below is the full process for choosing a cut, mixing flakes correctly, applying coat after coat without streaking, and troubleshooting the handful of problems that trip up most first-timers – plus one thing most shellac guides skip: how long a mixed batch actually stays usable before it stops curing properly.
Why Shellac Excels: The Power of Stick Shellac
Best Dewaxed Shellac Sealer
![]() |
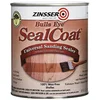
Zinsser Bulls Eye SealCoat Universal Sanding Sealer – $21.99 A pre-mixed, dewaxed 2-lb-cut shellac sealer – skip the flakes-and-alcohol mixing step below and brush this straight from the can.
|
Shellac isn’t some complicated modern marvel; it has been used for centuries spanning from fine furniture restoration to violin making. It truly is simple magic derived from the tiny lac bug. Understanding why we might choose it over other film finishes is super helpful for a beginner.
Affordability and Speed
- High Speed: Shellac is legendary for how fast it dries. You stack coats rapidly, often completing a 4 to 5-coat job in one afternoon. This saves precious workshop time compared to longer curing finishes.
- Low Cost: Made from shell or “flakes” dissolved in safe denatured alcohol, it tends to be very budget-friendly for small to medium projects destined for indoor use.
Durability and Safety Notes
Shellac offers above-average mild protection against blocking (sticking of surfaces accidentally placed together) and moisture, offering a lovely warm tone without muddying delicate wood colors like dark stains.
- Recoat Heaven: If you ever scratch a shellacked project ten years from now, repairing it is effortless. A light sanding and another fresh coat (even years later!) completely blend with the old finish. Other synthetics hardly do that so cleanly.
- The Alcohol Weak Spot: Shellac’s main weakness is its solubility. It mixes badly with solvents like ethanol, so an uncushioned hot coffee cup or a spilled cocktail can leave a watermark that only another coat of shellac (or a shellac-thinner wipe) usually removes. Always use coasters.

Setting Up for Success: Essential Tools and Materials
Before we dive into how to use shellac on wood, let’s lay everything out. Preparation ensures a calm, frustration-proof coating application. Organization greatly eases this process!
Materials You Must Have
| Item | Description and Importance |
|---|---|
| Shellac Flakes (Dewaxed) | Amber choice gives an inherently warmer tone; clear gives the truest wood color. MUST be de-waxed specifically, so fresh coats adhere properly. |
| Denatured Alcohol (“Denatured”) | This is the only thinner/cleaner for shellac coats. Must be household-grade denatured alcohol—rubbing (Isopropyl) alcohol will not work well. Check chemical classifications regarding denaturants for solvent safety reference. |
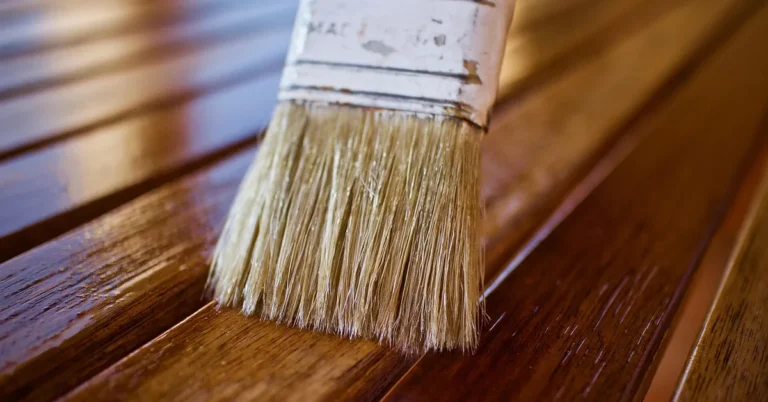
| High-Quality Applicator Brush | Natural bristle, China bristle brush is best. It handles the unique wiping/wet-flow better than synthetics for shellac. |
| Clean Glass Jars | For mixing. Do not use plastic containers as sustained contact with pure alcohol can degrade some plastics. Metal tins are also acceptable. |
Preparation Zone Checklist
Preparing Your Wood Surface: It All Starts Here (~90% of The Finish Work)
Did you know that excellent finishing is primarily sanding, not brilliant wiping?
Proper prep ensures the material sticks perfectly and looks flawless! Skip your typical wood glue clean-up for the sealant coat.
Step 1: Sanding Properly
For best results, no matter what film finish you use, prepare everything leading up to 280 or 320 grit sandpaper. Skipping grits leaves microscopic scratches underneath that the thin light of a shellac finish easily highlights.
- Start sanding with the grit that repairs any previous rough milling marks (usually 100 or 120 grit).
- Move up through a mid grit, such as 150 or 180, to remove the scratch pattern left by the coarser paper.
- Finish with 220 grit or 320 grit sandpaper, depending on the final look you want. For very fine interior trim or an antique look, go up to 320 grit.
Step 2: Controlling Popped Grain (Molding)
When moisture—even atmospheric moisture—hits raised wood fibers after staining or before sealing coat contact, those grain fibers stand up again, creating a rough surface, often called “raised grain.”
To prevent common beginner headaches:
- If your item is stained, let the stain cure completely.
- After ensuring the wood is perfectly smooth at the final required stage (often 220), wipe the furniture with a slightly damp (water-damp, not soaking wet) clean rag across the grain.
- Let this fully dry until it no longer feels damp. Sand the now-raised whiskers lightly with very fine paper—like 400 grit—quickly whisked across the direction of the grain.
- Wipe all physical dust completely away using a clean tack cloth or a light wipe with a rag barely damp with paint thinner (this dissolves tiny remaining wood particles).
The First Trick: Dialing in Your First Cut (“The Seal Coat”)
When experts talk about the right amount solvent in a mixture to obtain a desirable thinness, they use weight standards denoted as “Pounds” (lb) cut recipes. These cuts are crucial to nailing how to use shellac on wood correctly. We mix heavier “masters” and then thin them out.
Understanding Cutter Weights (Lbs)
A “pound cut” historically related very roughly to one pound of shellac flakes dissolved in one gallon of solvent. But universally today, a 2–2.5 lb cut is standard for an initial barrier coat to help the piece accept finish instead of just soaking it deeply.
| Recipe/Cut | Typical Appearance/Use |
|---|---|
| 1 lb Cut | Thin, very diluted barrier coats or use right before applying a final French Polish layer. |
| 2 lb Cut RECOMMENDED | Ideal for the first proper coat (seal coat) allowing penetration without building too much immediate bulk. Fast drying barrier. |
| 3 – 4 lb Cut | Moving toward a bulk, building process layer. Takes much longer, usually reserved due to bulkier application than preferable for beginners. |
Master Mix Instructions (Recommended Safe Starting Point) (2.5 lb Cut Batch, for future thinning)
First, you should prepare a good stock to draw from.
- Gather Parts A & B: Get 4 oz of dry, de-waxed shellac flakes (your weight source, Part A). Get 16 fl oz of denatured alcohol (Part B—the solvent volume). Yes, this is nearly a 4-part volume ratio yielding roughly a 2.5lb cut!
- Mix: Place the flakes into the canning jar. Pour the denatured alcohol over almost entirely covering the plastic layer. Many prefer pouring about ¾ of what they need of the alcohol first.
- The Wait: Seal tightly! Gently agitate the jar or hold it under running tap water so the alcohol washes over the flakes. Shellac flakes do not dissolve instantly. They sit in the solvent for many hours (8+) or overnight. Stir occasionally if you are impatient, but never violently or you will create too foam like lacquer finishes are sometimes made. Good shellac mixing can take an entire day to complete unless you use specialized heating.
- Adjusting Thinness: Many excellent DIY builders prefer the first application much lighter than 2 lbs. They want sealer so thin it soaks deeply and dries almost instantly to harden wayward fibers, almost like a dark ink. Add fresh alcohol, 1 oz at a time, until pouring freely resembles watered paint runoff speed.
The Winning Strategy: Coating Techniques for Beginners
Shellac dries quickly. This speed demands quick, decisive actions when applying your coat. Hesitation or wiping your brush back over a semi-dry section is when you get streaks.
Key Rule: Apply Heavily but Quickly
Unlike varnish where “thin coats win,” shellac loves liberal, flowing passes because of how fast solvents pull away. If brushed too heavily, the alcohol evaporates before the resin locks itself down strongly enough, causing “cracks” known as ALLIGATORING, but this is rare with beginners focused only on low-number cuts.
Master Coat Application Sequence
| Phase | Action Step | Key Goal |
|---|---|---|
| Load Brush | Dip the brush ¾ high into the mixed fluid. Remove excess against the inside wall of the mixing jar. | Load fully but without significant drips forming at the tip—a “saturated but dripping slow” brush. |
| Stroking/First Pass | Start 4 to 6 inches away from the edge of the panel (known as flooding the end). Apply the coat moving rapidly across the grain first (East to West). | A very fast wipe covers the start zone with product and confirms wetting capability. |
| Pulling Coat | Immediately—no hesitation—lay a long stroke, flowing completely cover the wood lengthwise (Tip 1 Rule/North to South stroke). The technique here merges the overlapping parts. Work fast this entire segment. | Achieve full cross-hatch coverage: Blend East-West strokes by running a liquid North-South stroke without stopping. Don’t go back! |
| Finishing Overlap | As you reach the far edge, lift straight up. Do NOT ‘tip off’ or drag the brush empty back—this will ruin shellac faster than almost any other finish. Turn around and stop, do not touch that spot again. | Fastest coverage possible limits drying time variations dramatically. |
The Intermediate “Flow Out” Trick
Here is a great trick when you must switch direction on large furniture sections or cross grain: Once your final “pulling coat” lengthwise is complete, wait mere seconds until the brush drag feels noticeable but is not kicking the base layer. If the surface feels thick,
Dip a SEPARATE, clean BRUSH sparingly in extra denatured alcohol. Run this clean, WETNING brush gently alone across the entire surface, helping guide flow and dissolving minor ridges left from the first heavy load.
Drying, Sanding Between Coats, and Building Finish Height
This drying speed lets you jump straight into sanding. Don’t feel compelled to wait a day; speed is shellac’s specialty.
Drying Checklist
- Allow ample fresh air movement if possible: Denatured alcohol evaporates vigorously and fresh streams replace it faster.
- Drying to “touch”—meaning the brush stops pulling the film around—is generally 10 to 15 minutes if applying a lighter concentration (1–2lb run). Wait 30 minutes for absolute initial tackiness gone.
- The piece should NOT feel overly sticky at a very brisk tap after this window. Test carefully.
Sanding Between Shellac Coats
Sanding roughs up the top flat areas to make the next coat look absolutely level. For shellac, less is profoundly more when it comes to sanding power.
- For the Base Coats (1st through 4th/5th): Use 280 or 320 dry abrasive/sanding paper or fine abrasive sanding sponges. ONLY hit the spots that haven’t flowed smoothly against last time. You are knocking off high spots, not sanding down near clear wood again.
- Caution: The Flashback Point! If you sand through to the bare wood substrate (this is surprisingly easy because shellac often transfers the stain color underneath the white looking coating), STOP sanding immediately at that visible point. You must seal that single hole with a drop of true sealing cut (use your existing can mixed further with ample alcohol—like a 0.5 lb cut concentrate), let that local patch totally cure (1 hour), before progressing the whole sanding review cycle.
If you applied 5 flawless, rapid-fire dust-free coats using a 2 lb cut mix sequentially, you should now have a dense, slightly hazy, warm foundation layer ideal for final buffing or rubbing out to clear final sheen.
Leveling and Achieving Supreme Clarity (Optional Advanced Steps)
What separates a good home job from flawless hand-rubbing comes down to perfecting that surface plane (leveled sheen). Many beginners achieve sufficient protection simply by stopping at 4 coats sanded lightly at 320.
The ‘Spirit French Polish’ Simplication
True French polishing incorporates friction and burnishing agent—often pure wax or oil. For the non-patience-ridden DIY structure, we modify a modern interpretation focusing on wet build-up to level the surface while simultaneously adding color.
Phase A: Adding Final Body (Focus on Coverage)
- Mix your next layer at a relatively fatty state you are now comfortable with applied: perhaps slightly stiffer again, like a straight 4 lb mixture applied very thinly and quickly across isolated repair/sanded sections only. You still need good coverage, just slower final layering focus.
- Allow full overnight cure this time (8+ hours).
- Use finest polishing films available, like 4/0 steel wool (crucially designated as Grade 0000 Steel Wool, usually available in hardware marts) or synthetic white scrub pad designed for finishes. Apply firm, absolute even, slight pressure following the grain only across the structure removing the dull texture left by the sealer phase.
Phase B: The Finish Flow and Sheen Agent
Many restorers employ mild rubbing compounds followed by mineral oil or wax embedded in your finishing pad for the final surface refinement; shellac works wonderfully with mild burnishing additives.
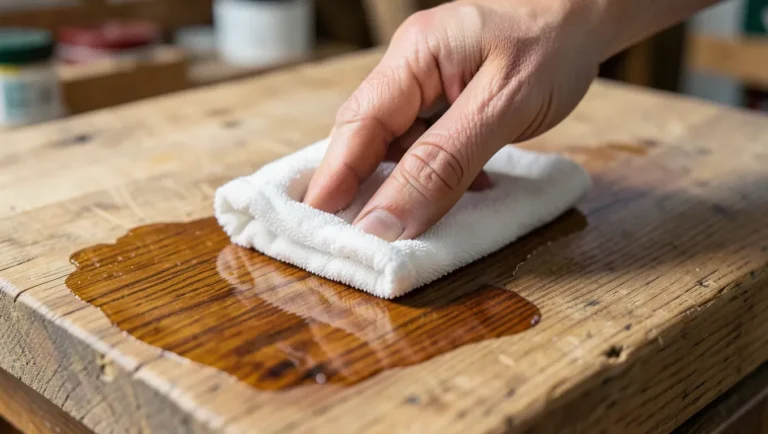
- Load a clean, lint-free rag loosely. Dip your rag tips only into extremely diluted shellac (half your existing light finishing material—your mix should practically run off freely with almost visual saturation).
- Rub the entire area using small, fast, very light circular motions over larger open panels, shifting immediately to parallel overlapping strokes for structure profiles or edge applications—THIS technique smooths imperfections at cure point.
- Repeat this application only as layers feel flat enough, usually once a day over three days maximum for this finishing stage. You are polishing into the previous set layer structure by dissolving and laying perfectly flat atop of each other in fine, controlled wet-motion passes. Finish needs light buff upon drying.
Proper Cleanup and Storage of Real Shellac Solutions (Denatured Alcohol Safety)
Don’t you hate going to refill a can, only to find settled sludge at the bottom?
Storing Ready-to-Use Mixing Tins Today:
When you finish for the day, avoid simply scooping chunks/flakes that settled out back into the original mix bottle. Good finishes keep moving fluid underneath.
- Keep Seal Tight: Alcohol evaporates ruthlessly. Alcohol loss makes remaining liquid effectively chemically stronger (thicker), which dries even faster and pulls more from under the next coat—greatly accelerating ALLIGATORING risk. Keep containers sealed TIGHTLY with tight metal lids like canning types for long service life.
- Discard Dead Solutions (Advanced Tip): If your original, sealed jar batch starts developing unusual cloudiness (is not simple darkening from prior exposure to light or slight particulate) even near the middle of the liquid when swirling, it likely underwent minor chemical degradation of the resin molecules or absorbed critical trace amounts of unwanted substances. Don’t bother sanding it. Pour off liquid top fractions into working cans, but always check for solid debris layer formation at container bottoms.
Cleaning Application Tools (The Right Way)
The cleaning sequence demands immediate action, especially with those nice tight hog/china bristle brushes favored for shellac, they clog almost instantly from its quick set time!
- Remove main bulk: Bang the brush against the sink edge to remove main load; flick excess onto newsprint. Re-shape the brush belly as much as possible through flexing.
- Thorough flush one – Dip brush into a dedicated bucket one with full-strength fresh denatured alcohol. Work the bristles sideways against the bottom for ten seconds. Slosh empty. Dispose carefully according to local codes OR collect the solvent mix since that liquid can still “eat wood” remarkably well for days!
- Safety Note on Disposal: Environment protection agencies stress that hazardous waste like unused solvent shouldn’t go down any house drains as this can impact plumbing or pollute environmental services. Alcohol evaporates; paint sludge cannot.
- Thorough flush two – Repeat using an alcohol rinse, vigorously ensuring the metal ferrule region close to the wooden handle receives attention—resins clog densely there.
- Final Setup: Shake the final bristle ends fiercely onto newspaper (this removes pooling moisture). Reshape it gently with long pulls. Hang brushes if possible using bristle-down orientation (not in water solutions, but after the cleaning stage using drying racks or clamps suitable for hanging flat against a wall). Let evaporation happen overnight before storing permanently with cap onto its bottle if brush has its plastic guard; never place partially set brustles into paper wrapping protection that might let them mold.
How Long Does Mixed Shellac Last? Real Shelf-Life Numbers
Most shellac guides tell you to “check if it’s fresh” without ever giving you an actual number. Here is the real timeline:
- Dry flakes, unopened, stored cool and dark: Effectively indefinite – flakes can sit for years with no measurable loss in cure quality, since there is no alcohol present yet to start any reaction.
- Flakes dissolved in denatured alcohol (mixed shellac): Plan on roughly 6 to 12 months of reliable use from the date you mix it, stored sealed in glass or metal, out of direct sunlight. Pre-mixed canned shellac off a hardware-store shelf carries the same practical window for the same reason – it is a wet chemical mix, not a stable finish yet.
- Past that window: The shellac does not spoil in a way you can smell, but it stops curing to a hard film. Old mixed shellac dries gummy or stays tacky for days instead of minutes, even at the correct cut ratio.
The fastest field test: brush a small amount onto scrap wood. If it is not dry to the touch within 15 to 20 minutes at room temperature, the batch has degraded past useful life – mix a fresh batch rather than troubleshooting your application technique.
Troubleshooting Common Shellac Problems for Beginners
Don’t panic if your first application is sticky, patchy, or opaque. Many beginner issues trace back to two simple causes: inadequate prep or incorrect dilution weight/drying air.
The Shellac Troubleshooting Guide
| Observed Problem | Likely Cause(s) | Beginner Fix |
|---|---|---|
| White Hazy Residues/Opacity (Milkiness) | In the Sealing Coat: Too high a percentage of heavy wax contamination in your flakes, OR extremely high humid local air forcing alcohol to flash (evaporate much too fast). Most likely, you’re using wax contaminated flakes incorrectly mixed/applied. Very common if using Amber shellac flakes. | Apply again using 1 lb cut of certified dewaxed flakes dissolved in 91% Isopropyl—despite standard rules—as an emergency top thin over slightly dried tacky layer. Wait full cure. Skip applying another heavy wet layer of same concentration you made initially. OR thin current bottle 3 parts denatured alcohol per 1 product to ensure fast pure resin laydown. |
| Brush Marks are Stubbornly Visible After Drying (Texture) | Under-dilution. Shellac was too thick to flow out during its short ‘wet time’. You overloaded the friction of blending the overlapping wet boundaries. | Thin fresh product severely (0.75–1.0 lb consistency). Wipe entire surface LIGHTLY AND QUICKLY with this new VERY THIN material only moving directionally, essentially just moistening irregularities. Allow fast dry. Then proceed with normal sanding/coating routine, ensuring much lighter brush loads. |
| Color Looks Unnaturally Dark or Orange-Hued After Layering | Use of Amber Shellac flakes instead of Clear or Super Blonde when wanting an unstained appearance. Shellac acts like an amber varnish over light-colored wood. | Switch entirely to certified Super Blonde Dewaxed Shellac Flakes for all future mixing and building coats. You must build up thin coats to mitigate saturation change during one section, or strip this piece back using alcohol (risk: stripping stain). Build new structure upon this with lightest of Blonde grades. |
| Finish Surface Smears/Tack Quickly Stops Drying Between Coats | Wax in the Flakes Remaining! You must use de-waxed material or remove wax residue manually. | Using a piece of clean flannel cloth dampened slightly with only good quality Denatured Alcohol scrub across those spot areas, lifting the heavy contamination load without resorting to complete sanding removal. Follow surface drying instantly with a sealing coat using proven shellac powder (use only a small fraction of powder/resin load). |
Alternative Applications Beyond Furniture Tops
Shellac is much more versatile in the wood hobby garden than just the primary clear coating on an eventual table.
Shellac as a Universal Sealer (Why You Should Use It on Woods)
Shellac is a barrier finisher that blocks interactions between incompatible undercoats and new finishes. Even master refinishers rely upon it! Its non-reactive, all-directional nature ensures nothing migrates where it might cause failure later.
- Oils Blocked: If exotic woods constantly bleed pitch, wax, or body oils which ruin subsequent oil or lacquer types, a heavy coat of Shellac freezes that chemistry pathway forever until physically stripped.
- Wax/Latex Sealer Alternative (Especially on Plaster/Paneling): Before staining dark pine kitchen trim or trying to make old furniture hold pigment evenly against underlying gunk moisture residues, a coat that dries as hard as rock quickly prevents dye leeching. Just seal it first with heavy use of 2lb Shellac cut.
- Before Lacquer Over an Incompatible Primer: Oil, wax, and varnish residues will ruin a fresh lacquer coat through chemical cross-bond interference, but a barrier coat of shellac separates the two chemistries cleanly. If you are converting an old painted or waxed piece to accept a modern oil-based finish, a shellac barrier coat prevents oil bleed-through and the yellowing that comes with it.
Shellac For Color and Minor Fill Where Wood Gaps EXIST on Projects
While not a grain filler in hardwood like maple or oak’s primary coarse pore structure is usually managed, shellacking can help bring texture uniformity for ultra-smooth look wood surfaces using its naturally built high resin content.
- If working with extremely airy softwoods like Pine intended for painting down the line, mixing pigment (like colored sanding dust if similar from Pine to match project wood powder, or dry pigment powder) directly into an absolutely thick shellac slurry can make a workable soft body glaze paste applied specifically into knot sections or minor imperfections. Wipe the high spots immediately clean of excess slurry mixture during the few moment the film is setting gently. This seals and subtly textures problem pits prior to its true clear finishing regimen starting upon top!

Quick Reference Q.&A for New Users
Q: What happens if I use Isopropyl Alcohol (rubbing alcohol) instead of Denatured Alcohol to thin my Shellac?
A: Isopropyl alcohol (common rubbing kind—usually 70% to 91% Isopropyl), typically leaves significant waters/oils behind as contamination as it flashes/dries so quickly. It leaves film hazy because low-purity solvents introduce trapped moisture that separates the curing shellac resin clumps in the liquid composition layer prematurely, blocking film creation surface bonds and sometimes causing cloudiness faster than humidity.
Q: Is it better to use a brush or a cloth (for French polished effect) when starting how to use shellac on wood?
A: For a beginner securing durable coverage, always utilize a good quality China bristle brush** or natural hair brush for coats needing bulk adherence and coverage; they hold volume best and allow necessary restorative scrubbing. Once satisfied completely with coating volume across the entire object: You then switch only to light padding applicators of flannel to finish/burnish out final appearance only. Stay with brushes while building thickness.
Q: Why Does Shellac Smell Terribly but Dry Odorless Eventually?
A: The smell comes highly concentrated from the volatile base solvent—denatured alcohol. Alcohol evaporates very quickly into gas release because the actual organic compounds resin itself (natural resin) breaks the bond immediately.
Q: How should I store unfinished (unmixed) Shellac Flakes I’ve purchased raw?
A: Store flakes cool away from heavy atmospheric changes (think a cellar or temperature stabilization closet). Very important: Keep away from all exposure to sunlight!
Q: If shellac is dissolved readily by denatured alcohol, what happens when I apply Shellac over Stained wood where heavy pigments have been used?
A: This is Shellac’s major use application over stain applications—shellac is unique in its near absence as reactive solute in oil/wax vs water! Since shellac uses Alcohol as base, oil-seating agents or mineral spirits used for initial penetration/staining on hardwoods do not react enough to lift it violently upward through a 2+lb concentration layer. That barrier separates final coats from oil/spirit interference, ensuring oil stain remains locked into wood surface by Shellac primer coating!
Q: Can I put Oil-Based Stain Directly on Top of a New Freshly Dried Shellac Surface?
A: No. Never put an oil-based formulation directly on raw shellac layer due to adhesion/chemical mixing probability.
Q: Does Shellac need a top coat of something else for total water barrier protection?
A: Shellac offers decent barrier protection for average indoor furniture, such as bookshelves and cabinet interiors, but it performs poorly against heavy liquids like fruit juice or standing water because of its low moisture tolerance. Many builders add a wax polish topcoat over shellac on display furniture for extra day-to-day scuff and moisture resistance.
Genuinely wet areas – a bathroom vanity top, a kitchen cutting board, anything near a sink – still need a stronger film finish like polyurethane or marine varnish. Shellac’s alcohol solubility and modest water resistance make it a poor standalone choice for high-moisture or outdoor exposure; treat it as an excellent indoor, low-moisture finish and sealer, not a substitute for a true waterproof topcoat.
Concluding Our Session on Finishing with Intent
Look around the world today; we rely on fast sprays and synthetics. Learning is realizing success often comes from returning to basic ingredients that respond beautifully under familiar methods! You have now successfully navigated every cornerstone requirement for:
- Getting Dewaxed Shellac and mixing correctly to a usable 2 lb cut in Denatured Alcohol primarily for barrier stability.
- Application: Relying upon speed, full loading, no hesitation on the grain, and letting clean wet tips avoid brush mark texture issues.
- Curing: Understanding the fast development of strength means even novice can build height relatively quickly in one afternoon.
Carry this knowledge forward. Whether you are sealing knotty pine so kitchen cupboards can accept that soft white milk-paint finish underneath all the previous dirtied years and surface issues, working within traditional repair areas, or finally adding that beautiful glow to an antique, you now possess the tools. Craft with confidence; wood projects finish faster than you think!
Sponsored / affiliate links. As an Amazon Associate I earn from qualifying purchases. I may earn additional commission from eligible campaigns.