Wood Care and Protection
Match wood care and protection to three factors: exposure, moisture risk, and failure mode; use food-safe oil for boards, interior film finishes for furniture, and penetrating exterior finishes where sun and rain can reach end grain. Get it wrong, and wood cups, checks, grays, peels, or rots long before its time. I use this same filter on every job, from kitchen boards to patched trim, because care, prep, and maintenance have to fit indoor pieces, decks, outdoor furniture, posts, trim, and repaired exterior areas.
How wood fails in service
What moisture, UV, and microbes do to wood fibers
Wood is a structural tissue/material found as xylem in stems and roots. It is an organic material made of cellulosic fibers in lignin and hemicellulose. That fibrous structure is why wood takes on and releases moisture, then swells, shrinks, and raises grain as conditions change.
JK Adams says wood expands and contracts with moisture and humidity. I see that constantly in the shop and on installed work. Indoors, that usually shows up as slight movement, dry-looking surfaces, and occasional checking around thirsty end grain. Outdoors, repeated wet-dry cycles drive deeper damage: water darkening, open checks, joint stress, finish wear-through, and decay where water lingers.
Sun adds a separate problem. UV breaks down exposed surface fibers, so color fades, then the surface turns rough and gray. Rain then washes those weakened fibers away. A clear finish that blocks little UV can still bead water for a while, yet lose the fight against graying.
Mold, mildew, algae, and rot fungi are different issues. Surface mildew and algae usually live on dirt, pollen, and damp finish residue. Rot attacks the wood itself after moisture stays high long enough, especially in trapped or shaded spots.
Heartwood vs sapwood: why durability changes within the same board
Heartwood is usually more resistant to rot than sapwood. That matters because one board can contain both zones. If sapwood sits at a cut end, fastener hole, or exposed edge, that local area often weathers and decays first even when the rest of the piece still looks sound.
Wood grows in annual rings, and those ring patterns often show where grain orientation changes across a face or edge. Flat-sawn faces may weather differently from vertical grain edges. The practical point is simple: protect the thirsty, weak spots first, not only the broad easy faces.
The high-risk zones: end grain, joints, fasteners, checks, and cut ends
End grain acts like a bundle of drinking straws. Newly cut ends, exposed tenons, deck board ends, railing tops, and post caps take water faster than side grain. Joints trap it. Fastener penetrations and old checks give it a path under a finish film.
Those are the first places to inspect and the first places to seal, oil, stain, or repaint after prep. Repaired patches need the same attention because fresh wood, fillers, and epoxy edges often absorb and shed moisture at different rates.
📊 In 2023, almost 4 billion cubic meters of wood were harvested. Source: Wood.
How do you choose the right protection method for each use case?
Choose the method by asking where the wood lives, how often it gets wet, how much direct sun it sees, and how the current finish tends to fail. Match the finish to that failure mode: easy-renew penetrating treatments for weathered exposure, stronger films for stable indoor use, and targeted sealing for end grain and repairs.
Start with location, wetting cycle, and sun exposure
People have worked wood for thousands of years, first for shelter, tools, and vessels, and now mainly for furniture and building construction. Those two broad uses need very different care. I never lump indoor side tables, cutting boards, porch chairs, deck stairs, fence posts, and patched trim into one category, because they fail in different ways.
South-facing surfaces weather faster and fade sooner. North-facing surfaces are more exposed to mold and algae. Those two facts explain why the same finish can fail by drying and bleaching on one side of a house, then by black spotting and green film on the other.
For selection, sort the job into four groups:
- Indoor, food-contact, frequently washed: boards, utensils, accessories.
- Indoor, furniture, stable climate: tables, casework, trim.
- Outdoor, touch-use, moderate wear: chairs, benches, planters, rails.
- Outdoor, foot traffic or water trap risk: decks, steps, tops of rails, posts, repaired sections.
Match the finish to the likely failure mode
If the wood usually goes gray and rough, use a finish system that is easy to clean and renew before erosion goes far. If the wood peels, cracks, or blisters, the problem is often a film finish over damp wood, poor prep, or moisture entry from the back side or end grain.
If mildew spotting is the main issue, focus on cleaning, drainage, airflow, and north-side maintenance. If wear-through happens on stair noses or deck paths, choose a treatment that can be refreshed locally without leaving a patchwork of peeling edges.
When unfinished wood is acceptable and when it is a short-term mistake
Unfinished interior wood in a dry room can be acceptable if appearance change is fine and staining risk is low. Unfinished food-contact boards are different; they need routine oiling or conditioning because repeated washing strips the surface.
Unfinished exterior wood starts weathering fast. On a sheltered ceiling or decorative piece, that may be a design choice. On deck boards, railing tops, cut ends, or repaired trim, bare exposure is usually a short-term mistake because UV and water begin working at once.

Decision matrix: what to use on boards, furniture, decks, and repaired areas
Use-case-first protection matrix
| Use case | Wood type and exposure | Recommended protection method | Recoat frequency | High-risk failure points |
|---|---|---|---|---|
| Indoor boards and accessories | Food-contact wood; frequent hand washing; no sun load | Mineral oil or wood conditioner applied with a lint-free cloth; beeswax only as a light top dressing after oil if desired | Apply conditioner weekly until the finish is established; reapply mineral oil when the surface looks dry or water stops beading briefly | End grain, knife cuts, around handles, drying cracks from sink-side storage |
| Indoor furniture and trim | Stable interior exposure; occasional spills; moderate touch wear | Interior clear finish, varnish, or paint chosen for appearance and washability | Clean routinely; spot-repair worn edges; full recoat when sheen breaks, color shifts, or bare wood appears | Table edges, around hardware, sunlit window sides, water rings on tops |
| Outdoor furniture | Rain and sun exposure; seasonal wet-dry cycling; touch surfaces | Penetrating exterior oil or exterior stain/sealer with UV protection; avoid thick brittle films unless the piece stays very dry | Inspect each season; refresh when color fades, grain roughens, or water no longer beads on exposed faces | Arm tops, seat slats, end grain at feet, screw holes, undersides that stay damp near patios or soil |
| Decks, steps, and railings | High sun, standing water, abrasion, snow or leaf load | Penetrating deck stain or deck sealer made for walking surfaces; low-build system that can be renewed without peeling | Inspect after wet seasons and high summer; recoat on wear-through, fading paths, splintery roughness, or loss of water shedding | Board ends, stair nosings, top rails, cracks around fasteners, shaded zones with algae, edges under planters |
| Repaired rot-prone areas | Patched trim, epoxy-filled spots, dutchman repairs, fresh cut ends | Seal bare wood and end grain first, then apply the surrounding finish system; use a two-coat refresh on exposed repaired wood after prep | Coat immediately after repair and cure; inspect often because patch margins fail early if left thin | Patch edges, filler-to-wood seams, scarf joints, bottom edges, exposed end grain, fastener penetrations |
How to read the matrix
The table separates maintenance by service conditions, not by product aisle. A deck needs a finish that tolerates abrasion and can be renewed in traffic lanes. A cutting board needs a food-contact conditioner that can survive repeated hand washing. Those needs do not overlap much.
Wood is used to make buildings and furniture, and the care system should reflect that split. Indoor boards are washed. Outdoor boards are weathered. Furniture is touched. Decks are walked on. Repaired trim has fresh end grain and patch edges that demand early attention.
Should I use oil, stain, or sealant on wood?
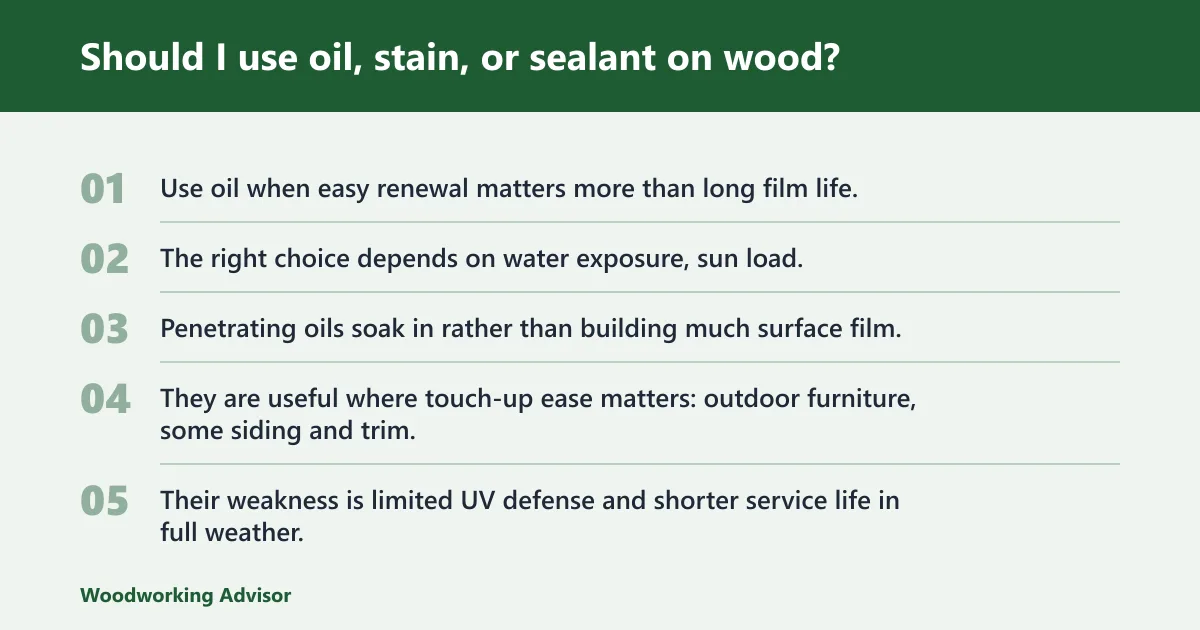
Use oil when easy renewal matters more than long film life, stain or stain-sealer when exterior color and moderate UV defense are needed, and sealant or film-forming finishes when a stronger surface barrier is worth stricter prep and more visible failure. The right choice depends on water exposure, sun load, and whether future upkeep must be simple.
Penetrating oils
Penetrating oils soak in rather than building much surface film. They are useful where touch-up ease matters: outdoor furniture, some siding and trim, and many food-contact boards when the oil is food-safe mineral oil. Their weakness is limited UV defense and shorter service life in full weather.
When oil wears, it usually fades, dries, and leaves the grain looking thirsty instead of peeling in sheets. That makes maintenance simpler. Clean, dry, reapply, and wipe off excess. The tradeoff is more frequent attention.
Stains and sealers
Exterior stains and sealers sit between bare wood and heavy film finishes. Penetrating semi-transparent products usually handle decks well because they add color and some UV screening without creating a thick shell underfoot. Clear water repellents can slow wetting but often allow faster graying.
On outdoor furniture and trim, a stain-sealer can be a good fit where some color change is acceptable and regular refresh coats are easier than full stripping. On decks, this category often beats glossy films because traffic wears it down instead of lifting it off in flakes.
Varnish, paint, and other film-forming finishes
Film-forming finishes create the strongest surface barrier when prep is sound and moisture cannot enter from behind. Indoors, they are often the cleanest choice for furniture. Outdoors, they can look excellent on protected doors or trim, yet they demand good detailing and earlier intervention when edges fail.
Paint generally blocks UV fairly well. Exterior varnish and other clear films can preserve a deep look, but if they crack, peel, or lose adhesion at a joint or end grain, water can get trapped under the surrounding film. That is why peeling is usually a moisture-entry problem as much as a finish-age problem.
How the finish families compare in practice
| Finish family | Water resistance | UV resistance | Appearance change | Typical failure pattern | Upkeep load |
|---|---|---|---|---|---|
| Mineral oil / board conditioner | Low to moderate | Very low | Natural, low sheen | Dry look, fast absorption, dull surface | Frequent, easy |
| Penetrating exterior oil | Moderate | Low to moderate | Natural to warm tone | Fading, graying, roughness | Regular, easy |
| Exterior stain/sealer | Moderate | Moderate to good | Adds color | Wear-through, uneven fade | Moderate |
| Varnish / clear film | Good while intact | Ranges by formula | Higher build, richer look | Cracking, peeling, trapped moisture | Higher, more prep-sensitive |
| Paint | Good while intact | Good | Opaque | Blistering, peeling at edges and joints | Moderate to high |
How do you protect wood from water and sun damage outdoors?
Protect exterior wood by starting with dry, clean stock, then using a finish that matches the exposure and can be renewed before failure spreads. Give extra attention to end grain, undersides, fastener holes, and repaired spots, because those areas usually admit water first and often decide how long the whole piece lasts.
Prep that matters: cleaning, dry time, sanding, and weather window
Prep often determines whether an exterior finish wears gracefully or fails early. Remove dirt, chalking, loose fibers, and any waxy contamination. Let the wood dry well before coating. Sand weather-roughened areas enough to remove loose gray fiber and raised grain, especially on hand-contact surfaces.
Do not coat over mildew residue and expect a good result. Clean first, rinse well, and allow full drying. I have seen more than one decent product blamed for failure when the real problem was damp wood under the finish. Coating wood that is still damp can trap moisture and may lead to blotchy absorption with penetrating finishes or weaker adhesion with film finishes.
End grain needs deliberate treatment. So do board bottoms near splashback, chair feet on wet patios, horizontal rail tops, and trim bottoms near caulk lines. If water sits there, the broad faces do not matter much.
Seal or stain fresh cuts and drilled holes right after making them. After repairs, coat patch margins and bare surrounding wood, not only the patch face. On exposed weathered wood, a two-coat refresh after cleaning and prep gives those thirsty zones a better chance of catching up with the rest of the surface.
Mildew and algae control in shade, near soil, and around planters
North-facing and shaded surfaces stay wetter longer, so mildew and algae become maintenance issues even when rot is not present. Clean those surfaces more often, keep mulch and soil from touching wood, and avoid trapping moisture under planters, mats, or cushions.
Black spotting on finish is often surface growth. Soft punky wood, deep probing, and crumbling fibers point toward decay and repair, not cleaning alone. Treat those as separate problems.
The two-coat refresh approach for exposed weathered wood
After cleaning, drying, and light prep, apply one coat to restore even absorption, then a second coat where the surface still drinks finish unevenly or where end grain and repairs need more build. This is especially useful on deck railings, furniture tops, and newly bared repair zones.
What is the best way to care for indoor wood and food-contact pieces?

For indoor boards and food-contact accessories, hand washing and routine oiling do more good than hard film finishes. Wash only by hand, never soak, never dishwash, dry at once, and reapply mineral oil or conditioner when the surface looks dry, chalky, or quickly absorbs water.
Hand-wash only: no soaking, no dishwasher, dry right away
JK Adams says not to soak boards, run them in a dishwasher, or use a microwave. Those rules matter because repeated saturation and harsh drying cycles drive movement, raised grain, and cracks at handles or end grain. Wash by hand, rinse promptly, and dry after washing.
Mineral oil: where it works, how often to reapply, and when it looks dry
Mineral oil is a penetrating conditioner widely used for food-contact wood care. It is a fit for cutting boards, butcher-block accessories, spoons, and similar items. It is not an exterior deck or structural wood finish.
Reapply when the wood loses its fresh, even tone, feels dry, or takes water quickly. Newly made or heavily washed pieces may need frequent early treatment. In my own kitchen, the clearest sign is absorption: if the surface drinks the oil quickly and turns patchy, it is asking for another coat.
Beeswax and board conditioners: surface feel, buffing, and realistic moisture resistance
Beeswax is a surface conditioner and light moisture barrier. It can improve feel and leave a polished look after buffing, especially when blended into a board conditioner over oil-treated wood. Used alone, wax wears away fast under washing and offers only modest water resistance.
Wood conditioner is useful on boards and accessories because it combines easy application with a pleasant surface feel. Apply it with a lint-free cloth, work it into dry areas, let it sit briefly if needed, then wipe and buff off the excess.
Weekly, monthly, and as-needed care for boards, utensils, and accessories
JK Adams recommends applying conditioner weekly until the finish is established. That weekly rhythm fits heavily washed kitchen items. After the surface stops looking thirsty so quickly, care can shift to as-needed reapplication based on dryness, fading, and water uptake.
Utensils and decorative accessories usually need less attention than cutting boards because they see less washing. Still, if grain feels fuzzy, color dulls, or end grain lightens sharply, it is time for another light coat.
Can I use the same wood care product on furniture and decks?
Often no. Furniture and decks face different wear, traction, and maintenance demands, so the same product can create extra work or a poor surface underfoot. Use board conditioners for food-contact items, interior films for stable furniture, and deck-rated penetrating exterior finishes for walking surfaces and exposed structural wood.
Why walking surfaces need different traction, wear, and maintenance choices
Decks and steps need finishes that tolerate abrasion and do not create a slick, fragile film. A product that leaves a pleasant hand feel on a chair arm can become a poor choice on stairs if it wears unevenly or turns slippery when damp.
Outdoor furniture: touch comfort, appearance, and easier recoat options
Outdoor furniture benefits from finishes that are easy to renew on arms, seat slats, and top rails. Penetrating systems usually make more sense here than they do on a formal indoor table, because spot maintenance is simpler and peeling edges are less likely.
Posts, rails, and joinery: where moisture entry beats finish thickness
Posts, rail tops, and joints often fail at cut ends and horizontal surfaces before broad faces fail. A thick coating on the front face will not save a post with an unsealed top cut. In those places, detailing and targeted sealing matter more than chasing the heaviest possible build.
When should wood be cleaned, recoated, or repaired?
Clean wood when dirt, mildew, or surface growth keeps it wet; recoat when water shedding, color, or surface smoothness noticeably drop; and repair when probing finds soft fibers, widening checks, or failure around fasteners and joints. Timing should follow exposure and wear, not a vague calendar alone.
Routine inspection schedule by exposure level
Check indoor boards often because washing strips their treatment fast. Check outdoor furniture each season, especially before wet weather and after strong sun periods. Check decks, steps, rail tops, posts, and repaired trim more often because they combine weather with heavy wear or water traps.
Simple field tests: water beading, color fade, surface roughness, and wear-through
Recoat triggers should be visible and simple:
- Water no longer beads or sheds on exposed faces.
- Color fades unevenly or the surface turns gray.
- Grain feels rough, splintery, or chalky.
- Bare wood appears on edges, traffic paths, or around hardware.
- Film finish shows cracking, lifting, or early peeling at joints and end grain.
Treatment timing after repairs, sanding, and fresh cuts
Fresh cuts, sand-through spots, and repairs need treatment right away after the substrate is dry and ready. Do not leave new end grain, dutchman patches, epoxy margins, or bored holes bare through a weather cycle. Those zones usually become the next failure points.
Recoat intervals by finish family and use case
There is no one interval that fits every piece. Mineral oil and board conditioner may need weekly early use on heavily washed boards. Penetrating exterior systems need seasonal inspection and refresh when fading and roughness start. Higher-build films can run longer when intact, yet once they begin to crack or peel, maintenance becomes more involved and costlier.
How to Select the Right Hardener for Rotted Wood Repairs
Not all wood hardeners work for every type of rot. For deep, softened wood that still holds structural integrity, a **penetrating epoxy hardener** is essential—it reinforces load-bearing areas and prevents future failure under screws or weight. Shallow, dry rot, however, only needs a **light consolidant** to stabilize surface layers without overhardening. Choosing incorrectly can leave repairs brittle or trap moisture, accelerating decay. The best approach depends on the wood’s remaining strength and the rot’s severity, with specific products tailored to each scenario.
For a breakdown of top-rated hardeners—including when to use epoxy pastes vs. liquid hardeners—and how to assess whether a piece is salvageable, see recommendations for rotted wood repair products.
Common mistakes that shorten wood life
Applying finish to damp wood or over contamination
Damp fibers, mildew residue, old wax, and sanding dust interfere with absorption and adhesion. The result is often blotchy color, weak bonding, or trapped moisture under a film.
Leaving bare end grain and repair patches exposed
Most early failures start here. Trim bottoms, cut deck board ends, post tops, and patch seams need immediate attention after cutting or repair.
Using indoor conditioners outdoors
Mineral oil, beeswax, and kitchen-board conditioners are for food-contact wood care and interior accessories. They are not suitable protection for decks, exterior siding, fence posts, or outdoor structural parts.
Letting a failing film peel too long before maintenance
Once peeling spreads, prep gets harder. Light sanding and timely recoating can save a finish early. Waiting until wide sheets lift usually means stripping, deeper sanding, and more exposed weathering underneath.
Frequently asked questions
How do you protect wood from water and sun damage?
Start by sorting the wood by exposure, then use a finish that fits the wetting cycle and UV load. Protect end grain, cut ends, fastener holes, and horizontal surfaces first. Clean before coating, let the wood dry well, and recoat when water shedding, color, or surface smoothness falls off.
What is the best way to care for outdoor wood furniture?
Use a penetrating exterior oil or stain-sealer that can be renewed without peeling, then inspect arms, seat slats, feet, and top rails each season. Clean off dirt and mildew, keep cushions from trapping moisture, and refresh the finish when color fades or the grain starts feeling dry and rough.
Should I use oil, stain, or sealant on wood?
Use food-safe mineral oil on cutting boards and similar kitchen items, penetrating oil where easy exterior renewal matters, stain-sealer where added color and UV defense help, and stronger film finishes for stable indoor furniture or protected trim. Pick the finish by failure pattern, not by shelf label alone.
How often should wood be cleaned and resealed?
Clean whenever dirt, mildew, algae, or residue keeps the surface damp or hides finish wear. Reseal or recoat based on triggers: lost water beading, fading, rough grain, bare spots, or cracking film. Boards may need weekly early conditioning; decks and furniture need seasonal inspection and exposure-based refresh timing.
Can I use the same wood care product on furniture and decks?
Usually no, because decks need traction, abrasion tolerance, and easy renewal on walking surfaces, while furniture often needs a different feel and appearance. Board conditioners belong on indoor food-contact items, interior films belong on stable furniture, and deck-rated penetrating finishes belong on exposed exterior walking surfaces.
What maintenance does unfinished wood need?
Indoors, unfinished wood may need only dusting and spill control if appearance change is acceptable, though food-contact boards still need oil or conditioner. Outdoors, unfinished wood weathers quickly, so bare decking, rails, cut ends, and repairs should be protected soon or they will gray, roughen, and take up water fast.
Sponsored / affiliate links. As an Amazon Associate I earn from qualifying purchases. I may earn additional commission from eligible campaigns.